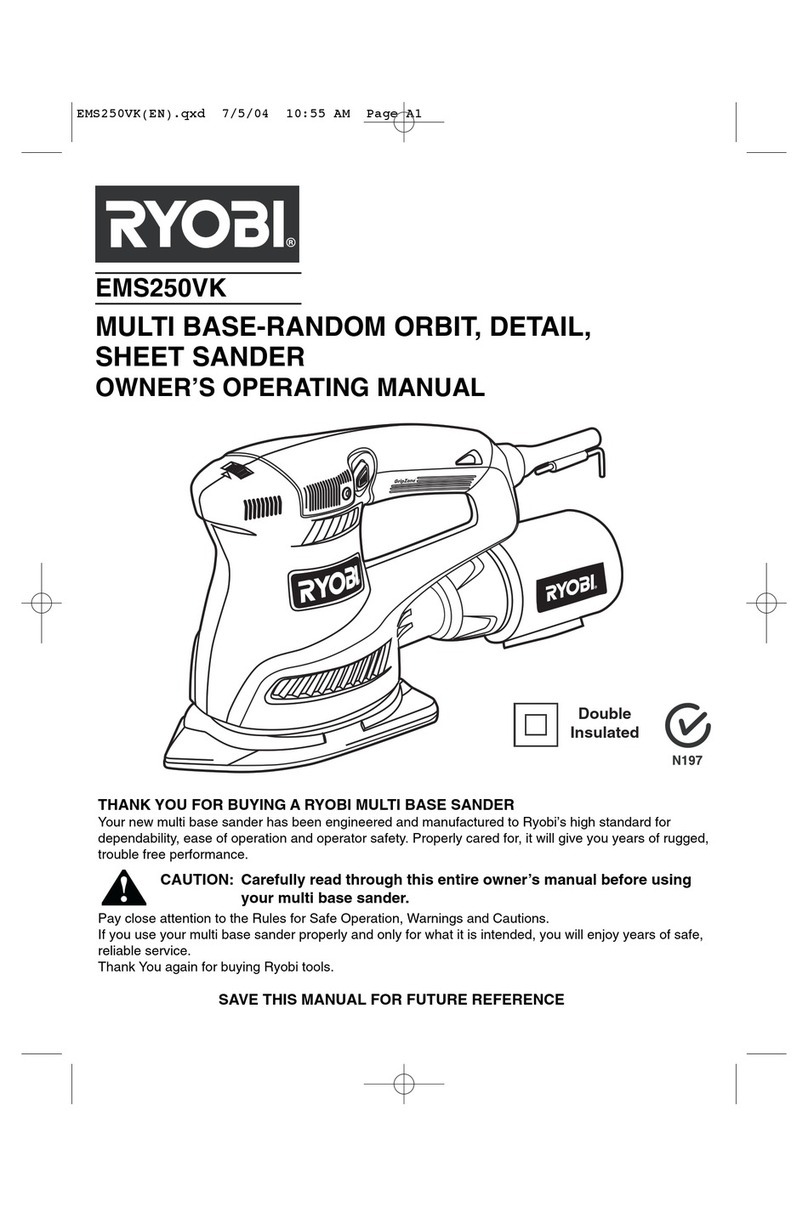
Ryobi DS1100 User manual

OPERATOR'S MANUAL
DETAIL SANDER
MODEL DS1100
DOUBLE INSULATED
SAVE THIS MANUAL FOR FUTURE REFERENCE
SPECIFICATIONS:
Sanding Pad Triangle shaped
No load speed 12,000 spm
Motion Oscillating
Rating 120 volts, 60 Hz, AC
Input .30 amperes
Paper type Pressure sensitive adhesive backed
Arc size 3.0 mm at tip
THANK YOU FOR BUYING A RYOBI DETAIL SANDER.
YournewDetailSanderhasbeenengineeredandmanufacturedtoRyobi'shighstandardfordependability,easeofoperation,
and operator safety. Properly cared for, it will give you years of rugged, trouble-free performance.
CAUTION: Carefully read through this entire operator's manual before using your new sander.
PaycloseattentiontotheRulesforSafeOperation,Warnings,andCautions.Ifyouuseyoursanderproperlyandonlyforwhat
it is intended, you will enjoy years of safe, reliable service.
Thank you again for buying Ryobi tools.

Page 2
WARNING:
Read and understand all instructions. Failure to
follow all instructions listed below, may result in
electric shock, fire and/or serious personal injury.
SAVE THESE INSTRUCTIONS
Work Area
■Keep your work area clean and well lit. Clut-
tered benches and dark areas invite accidents.
■Do not operate power tools in explosive
atmospheres, such as in the presence of
flammable liquids, gases, or dust. Power tools
create sparks which may ignite the dust or fumes.
■Keep bystanders, children, and visitors away
while operating a power tool. Distractions can
cause you to lose control.
Electrical Safety
■Double insulated tools are equipped with a
polarized plug (one blade is wider than the
other.) This plug will fit in a polarized outlet
only one way. If the plug does not fit fully in
the outlet, reverse the plug. If it still does not
fit, contact a qualified electrician to install a
polarized outlet. Do not change the plug in
any way. Double insulation eliminates the
need for the three wire grounded power cord and
grounded power supply system.
■Avoid body contact with grounded surfaces
such as pipes, radiators, ranges and refrigera-
tors. There is an increased risk of electric shock
if your body is grounded.
■Don’t expose power tools to rain or wet condi-
tions. Water entering a power tool will increase
the risk of electric shock.
■Do not abuse the cord. Never use the cord to
carry the tools or pull the plug from an outlet.
Keep cord away from heat, oil, sharp edges or
moving parts. Replace damaged cords imme-
diately. Damaged cords increase the risk of
electric shock.
■When operating a power tool outside, use an
outdoor extension cord marked “W-A” or “W”.
These cords are rated for outdoor use and reduce
the risk of electric shock.
Personal Safety
■Stay alert, watch what you are doing and use
common sense when operating a power tool.
Do not use tool while tired or under the influ-
ence of drugs, alcohol, or medication. A
moment of inattention while operating power tools
may result in serious personal injury.
■Dress properly. Do not wear loose clothing or
jewelry. Contain long hair. Keep your hair,
clothing, and gloves away from moving parts.
Loose clothes, jewelry, or long hair can be caught
in moving parts.
■Avoid accidental starting. Be sure switch is
off before plugging in. Carrying tools with your
finger on the switch or plugging in tools that have
the switch on invites accidents.
■Remove adjusting keys or wrenches before
turning the tool on. A wrench or a key that is left
attached to a rotating part of the tool may result in
personal injury.
■Do not overreach. Keep proper footing and
balance at all times. Proper footing and balance
enables better control of the tool in unexpected
situations.
■Use safety equipment. Always wear eye pro-
tection. Dust mask, nonskid safety shoes, hard
hat, or hearing protection must be used for
appropriate conditions.
Tool Use and Care
■Use clamps or other practical way to secure
and support the workpiece to a stable plat-
form. Holding the work by hand or against your
body is unstable and may lead to loss of control.
■Do not force tool. Use the correct tool for your
application. The correct tool will do the job better
and safer at the rate for which it is designed.
■Do not use tool if switch does not turn it on or
off. Any tool that cannot be controlled with the
switch is dangerous and must be repaired.
■Disconnect the plug from the power source
before making any adjustments, changing
accessories, or storing the tool. Such preven-
tive safety measures reduce risk of starting the
tool accidentally.
■Store idle tools out of reach of children and
other untrained persons. Tools are dangerous
in the hands of untrained users.
■Maintain tools with care. Keep cutting tools
sharp and clean. Properly maintained tools, with
sharp cutting edges are less likely to bind and are
easier to control.
■Check for misalignment or binding of moving
parts, breakage of parts, and any other condi-
tion that may affect the tools operation. If
damaged, have the tool serviced before using.
Many accidents are caused by poorly maintained
tools.
■Use only accessories that are recommended
by the manufacturer for your model. Accesso-
ries that may be suitable for one tool, may be-
come hazardous when used on another tool.
RULES FOR SALFE OPERATION
RULES FOR SAFE OPERATION


Page 3
Service
■Tool service must be performed only by
qualified repair personnel. Service or mainte-
nance performed by unqualified personnel could
result in a risk of injury.
■When servicing a tool, use only identical
replacement parts. Follow instructions in
Maintenance section of this manual. Use of
unauthorized parts or failure to follow Mainte-
nance Instructions may create a risk of electric
shock or injury.
Specific Safety Rules for Sanders
■Hold tool by insulated gripping surfaces
when performing an operation where the tool
may contact hidden wiring or its own cord.
Contact with a “live” wire will make exposed
metal parts of the tool “live” and shock the opera-
tor.
■Never use this or any power sander for wet
sanding or liquid polishing. Failure to comply
canresultinelectricalshockcausingseriousinjury
or worse.
■Keep hands away from sanding area.
Additional Rules for Safe Operation
■Know your power tool. Read operator's manual
carefully. Learn its applications and limitations as
wellasthespecificpotentialhazardsrelatedtothis
tool.
■Always wear safety glasses. Everyday eye-
glasses have only impact-resistant lenses; they
are NOT safety glasses.
■Protect your lungs. Wear a face or dust mask if
the operation is dusty.
■Protect your hearing. Wear hearing protection
during extended periods of operation.
■Don'tabusecord.Nevercarrytoolbycordoryank
it to disconnect from receptacle. Keep cord from
heat, oil and sharp edges.
■Make sure your extension cord is in good con-
dition. When using an extension cord, be sure to
use one heavy enough to carry the current your
product will draw. An undersized cord will cause a
drop in line voltage resulting in loss of power and
overheating. A wire gage size (A.W.G.) of at least
16 is recommended for an extension cord 100 feet
or less in length. A cord exceeding 100 feet is not
recommended. If in doubt, use the next heavier
gage. The smaller the gage number, the heavier
the cord.
RULES FOR SAFE OPERATION
■Inspect tool cords periodically and if damaged,
have repaired at your nearest authorized service
center. Stay constantly aware of cord location.
■Check damaged parts. Before further use of the
tool,aguardorotherpartthatisdamagedshouldbe
carefully checked to determine that it will operate
properly and perform its intended function. Check
for alignment of moving parts, binding of moving
parts, breakage of parts, mounting, and any other
conditions that may affect its operation. A guard or
other part that is damaged should be properly
repaired or replaced by an authorized service cen-
ter.
■Inspectforandremoveallnailsfromlumberbefore
sanding.
■Drugs, Alcohol, Medication. Do not operate tool
while under the influence of drugs, alcohol, or any
medication.
■Savetheseinstructions.Refertothemfrequently
and use them to instruct others who may use this
tool.If you loan someone this tool,loan them these
instructions also.
SAVE THESE INSTRUCTIONS
WARNING:
Somedustcreatedbypowersanding,sawing,grinding,
drilling, and other construction activities contains
chemicals known to cause cancer, birth defects or
other reproductive harm. Some examples of these
chemicals are:
• lead from lead-based paints,
• crystalline silica from bricks and cement and other
masonry products, and
• arsenic and chromium from chemically-treated
lumber.
Your risk from these exposures varies, depending on
how often you do this type of work. To reduce your
exposure to these chemicals: work in a well ventilated
area, and work with approved safety equipment, such
asthosedustmasksthatarespeciallydesignedtofilter
out microscopic particles.

Page 4
The purpose of safety symbols is to attract your attention to possible dangers. The safety symbols, and the
explanations with them, deserve your careful attention and understanding. The safety warnings do not by
themselves eliminate any danger. The instructions or warnings they give are not substitutes for proper accident
prevention measures.
SYMBOL MEANING
SAFETY ALERT SYMBOL:
Indicates danger, warning or caution. May be used in conjunction with other symbols or pictographs.
DANGER: Failure to obey a safety warning will result in serious injury to yourself or to others. Always
follow the safety precautions to reduce the risk of fire, electric shock and personal injury.
WARNING: Failure to obey a safety warning can result in serious injury to yourself or to others. Always
follow the safety precautions to reduce the risk of fire, electric shock and personal injury.
CAUTION:Failuretoobeyasafetywarningmayresultinpropertydamageor personalinjury toyourself
or to others. Always follow the safety precautions to reduce the risk of fire, electric shock and personal
injury.
NOTE: Advises you of information or instructions vital to the operation or maintenance of the equipment.
SYMBOLS
SYMBOL NAME DESIGNATION/EXPLANATION
V Volts Voltage
A Amperes Current
Hz Hertz Frequency (cycles per second)
W Watt Power
min Minutes Time
Alternating Current Type or a characteristic of current
n0No Load Speed Rotational speed, at no load
Class II Construction Designates Double Insulated
Construction tools
.../min Revolutions or Reciprocation Per Minute Revolutions, strokes,
surface speed, orbits etc. per minute
Important: Some of the following symbols may be used on your tool. Please study them and learn their meaning.
Proper interpretation of these symbols will allow you to operate the tool better and safer.
Look for this symbol to point out important safety precautions. It means
attention!!! Your safety is involved.

Page 5
Your sanderissuitableforsandingwithcoarse,medium,and
fine grit sandpaper. It will produce a fine scratch free finish
when used to sand with the grain on wood surfaces. By
purchasing optional accessories, it can also be used as a
polisher or scraper.
Beforeattemptingtouseyoursander,familiarizeyourself
with all operating features and safety requirements.
See Figure 1.
DOUBLE INSULATION
Double insulation is a concept in safety, in electric power
tools, which eliminates the need for the usual three-wire
grounded power cord. All exposed metal parts are isolated
from the internal metal motor components with protecting
insulation.Doubleinsulatedtoolsdonotneedtobegrounded.
IMPORTANT
Servicing of a tool with double insulation requires extreme
careand knowledge ofthesystem and shouldbeperformed
onlybyaqualifiedservicetechnician.Forservicewesuggest
you return the tool to your nearest RYOBI AUTHORIZED
SERVICE CENTER for repair. When servicing use only
identical Ryobi replacement parts.
FEATURES
WARNING:
The double insulated system is intended to protect the
user from shock resulting from a break in the tool's
internal wiring. Observe all normal safety precautions
related to avoiding electrical shock.
OSCILLATING MOTION
The oscillating motion sands 3.0 mm arcs, providing fast
cutting action with excellent sanding results. As the name
implies,thistoolhasbeendesignedprimarilyfordetailedand
intricate sanding. For example, refinishing furniture, chairs,
etc., enabling you to sand in places that are hard to get to.
SWITCH
Thistoolisequippedwithasimpleswitchcontrol.Toturnyour
sander ON, depress the switch button as shown in Figure 1.
Depress the switch button in the opposite direction to turn
your sander OFF.
ELECTRICAL CONNECTION
Yoursanderhasaprecisionbuiltelectricmotor. Itshouldbeconnectedtoapower supply that is 120 volts, 60 Hz, AC only
(normal household current). Do not operate this tool on direct current (DC). A substantial voltage drop will cause a loss
ofpowerandthemotorwillloverheat. Ifyourtooldoesnotoperatewhenpluggedintoanoutlet,double-checkthepowersupply.
Fig. 1
FOOT
RUBBER PAD
PRESSURE SENSITIVE
ADHESIVE BACKED SANDPAPER
TO TURN OFF
TO TURN ON
SWITCH
BUTTON

Page 6
OPERATION
WARNING:
Your sander should never be connected to power supply
when you are assembling parts, making adjustments,
assembling or replacing sandpaper, cleaning, or when
not in use. Disconnecting sander will prevent accidental
starting that could cause serious personal injury.
APPLICATIONS
(Use only for the purposes listed below)
■Sanding on wood surfaces.
■Removing rust from and sanding steel surfaces.
■Polishing and buffing.
■Scraping paint or glue from window panes.
INSTALLING SANDPAPER
See Figure 2.
The rubber pad on your sander accepts pressure sensitive
adhesive backed sandpaper. Precut triangle shaped
sandpaper in assorted grits are available from your local
Ryobi dealer.
■UNPLUG YOUR SANDER.
■Ifinstallingsandpaperforthefirsttime,proceedasfollows.
Ifreplacingsandpaper,removeoldsandpaperbypeeling
it off rubber pad, then proceed as follows.
■Carefully peel paper backing from new sandpaper.
■Position sandpaper into place, then carefully press sticky
side of sandpaper on rubber pad.
WARNING:
Failure to unplug your sander could result in accidental
starting causing possible serious personal injury.
WARNING:
Before connecting your sander to power supply source,
always check to be sure switch is not in ON position.
Failure to do so could result in accidental starting of
your sander resulting in possible serious injury.
WARNING:
Never use your detail sander for wet sanding or liquid
polishing. Failure to comply can result in electrical shock
causing serious injury or worse.
Fig. 2
ADHESIVE
BACKING
RUBBER PAD
PRESSURE SENSITIVE
ADHESIVE BACKED SANDPAPER
WARNING:
Do not allow familiarity with your sander to make you
careless. Remember that a careless fraction of a second
is sufficient to inflict severe injury.
WARNING:
If any parts are missing do not operate your sander until
the missing parts are replaced. Failure to do so could
result in possible serious personal injury.

Page 7
OPERATION
PREPARING FOR OPERATION
CAUTION:
Be careful not to let your hand cover the air vents.
TO OPERATE
When applicable, clamp or otherwise secure the work to
prevent it from moving under your sander.
WARNING:
Unsecured work could be thrown towards the operator
causing injury.
SANDING
See Figures 3 and 4.
Holdsanderinfrontandawayfromyou,keepingitclearofthe
workpiece.Startsanderandletthemotorbuildtoitsmaximum
speed,thengraduallylower on the work with a slight forward
movement.Moveitslowlyover workpiece using forward and
backwardorsidetosidestrokes.Uponcompletionofsanding
operation, always remove sander from workpiece before
turning it off.
DO NOT FORCE. The weight of the unit supplies adequate
pressure, so let the sandpaper and sander do the work.
Applying additional pressure only slows the motor, rapidly
wears sandpaper and greatly reduces sander speed.
Excessivepressure willoverloadthemotorcausingpossible
damage from motor overheating and can result in inferior
work. Any finish or resin on wood may soften from the
frictional heat. Do not allow sanding on one spot too long as
sander'srapidactionmayremovetoomuchmaterial,making
the surface uneven.
SANDPAPER SELECTION
Selecting the correct size grit and type sandpaper is an
extremely important step in achieving a high quality sanded
finish. Aluminum oxide, silicon carbide, and other synthetic
abrasives are best for power sanding. Natural abrasives,
such as flint and garnet are too soft for economical use in
power sanding.
Ingeneral,coarsegritwillremovethemostmaterialandfiner
gritwill producethebestfinishin allsanding operations. The
conditionofthesurfacetobesandedwilldeterminewhichgrit
will do the job. If the surface is rough, start with a coarse grit
and sand until the surface is uniform. Medium grit may then
beusedtoremove scratches left by the coarser gritandfiner
gritusedforfinishingofthesurface. Alwayscontinuesanding
with each grit until surface is uniform.
WARNING:
Do not wear loose clothing or jewelry when operating
sander. They could get caught in moving parts causing
serious injury. Keep head away from sander and sanding
area. Hair could be drawn into sander causing serious
injury.
Fig. 4
Fig. 3

Page 8
MAINTENANCE
WARNING:
When servicing use only identical Ryobi replacement
parts. Use of any other parts may create a hazard or
cause product damage.
GENERAL
Avoidusingsolventswhencleaningplasticparts.Mostplastics
are susceptible to various types of commercial solvents and
may be damaged by their use. Use clean cloths to remove
dirt, carbon dust, etc.
WARNING:
Do not at any time let brake fluids, gasoline, petroleum-
based products, penetrating oils, etc. come in contact
with plastic parts. They contain chemicals that can
damage, weaken, or destroy plastic.
Whenelectrictoolsareusedonfiberglassboats,sportscars,
wallboard, spackling compounds, or plaster, it has been
found that they are subject to accelerated wear and possible
premature failure, as the fiberglass chips and grindings are
highly abrasive to bearings, brushes, commutators, etc.
Consequentlyitisnotrecommendedthatthistoolbeusedfor
extendedworkonanyfiberglassmaterial,wallboard,spackling
compounds, or plaster. During any use on these materials,
itisextremely important that thetooliscleaned frequently by
blowing with an air jet.
WARNING:
Always wear safety goggles, or safety glasses with side
shields during power tool operation or when blowing
dust. If operation is dusty, also wear a dust mask.
LUBRICATION
All of the bearings in this tool are lubricated with a sufficient
amount of high grade lubricant for the life of the unit under
normaloperatingconditions.Therefore,nofurtherlubrication
is required.
EXTENSION CORDS
Theuseofanyextensioncordwillcausesomelossofpower.
Tokeepthelosstoaminimumandtopreventtooloverheating,
use an extension cord that is heavy enough to carry the
current the tool will draw.
A wire gage size (A.W.G.) of at least 16 is recommended for
an extension cord 100 feet or less in length. When working
outdoors, use an extension cord that is suitable for outdoor
use. The cord's jacket will be marked WA.
CAUTION:
Keep extension cords away from any sanding area and
position the cord so that it will not get caught on lumber,
tools, etc., during sanding operation.
WARNING:
Check extension cords before each use. If damaged
replaceimmediately.Neverusetoolwithadamagedcord
since touching the damaged area could cause electrical
shock resulting in serious injury.

Page 9
4615040 40 Grit Sanding Angles 10 pack
4615060 60 Grit Sanding Angles 10 pack
4615080 80 Grit Sanding Angles 10 pack
4615100 100 Grit Sanding Angles 10 pack
4615150 150 Grit Sanding Angles 10 pack
4615220 220 Grit Sanding Angles 10 pack
4615500 Sanding Angle Assortment 10 pack
4615505 Preparation Pad For Wood 5 pack
4615506 Preparation Pad For Metal 5 pack
4615507 Preparation Pad For Paint 5 pack
4615555 Wax Applicator/Polishing Pad 5 pack
4615510 Scraper Assembly
4615511 Large Triangular Scraper Blade
4615520 Scraper Foot Only
4615521 Teardrop Triangular Scraper Blade
4615522 Small Triangular Scraper Blade
The following recommended accessories are current and were available at the time this manual was printed:
Individual sanding grits are available in economical 10 sheet packs.
OPTIONAL ACCESSORIES
Theoperationofanysandercanresultinforeignobjectsbeingthrownintoyoureyes,whichcan
result in severe eye damage. Before beginning power tool operation, always wear safety
gogglesorsafety glasses with side shields andafullface shield when needed. We recommend
Wide Vision Safety Mask for use over eyeglasses or standard safety glasses with side shields.
WARNING:
OPTIONAL POLISHING PADS
Therubberpadsuppliedwithyourdetailsanderallowsyouto
easilyfittheoptionalwaxapplicator/polishingpadsforbuffing
and polishing applications.
OPTIONAL SCRAPER ASSEMBLY
Theoptionalscraperassemblyisavailabletofittothefrontof
yourdetailsander.Thisallowsforeasyremovalofpaintfrom
window panes and frames. It is also ideal for removal of built
up glue or paint.
OPTIONAL PREPARATION PADS
Therubberpadsuppliedwithyourdetailsanderallowsyouto
easily fit the optional preparation pads to dull the surface in
preparation for repainting.
WARNING:
The use of attachments not listed above might be
hazardous and must not be used.

Page 10
RYOBI DETAIL SANDER – MODEL NUMBER DS1100
WARNING:
THE FOOT COVER, KEY NUMBER 19, INSULATES THE CAP SCREW, KEY NUMBER 20, MAKING IT PART OF THE DOUBLE INSULATED SYSTEM.
THEREFORE, IT MUST ALWAYS BE REPLACED WHEN REPLACING PARTS OR MAKING REPAIRS TO THIS TOOL.
1
2
3
4
5
6
78
9
10
212
13
3
11
14
15
16
17
18
19 20
21

Page 11
The model number will be found on a plate attached to the motor housing. Always mention the model number in all correspondence regarding your
DETAIL SANDER or when ordering repair parts.
RYOBI DETAIL SANDER – MODEL NUMBER DS1100
1 Data Plate.................................................................................. 1
2 Screw (#6-19 x 5/8 in. Pan Hd.) .............................................. 12
3 Housing Assembly..................................................................... 1
4 Switch Assembly (Includes Key No. 5)...................................... 1
5 Switch Cover ............................................................................. 1
6 Spherical Ring ........................................................................... 1
7 Arm Support .............................................................................. 1
8 Sleeve Bearing .......................................................................... 1
9 Motor Assembly (Includes Key No. 8) ....................................... 1
10 Black Lead................................................................................. 1
11 Arm Cover ................................................................................. 1
12 Cord Assembly .......................................................................... 1
13 Logo Plate ................................................................................. 1
14 Arm............................................................................................ 1
15 Dowel Pin .................................................................................. 1
16 Sandpaper................................................................................. 1
17 Foot w/Pad ................................................................................1
18 Screw (#4-24 x 3/8 in. Pan Hd.) ................................................ 1
19 Foot Cover................................................................................. 1
20 Cap Screw (#8-32 x 7/16 in. Hex Socket) ................................. 1
21 Rubber Washer ......................................................................... 1
Owner’s Manual
Key
No. Description Quan. Key
No. Description Quan.
PARTS LIST
WARNING:
IMPROPER REPAIR OF A DOUBLE INSULATED TOOL CAN RESULT IN DAMAGES TO THE DOUBLE INSULATION SYSTEM POSSIBLY
CAUSING ELECTRICAL SHOCK OR ELECTROCUTION. ANY REPAIRS REQUIRING DISASSEMBLY OF YOUR TOOL REQUIRES SAFETY
TESTING AND SHOULD ONLY BE PERFORMED BY A FACTORY SERVICE CENTER OR OTHER QUALIFIED SERVICE ORGANIZATION.

972000-426 Printed in U.S.A.
11-00
OPERATOR'S MANUAL
Detail Sander
Model DS1100
Double Insulated
• SERVICE
Nowthatyouhavepurchasedyourtool,shouldaneedeverexistforrepairpartsorservice,
simply contact your nearest Ryobi Authorized Service Center. Be sure to provide all
pertinent facts when you call or visit. Please refer to the Service Center insert or call
1-800-525-2579 in the United States or 1-800-265-6778 in Canada for your nearest Ryobi
Authorized Service Center.
• MODEL NO.AND SERIAL NO.
The model number and serial number of this tool will be found on a plate attached to the
motor housing.
Please record the serial number in the space provided below.
• MODEL NUMBER
• SERIAL NUMBER
RYOBI TECHNOLOGIES INC.
1428 Pearman Dairy Road Anderson, SC 29625
Post Office Box 1207 Anderson, SC 29622-1207
Phone 1-800-525-2579
RYOBI TECHNOLOGIES INC.
Post Office Box 910
Cambridge, Ontario N1R 6K2
Phone 1-800-265-6778
DS1100
EXTENSION CORD CAUTION
Whenusingapowertoolataconsiderabledistancefromapower
source,be sureto use anextension cordthat has the capacity to
handle the current the tool will draw. An undersized cord will
cause a drop in line voltage, resulting in overheating and loss of
power. Use the chart to determine the minimum wire size re-
quiredinanextensioncord.Onlyroundjacketedcordsshouldbe
used.
Whenworking with a tool outdoors,use an extensioncord thatis
designedfor outside use. Thisisindicated by theletters"WA" on
the cord's jacket.
Before using any extension cord, inspect it for loose or exposed
wires and cut or worn insulation.
**Ampere rating
(on tool data plate) 0-2.0 2.1-3.4 3.5-5.0 5.1-7.0 7.1-12.0 12.1-16.0
Cord Length Wire Size (A.W.G.)
25' 16 16 16 16 14 14
50' 16 16 16 14 14 12
100' 16 16 14 12 10 —
CAUTION:
Keep the extension cord clear of the working area. Position the
cord so that it will not get caught on workpiece, tools, or other
obstructions while you are working with a power tool.
**Used on 12 gauge - 20 amp circuit.
Other manuals for DS1100
3
Table of contents
Other Ryobi Sander manuals

Ryobi
Ryobi R18BP User manual

Ryobi
Ryobi CORNER CAT CFS1503G User manual

Ryobi
Ryobi RB101 Configuration guide

Ryobi
Ryobi ESS-3215V Operation manual

Ryobi
Ryobi RSS240Q-S Operation manual

Ryobi
Ryobi BE318-2 User manual

Ryobi
Ryobi R18PS User manual

Ryobi
Ryobi RMS-231 Operation manual

Ryobi
Ryobi EDS180K Operation manual

Ryobi
Ryobi RSS280-S User manual

Ryobi
Ryobi CFS1503K Quick setup guide

Ryobi
Ryobi P430 User manual

Ryobi
Ryobi RAROS-G User manual

Ryobi
Ryobi ECS-1214N Operation manual

Ryobi
Ryobi RSS280 User manual

Ryobi
Ryobi ESS2414K Operation manual

Ryobi
Ryobi EPS2213K Operation manual

Ryobi
Ryobi ESS-3215V Operation manual

Ryobi
Ryobi EBS-8021V User manual

Ryobi
Ryobi R18B User manual