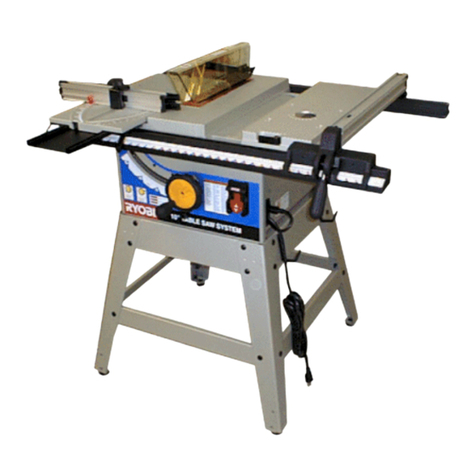
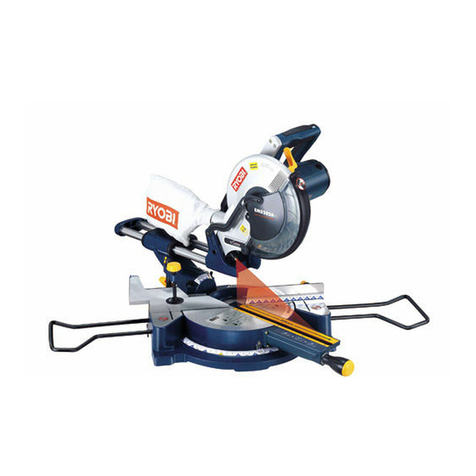
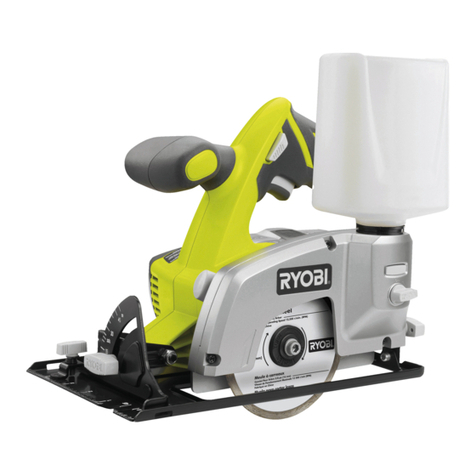
Ryobi TMS-250 Operation manual

TMS-250

1
1
4
2
5
3
8
9
7
6
9
10 11 12 13 14
15 16 17 18 19

2
43
65
21
Wing nut
Release lever
9
3
4
Adjustment
screw
Saw head
locking knob
Lever

3
109
1211
87
14
15
Limiter lever
14 13
Button
Saw head
locking knob
Saw head
locking knob
Lever

4
1615
1817
1413
4
Wing nut
10
Screw
Adjustment
screw
10

5
2221
2423
2019
15
12
14
16
Adjustment
lever

6
2827
2625
Spindle lock
lever
18

THANK YOU FOR BUYING A RYOBI PRODUCT.
To ensure your safety and satisfaction, carefully read through
this OWNER’S MANUAL before using the product.
3
General Safety Rules
SAVE THESE INSTRUCTIONS
WARNING! Read all instructions Failure to follow all instructions
listed below may result in electric shock, fire and/or serious injury.
The term “power tool” in all of the warnings listed below refers
to your mains-operated (corded) power tool or battery-operated
(cordless) power tool.
1) Work area
a) Keep work area clean and well lit. Cluttered and dark areas
invite accidents.
b) Do not operate power tools in explosive atmospheres,
such as in the presence of flammable liquids, gases or
dust. Power tools create sparks which may ignite the dust or
fumes.
c) Keep children and bystanders away while operating a
power tool. Distractions can cause you to lose control.
2) Electrical safety
a) Power tool plugs must match the outlet. Never modify
the plug in any way. Do not use any adapter plugs with
earthed (grounded) power tools. Unmodified plugs and
matching outlets will reduce risk of electric shock
b) Avoid body contact with earthed or grounded surfaces
such as pipes, radiators, ranges and refrigerators. There
is an increased risk of electric shock if your body is earthed or
grounded.
c) Do not expose power tools to rain or wet conditions.
Water entering a power tool will increase the risk of electric
shock.
d) Do not abuse the cord. Never use the cord for carrying,
pulling or unplugging the power tool. Keep cord away
from heat, oil, sharp edges or moving parts. Damaged or
entangled cords increase the risk of electric shock.
e) When operating a power tool outdoors, use an extension
cord suitable for outdoor use. Use of a cord suitable for
outdoor use reduces the risk of electric shock.
3) Personal safety
a) Stay alert, watch what you are doing and use common
sense when operating a power tool. Do not use a power
tool while you are tired or under the influence of drugs,
alcohol or medication. A moment of inattention while
operating power tools may result in serious personal injury.
b) Use safety equipment. Always wear eye protection. Safety
equipment such as dust mask, non-skid safety shoes, hard
hat, or hearing protection used for appropriate conditions will
reduce personal injuries.
4) Power tool use and care
a) Do not force the power tool. Use the correct power tool
for your application. The correct power tool will do the job
better and safer at the rate for which it was designed.
b) Do not use the power tool if the switch does not turn it on
and off. Any power tool that cannot be controlled with the
switch is dangerous and must be repaired.
c) Disconnect the plug from the power source before making
any adjustments, changing accessories, or storing power
tools. Such preventive safety measures reduce the risk of
starting the power tool accidentally.
d) Store idle power tools out of the reach of children and do
not allow persons unfamiliar with the power tool or these
instructions to operate the power tool. Power tools are
dangerous in the hands of untrained users.
e) Maintain power tools. Check for misalignment or binding
of moving parts, breakage of parts and any other condition
that may affect the power tools operation. If damaged, have
the power tool repaired before use. Many accidents are
caused by poorly maintained power tools.
f) Keep cutting tools sharp and clean. Properly maintained
cutting tools with sharp cutting edges are less likely to bind and
are easier to control.
g) Use the power tool, accessories and tool bits etc., in
accordance with these instructions and in the manner
intended for the particular type of power tool, taking into
account the working conditions and the work to be
performed. Use of the power tool for operations different from
intended could result in a hazardous situation.
5) Battery tool use and care
a) Ensure the switch is in the off position before inserting
battery pack. Inserting the battery pack into power tools that
have the switch on invites accidents.
b) Recharge only with the charger specified by the
manufacturer. A charger that is suitable for one type of
battery pack may create a risk of fire when used with another
battery pack.
c) Use power tools only with specifically designated battery
packs. Use of any other battery packs may create a risk of
injury and fire.
d) When battery pack is not in use, keep it away from other
metal objects like paper clips, keys, nails, screws, or
other metal objects that can make a connection from one
terminal to another. Shorting the battery terminals together
may cause burns or a fire.
e) Under abusive conditions, liquid may be ejected from the
battery; avoid contact. If contact accidentally occurs, flush
with water. If liquid contacts eyes, additionally seek
medical help. Liquid ejected from the battery may cause
irritation or burns.
5) Service
a) Have your power tool serviced by a qualified repair person
using only identical replacement parts. This will ensure that
the safety of the power tool is maintained.
c) Avoid accidental starting. Ensure the switch is in the
off-position before plugging in. Carrying power tools with
your finger on the switch or plugging in power tools that have
the switch on invites accidents.
d) Remove any adjusting key or wrench before turning the
power tool on. A wrench or a key left attached to a rotating
part of the power tool may result in personal injury.
e) Do not overreach. Keep proper footing and balance at all
times. This enables better control of the power tool in
unexpected situations.
f) Dress properly. Do not wear loose clothing or jewellery.
Keep your hair, clothing and gloves away from moving
parts. Loose clothes, jewellery or long hair can be caught in
moving parts.
g) If devices are provided for the connection of dust
extraction and collection facilities, ensure these are
connected and properly used. Use of these devices can
reduce dust-related hazards.
THANK YOU FOR BUYING A RYOBI PRODUCT.
To ensure your safety and satisfaction, carefully read through
this OWNER’S MANUAL before using the product.
General Power Tool Safety Warnings
WARNING! Read all safety warnings and all instructions.
Failure to follow the warnings and instructions may result in elec-
Save all warnings and instructions for future reference.
The term ″power tool″ in the warnings refers to your mains-operat-
ed (corded) power tool or battery-operated (cordless) power tool.
1) Work area safety
a) Keep work area clean and well lit. Cluttered or dark ar-
eas invite accidents.
b) Do not operate power tools in explosive atmospheres,
dust. Power tools create sparks which may ignite the dust
or fumes.
c) Keep children and bystanders away while operating a
power tool. Distractions can cause you to lose control.
2) Electrical safety
a) Power tool plugs must match the outlet. Never modify
the plug in any way. Do not use any adapter plugs with
earthed (grounded) power tools.
matching outlets will reduce risk of electric shock.
b) Avoid body contact with earthed or grounded surfaces
such as pipes, radiators, ranges and refrigerators.
There is an increased risk of electric shock if your body is
earthed or grounded.
c) Do not expose power tools to rain or wet conditions.
Water entering a power tool will increase the risk of electric
shock.
d) Do not abuse the cord. Never use the cord for carrying,
pulling or unplugging the power tool. Keep cord away
from heat, oil, sharp edges or moving parts. Damaged
or entangled cords increase the risk of electric shock.
e) When operating a power tool outdoors, use an exten-
sion cord suitable for outdoor use. Use of a cord suit-
able for outdoor use reduces the risk of electric shock.
f) If operating a power tool in a damp location isunavoid-
able, use a residual current device (RCD) protected
supply. Use of an RCD reduces the risk of electric shock.
3) Personal safety
a) Stay alert, watch what you are doing and use com-
mon sense when operating a power tool. Do not use a
of drugs, alcohol or medication. A moment of inattention
while operating power tools may result in serious personal
injury.
b) Use personal protective equipment. Always wear eye
protection. Protective equipment such as dust mask, non-
skid safety shoes, hard hat, or hearing protection used for
appropriate conditions will reduce personal injuries.
c) Prevent unintentional starting. Ensure the switch is
in the off-position before connecting to power source
.lootehtgniyrracropugnikcip,kcapyrettabro/dna
Carrying power tools with your finger on the switch or
energising power tools that have the switch on invites ac-
cidents.
d) Remove any adjusting key or wrench before turning
the power tool on. A wrench or a key left attached to a
rotating part of the power tool may result in personal injury.
e) Do not overreach. Keep proper footing and balance at
all times. This enables better control of the power tool in
unexpected situations.
f) Dress properly. Do not wear loose clothing or jewel-
lery. Keep your hair, clothing and gloves away from
moving parts. Loose clothes, jewellery or long hair can be
caught in moving parts.
g) If devices are provided for the connection of dust ex-
traction and collection facilities, ensure these are con-
nected and properly used. Use of dust collectioncan
reduce dust-related hazards.
4) Power tool use and care
a) Do not force the power tool. Use the correct power tool
for your application. The correct power tool will do the
job better and safer at the rate for which it was designed.
b) Do not use the power tool if the switch does not turn it
on and off. Any power tool that cannot be controlled with
the switch is dangerous and must be repaired.
c) Disconnect the plug from the power source and/or the
battery pack from the power tool before making any
adjustments, changing accessories, or storing power
tools. Such preventive safety measures reduce the risk of
starting the power tool accidentally.
d) Store idle power tools out of the reach of children and
do not allow persons unfamiliar with the power tool
or these instructions to operate the power tool. Power
tools are dangerous in the hands of untrained users.
e) Maintain power tools. Check for misalignment or bind-
ing of moving parts, breakage of parts and any other
condition that may affect the power tool’s operation.
If damaged, have the power tool repaired before use.
Many accidents are caused by poorly maintained power
tools.
f) Keep cutting tools sharp and clean. Properly maintained
cutting tools with sharp cutting edges are less likely to bind
and are easier to control.
g) Use the power tool, accessories and tool bits etc. in
accordance with these instructions, taking into ac-
count the working conditions and the work to be per-
formed. Use of the power tool for operations different from
those intended could result in a hazardous situation.
5) Service
a) Have your power tool serviced by a qualified repair
person using only identical replacement parts. This will
ensure that the safety of the power tool is maintained.
THANK YOU FOR BUYING A RYOBI PRODUCT.
To ensure your safety and satisfaction, carefully read through
this OWNER’S MANUAL before using the product.
7
General Safety Rules
SAVE THESE INSTRUCTIONS
WARNING! Read all instructions Failure to follow all instructions
listed below may result in electric shock, fire and/or serious injury.
The term “power tool” in all of the warnings listed below refers
to your mains-operated (corded) power tool or battery-operated
(cordless) power tool.
1) Work area
a) Keep work area clean and well lit. Cluttered and dark areas
invite accidents.
b) Do not operate power tools in explosive atmospheres,
such as in the presence of flammable liquids, gases or
dust. Power tools create sparks which may ignite the dust or
fumes.
c) Keep children and bystanders away while operating a
power tool. Distractions can cause you to lose control.
2) Electrical safety
a) Power tool plugs must match the outlet. Never modify
the plug in any way. Do not use any adapter plugs with
earthed (grounded) power tools. Unmodified plugs and
matching outlets will reduce risk of electric shock
b) Avoid body contact with earthed or grounded surfaces
such as pipes, radiators, ranges and refrigerators. There
is an increased risk of electric shock if your body is earthed or
grounded.
c) Do not expose power tools to rain or wet conditions.
Water entering a power tool will increase the risk of electric
shock.
d) Do not abuse the cord. Never use the cord for carrying,
pulling or unplugging the power tool. Keep cord away
from heat, oil, sharp edges or moving parts. Damaged or
entangled cords increase the risk of electric shock.
e) When operating a power tool outdoors, use an extension
cord suitable for outdoor use. Use of a cord suitable for
outdoor use reduces the risk of electric shock.
3) Personal safety
a) Stay alert, watch what you are doing and use common
sense when operating a power tool. Do not use a power
tool while you are tired or under the influence of drugs,
alcohol or medication. A moment of inattention while
operating power tools may result in serious personal injury.
b) Use safety equipment. Always wear eye protection. Safety
equipment such as dust mask, non-skid safety shoes, hard
hat, or hearing protection used for appropriate conditions will
reduce personal injuries.
4) Power tool use and care
a) Do not force the power tool. Use the correct power tool
for your application. The correct power tool will do the job
better and safer at the rate for which it was designed.
b) Do not use the power tool if the switch does not turn it on
and off. Any power tool that cannot be controlled with the
switch is dangerous and must be repaired.
c) Disconnect the plug from the power source before making
any adjustments, changing accessories, or storing power
tools. Such preventive safety measures reduce the risk of
starting the power tool accidentally.
d) Store idle power tools out of the reach of children and do
not allow persons unfamiliar with the power tool or these
instructions to operate the power tool. Power tools are
dangerous in the hands of untrained users.
e) Maintain power tools. Check for misalignment or binding
of moving parts, breakage of parts and any other condition
that may affect the power tools operation. If damaged, have
the power tool repaired before use. Many accidents are
caused by poorly maintained power tools.
f) Keep cutting tools sharp and clean. Properly maintained
cutting tools with sharp cutting edges are less likely to bind and
are easier to control.
g) Use the power tool, accessories and tool bits etc., in
accordance with these instructions and in the manner
intended for the particular type of power tool, taking into
account the working conditions and the work to be
performed. Use of the power tool for operations different from
intended could result in a hazardous situation.
5) Battery tool use and care
a) Ensure the switch is in the off position before inserting
battery pack. Inserting the battery pack into power tools that
have the switch on invites accidents.
b) Recharge only with the charger specified by the
manufacturer. A charger that is suitable for one type of
battery pack may create a risk of fire when used with another
battery pack.
c) Use power tools only with specifically designated battery
packs. Use of any other battery packs may create a risk of
injury and fire.
d) When battery pack is not in use, keep it away from other
metal objects like paper clips, keys, nails, screws, or
other metal objects that can make a connection from one
terminal to another. Shorting the battery terminals together
may cause burns or a fire.
e) Under abusive conditions, liquid may be ejected from the
battery; avoid contact. If contact accidentally occurs, flush
with water. If liquid contacts eyes, additionally seek
medical help. Liquid ejected from the battery may cause
irritation or burns.
5) Service
a) Have your power tool serviced by a qualified repair person
using only identical replacement parts. This will ensure that
the safety of the power tool is maintained.
c) Avoid accidental starting. Ensure the switch is in the
off-position before plugging in. Carrying power tools with
your finger on the switch or plugging in power tools that have
the switch on invites accidents.
d) Remove any adjusting key or wrench before turning the
power tool on. A wrench or a key left attached to a rotating
part of the power tool may result in personal injury.
e) Do not overreach. Keep proper footing and balance at all
times. This enables better control of the power tool in
unexpected situations.
f) Dress properly. Do not wear loose clothing or jewellery.
Keep your hair, clothing and gloves away from moving
parts. Loose clothes, jewellery or long hair can be caught in
moving parts.
g) If devices are provided for the connection of dust
extraction and collection facilities, ensure these are
connected and properly used. Use of these devices can
reduce dust-related hazards.

THANK YOU FOR BUYING A RYOBI PRODUCT.
To ensure your safety and satisfaction, carefully read through
this OWNER’S MANUAL before using the product.
8
General Safety Rules
SAVE THESE INSTRUCTIONS
WARNING! Read all instructions Failure to follow all instructions
listed below may result in electric shock, fire and/or serious injury.
The term “power tool” in all of the warnings listed below refers
to your mains-operated (corded) power tool or battery-operated
(cordless) power tool.
1) Work area
a) Keep work area clean and well lit. Cluttered and dark areas
invite accidents.
b) Do not operate power tools in explosive atmospheres,
such as in the presence of flammable liquids, gases or
dust. Power tools create sparks which may ignite the dust or
fumes.
c) Keep children and bystanders away while operating a
power tool. Distractions can cause you to lose control.
2) Electrical safety
a) Power tool plugs must match the outlet. Never modify
the plug in any way. Do not use any adapter plugs with
earthed (grounded) power tools. Unmodified plugs and
matching outlets will reduce risk of electric shock
b) Avoid body contact with earthed or grounded surfaces
such as pipes, radiators, ranges and refrigerators. There
is an increased risk of electric shock if your body is earthed or
grounded.
c) Do not expose power tools to rain or wet conditions.
Water entering a power tool will increase the risk of electric
shock.
d) Do not abuse the cord. Never use the cord for carrying,
pulling or unplugging the power tool. Keep cord away
from heat, oil, sharp edges or moving parts. Damaged or
entangled cords increase the risk of electric shock.
e) When operating a power tool outdoors, use an extension
cord suitable for outdoor use. Use of a cord suitable for
outdoor use reduces the risk of electric shock.
3) Personal safety
a) Stay alert, watch what you are doing and use common
sense when operating a power tool. Do not use a power
tool while you are tired or under the influence of drugs,
alcohol or medication. A moment of inattention while
operating power tools may result in serious personal injury.
b) Use safety equipment. Always wear eye protection. Safety
equipment such as dust mask, non-skid safety shoes, hard
hat, or hearing protection used for appropriate conditions will
reduce personal injuries.
4) Power tool use and care
a) Do not force the power tool. Use the correct power tool
for your application. The correct power tool will do the job
better and safer at the rate for which it was designed.
b) Do not use the power tool if the switch does not turn it on
and off. Any power tool that cannot be controlled with the
switch is dangerous and must be repaired.
c) Disconnect the plug from the power source before making
any adjustments, changing accessories, or storing power
tools. Such preventive safety measures reduce the risk of
starting the power tool accidentally.
d) Store idle power tools out of the reach of children and do
not allow persons unfamiliar with the power tool or these
instructions to operate the power tool. Power tools are
dangerous in the hands of untrained users.
e) Maintain power tools. Check for misalignment or binding
of moving parts, breakage of parts and any other condition
that may affect the power tools operation. If damaged, have
the power tool repaired before use. Many accidents are
caused by poorly maintained power tools.
f) Keep cutting tools sharp and clean. Properly maintained
cutting tools with sharp cutting edges are less likely to bind and
are easier to control.
g) Use the power tool, accessories and tool bits etc., in
accordance with these instructions and in the manner
intended for the particular type of power tool, taking into
account the working conditions and the work to be
performed. Use of the power tool for operations different from
intended could result in a hazardous situation.
5) Battery tool use and care
a) Ensure the switch is in the off position before inserting
battery pack. Inserting the battery pack into power tools that
have the switch on invites accidents.
b) Recharge only with the charger specified by the
manufacturer. A charger that is suitable for one type of
battery pack may create a risk of fire when used with another
battery pack.
c) Use power tools only with specifically designated battery
packs. Use of any other battery packs may create a risk of
injury and fire.
d) When battery pack is not in use, keep it away from other
metal objects like paper clips, keys, nails, screws, or
other metal objects that can make a connection from one
terminal to another. Shorting the battery terminals together
may cause burns or a fire.
e) Under abusive conditions, liquid may be ejected from the
battery; avoid contact. If contact accidentally occurs, flush
with water. If liquid contacts eyes, additionally seek
medical help. Liquid ejected from the battery may cause
irritation or burns.
5) Service
a) Have your power tool serviced by a qualified repair person
using only identical replacement parts. This will ensure that
the safety of the power tool is maintained.
c) Avoid accidental starting. Ensure the switch is in the
off-position before plugging in. Carrying power tools with
your finger on the switch or plugging in power tools that have
the switch on invites accidents.
d) Remove any adjusting key or wrench before turning the
power tool on. A wrench or a key left attached to a rotating
part of the power tool may result in personal injury.
e) Do not overreach. Keep proper footing and balance at all
times. This enables better control of the power tool in
unexpected situations.
f) Dress properly. Do not wear loose clothing or jewellery.
Keep your hair, clothing and gloves away from moving
parts. Loose clothes, jewellery or long hair can be caught in
moving parts.
g) If devices are provided for the connection of dust
extraction and collection facilities, ensure these are
connected and properly used. Use of these devices can
reduce dust-related hazards.

1 . Replace table insert when worn.
2 . Use only saw blades recommended by the manufacturer.
3. When changing the saw blade, beware that the width of the
groove cut of the saw blades shall not be less than and the
thickness of the body of the saw blade shall not be more than
the thickness of the riving knife.
4. Take care that the selection of the saw blade is suitable to be
cut.
5. Wear suitable personal protective equipment when
necessary. This could include hearing protection to reduce the
risk of induced hearing loss and respiratory protection to
reduce the risk of inhalation of harmful dust.
6. Wear gloves when handing saw blades and rough material.
Saw blades should be carried in a holder whenever possible.
7. Do not use high speed steel blades.
8. The push-stick or push-block should always be stored with the
machine when not in use.
9. Use only saw blades for which the maximum possible speed is
not less than the maximum spindle speed of the tool and the
material to be cut.
10.When transporting the machine use only transportation
devices.
11.During transportation the upper part of the saw blade should
be covered, for example by the guard.
12.If using an extension cable, make sure its conductor
cross-section is large enough for the saw's power
consumption.
13.After you have switched off the motor, never slow down the
saw blade by applying pressure to its side.
14.Fit only blades which are well sharpened and have no cracks
or deformations.
15.Faulty saw blades have to be replaces immediately.
16.If you are interrupted when operating the saw, complete the
process and switch off before locking up.
17.Periodically check that all nuts, bolts and other fixing are
properly tightened.
18.Always ensure that your work is on the table. Never use the
tool to cut pieces that are not on the table.
19.Do not place your hands in awkward positions, where one
both may slip suddenly and touch the saw bade.
20.When working with a long piece, use an additional support
such as a saw table to prevent the blade from grabbing the
work.
21.When cutting round wood, use clamps that prevent the
workpiece from turning on the table.
22.There must be no nails or other foreign bodies in that part of
the workpiece you want to cut.
23.Never load the machine so much that it slows down and
over-heats.
24.Never saw several workpiece simultaneously.
25.Never remove loose splinters, chips or jammed pieces of
wood when the saw is running.
26.To rectify or remove jammed pieces of wood, always switch off
the machine first and remove the mains plug.
27.Rebating or grooving should not be carried out unless suitable
guarding. Such as a tunnel guard, is fitted above the table
saw.
28.Saws must not be used for slotting (stopped grooves).
29.Always use a push-stick or push-block for ripping narrow stock.
Refer to ripping applications in this Instruction Manual where
use of the push-stick or push-block is covered in detail.
30.Always use the saw blade guard and riving knife for every
operation, including through sawing through sawing operations
are those in which the blade cuts completely through the work
piece when ripping or crosscutting.
31.Always hold the work firmly against the mitre fence or rip fence.
32.Never perform any operation "free hand". Always use either the
mitre fence or the rip fence to position and guide the work.
33.Move the rip fence out of the way when crosscutting.
34.Feed the work into the blade AGAINST the direction of rotation
only.
35.Never use the fence as a cut-off gauge when crosscutting.
36.Never stand or have any parts of your body in line with the path
of the saw blade.
37.Keep your hands out off the line of the saw blade.
38.All guards and safety devices have to be refitted immediately
after completion of any repairs or maintenance.
39. Adjustments, measurements and cleaning jobs are to be
performed only when the motor is switched off and the mains
plug removed.
40.The machine may be used in a closed room only in conjunction
with a suitable vacuum extraction system.
41.This table saw must be connected to 230-240V socket-outlet
with a minimum 10A circuit.
42.Unless otherwise stated in these instructions, damaged safety
devices and parts must be repaired or replaced by an
authorized service facility.
43.Have damaged switches replaced by an authorized service
facility.
44.This tool complies with the pertinent safety regulations.
SPECIFIC RULES FOR TABLE SAWS
SPECIFIC RULES FOR MITRE SAWS
1. Do not lock the moving guard in the open position. Ensure that
the movable guards operate freely without jamming.
2. Remove all loose clothing and confine long hair.
3. Before operating the machine, remove tie, rings, watches, other
jewellery, and roll up sleeves above the elbows.
4. Wear safety shoes; never wear leisure shoes or sandals.
Always wear the approved working outfit
5. Do not wear gloves while operating this machine.
6. For the safe handling of saw blades wear work gloves.
7. Observe the chapter “save operation” in this manual.
8. Control the stopping time of the machine, it may not be longer
than 10 seconds.
9. Do NOT stop the blade by forcing the machine or by using
sideways pressure.
10.Insure that the workpiece does not roll when cutting round
pieces.
11.Use suitable table extensions and supporting aids for difficult to
handle workpieces.
12.Never use just your hands for sawing
13.Always hold and guide the workpieces safely during machining.
14.Never cut pieces that are too small.

SPECIFICATIONS
INSTRUCTIONS FOR SAFE HANDLING
1. Make sure that the tool is only connected to the voltage marked
on the name plate.
2. Never use the tool if its cover or any bolts are missing. If the
cover or bolts have been removed, replace them prior to use.
Maintain all parts in good working order.
3. Always secure the tool when working in elevated positions.
4. Never touch the blade, drill bit, grinding wheel or other moving
parts during use.
5. Never start the tool when its rotating component is in contact
with the work piece.
6. Never lay the tool down before its moving parts have come to a
complete stop.
7. ACCESSORIES :
The use of accessories or attachments other than those
recommended in this manual might present a hazard.
8. REPLACEMENT PARTS :
When servicing use only identical replacement parts.
DESCRIPTION
THANK YOU FOR BUYING A RYOBI PRODUCT.
To ensure your safety and satisfaction, carefully read through
this OWNER’S MANUAL before using the product.
9
General Safety Rules
SAVE THESE INSTRUCTIONS
WARNING! Read all instructions Failure to follow all instructions
listed below may result in electric shock, fire and/or serious injury.
The term “power tool” in all of the warnings listed below refers
to your mains-operated (corded) power tool or battery-operated
(cordless) power tool.
1) Work area
a) Keep work area clean and well lit. Cluttered and dark areas
invite accidents.
b) Do not operate power tools in explosive atmospheres,
such as in the presence of flammable liquids, gases or
dust. Power tools create sparks which may ignite the dust or
fumes.
c) Keep children and bystanders away while operating a
power tool. Distractions can cause you to lose control.
2) Electrical safety
a) Power tool plugs must match the outlet. Never modify
the plug in any way. Do not use any adapter plugs with
earthed (grounded) power tools. Unmodified plugs and
matching outlets will reduce risk of electric shock
b) Avoid body contact with earthed or grounded surfaces
such as pipes, radiators, ranges and refrigerators. There
is an increased risk of electric shock if your body is earthed or
grounded.
c) Do not expose power tools to rain or wet conditions.
Water entering a power tool will increase the risk of electric
shock.
d) Do not abuse the cord. Never use the cord for carrying,
pulling or unplugging the power tool. Keep cord away
from heat, oil, sharp edges or moving parts. Damaged or
entangled cords increase the risk of electric shock.
e) When operating a power tool outdoors, use an extension
cord suitable for outdoor use. Use of a cord suitable for
outdoor use reduces the risk of electric shock.
3) Personal safety
a) Stay alert, watch what you are doing and use common
sense when operating a power tool. Do not use a power
tool while you are tired or under the influence of drugs,
alcohol or medication. A moment of inattention while
operating power tools may result in serious personal injury.
b) Use safety equipment. Always wear eye protection. Safety
equipment such as dust mask, non-skid safety shoes, hard
hat, or hearing protection used for appropriate conditions will
reduce personal injuries.
4) Power tool use and care
a) Do not force the power tool. Use the correct power tool
for your application. The correct power tool will do the job
better and safer at the rate for which it was designed.
b) Do not use the power tool if the switch does not turn it on
and off. Any power tool that cannot be controlled with the
switch is dangerous and must be repaired.
c) Disconnect the plug from the power source before making
any adjustments, changing accessories, or storing power
tools. Such preventive safety measures reduce the risk of
starting the power tool accidentally.
d) Store idle power tools out of the reach of children and do
not allow persons unfamiliar with the power tool or these
instructions to operate the power tool. Power tools are
dangerous in the hands of untrained users.
e) Maintain power tools. Check for misalignment or binding
of moving parts, breakage of parts and any other condition
that may affect the power tools operation. If damaged, have
the power tool repaired before use. Many accidents are
caused by poorly maintained power tools.
f) Keep cutting tools sharp and clean. Properly maintained
cutting tools with sharp cutting edges are less likely to bind and
are easier to control.
g) Use the power tool, accessories and tool bits etc., in
accordance with these instructions and in the manner
intended for the particular type of power tool, taking into
account the working conditions and the work to be
performed. Use of the power tool for operations different from
intended could result in a hazardous situation.
5) Battery tool use and care
a) Ensure the switch is in the off position before inserting
battery pack. Inserting the battery pack into power tools that
have the switch on invites accidents.
b) Recharge only with the charger specified by the
manufacturer. A charger that is suitable for one type of
battery pack may create a risk of fire when used with another
battery pack.
c) Use power tools only with specifically designated battery
packs. Use of any other battery packs may create a risk of
injury and fire.
d) When battery pack is not in use, keep it away from other
metal objects like paper clips, keys, nails, screws, or
other metal objects that can make a connection from one
terminal to another. Shorting the battery terminals together
may cause burns or a fire.
e) Under abusive conditions, liquid may be ejected from the
battery; avoid contact. If contact accidentally occurs, flush
with water. If liquid contacts eyes, additionally seek
medical help. Liquid ejected from the battery may cause
irritation or burns.
5) Service
a) Have your power tool serviced by a qualified repair person
using only identical replacement parts. This will ensure that
the safety of the power tool is maintained.
c) Avoid accidental starting. Ensure the switch is in the
off-position before plugging in. Carrying power tools with
your finger on the switch or plugging in power tools that have
the switch on invites accidents.
d) Remove any adjusting key or wrench before turning the
power tool on. A wrench or a key left attached to a rotating
part of the power tool may result in personal injury.
e) Do not overreach. Keep proper footing and balance at all
times. This enables better control of the power tool in
unexpected situations.
f) Dress properly. Do not wear loose clothing or jewellery.
Keep your hair, clothing and gloves away from moving
parts. Loose clothes, jewellery or long hair can be caught in
moving parts.
g) If devices are provided for the connection of dust
extraction and collection facilities, ensure these are
connected and properly used. Use of these devices can
reduce dust-related hazards.
1. Lock-off button
2. On/Off trigger switch
3. Lower guard
4. Holing prop
5. Dust bag
6. Wheels
7. Electronic switch for table saw
8. Legs
9. Locking knobs
10. Dust cover
11. Fastening screw of clamping guard
12. Push stick
13. Rip fence
14. Blade guard for table saw
15. Mitre gauge
16. Vice clamp
17. Allen key
18. Dust extraction adapter
19. Coil hook
TRANSPORT AND STORAGE
• If stored for longer time, it needs to be cleaned properly.
• To avoid injuries keep the blade down while storing.
• Use plastic board or cardboard for weather protection
Power input...................................................... 230V~50Hz 1800W
No load speed.................................................................. 4200min-1
Blade size............................................... Ø255xØ25.4x3.0mm, 60T
Mitre saw fence-angle.......................... 0°, ±15°, ±22.5°, ±30°, ±45°
Mitre saw bevel angle............................................................. 0~45˚
Mitre saw cutting capacity
90° x 90°.................................................................65 x 155 mm
90° x 45°.................................................................65 x 105 mm
45° x 90°.................................................................40 x 155 mm
45° x 45°.................................................................40 x 105 mm
Table saw cutting capacity............................ 90°-70mm; 45°-50mm
Table height...........................................................................820mm
Net weight................................................................................42kgs
15.For safety reasons this machine requires the use of two hands
and should not be operated standing on a staircase or leather.
16.Make sure that the motor ventilation holes are clean and open.
17.Install the machine so that there is sufficient space for safe
operation and workpiece handling.
18.The machine is designed to operate in closed rooms and must
be placed stable on firm and levelled ground.
19.Make sure that the power cord does not impede work and
cause people to trip.
20.Never reach into the machine while it is operating or running
down.
21.Observe the fire fighting and fire alert options, for example the
fire extinguisher operation and place.
22.Wood dust is explosive and can also represent a risk to health.
23.Dust form some tropical woods in particular, and from
hardwoods like beach and oak, is classified as a carcinogenic
substance.
24.Always use a suitable dust extraction device.
25.Before machining, remove any nails and other foreign bodies
from the workpiece.
26.Specifications regarding the maximum or minimum size of the
workpiece must be observed.
27.Do not remove chips and workpiece parts until the machine is
at a complete standstill.
28.Never operate with the guards not in place– serious risk of
injury!
29.Always unwind any extension cords fully.
30. Make all machine adjustments or maintenance with the
machine unplugged from the power source.
31. Do not use blades made from High Speed Steel (HSS).
32. Remove defective saw blades immediately.
33. Use carbide-tipped sawblades with a negative chip angle only.
Never attempt to use ripping or combination blades with this
saw.
34. When cutting thin walled stock, it is essential that you use a
fine tooth blade of at least 80 teeth. A coarse blade may hook
into the stock and eject it.
35. This machine is not suitable for cutting steel and other metals.
36. Never attempt to cut round or irregular cross-section stock
without using a suitable jig.
37. If the blade stalls, switch off immediately.
38. When using machine on a workstand, always clamp it down.
39. Always listen to the machine and switch off immediately if
abnormal sounds are heard.
40. Keep the slide lock tight unless slide action is needed.
41. Ensure that the blade guard opens and closes smoothly.
42. Always support long pieces with an additional supporting stand
of appropriate height.
43. Never carry tool by operating handle. Always use the carry
handle or use two hands to carry by the base.
44. Always use approved eye and ear protection.
45. Keep hands away from blad at all times.

10
OPERATION
PREPARATION (Fig. 1)
SETTING UP FOR TABLE SAW MODE
SETTING UP FOR MITRE SAW MODE
Before each saw adjustment and modification pull
the plug out of the power supply.
Safety instructions for operators
• All protective and safety equipment must be mounted properly
and in place before running the tool.
• Never cut such a wood pieces that cannot be fixed safely.
• Saw blade must rotate freely.
• If cutting already processed wood, watch out for nails, bolts etc.
Remove all objects before work.
• Confirm before pressing the main switch that the saw blade is
mounted correctly and all moving parts are moving freely.
• If any doubts seek qualified advice at authorized Service center.
• Read the instruction manual carefully before operation.
• Observe all safety precautions stated in the manual.
• Be responsible towards other people.
TABLE SAW (Fig. 20, 21)
• Set the mitre gauge and rip fences according to required cut.
• Turn the tool on.
• Slide the workpiece slowly under the saw blade until the cut is
finished.
• Turn the saw off and wait until the blade stops completely.
• Now remove the workpiece.
MITRE SAW (Fig. 22, 23, 24)
• Release the adjustment lever to set the saw angle from 0° to 45°
by reading on scale. (Fig. 22)
• Loose the adjustment knob and turn the saw to change position
of the saw blade. (Fig. 23)
• Fix the workpiece with vice clamp (16).
• Turn the tool on.
• Press the saw slowly down to execute the cut.
• Turn the saw off and wait until the blade stops completely.
• Now remove the workpiece.
Linear cuts (Fig. 20)
• Set the rip fence towards the saw blade to get required width.
• Put the workpiece on the table, flat resp. wider side down.
Cross cuts (Fig. 21)
• Remove the rip fence, place the mitre guage (15) in one of the
groove on the table.
• Adjust the blade height, set the fence rail of mitre guage to the
most suitable lenght.
• Hold the workpiece firmly against the mitre guage.
• Switch on the saw.
• Push forward the mitre guage and the work piece smoothly until
cut off.
• Switch off the saw again.
• Wait for the saw blade to stop before you remove the off-cuts.
ON/OFF SWITCH (Fig. 18, 19)
• Turn up to open the emergency stop cover on the switch.
• Press the green button for to start the table saw ON.
• For switching off the machine, press the red button, or directly
push the emergency stop cover in place.
1. Push the lever forward and flip the table over until it clicks. (Fig. 2)
2. Keeping pushing the mitre saw handle downwards lightly with
one hand, another hand pull out the saw head locking knob,
release the saw head up and then turn the saw head locking
knob to let it snap in. (Fig. 3)
3. Loose the wing nut which holds holing prop. In the holding
cylinder of the holing prop there are two grooves allowing two
different settings. Move with the saw handle while pressing the
release lever to adjust the saw blade guard. (Fig. 4)
4. Pull the lower guard (3) up and place the holing prop (4) ,tight
up the wing nut. (Fig. 5)
WARNING! Confirm that the distance between holing prop and
saw blade is sufficient.
5. Pull out the saw head locking knob while push the saw head
down fully and then lock the saw head in table saw position.
(Fig. 3)
6. Turn the adjustment screw to the limit. (Fig. 6)
7. Flip over the table until it clicks. (Fig. 7)
8. Mount the blade guard for table saw (14) in the groove and
press the button to snap in. (Fig. 8)
9. Attach the dust bag to the suction outlet under the table if you
are not going to use suction.
10. Place mitre gauge (15) or rip fence (13) as necessary. (Fig. 9)
1. Remove mitre gauge (15) or rip fence (13) and blade guard for table
saw (14).
2. Press the lever to unclock the table and turn the table until it
clicks. (Fig. 2, Fig. 11)
3. Keeping pushing the mitre saw handle downwards lightly with
one hand, another hand pulls out the saw head locking knob,
release the saw head up and then turn the saw head locking
knob to snap in. (Fig. 10, Fig. 11)
4. Set the cutting depth by the limiter lever. (Fig. 12)
5. Change the position of the holing prop by releasing the wing
nut. (Fig. 13)
6. Push back the holing prop to be parallel with the saw blade,
tight the wing nut. (Fig. 14)
7. Turn the adjustment screw to the right completely to set the
height. (Opposite way as with the table saw setting). (Fig. 13)
8. Move the saw handle while pressing the release lever to adjust
the lower guard (3) up, pull out the saw head locking knob
while push the saw head down fully and then lock the saw
head , then flip over the table until it clicks. (Fig. 7)
9. Place the dust cover (10) on the turntable, mount the two
designed lugs into the table, tight the screw on the other side.
(Fig. 16)
Fold the main part back and then easily set the legs into
working position.
Loose locking knobs (9) for the legs release. Then fasten it back,
so all four legs (8) are fixed.
Now stand the saw up.
WARNING!
Keep adequate safety distance from the saw blade.
ON/OFF SWITCH FOR MITRE SAW
To start the saw, squeeze the on/off trigger switch (2) while
depressing the lock-off button (1).
To stop the saw, just release the on/off trigger switch.
10. Flip over the table until it clicks. (Fig. 17)
11. Attach the dust bag to the suction outlet under the table if you
are not going to use suction.

11
After use, check the tool to make sure that it is in top condition.It
is recommended that you take this tool to a RYOBI Authorized
Service Center for a thorough cleaning and lubrication at least
once a year.
DO NOT MAKE ANY ADJUSTMENTS WHILE THE MOTOR IS
IN MOTION.
ALWAYS REMOVE THE BATTERY FROM THE TOOL BEFORE
CHANGING REMOVABLE OR EXPENDABLE PARTS
(BIT...ETC.), LUBRICATING OR WORKING ON THE UNIT.
WARNING!
To ensure safety and reliability, all repairs should be performed by
an AUTHORIZED SERVICE CENTER or other QUALIFIED
SERVICE ORGANIZATION.
SAVE THESE INSTRUCTIONS FOR FUTURE REFERENCE.
MAINTENANCE
Bevel cuts (Fig. 24)
• Fix the workpiece with the vice clamp (16).
• Loose the adjustment lever and set the angle required.
• Confirm the holing prop is in the saw line.
• Fasten up the adjustment screw. Turn the tool on and press
the saw down to carry out required cut.
• Insert the dust extraction adapter (18) into the dust outlet.
• Pull the dust extraction adapter and make sure it is tightened
securely on the dust outlet.
• Connect the hose of a vacuum cleaner.
• Turn on the vacuum cleaner first, and then turn on the
machine.
• If you stop cutting, turn off the machine first, and then turn off
the vacuum cleaner.
• To clean plastic parts use a damp cloth. Never use any
detergents, neither dissolvents or sharp tools.
• Remove dirt of the table with proper cleaning spray.
• If it takes more then 10sec. to stop the motor, replace the worn
out brakeparts in qualified workshop.
• Ventilation holes and moving parts always clean up from the
dust with soft brush after each use.
Lubricate metal moving parts regularly.
Plug the cord out before any activity
INSPECTION AND MAINTENANCE
1. Power cord is too long or has small diameter. Secure proper
extension cable with minimum diameter of 1,5 mm²
2. Saw blade is not sharp enough. Sharp it up.
Saw blade teeth have not sufficient rake.
1. Saw blade is dull. Let it sharpen up or eplace it.
MALFUNCTIONS-CAUSES-ELIMINATION
1. The tool is without power.
Check electric distribution and power cord, seek qualified
advice.
2. Heat sensor cut the power off.
Wait 5 to 10sec. and then turn the tool on again.
1. Heat sensor is defective. Have it replaced by an electrician
expert.
2. Motor safeguard turns it off from some reason.
Wait 5 to 10 sec. and then turn the tool back on again.
Attention: first of all check the overcurrent fusses!
Motor is not running
Motor went off during the work
Overloading reasons
Burned marks on the workpiece
CHIP SUCTION (Fig. 25)
If running the tool in confined places, it is needed to use proper
suction unit or the dust bag (5) must be put on the outlet
nozzle.
WARNING!
Hold the carried workpiece firmly but never the part which
is going to be cut off.
DUST EXTRACTION ADAPTER (Fig. 26)
• Press the spindle lock lever and hold it to loosen the saw
blade fixing bolt.
• Turn the bolt in clockwise direction with socket wrench or
open-ended wrench.
• Take the saw blade off the spindle and remove it.
• Clean the spindle up and put a new saw blade on.
• Put a new saw blade on and secure it in opposite way as
described above.
Attention!
• Check the rotation direction. Confirm that cutting edge of
teeth match with the direction of rotation, i.e. forward. Watch
out for the arrows on the saw blade and saw blade guard.
• Every time before use check if all protective and safety
equipment function correctly.
Important!
• After you mounted on a new saw blade check by hand if it
spins freely.
• Then plug the power back in and trial run the tool before you
start working on it.
REPLACING SAW BLADE (Fig. 27, 28)
Always disconnect the power plug before any
maintenance or adjustment and before removing
or installing the saw blade.
WARNING!

NOTE
12

NOTE
13

NOTE
14

Table of contents
Other Ryobi Saw manuals

Ryobi
Ryobi CSB133L User guide

Ryobi
Ryobi TS1343L Quick setup guide

Ryobi
Ryobi TC401 User manual

Ryobi
Ryobi CSB142LZ Quick setup guide

Ryobi
Ryobi BTS211 User manual

Ryobi
Ryobi CSB134L User manual

Ryobi
Ryobi RCS1400 User manual

Ryobi
Ryobi RJ150V Operation manual

Ryobi
Ryobi TS1342L User manual

Ryobi
Ryobi ESW1240RK Instructions for use

Ryobi
Ryobi TS1346 User manual

Ryobi
Ryobi RLS1351 Quick setup guide

Ryobi
Ryobi R18RS User manual

Ryobi
Ryobi RRS1200 User manual

Ryobi
Ryobi ONE+ RBP18150 User manual

Ryobi
Ryobi P530 User manual

Ryobi
Ryobi TS1552LA User manual

Ryobi
Ryobi BS904 User manual

Ryobi
Ryobi TS1342 Quick setup guide

Ryobi
Ryobi RWS14004 User manual