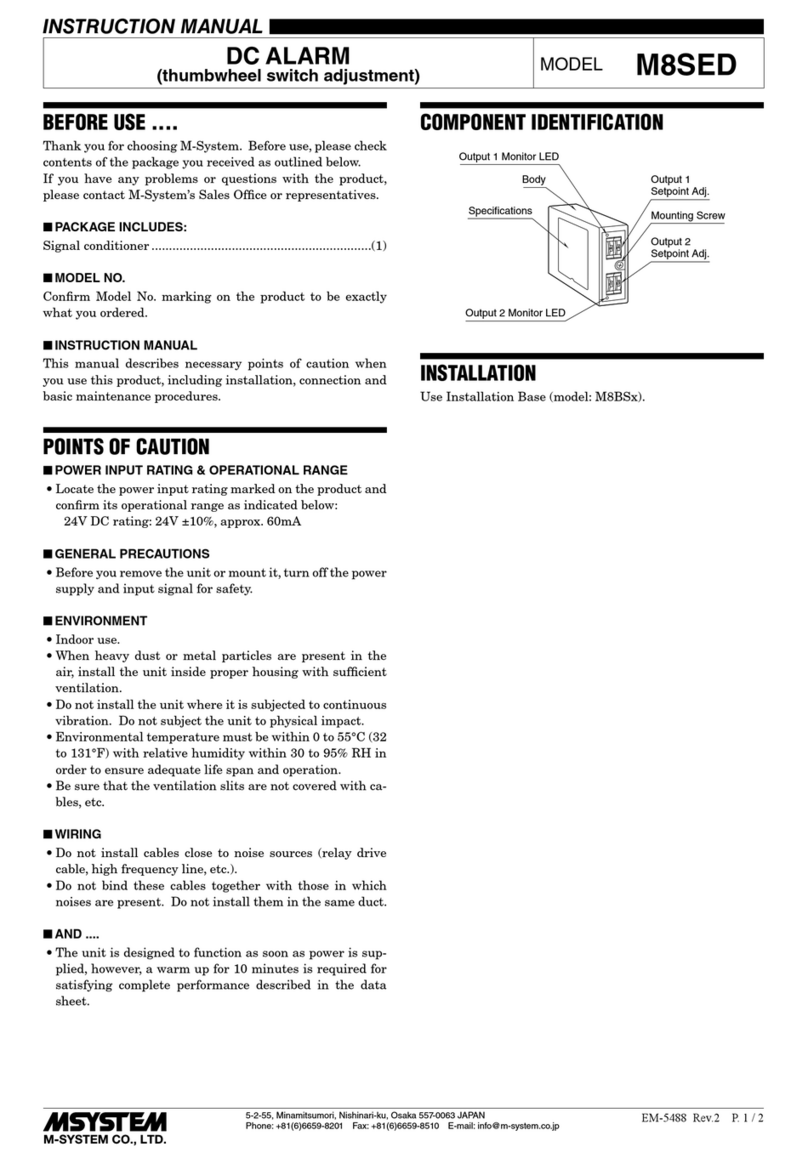
S-Tech COCR-015 User manual

-1-
S-TECH ®
Carbon Monoxide (CO) Alarm
With AM / FM Clock Radio
“FIRST” combination clock radio Carbon Monoxide alarm in the world
with voice warning
COCR-015
Owner’s Manual

-1-
STECH
Products for Your Ultimate Safety
C US
LISTED
E153583 LR111873
OWNER’S MANUAL
COCR-015 Single Station 120 Volt CO Alarm
AM /FM Digital Clock Radio
ELECTRICAL RATING: 120VAC, 60 Hz, TOTAL 12 VA
SNOOZE
BUTTON
DUAL COLOUR
CO ALARM / POWER-ON LED
GREEN-POWER ON
RED-ALARM (WITH VOICE MESSAGE)
CO ALARM
TEST / RESET SWITCH
AM / FM
BAND SWITCH
SLEEP
WAKE
TUNING
CONTROL
VOLUME
CONTROL
AM / FM
DIAL SCALE
DIAL SCALE
POINTER
DIGITAL
DISPLAY
WAKE SET
INDICATOR
AM / PM
INDICATORS
HOUR TIME
SET BUTTON
MINUTE TIME
SET BUTTON
CO SENSOR
FUNCTION SELECTOR
- ON
- OFF
- MUSIC
- ALARM
CAUTION: TO PREVENT ELECTRIC SHOCK, MATCH WIDE BLADE OF PLUG TO
WIDE SLOT, FULLY INSERT.

-2-
FCC INFORMATION
This device complies with Part 15 of the FCC Rules. Operation is subject to the following
two conditions: (1) This device may not cause harmful interference, and (2) this device
must accept any interference received, including interference that may cause undesired
operation.
In accordance with FCC requirements, changes or modifications not expressly approved
by manufacturer could void the user’s authority to operate this product.
This device generates and uses radio frequency (RF) energy, and if not installed and used
properly, this equipment may cause interference to radio or television reception. If this
equipment does cause interference to radio or television reception (which you can
determine by unplugging the unit), try to correct the interference by one or more of the
following measures:
•Reorient the receiving antenna (that is, the antenna for the radio or television that is
“receiving” the interference.
•Move the unit away from the equipment that is receiving interference.
•Plug the unit into a different wall outlet so that the unit and the equipment receiving
interference are on different branch circuits.
If these measures do not eliminate the interference, please consult your dealer or an
experienced radio / television technician for additional suggestions. Also, the Federal
Communications Commission has prepared a helpful booklet, “How to identify and
Resolve Radio TV interference Problems.” This booklet is available from the U.S.
Government Printing Office, Washington, DC 20402. Please specify stock number 004-
000-00345-4 when ordering copies.
FOR YOUR SAFETY
The AC power plug is polarized (one blade is wider than the other) and only fits into AC
power outlets one way. If the plug won’t go into outlet completely, turn the plug over and
try to insert it the other way. If it still won’t fit, contact a qualified electrician to change the
outlet, or use a different one. Do not attempt to bypass this safety feature.
CAUTION
RISK OF ELECTRIC SHOCK
DO NOT OPEN
!
WARNING: TO PREVENT FIRE OR
ELECTRIC SHOCK HAZARD.
DO NOT EXPOSE THIS PRODUCT
TO RAIN OR MOISTURE.
THE LIGHTNING
FLASH AND ARROW-
HEAD WITHIN THE
TRIANGLE IS A
WARNING SIGN
ALERTING YOU OF
DANGEROUS
VOLTAGE INSIDE
THE PRODUCT.
CAUTION: TO REDUCE THE
RISK OF ELECTRIC SHOCK.
DO NOT REMOVE COVER
(OR BACK). NO USER
SERVICEABLE PARTS
INSIDE. REFER S
ERVICING
TO QUALIIED SERVICE
PERSONNEL.
THE EXCLAMATION
POINT WITHIN THE
TRIANGLE IS A
WARNING SIGN
ALERTING YOU OF
IMPORTANT
INSTRUCTIONS
ACCOMPANYING THE
PRODUCT.
SEE MARKING ON BOTTOM / BACK OF PRODUCT

-3-
CONTENTS OF THIS MANUAL:
PART A –CO ALARM
A1….
INFORMATION ABOUT CARBON MONOXIDE
A2….
SPECIFICATIONS
A3….
RECOMMENDED LOCATIONS OF ALARMS
A4….
LOCATIONS TO AVOID
A5….
INSTALLATION INSTRUCTIONS
A6….
OPERATION AND TESTING
A7….
FALSE ALARMS
A8….
MAINTENANCE
A9….
LIMITATIONS OF CARBON MONOXIDE ALARMS
A10…
GOOD SAFETY HABITS / WHAT TO DO WHEN THE ALARM SOUNDS
A11…
SERVICE AND WARRANTY
PART B –AM/FM DIGITAL CLOCK RADIO
B1….
POWER FAILURE INDICATOR
B2….
RADIO OPERATION
B3….
SET THE TIME
B4….
SET THE WAKE TIME
B5….
WAKE TO MUSIC OR ALARM
B6….
SLEEP TO MUSIC
B7….
SLEEP TO MUSIC AND WAKE TO MUSIC OR WAKE TO ALARM
B8….
SNOOZE BAR
B9….
BUILT-IN AFC
B10…
ANTENNAS
B11…
“NO WORRY” BATTERY BACKUP SYSTEM
B12…
ONE YEAR LIMITED WARRANTY (FOR AM/FM DIGITAL CLOCK RADIO SECTION)
PART A –CO ALARM
IMPORTANT! READ ALL INSTRUCTIONS BEFORE INSTALLATION AND
SAVE THIS MANUAL FOR FUTURE REFERENCE
WARNING! THIS ALARM WILL ONLY INDICATE THE PRESENCE OF CARBON
MONOXIDE GAS AT THE SENSOR. CARBON MONOXIDE GAS MAY BE PRESENT IN
OTHER AREAS. THIS DEVICE IS NOT A SUBSTITUTE FOR SMOKE OR FIRE ALARM
(See limitations of alarms in Section A9 for details).
WARNING! DISCONNECTING OR LOSS OF AC POWER WILL RENDER THIS
UNIT INOPERATIVE.
Do not try to repair this CO alarm yourself. Refer to the instructions in section A11
for service.

-4-
A1. INFORMATION ABOUT CARBON MONOXIDE
WHAT IS CARBON MONOXIDE?
Carbon monoxide (CO) is a highly toxic, invisible, odorless, tasteless gas.
HOW IS CO GENERATED IN THE HOME?
Carbon monoxide is generated through incomplete combustion of fuel in various
home appliances. Faulty ventilation of furnaces, water heaters, fire places, wood burning
stoves, and space heaters are the major of cause of high CO levels in the home.
Automobile and small engine exhaust are another source of CO.
HOW DOES CO POISON PEOPLE?
The human body depends on oxygen for the burning of fuel (food) to provide us with
the energy that allows our cells to live and function. Oxygen makes up approximately 21%
of the atmosphere and enters our lungs when we breathe. In our lungs the oxygen
combines with the hemoglobin in the blood (oxyhemoglobin) and is carried in the blood
stream throughout the body where it releases oxygen to the cells.
Carbon monoxide is dangerous because it bonds more tightly to the hemoglobin
(carboxyhemoglobin) than oxygen does. When CO combines with hemoglobin, the
hemoglobin's ability to combine with oxygen is lost. As the carboxyhemoglobin
concentration rises, people become nauseous, unconscious and ultimately die (see
below).
WHAT ARE THE SYMPTOMS OF CARBON MONOXIDE POISONING?
Many people often confuse carbon monoxide poisoning with the flu; the initial
symptoms being very similar. Different concentrations of CO over various lengths of time
cause different symptoms.
Many cases of carbon monoxide poisoning indicate that while the victims were aware
that they were not well, they were too disoriented to save themselves by either calling for
assistance or exiting the building. Also, due to size, small children and pets are generally
the first affected.
The following are the symptoms related to CARBON MONOXIDE POISONING.
Discuss them with all members of the household.
MILD EXPOSURE:
Slight headache, vomiting, nausea, fatigue (flu like
symptoms).
MEDIUM EXPOSURE: Severe throbbing headache, Drowsiness, Confusion,
Fast heart rate.
EXTREME EXPOSURE: Unconsciousness, Convulsions, Heart and Lung Failure,
Brain Damage, Death

-5-
CO GAS EXPOSURE VERSUS TIME
(400 PPM EXPOSURE)
MINUTES RESPONSE
8NONE
15 NONE
25 SLIGHT HEADACHE
35 HEADACHE
45 HEADACHE AND NAUSEA
60 DROWSY
75 VOMITING
90 COLLAPSE
110 COMA AND PERMANENT
BRAIN DAMAGE
140 PERMANENT BRAIN
DAMAGE -DEATH
A2. SPECIFICATIONS
CO ALARM RANGE 70 PPM AND UP
CO RESPONSE TIME @ 70 PPM 60~240 MINUTES
@ 150 PPM 10~50 MINUTES
@ 400 PPM 4~15 MINUTES
POWER SOURCE 120VAC, 60Hz, 12VA
OPERATING TEMPERATURE 32oF (0oC) TO 120.2oF (49oC)
ALARM 85 dB AT 10 FEET
DETECTION FREQUENCY SAMPLING EVERY 2.5 MINUTES
TOLERANCE OF VOICE MESSAGE
FOR 70 PPM:
50 -119 PPM
(ALL @ 50% RH 22 ±3°C)
150 PPM:
120 -200 PPM
400 PPM:
> 201 PPM
WARNING! This product is intended for use in ordinary indoor locations
of family living units. It is not designed to measure compliance with Occupational
Safety and Health Administration (OSHA) commercial or industrial standards.
Individuals with medical problems may consider using warning devices which
provide audible and visual signals for carbon monoxide concentrations under
30ppm.
0.00
0.05
0.10
0.15
0.20
0.25
0.30
0.35
0.40
0.45
0.50
8 15 25 35 45 60 75 90 110 140
MINUTES
COHb 100%
400 PPM EXPOSURE

-6-
WARNING
Actuation of your CO alarm indicates the presence of carbon monoxide (CO) which
can KILL YOU.
If alarm signal sounds:
1) Operate reset/silence button;
2) Call your emergency services (tel. no. ) [fire department or 911];
3) Immediately move to fresh air -outdoors or by an open door/window. Do a
head count to check that all persons are accounted for. Do not re-enter the
premises nor move away from the open door/window until the emergency
services responders have arrived, the premises have been aired out, and your
alarm remains in its normal condition.
4) After following steps 1-3, if your alarm reactivates within a 24 hour period,
repeat steps 1 -3 and call a qualified appliance technician (tel. no. )
to investigate for sources of CO from fuel burning equipment and appliances,
and inspect for proper operation of this equipment. If problems are identified
during this inspection have the equipment serviced immediately. Note any
combustion equipment not inspected by the technician and consult the
manufacturers' instructions, or contact the manufacturers directly, for
more information about CO safety and this equipment. Make sure that motor
vehicles are not, and have not been, operating in an attached garage or
adjacent to the residence.
Condition which can result in transient CO situations such as:
1) Excessive spillage or reverse venting of fuel burning appliances caused by
outdoor ambient conditions, such as:
i) Wind direction and/or velocity, including high gusts of wind. Heavy air in
the vent pipes (cold/humid air with extended periods between cycles).
ii) Negative pressure differential resulting from the use of exhaust fans.
iii) Simultaneous operation of several fuel burning appliances competing for
limited internal air.
iv) Vent pipe connections vibrating loose from clothes dryers, furnaces, or
water heaters.
v) Obstructions in or unconventional vent pipe designs which can amplify the
above situations.
2) Extended operation of unvented fuel burning devices (range, oven, fireplace,
etc.).
3) Temperature inversions which can trap exhaust gases near the ground.
4) Car idling in an open or closed attached garage, or near a home.
!

-7-
A3. RECOMMENDED LOCATIONS OF ALARMS:
The Consumer Products Safety Commission (CPSC) recommends the use of "At
least one CO alarm per household located outside the sleeping area".
CO poisoning can happen anywhere in the home, but because most CO poisoning
cases occur while people are sleeping, the best location for the CO alarm is near the
sleeping area in the home. If there is more than one sleeping area in the home (on a
different floor) or the bedroom doors are closed during the night, you may need more than
one CO alarm.
vLocate the first alarm in the immediate area of the bedrooms. If more than one sleeping
area exists, locate additional alarms in each sleeping area.
vLocate an alarm in every room where someone sleeps with a door closed. The closed
door may prevent the alarm from waking the sleeper.
vLocate an alarm on every level of the home.
vDO NOT install unit within 5 feet of cooking appliances.
A4. WARNING!LOCATIONS TO AVOID:
NEAR THE COOKING AREA: CO may be generated in the cooking process and cause
false alarms. Also cooking grease can build up on the alarm and cause nuisance alarms.
CLOSE TO CIGARETTE ASH TRAY WHERE CIGARETTE IS RESTING AND
BURNING: Cigarette smoke does compose of CO gas that may cause false alarms.
CLOSE TO A FURNACE, WATER HEATER, OR SPACE HEATER: These devices often
spill out small amounts of CO when they first turn on.
IN OR NEAR BATHROOMS: Steam and high humidity can cause nuisance alarms.
IN GARAGES: Automobile exhaust contains CO and will cause the alarm to alarm.
IN DUSTY AREAS: Dust can build up on the alarm and cause nuisance alarms or failure
to alarm.
IN CLEANING SUPPLY ROOMS: Chemicals used in household cleaning and painting
supplies can cause nuisance alarms.
IN VERY HOT OR COLD AREAS: Do not install the alarm in areas which are below 40oF
(4.4°C) or above 100oF (37.8°C).
IN HAZARDOUS LOCATIONS: This alarm is not suitable for installation in a hazardous
location, as defined in the National Electrical Code.
A5. INSTALLATION INSTRUCTIONS:
NOTE: REVIEW SECTION A3, RECOMMENDED LOCATIONS OF ALARMS AND
SECTION A4, LOCATIONS TO AVOID, PRIOR TO INSTALLING YOUR ALARM.
vThe proper power for the COCR-015 CO alarm is 120 volt single phase, supplied from
a non-switchable circuit which is not protected by a ground fault interrupter.
Installation COCR-015:
vThe model COCR-015 has a line cord. Be sure that the outlet for installing the alarm is
not controlled by a switch and that it is not obstructed by bedding or furniture.

-8-
A6. OPERATION, TESTING
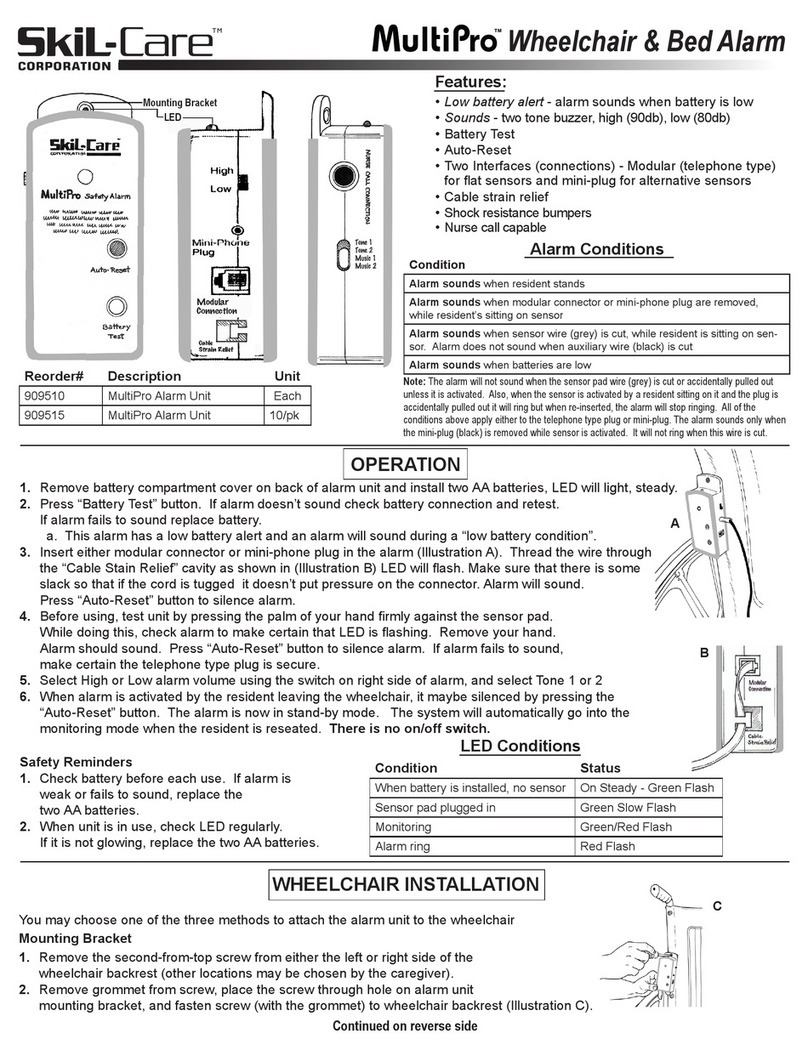
OPERATION: The CO alarm is operational once A.C. power is applied (green LED is on)
and testing is complete.
TROUBLE CONDITION: The internal microcontroller continuously monitors the sensor
and other critical components. If an internal failure of any of these components occurs the
alarm will flash the LED red, beep once every minute and the LED will blink yellow
continuously.
ALARM CONDITION: When the concentration of CO gas reaches a hazardous level, the
alarm will sound within the time limits outlined in section A2. The LED will light red
continuously when the alarm sounds. The alarm signal will sound 4 short beeps in every 6
seconds. The accommodation spaces should be well ventilated when household cleaning
supplies or similar contaminants are used. See section A7 for false alarm information.
Voice message: during alarm condition, the instructions will be announced in the following
sequence: “Beep, beep, beep, beep, 70 ppm (or 150 ppm, or 400 ppm depending on the
level of alarm) carbon monoxide gas alarm, operate reset button, beep, beep, beep, beep,
call your emergency services, immediately move to fresh air”. These messages will be
announced continuously, until the reset button is pushed, or the CO gas concentration
drops below the alarm threshold level.
TESTING: Test your alarm by pushing the TEST / RESET button which is located on the
back of the cabinet and hold it down for a minimum of 5 seconds. This will simulate a CO
concentration of approximately 400 ppm CO gas and sound the alarm if all the electronic
circuitry, and buzzer are working.
Voice message: during testing condition, the instructions will be announced inthe following
sequence: “Beep, beep, beep, beep, testing, testing, carbon monoxide gas alarm, operate
reset button, beep, beep, beep, beep, testing, testing, call your emergency services,
immediately move to fresh air”.
DO NOT TRY TO TEST THIS ALARM IN ANY OTHER WAY.
If no alarm sounds check the fuse or circuit breaker supplying power to the “clock
radio/CO alarm”. If the alarm still does not sound the unit may be defective or have other
failure and should be returned for service (SEE SECTION A11).
TEST THE ALARM WEEKLY TO ENSURE PROPER OPERATION.
Erratic or low sound coming from your alarm may indicate a defective alarm, and it
should be returned for service (SEE SECTION A11).
RESET: The CO alarm will automatically reset itself when the CO gas which caused the
alarm has cleared. The alarm will however alarm for at least 4 minutes if it is not manually
reset. You can also silence the alarm by pushing the TEST / RESET button. If CO is still
present the alarm will alarm again within 6 minutes if the CO concentration level is at 70
ppm or greater. If the alarm sounds again after reset, go to section A2... WARNING...If
alarm signal sounds:...and follow instructions 1), 2), 3), 4).
!

-9-
A7. FALSE ALARMS:
Carbon monoxide alarms respond to the presence of CO. They do not detect smoke.
If the CO alarm sounds, follow instructions 1 to 4 under WARNING in section A2… If alarm
signal sounds….
Some solvents used in chemical cleaning agents, paints, varnishes and the furniture
refinishing process, and some propellants used in aerosol hair spray and air fresheners
can cause the CO alarm to alarm if they are used in close proximity to the alarm for
extended periods of time. Gasoline or other flammable liquids stored in open containers
near the alarm may also cause the CO alarm to alarm. Never store flammable liquids in
open containers.
IF YOU HAVE BEEN AWAY FROM HOME and you return to find your alarms
sounding, DO NOT ENTER YOUR HOME. Call the Fire Department from a neighbor's
home. DO NOT RE-ENTER YOUR HOME FOR ANY REASON UNTIL YOU HAVE
BEEN ASSURED THAT IT IS SAFE TO DO SO.
IMPORTANT: A newly installed alarm may have absorbed various fumes or gases
during transit and storage. This accumulation contamination can cause the alarm to go
into the alarm mode during the initial power up. You can choose to do nothing and the
alarm will stop sounding in a few minutes or you can press the Test / Reset button to stop
the alarm. It may be necessary to repeat this procedure several times to clear the sensor
of the accumulated contamination. During this initial startup period the alarm may not
accurately detect the presence of potentially dangerous gas.
A8. MAINTENANCE : CLEANING YOUR ALARM
You can clean your alarm by using a vacuum cleaner hose and vacuuming around
the openings on the alarm. The outside of the alarm can be wiped with a damp cloth.
AFTER CLEANING, TEST YOUR ALARM BY USING THE TEST BUTTON AND CHECK
THAT THE GREEN LED IS ON.
A9. LIMITATIONS OF CARBON MONOXIDE ALARMS
Carbon monoxide alarms are devices that can provide an early warning of the
presence of CO gas at a reasonable cost. However alarms have sensing limitations and
may not always sound a warning of the presence of CO. A.C. powered alarms will not
operate if the A.C. power has been cut off, such as by an electrical fire, a tripped circuit
breaker or an open fuse. CO alarms must be tested regularly to make sure that they are
receiving power and operating properly. Carbon monoxide alarms cannot sense CO that
does not reach the alarm and therefore CO alarms may not detect CO which is in a
different area of a home. Furthermore if the alarm is located on a different level of the
home or on the other side of a closed door it may not waken a sound sleeper. The use of
drugs and alcohol may impair ones ability to hear the alarm. If you have a multi-level
home, install CO alarms on each level of the home. If the alarm is installed in a hallway
and the bedroom doors are kept closed at night, install a CO alarm in each bedroom.
Although CO alarms can help save lives by providing an early warning to the
presence of carbon monoxide, they are not a substitute for an insurance policy.
Homeowners and renters should have adequate insurance to protect their lives and
property.

-10 -
A10. GOOD SAFETY HABITS:
DEVELOP AND PRACTICE A PLAN OF ESCAPE:
vMake a floor plan indicating all doors and windows and at least two (2) escape routes
from each room. Second story windows may need a rope or chain ladder.
vHave a family meeting and discuss your escape plan, showing everyone what to do in
case the alarm sounds.
vDetermine a place outside your home where you can all meet if an alarm occurs.
vFamiliarize everyone with the sound of the Alarm and train them to leave your home
when they hear it.
vPractice a CO / fire drill at least every six months. Practice allows you to test your plan
before an emergency. You may not be able to reach your children. It is important they
know what to do.
WHAT TO DO WHEN THE ALARM SOUNDS:
vSee Section A2.
A11. SERVICE AND WARRANTY:
(FOR THE CO ALARM SECTION)
A one year limited warranty on the carbon monoxide alarm section. This warranty
provides free parts, labor and service for the full whole year. This warranty is limited to
repairing or replacing any parts which it finds under normal use, to be defective in material,
workmanship or design and returning same to the customer. This warranty shall not apply
to any units that have been opened, damaged, modified, abused or altered in anyway after
the date of purchase, or if it fails to operate due to improper maintenance of inadequate
AC electrical power.
Since some states do not allow limitations on the duration of an implied warranty or do not
allow the exclusions or limitations of incidental or consequential damages, the above
limitations or exclusions may not apply to you. While this warranty gives you specific legal
rights, you may also have other rights which vary from state to state.
For US customers:
Pro-Tech Safety Products
P.O. Box 493727
Redding, CA 96049
Tel: 1-877-955-TECH (8324)
http://www.protechsafety.com

-11 -
PART B –AM/FM DIGITAL CLOCK RADIO
B1. POWER FAILURE INDICATOR
When AC power is interrupted (disconnected) for a short period. Both time and
alarm setting will change (unless optional clock timer “NO WORRY” Battery Backup is
installed). After AC power is restored (RECONNECTED) the DIGITAL DISPLAY will blink
to indicate that power was interrupted and you must readjust the TIME and ALARM
settings. (See “NO WORRY” BATTERY BACKUP SYSTEM.) To stop display from blinking,
press HOUR or MINUTE time set button.
B2. RADIO OPERATION
1. Plug the Power Cord into any 120 volt AC household outlet.
2. Slide the FUNCTION SELECTOR to ON.
3. Select AM or FM broadcasts using the BAND switch.
4. Select a station with the TUNING CONTROL and adjust the VOLUME CONTROL to
your preferred listening level.
5. Turn the radio OFF by sliding the FUNCTION SELECTOR to OFF.
B3. SET THE TIME
The digital clock has a 12 hour format. The AM or PM indicator to the left of the
digital display will light when the clock is reading AM or PM time.
Use the HOUR and MINUTE time set buttons to set the AM or PM time you want.
NOTE: For display of minutes and seconds only, hold down the WAKE push button and,
then, the SLEEP push button, The Hour digit(s) will display the minutes and the Minutes
digit(s) will display the seconds. Release both push buttons and current time will be
displayed.
B4. SET THE WAKE TIME
Select the AM or PM time that you want your radio or alarm to turn on automatically
by following these simple steps:
1. Slide the FUNCTION SELECTOR to OFF.
2. Press and hold the WAKE button. The display changes to Wake time.
3. Use the HOUR and MINUTE buttons to set the display to your desired AM or PM wake
time.
4. Release the WAKE button. The current time is again displayed.
B5. WAKE TO MUSIC OR ALARM
YOUR CHOICE OF:
Wake to Music
1. Select your AM or FM Station as outlined under RADIO OPERATION.
2. Slide the FUNCTION SELECTOR to OFF.
3. Set wake time as outlined under SET THE WAKE TIME.

-12 -
4. Slide the FUNCTION SELECTOR to MUSICWAKE. (The WAKE indicator in display
will light.)
The radio will turn on at the time you have set, and will turn itself off after about 1 hour and
59 minutes. To turn the radio off sooner, slide the FUNCTION SELECTOR to OFF.
WAKE TO ALARM
1. Set wake time as outlined under SET THE WAKE TIME.
2. Slide the FUNCTION SELECTOR to ALARMWAKE. (The WAKE indicator in the
display will light.)
The alarm will turn on at the time you have set and will sound for about 1 hour and 59
minutes, then turn itself off. To turn the alarm off sooner, slide the FUNCTION
SELECTOR to OFF.
The clock timer operate on a 24-hour cycle. When the FUNCTION SELECTOR is left
in the ALARMWAKE or the MUSICWAKE mode, it will turn itself on, sound for
approximately 2 hours, turn itself off, and turn on again at the same time the
following day.
B6. SLEEP TO MUSIC
You can drift off to sleep listening to music and have the radio turn itself off
automatically.
1. Switch the FUNCTION SELECTOR to OFF.
2. Press and hold the SLEEP button, the display will exhibit SLEEP time of 0:59.
3. Press the MINUTE button to set a sleep time of up to 59 minutes, depending on how
long you want the radio to play. For sleep time of more than 59 minutes, up to 1 hour
and 59 minutes, momentarily press the HOUR button while holding the SLEEP button.
The display will exhibit 1:59. Then, press the MINUTES button to select the desired
amount of sleep time in excess of 1 hour.
4. Release the SLEEP button, the current time is again displayed.
5. The radio will automatically turn on and you can select your station in the usual way.
The radio will play for the chosen length of time (up to 1 hour and 59 minutes), and
then turn itself off. If you decide to turn the radio off before the total number of minutes
have passed, just press the SNOOZE bar.
B7. SLEEP TO MUSIC AND WAKE TO MUSIC OR WAKE
TO ALARM
You can set your clock radio to lull you to sleep, turn itself off, then awaken you at
preset time, all automatically. Follow the steps under WAKE to MUSIC or WAKE to
ALARM, then proceed as in SLEEP TO MUSIC instructions, step 2 through 5.

-13 -
B8. SNOOZE BAR
The SNOOZE feature has two functions:
1. To take an extra nap after the alarm sounds or the radio comes on in the WAKE mode;
simply press the SNOOZE bar to silence the radio or alarm. About 9 minutes later the
radio or alarm will sound again, you can use the SNOOZE feature repeatedly during
the 1hour and 59 minutes WAKE cycle, after which the radio or alarm will turn it off.
2. To shut off the SLEEP cycle (see step 5 under SLEEP TO MUSIC)
B9. BUILT –IN AFC.
The built-in automatic Frequency Control (AFC) works to help reduce drift in FM
reception and keep the radio locked in on the station to which it is tuned. AFC works only
on FM.
B10. ANTENNAS
AM –A built-in ferrite rod antenna eliminates the need for an outside antenna for AM
reception. Rotating the radio slightly may improve reception for distant AM stations.
FM –The FM antenna is an integral part of the power cord. It picks up moderate to strong
stations and eliminates the need for an external antenna inmost strong signal area. Be
sure the power cord is stretched out to its full length. Do not coil or bunch the cord
together. Changing position of the power cord may improve reception.
B11. “NO WORRY” BATTERY BACKUP SYSTEM
(FOR CLOCK RADIO FUNCTIONS ONLY)
This clock radio is equipped with a memory holding system that can be powered
with a customer installed 9 volt alkaline battery (not included). The power failure protection
circuit will not operate unless battery is installed.
When normal household power is interrupted, or the AC line cord is unplugged, the battery
will power the clock radio to keep track of time and alarm settings programmed into
memory. Should WAKE TIME occur during the power interruption, the radio will operate or
the alarm will sound if remaining battery power is adequate. Normal operation will resume
after AC power is restored so you will not have to reset time or alarm. (NOTE: when on
battery power, the digital display will not light.)
Install battery as follows:
1. Lift off battery compartment door (located on bottom of radio).
2. Connect a 9 volt battery to connector.
3. Insert battery in compartment and replace compartment door.
NOTE:Alkaline (NEDA 1604A) batteries are recommended. Carbon-zinc (NEDA 1604)
batteries may be used but memory-holding time will be substantially reduced.

-14 -
CAUTION:
Carbon monoxide alarm is AC powered only. This battery backup system does not apply
to CO alarm.
Memory holding time for a fresh alkaline battery is approximately 8 hours (if radio or alarm
are not operated ), which should take care of short, nuisance-type AC power failures. To
preserve battery life, the radio should be remained plugged into an AC outlet. As the
battery gets older, its voltage will drop and memory may be lost. Be sure to replace the
battery periodically. Battery is not included with this clock radio.
IMPORTANT: Be sure to remove battery when storing the set. Battery will be drained if left
connected when set is unplugged, and a worn out battery may leak chemicals which can
badly damage the clock radio. When discarding batteries, be sure to dispose of them in the
proper manner, according to your state and local regulations.
B12. ONE –YEAR LIMITED WARRANTY
(FOR AM/FM DIGITAL CLOCK RADIO SECTION)
What does your warranty cover?
•Any defect in material or workmanship.
For how long after the original purchase?
•One year.
•The warranty for rental units begins with the
first rental.
What will we do?
•Provide you with a new, or at our option, a
refurbished unit.
•The exchange unit is warranted for the
remainder of your product’s original one-
year warranty period.
How do you make a warranty claim?
•Properly pack your unit. Include any cables,
etc., which were originally provided with the
product. We recommend using the original
carton and packing materials.
•Include in the package a copy of the sales
receipt or the evidence of data of original
purchase. If the unit was a gift, provide a
statement specifying the date received. Also
print your name and address and a
description of the defect.
•Ship the unit standard UPS or equivalent to
manufacturer.
•Pay any charges billed to you by the
Exchange Center to service not covered by
the warranty.
•A new or refurbished unit will be shipped to
you prepaid freight.
What does your warranty not cover?
•Customer instruction. Your Owner’s Manual
provides information regarding operating
instructions and user controls. For additional
information, ask your dealer.
•Installation and set-up service adjustments.
•Batteries.
•Damage from misuse or neglect.
•Products which have been modified or
incorporated into other products.
•Product purchased or serviced outside in the
USA.
How does state law relate to this warranty?
•This warranty gives you specific legal rights,
and you may also have other rights which
vary from state to state.
What if you purchased your product outside
the United States?
•This warranty does not apply. See your
dealer for details. U.S. Patent 5,786,768

-15 -
IMPORTANT SAFETY INSTRUCTION
All the safety and operating instructions should be read
before the product is operated.
•Before using the product, please follow and adhere to all
warnings, safety and operating instructions located on the
product and in the user book. Save all instructions for
future reference.
•Do not use this product near water -for example, near a
bath tub, wash bowl, kitchen sink, or laundry tub; in a wet
basement; or near a swimming pool; and the like.
•Always leave sufficient space around the product for
ventilation. Do not place product in or on a bed, rug, in a
bookcase or cabinet that may prevent air flow through
vent openings.
•Do not expose product to extreme temperatures such as
found near a hot radiator or stove, or in a car parked in
the Summer sun.
•Connect power cord only AC power source as marked on
the product.
•Some products employ a polarized AC line plug (one
blade is wider). This is a safety feature. The plug will go in
the power outlet only one way. If the plug doesn't go into
the outlet completely, turn the plug over and put it in the
other way. If it still doesn't fit, contact a qualified
electrician to change the outlet. Do not defeat the safety
purpose of the polarized plug.
•Route power cord to prevent it from being pinched, or
walked on, or melted by a hot stove or radiator.
•To clean cabinet, unplug A/C power cord, then use a soft
cloth dampened only with water.
•Do not overload wall outlets, extension cords, or integral
convenience receptacles as this can result in a risk of fire
or electric shock.
•Do not place lighted candles, cigarettes, cigars, etc. on
the product.
•Unplug AC power cord from outlet during lightning storm
or when product is left unused for a long period of time to
prevent damage due to lightning or power line surges.
•Care should be taken so that objects do not fall and
liquids do not spill into the product.
•Never add accessories that the product has not been
designed to accommodate.
•Do not place this product on an unstable cart, stand,
tripod, bracket, or table. The product may fall, causing
serious injury to a child or adult, and serious damage to
the product. Use only with a cart, stand, tripod, bracket,
or table recommended by the manufacturer, or sold with
the product. Any mounting of the product should follow
the manufacturer's instructions, and should use a
mounting accessory recommended by the manufacturer.
•Use only the manufacturer's approved mounting
instructions and hardware when installing product.
•Never push objects of any kind into this product through
openings as they may touch dangerous voltage points or
short-out parts that could result in a fire or electric shock.
Never spill liquid of any kind on the product.
•Do not attempt to disassemble the cabinet. This product
does not contain customer serviceable components.
•Do not attempt to service this product yourself as opening
or removing covers may expose you to dangerous voltage
or other hazards. Refer all servicing to qualified service
personnel.
•Damage Requiring Service -Unplug this product from the
wall outlet and refer servicing to qualified service
personnel under the following conditions:
a) When the power-supply cord or plug is damaged,
b) If liquid has been spilled, or objects have fallen into
the product,
c) If the product has been exposed to rain or water,
d) If the product does not operate normally by following
the operating instructions. Adjust only those controls
that are covered by the operating instructions as an
improper adjustment of other controls may result in
damage and will often require extensive work by a
qualified technician to restore the product to its normal
operation,
e) If the product has been dropped or damaged in any
way,
f) and When the product exhibits a distinct change in
performance -this indicates a need for service.
•Upon completion of any service or repairs to this product,
ask the service technician to perform safety checks to
determine that the product is in proper operating
condition.
•The product should be situated away from heat sources
such as radiators, heat register, stoves, or other products
(including amplifiers) that produce heat.
•IF YOUR PRODUCT OPERATES ON BATTERIES,
adhere to the following precautions:
a) Any battery may leak electrolyte if mixed with a different
battery type, if inserted incorrectly, or if all batteries are
not replaced at the same time.
b) Any battery may leak electrolyte or explode if disposed of
in fire or an attempt is made to charge battery not
intended to be recharged.
c) Discard leaky batteries immediately. Leaking batteries
can cause skin burns or other personal injury.
240-1054-05 6/28/02
Table of contents
