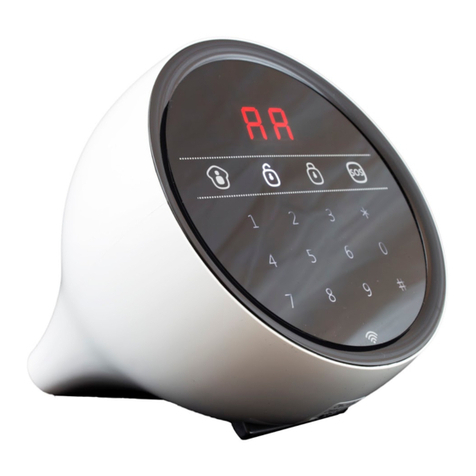
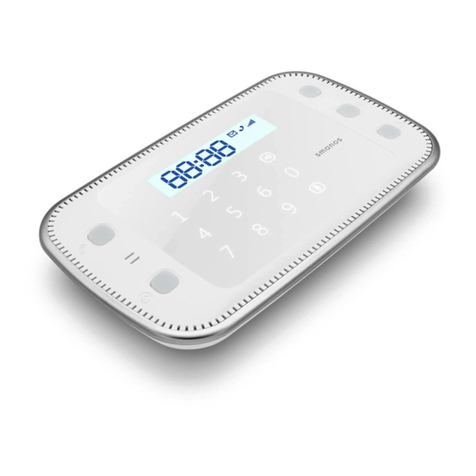
Smanos X500 User manual

Printed in China
PA: OI-X500-EN-1405-V1.0
2014 smanos. All rights reserved.
c
GSM/SMS/RFID Touch
Alarm System
User Manual
X500
PIR-900 Wireless PIR Motion Detector
IMPORTANT: WHEN SINGLE DELAY ZONE IS SELECTED, THE SENSOR
WILL ALWAYS BE IN THE NORMAL ZONE. IT IS NOT POSSIBLE TO PLACE IT IN
THE HOME GROUP.
5
TIP: Always start the SIM card telephone number with the area code of your
country (eg. 0031 for the Netherlands). This will allow you to operate the alarm
system abroad.
8
17
18
19
20
24
X500 Alarm
X500 Alarm
smanos holding...

Contents
Congratulations on buying this smanos X500 alarm system. Installing the smanos X500
alarm system is easy and quick. Before using the product we recommend reading the
manual first. There are some parts of the installation which have to be done in the right
order to complete the installation successfully.
Overview of X500 Alarm System ----------------------------------
Included accessories -------------------------------------------------------
Operating principle of the alarm system ------------------------------------
Sensors -----------------------------------------------------------------------
Sensor placement -----------------------------------------------------------
Zone mode of sensors -----------------------------------------------------------------
Changing sensor name ----------------------------------------------------
Test mode alarm system ----------------------------------------------------
Record alarm message ------------------------------------------------------
Getting Started ---------------------------------------------------------------
Inserting SIM card ----------------------------------------------------------
Turning on the control panel ------------------------------------------------
Network connection (indicator) ---------------------------------------------
Settings inquiry by SMS -----------------------------------------------------
Control Panel Operation ------------------------------------------------------
Arming the system --------------------------------------------------------
Partially arming the system -------------------------------------------------
Disarming the system with the control panel --------------------------------
Disarming the system by RFID tag -------------------------------------------
Record and play back voice message ----------------------------------------
Naming RFID tags ----------------------------------------------------------
Speed dial ------------------------------------------------------------------
Phone dial ------------------------------------------------------------------
Changing the language -----------------------------------------------------
Disarming the alarm system by SMS -----------------------------------------
Arming the system by SMS --------------------------------------------------
Partially arming (home mode) the system by SMS ---------------------------
Two-way talk ---------------------------------------------------------------
Leaving a message by phone call -------------------------------------------
Phone operation when receiving emergency call ----------------------------
Apple and Android App ------------------------------------------------------
Adding an account ----------------------------------------------------------
X500 alarm App overview ---------------------------------------------------
1~3
2
3
4~6
4
5
6
6
6
7~9
7
8
8
8~9
10~15
10
10
10
10
11
11
12
12
12~13
14
14
14
15
15
15
16~17
16
17
PIR-900 Wireless PIR Motion Detector
IMPORTANT: WHEN SINGLE DELAY ZONE IS SELECTED, THE SENSOR
WILL ALWAYS BE IN THE NORMAL ZONE. IT IS NOT POSSIBLE TO PLACE IT IN
THE HOME GROUP.
5
TIP: Always start the SIM card telephone number with the area code of your
country (eg. 0031 for the Netherlands). This will allow you to operate the alarm
system abroad.
8
17
18
19
20
24
X500 Alarm
X500 Alarm
smanos holding...

Test and Install the PIR Motion Detector --------------------------------------
Overview
Working mode
Test the PIR motion detector
Install the PIR motion detector
Installation Notices
Technical Specifications -------------------------------------------------------
Control Panel ---------------------------------------------------------------
MD2300 PIR Motion Detector -----------------------------------------------
DS2300 Door/Window Contact ----------------------------------------------
PR2600 RFID tag ------------------------------------------------------------
RE2300 Remote Control -----------------------------------------------------
Troubleshooting --------------------------------------------------------------
Caution and Warnings ---------------------------------------------------------
Terms of Warranty ------------------------------------------------------------
Notes -------------------------------------------------------------------------
--------------------------------------
Setting up the Alarm System with the App --------------------------------------
Request alarm system status by SMS ---------------------------------------
Store emergency telephone numbers ---------------------------------------
Store emergency SMS numbers ---------------------------------------------
Store SMS number for RFID tags ---------------------------------------------
Store speed dial number ----------------------------------------------------
Change sensor name and zone mode ---------------------------------------
Change RFID tags name -----------------------------------------------------
Change entry/exit delay time -----------------------------------------------
Setting alarm volume --------------------------------------------------------
Setting alarm duration ------------------------------------------------------
disarm passwordSet --------------------------------------------------------
Setting single zone delay time ----------------------------------------------
Set duress code -------------------------------------------------------------
Set timing -----------------------------------------------------------------
Delete wireless sensors by SMS ----------------------------------------------
Delete all RFID tags by SMS --------------------------------------------------
Delete all remote controls by SMS -------------------------------------------
Restore system to default setting --------------------------------------------
Synchronize control panel time ---------------------------------------------
SMS notification low battery sensorsof
SMS notification of tampering sensors ---------------------------------------
SMS notification of AC power failure and recovery -----------------------------
Arm & Disarm by free phone call --------------------------------------------
Connect (new) wireless & RFID tagssensors, remote controls -----------------
Connect new wireless sensors and remote controls
Connect new RFID tags
Connect wireless siren -------------------------------------------------------
Delete all accessories -------------------------------------------------------
Delete wireless siren -------------------------------------------------------
Accessories -----------------------------------------------------------------
Remote Control -------------------------------------------------------------
Overview
Arm
Disarm
Home mode
SOS
Mute Operation
Test and Install the Door/Window Contact -----------------------------------
Overview
Test the door/window contact
Install the door/window contact
18~36
18
19~20
20
21
22
23~24
25
26
27
28
29
30
31
32
33
33
33~34
34
34
35
35
35
35
35~36
35
36
36
36
36
37~50
37
37
38
38
39
39
40
41
41
42
43
44
44
45
46
47~48
49~50
51~54
51
52
53
53
54
55~57
58
59
60
PIR-900 Wireless PIR Motion Detector
IMPORTANT: WHEN SINGLE DELAY ZONE IS SELECTED, THE SENSOR
WILL ALWAYS BE IN THE NORMAL ZONE. IT IS NOT POSSIBLE TO PLACE IT IN
THE HOME GROUP.
5
TIP: Always start the SIM card telephone number with the area code of your
country (eg. 0031 for the Netherlands). This will allow you to operate the alarm
system abroad.
8
17
18
19
20
24
X500 Alarm
X500 Alarm
smanos holding...

12
Overview of X500 Alarm System
Rear View
Tamper switch
On/Off
SIM card slot
Wired connection terminals
Adapter jack
Service
Bottom View
Front View
SOS
Arm
Home mode
Disarm
Call
RFID tag reader
Touch screen
LCD screen
Play voice memo
Record voice memo
Included accessories
The smanos X500 Alarm System has the following accessories included in the box:
2 x Multifunctional
remote control
1x Desk stand
- English manual
- English quick guide
2 x Wireless door/window
contact
1 x Wireless PIR motion detector
2 x RFID tag
1x Wall mount
1 x Adapter
PIR-900 Wireless PIR Motion Detector
IMPORTANT: WHEN SINGLE DELAY ZONE IS SELECTED, THE SENSOR
WILL ALWAYS BE IN THE NORMAL ZONE. IT IS NOT POSSIBLE TO PLACE IT IN
THE HOME GROUP.
5
TIP: Always start the SIM card telephone number with the area code of your
country (eg. 0031 for the Netherlands). This will allow you to operate the alarm
system abroad.
8
17
18
19
20
24
X500 Alarm
X500 Alarm
smanos holding...

34
Operating principle of the alarm system
Sensor placement
The alarm system is more effective with well-placed and set sensors. Determine which
areas you want to monitor and with which sensor. In the picture below are potential
places shown for different types of sensors from which you can determine what the
best placing is for your space.
A. Alarm panel B. Remote control C. Siren
Front door : Door/window contact
Living area : PIR motion detector
Window: living area : Door/window contact
Terrace door : Door/window contact
Window : Door/window contact
Bedroom : PIR motion detector
Kitchen : Gas detector
Wash room : Water flood detector
1.
2.
3.
4.
5.
6.
7.
8.
9.
Sensors
The alarm system will receive a signal when a sensor is triggered. The control
panel will sound the alarm and send a SMS to all stored phone numbers. When
texting is done it will call stored phone numbers. When an optional external
siren is, placed it will be send a signal to the siren.
sos
PIR-900 Wireless PIR Motion Detector
IMPORTANT: WHEN SINGLE DELAY ZONE IS SELECTED, THE SENSOR
WILL ALWAYS BE IN THE NORMAL ZONE. IT IS NOT POSSIBLE TO PLACE IT IN
THE HOME GROUP.
5
TIP: Always start the SIM card telephone number with the area code of your
country (eg. 0031 for the Netherlands). This will allow you to operate the alarm
system abroad.
8
17
18
19
20
24
X500 Alarm
X500 Alarm
smanos holding...

65
Changing sensor name
Test mode alarm system
The alarm system can be put in a testing mode. This will cause the alarm beep
three times when it getting a signal from a sensor which is triggered, instead of
ringing the siren.
The test mode can be star ted by sending “100” to SIM card which is inserted in
the control panel. After 10 minutes the system will automatically stop the test
mode. It is also possible to stop the test mode by pressing the button on [SOS]
the control panel.
Record alarm message
The supplied motion detector and door/window contact are by default paired with the
alarm system. Every sensor is called a zone and every sensor will get it’s own zone
number assigned. The door/window contact is by default assigned to zone 1. The
motion detector is by default assigned to zone 2. Each sensor that will be assigned
afterwards will become zone 3, zone 4.. in the sequence of pairing order. Names can
be set up to 50 zones..
When the alarm is activated, the control panel will call the pre-stored
emergency numbers and play a message. This message can be changed by
pressing the button, press again the button and finally press the [0]
button. From that point you have 10 seconds to leave a message.
Zone mode of sensors
Each sensor can be placed in a zone mode. Four different zone mode can be selected.
The home mode zone, normal zone, 24 hour zone or single delay zone. Please refer
to page 23 for setting the zone mode.
IMPORTANT: Determine before setting the alarm system which zone a sensor
should be placed.
Normal zone: The supplied door/window contact is by default set in the normal
zone. In the normal zone setting, a sensor is always activated when the alarm
system is armed.
Home mode zone: The supplied PIR motion detector is by default which set in
the home zone. When the alarm system is in home mode, the sensors set in
home zone will send a signal to the alarm system when triggered but does not
respond to the signal. Sensors in the normal zone will send a signal when
triggered and the alarm system will respond. With the home zone it is possible
to partially arm the house with the advantage of being able to walk around in it.
Single delay zone: One or more detectors can be set in single delay zone that
will alarm at the specified time after being triggered. The state is usually used
for door/window contact on entrance. For example, if the user does not want to
carry the remote control, he/she can set the door/window contact in single
delay zone and set the time to 30 seconds. When the user comes home, the
control panel will alarm after 30 seconds, so it leaves certain time for the user to
disarm the system.
24 hourzone: It is recommended to set smoke detector, gas leakage detector,
vibration detector, glass break detector, water flood detector and IR beams to
24 hour zone. When set to this zone the sensor is always active and will always
send a signal without delay to the control panel when triggered, regardless
whether the system is armed or disarmed.
PIR-900 Wireless PIR Motion Detector
IMPORTANT: WHEN SINGLE DELAY ZONE IS SELECTED, THE SENSOR
WILL ALWAYS BE IN THE NORMAL ZONE. IT IS NOT POSSIBLE TO PLACE IT IN
THE HOME GROUP.
5
TIP: Always start the SIM card telephone number with the area code of your
country (eg. 0031 for the Netherlands). This will allow you to operate the alarm
system abroad.
8
17
18
19
20
24
X500 Alarm
X500 Alarm
smanos holding...

8
7
1.
2.
3.
4.
Getting Started
Inserting SIM card
Before inser ting the SIM card, please perform the following steps:
Makesurethealarmsystemispoweredoff.
IMPORTANT:removethe(default)codepermanentlyfromtheSIMcard.
Turnoffthevoicemailfunctionifitisenabled.
InserttheSIMcardintotheSIMcardslotfromthealarmsystemasshowninthe
illustrationbelow.
IMPORTANT: In order to use and set up the alarm system, SMS texting
will be used. The use of SMS texting cost money. Consult your carrier for
the costs.
IMPORTANT: The Android and/or Apple App both make use of SMS texting.
SPK
GND
PUSH
GND
ZONE 1
24H ZONE
Wired connection (Siren 12V≤500mA)
Output for electronic lock
Wired sensor (Normal zone)
Wired sensor (24-H zone)
OFF O N
The settings of the alarm system can be changed by simply sending a SMS with a
mobile phone. You can request an entire menu for information on possible SMS
commands. The complete menu consists of three parts which can be requested by
sending one, two or three question marks as can be seen below.
Sending “ ? ”
Control panel replies:
Settings inquiry by SMS
Turning on the control panel
Connect the power adapter to the connector in the back of the control panel. Then
slide the power switch to “On“.
Network connection (indicator)
After switching on the system, the network icon will show on the LCD screen. This [ ]
indicates that the control panel is connected to a network.
IMPORTANT: If the network icon does not shown on the LCD screen, the control
panel has not connected to a network. Make sure the security code of the SIM
card is permanently deactivated.
‘0’ Disarm
‘1’ Arm
‘2’ Home mode
‘3’ Two-way talk
‘4’ Call-back voice memo
‘00’ Settings inquiry
‘??’ Store phone and SMS No.
?
PIR-900 Wireless PIR Motion Detector
IMPORTANT: WHEN SINGLE DELAY ZONE IS SELECTED, THE SENSOR
WILL ALWAYS BE IN THE NORMAL ZONE. IT IS NOT POSSIBLE TO PLACE IT IN
THE HOME GROUP.
5
TIP: Always start the SIM card telephone number with the area code of your
country (eg. 0031 for the Netherlands). This will allow you to operate the alarm
system abroad.
8
17
18
19
20
24
X500 Alarm
X500 Alarm
smanos holding...

910
Control Panel Operation
Arming the system
Press . All the sensors will be activated.
Partially arming the system
Press . Sensors which are set in the home mode zone will not active when home
arm is activated. All other sensors in other zones will remain active.
Disarming the system with the control panel
Disarming the system with the control panel can be done by entering the 4-digit
password (default 1234) and press the button. You will hear one beep and the
system will be disarmed. If you hear three beeps, the password is entered incorrectly.
Disarming the system by RFID tag
Hold the RFID tag close to the RFID reader. The system will beep as a confirmation it is
disarmed.
IMPORTANT: The control panel must be
connected to AC adapter when using a RFID
tag to disarm the system.
IMPORTANT: RFID tags can only be used to disarm the system.
‘901-950' Zone name
'101-120' RFID tags SMS notice
'11' Entry and exit delay time
'121' Siren volume
'122' Siren ringing time
'13' Disarm password
'14' Single zone delay time
‘15’ Duress code
‘16’ Timing
Sending “ ? ? ”
Control panel replies:
Sending “ ? ? ? ”
Control panel replies:
‘5’ Store alarm phone No.
‘6’ Store alarm SMS No.
‘7’ Store SMS No. for RFID tags
‘8’ Store speed dial phone No.
‘???’ System setups
???
??
PIR-900 Wireless PIR Motion Detector
IMPORTANT: WHEN SINGLE DELAY ZONE IS SELECTED, THE SENSOR
WILL ALWAYS BE IN THE NORMAL ZONE. IT IS NOT POSSIBLE TO PLACE IT IN
THE HOME GROUP.
5
TIP: Always start the SIM card telephone number with the area code of your
country (eg. 0031 for the Netherlands). This will allow you to operate the alarm
system abroad.
8
17
18
19
20
24
X500 Alarm
X500 Alarm
smanos holding...

11 12
Phone dial
Changing the language
English
Enter a phone number and press the button. The system dials out and you can
make the call via the built-in microphone and speaker of the alarm system. When you
press again the call is ended.
Send a SMS message with "0001" to the telephone number of the SIM card in the
control panel. The language of the alarm system will be changed into English. The
control panel will send a SMS message to confirm the language is set successfully.
Speed dial
When you press the button for 3 seconds, the system will dial the preset emergency
number immediately. The call ends when you press the button again. How to set the
speed dial number can be found at page 22.
Record and play back voice message
Naming RFID tags
Press the button for 2 seconds to record a
personal message of up to 10 seconds. If your
message is shorter than 10 seconds, press the
button to stop recording. The voice message
can be played back by pressing the for 2
seconds.
Besides the ability to disarm the system, the RFID tags can be given a name. If
someone disarm the alarm system, a message with the name will be sent to the pre-
stored RFID text number.
Administrator
Mom
IMPORTANT: The administrator can only receive a notification if the RFID tag
has been assigned a SMS number for RFID tags is stored. (Settings can be found
at page 21 and 25.
Nancy came home
Nancy
PIR-900 Wireless PIR Motion Detector
IMPORTANT: WHEN SINGLE DELAY ZONE IS SELECTED, THE SENSOR
WILL ALWAYS BE IN THE NORMAL ZONE. IT IS NOT POSSIBLE TO PLACE IT IN
THE HOME GROUP.
5
TIP: Always start the SIM card telephone number with the area code of your
country (eg. 0031 for the Netherlands). This will allow you to operate the alarm
system abroad.
8
17
18
19
20
24
X500 Alarm
X500 Alarm
smanos holding...

13 14
Disarming the alarm system by SMS
Disarming
System disarmed.
Arming the system by SMS
If you want to arm the system, you only have to send a ”1” to the number of the SIM
card in the control panel.
Arming
System armed.
Home Mode (Stay)
System in home mode.
Partially arming (home mode) the system by SMS
If you want to partially arm the system you only have to send a ”2” to the number of
the SIM card in the control panel.
The main menu, which you receive after texting “?”, will display the command for
disarming the system (”0”). If you want to disarm the system, you only have to send a
”0” to the number of the SIM card in the control panel. You will receive a confirmation if
it succeeded as shown in the picture below.
Dutch
Send a SMS message with "0031" to the telephone number of the SIM card in the control
panel. The language of the alarm system will be changed into Dutch. The control panel
will send a SMS message to confirm the language is set successfully.
The language can also be set in the X500 Alarm App.
0
2
1
PIR-900 Wireless PIR Motion Detector
IMPORTANT: WHEN SINGLE DELAY ZONE IS SELECTED, THE SENSOR
WILL ALWAYS BE IN THE NORMAL ZONE. IT IS NOT POSSIBLE TO PLACE IT IN
THE HOME GROUP.
5
TIP: Always start the SIM card telephone number with the area code of your
country (eg. 0031 for the Netherlands). This will allow you to operate the alarm
system abroad.
8
17
18
19
20
24
X500 Alarm
X500 Alarm
smanos holding...

15 16
Apple and Android App
The X500 alarm system can also be operated
with an App. You can download it by searching the
keyword ”X500 Alarm” in the App Store or Google Play.
Download and install the App on your smartphone.
IMPORTANT: The Android and/or Apple App both make use of SMS texting.
Adding an account
The alarm system can be operated with the X500 Alarm App. When using the Apple
App there will be set up a SMS text message automatically for every function. Press the
“send” button to send the text message and set the function you have chosen.
When using an Android smartphone, the App will send a text message in the
background without needing to confirm sending the message.
Launch the App on your phone and
select “Add account“.
Enter a name for the alarm (eg.
Alarm home) and enter the mobile
number of the SIM card installed in
the alarm system.
Once the account is added it will
appear on the home screen of the
App.
Two-way talk
Send a text message with number ”3” to the telephone number of the SIM card in the
control panel. You will be called back by the system and will be able to listen and/or
speak.
Leaving a message by phone call
Phone operation when receiving emergency call
When the alarm system is alarming, the control panel will call the pre-stored
emergency numbers. The following commands can be used to operate the alarm
system when pick up the call:
SMS command
Disarm
Arm
Turn off siren
Turn on siren
Two-way talk
Replay alarm voice message
Input
0
1
6
9
Send a text message with number ”4” to the telephone number of the SIM card
in the control panel. You will be called back by the system. Pick up the phone to
leave a message for 10 seconds . The message can be played back by pressing
thebutton for 2 seconds on the control panel.
#
4
3
PIR-900 Wireless PIR Motion Detector
IMPORTANT: WHEN SINGLE DELAY ZONE IS SELECTED, THE SENSOR
WILL ALWAYS BE IN THE NORMAL ZONE. IT IS NOT POSSIBLE TO PLACE IT IN
THE HOME GROUP.
5
TIP: Always start the SIM card telephone number with the area code of your
country (eg. 0031 for the Netherlands). This will allow you to operate the alarm
system abroad.
8
17
18
19
20
24
X500 Alarm
X500 Alarm
smanos holding...

17 18
Setting up the Alarm System with the App
Setting the alarm system can be done by sending text messages but also by using the
App. This chapter will show how this can be done for all the functions.
Request alarm system status by SMS
Send a text message with “00“ to the SIM card telephone number in the control panel.
System armed
Entry and exit delay time: 0sec
Single zone delay time: 30sec
Siren volume: 2
Siren ringing time: 5min
Disarm password: 1234
In the X500 Alarm App press the following button:
X500 alarm App overview
The illustration below shows the functions of the home screen of the App. Other tabs
will be explained in the following pages.
Arm
Stay
Disarm
Two-way talk
Record
voice memo
Synchronize the time
00
PIR-900 Wireless PIR Motion Detector
IMPORTANT: WHEN SINGLE DELAY ZONE IS SELECTED, THE SENSOR
WILL ALWAYS BE IN THE NORMAL ZONE. IT IS NOT POSSIBLE TO PLACE IT IN
THE HOME GROUP.
5
TIP: Always start the SIM card telephone number with the area code of your
country (eg. 0031 for the Netherlands). This will allow you to operate the alarm
system abroad.
8
17
18
19
20
24
X500 Alarm
X500 Alarm
smanos holding...
19 20
In the X500 Alarm App, this setting can be done as follows:
Store emergency SMS numbers
Emergency SMS numbers are the numbers that should be text to when the alarm goes
off. When sending “6“ to the SIM card in the control panelyou will receive the current
settings. Copy and edit this text message and send it back. After sending the message
it will send back a message from the control panel to confirm the new settings.
TEL:
IMPORTANT: Only phone numbers stored in the alarm system can make
changes and modify the system.
SMS:
1. 6123654789
2. 6123654788
3. 6123654787
4. 6123654786
5. 6123654785
Store emergency telephone numbers
Emergency numbers are the telephone numbers which have to be called when the
alarm goes off. To get a list of the current settings, send “5“ to the control panel.
TEL:
1.
2.
3.
4.
5.
TEL:
1. 6123654789
2. 6123654788
3. 6123654787
4. 6123654786
5. 6123654785
Forward Edit
Store alarm phone No. successfully.
Copy the received SMS message entirely and paste it into a new text
message. Here you can fill in five numbers you would like to. You can
specify multiple phone numbers in the same text message. When you
have finished the entry, the message can be sent.
Right is an example
of a list of numbers
filled in the text
message.
After sending the message there will be sent back a message from the control panel to
confirm the new settings.
Note: When alarming, the control panel will call these numbers for three rounds
at most, if the phone is pick up with operation on phone button, the system will
stop calling .
6
5
PIR-900 Wireless PIR Motion Detector
IMPORTANT: WHEN SINGLE DELAY ZONE IS SELECTED, THE SENSOR
WILL ALWAYS BE IN THE NORMAL ZONE. IT IS NOT POSSIBLE TO PLACE IT IN
THE HOME GROUP.
5
TIP: Always start the SIM card telephone number with the area code of your
country (eg. 0031 for the Netherlands). This will allow you to operate the alarm
system abroad.
8
17
18
19
20
24
X500 Alarm
X500 Alarm
smanos holding...
21 22
In this menu you can assign a phone number that will be stored as speed dial number.
You can speed dial by pressing the button for 3 seconds.
Copy and edit the received text message and send it back with the new telephone
number. After sending the message it will send back a message from the control panel
to confirm the new settings. It is highly recommended to start with your area code or
land code.
In the App:
The SMS number for RFID tag is the number which will be used to send a text message
to when a RFID tag is used to disarm the system.
Copy and edit the received text message and send it back with the new telephone
number. After sending the message it will send back a message from the control panel
to confirm the new settings.
In the App:
Store speed dial number
Speed dial phone number
(0-20 digits):
1.
Store SMS number for RFID tags
SMS No. for RFID tags
(0-20 digits):
1.
8
7
PIR-900 Wireless PIR Motion Detector
IMPORTANT: WHEN SINGLE DELAY ZONE IS SELECTED, THE SENSOR
WILL ALWAYS BE IN THE NORMAL ZONE. IT IS NOT POSSIBLE TO PLACE IT IN
THE HOME GROUP.
5
TIP: Always start the SIM card telephone number with the area code of your
country (eg. 0031 for the Netherlands). This will allow you to operate the alarm
system abroad.
8
17
18
19
20
24
X500 Alarm
X500 Alarm
smanos holding...

23 24
In the App:
Change sensors name and zone mode
Each sensor is referred to as a zone. 50 sensors' name and and zone mode can be
changed according to personal preference. Each sensor(zone)' name is not allowed to
exceed 30 characters.
After sending this message you will receive a confirmation of the new settings being
adjusted successfully. Send 902,903,904 etc.... to change the rest of the sensor's name
and zone type if you want to .
Zone 1 name:
Zone 1 alarm
Zone 1 type(0 , 1 , 2 , 3 ):
0
Zone 1 name:
Bedroom PIR sensor
Zone 1 type(0 , 1 , 2 , 3 ):
1
IMPORTANT:
0 = Normal Zone
1 = Home Mode Zone
2 = 24 Hour Zone
3 = Single Delay Zone
901
PIR-900 Wireless PIR Motion Detector
IMPORTANT: WHEN SINGLE DELAY ZONE IS SELECTED, THE SENSOR
WILL ALWAYS BE IN THE NORMAL ZONE. IT IS NOT POSSIBLE TO PLACE IT IN
THE HOME GROUP.
5
TIP: Always start the SIM card telephone number with the area code of your
country (eg. 0031 for the Netherlands). This will allow you to operate the alarm
system abroad.
8
17
18
19
20
24
X500 Alarm
X500 Alarm
smanos holding...
25 26
Change RFID tags name
With this menu you can adjust the names linked to the RFID tags. 20 RFID tags can be
renamed. Send 101-120 to rename the RFID tags.
Change RFID tags SMS notice:
1.
2.
3.
4.
Left is the response message of the alarm
system shown when texting ”101” to the
control panel. Copy the message and adjust
the names behind the numbers as shown
below.
Change RFID tags SMS notice:
1.Kids come home from school
2.
3.
4.
Changing RFID tags SMS notice successfully
In the App:
Change entry/exit delay time
The system can be armed or alarmedwith a time delay. When a delay time is set you
will hear a beep every second as a warning of this delay. The beep will go faster in the
last 15 seconds. The default setting is turn off the entry/exit delay time.
Entry and exit delay time
(0-300 sec.):
0
Entry and exit delay time
(0-300 sec.):
30
Set delay time successfully.
Left is the response message of the alarm system
shown when texting “11“ to the control panel. Copy
the message and adjust the time as shown below.
In the App:
101
11
PIR-900 Wireless PIR Motion Detector
IMPORTANT: WHEN SINGLE DELAY ZONE IS SELECTED, THE SENSOR
WILL ALWAYS BE IN THE NORMAL ZONE. IT IS NOT POSSIBLE TO PLACE IT IN
THE HOME GROUP.
5
TIP: Always start the SIM card telephone number with the area code of your
country (eg. 0031 for the Netherlands). This will allow you to operate the alarm
system abroad.
8
17
18
19
20
24
X500 Alarm
X500 Alarm
smanos holding...

27 28
Setting alarm duration
Alarm duration of the siren can be adjusted in this menu. Thedefaultsettingis5
minutes.
Siren ringing time(1-9min):
5
Left is the response message of the alarm
system shown when texting “122“ to the
control panel. Copy the message and adjust
the duration of the siren as shown below:
Siren ringing time(1-9min):
3
Set siren ringing time successfully.
In the App:
Setting alarm volume
Alarm volume of the siren can be adjusted in this menu.The default setting is low.
Siren volume (0 Mute, 1 Low,
2 High):
1
Left is the response message of the alarm
system shown when texting “121“ to the
control panel. Copy the message and adjust
the volume (“0, 1 or 2“) of the siren as shown
below:
Siren volume (0 Mute, 1 Low, 2 High): 2
Set siren volume successfully.
121
122
PIR-900 Wireless PIR Motion Detector
IMPORTANT: WHEN SINGLE DELAY ZONE IS SELECTED, THE SENSOR
WILL ALWAYS BE IN THE NORMAL ZONE. IT IS NOT POSSIBLE TO PLACE IT IN
THE HOME GROUP.
5
TIP: Always start the SIM card telephone number with the area code of your
country (eg. 0031 for the Netherlands). This will allow you to operate the alarm
system abroad.
8
17
18
19
20
24
X500 Alarm
X500 Alarm
smanos holding...

29 30
Set disarm password
Disarm password(4-6 digits):
1234
Disarm password(4-6 digits):
8888
Set disarm password successfully.
Left is the response message of the alarm
system shown when texting “13“ to the control
panel. Copy the message and adjust the
password as shown below.
In the App:
The default disarm password is 1234. To change the disarm password, follow the menu
below:
Setting single zone delay time
Single zone delay time
(0-300 sec.):
30
Single zone delay time (0-300 sec.):
15
Set single zone delay time successfully.
Left is the response message of the alarm
system shown when texting “14“ to the control
panel. Copy the message and adjust the delay
time for the single zone as shown below.
In the App:
The system will be delayed to alarm if single delay zone sensor is triggered. It is
recommended to set the entry door/window contact in single delay zone.
14
13
PIR-900 Wireless PIR Motion Detector
IMPORTANT: WHEN SINGLE DELAY ZONE IS SELECTED, THE SENSOR
WILL ALWAYS BE IN THE NORMAL ZONE. IT IS NOT POSSIBLE TO PLACE IT IN
THE HOME GROUP.
5
TIP: Always start the SIM card telephone number with the area code of your
country (eg. 0031 for the Netherlands). This will allow you to operate the alarm
system abroad.
8
17
18
19
20
24
X500 Alarm
X500 Alarm
smanos holding...
31 32
Duress code:
1111
Operate successfully.
Duress code:
2345
Set duress code
The default duress code is 1111. Duress code can be used when the user is threatened
to disarm the system. When using duress code to disarm the system, the control panel
will dial out silently. Change the duress code by following the menu:
Left is the response of the alarm system show when texting "15"
to the control panel. Copy the message and change the duress
code (four digits).
In the App:
15
Set timing
Below is the response message of the alarm system shown when texting “16“ to the
control panel. Copy the message and adjust the timing as shown below.
Timing:
1.00:00 0
2.00:00 0
3.00:00 0
4.00:00 0
5.00:00 0
6.00:00 0
Timing:
1.09:00 1
2.18:00 0
3.00:00 0
4.00:00 0
5.00:00 0
6.00:00 0
Operate successfully.
Leftistheresponseofthealarmsystemshowwhentexting“16“to
thecontrolpanel.Copythemessageandchangethesettings.
IMPORTANT: "0" = TURN OFF THE TIMING. "1" = ARM. "2"=DISARM.
Please synchronize panel time before set timing. See details on page 34.
16
PIR-900 Wireless PIR Motion Detector
IMPORTANT: WHEN SINGLE DELAY ZONE IS SELECTED, THE SENSOR
WILL ALWAYS BE IN THE NORMAL ZONE. IT IS NOT POSSIBLE TO PLACE IT IN
THE HOME GROUP.
5
TIP: Always start the SIM card telephone number with the area code of your
country (eg. 0031 for the Netherlands). This will allow you to operate the alarm
system abroad.
8
17
18
19
20
24
X500 Alarm
X500 Alarm
smanos holding...
33 34
Delete all remote controls by SMS
All remote controlscan be removed by texting “23“ to the SIM card number in the
control panel.
Delete remote controls successfully.
Delete wireless sensors by SMS
All sensors can be removed from the system by texting “21“ to the SIM card number in
the control panel.
Delete all RFID tags by SMS
All RFID tags can be removed by texting “22“ to the SIM card number in the control
panel.
Restore system to default setting
Also called a “hard reset.“ Text "0000" to the SIM card number in the control panel.
A hard reset can also be performed by holding the button, then slide the power
switch of the control panel from off to on. Until 2 beeps are heard, means the system
has been restored to default setting.
IMPORTANT: If the control panel is on, turn it off first to apply the function.
Synchronize control panel time
When the control panel is power off, the time will restore to 00:00. Please synchronize
the time by sending “99”.
The control panel will send notification “Operate successfully” when the time is
restored. The system will send notification “Please reply '99' to sync panel time." when
the power is turned on from power failure.
In the App, you can remove the
sensors, RFID tags and remote
controls separately:
Delete wireless sensors successfully.
Delete RFID tags successfully.
21
22
23
0000
99
PIR-900 Wireless PIR Motion Detector
IMPORTANT: WHEN SINGLE DELAY ZONE IS SELECTED, THE SENSOR
WILL ALWAYS BE IN THE NORMAL ZONE. IT IS NOT POSSIBLE TO PLACE IT IN
THE HOME GROUP.
5
TIP: Always start the SIM card telephone number with the area code of your
country (eg. 0031 for the Netherlands). This will allow you to operate the alarm
system abroad.
8
17
18
19
20
24
X500 Alarm
X500 Alarm
smanos holding...
Other manuals for X500
3
Table of contents
Other Smanos Security System manuals
Popular Security System manuals by other brands

Visonic
Visonic CLIP PG2 installation instructions

Chamberlain
Chamberlain 976LMC Security+ user manual

Federal Signal Corporation
Federal Signal Corporation PAGASYS GEN II P-SYS-G Description, Installation, Operations and Maintenance Manual

AL-KO
AL-KO AKS 1300 user manual

Aiphone
Aiphone AI-900 operating instructions

Elkron
Elkron HP501 manual