MVQ-V200-MTPLT Mounting Bracket
Installation Guide
© Safe Fleet | February 2020 | All rights reserved | Part # 700-1203 R1
Service & Support
If your MVQ-V200-MTPLT mounting bracket is to be returned for service,
1.844.899.7366), provide the model and/or serial# of your unit, and
ask for a Return Merchandise Authorization (RMA) number. An RMA#
allows the support team to better track your product when it comes in for
service. Please show the RMA# on the outside of the package.
ANY PRODUCT SENT WITHOUT AN RMA# MAY BE REFUSED!
Documentation
Additional copies of this guide,
along with other supporting
documentation can be found
on the Safe Fleet Community
at https://community.seon.
com/documents/.
This guide provides instructions on how to use the MVQ-V200-MTPLT universal mounting bracket when
installing your public display monitor.
About the mounting bracket
The MVQ-V200-MTPLT bracket is intended for mounting monitors that comply with the following standard
VESA mounting hole patterns:
• 75 mm x 75 mm
• 100 mm x 100 mm
• 100 mm x 200 mm
• 200 mm x 200 mm
What is included
The MVQ-V200-MTPLT mounting bracket assembly contains the following components:
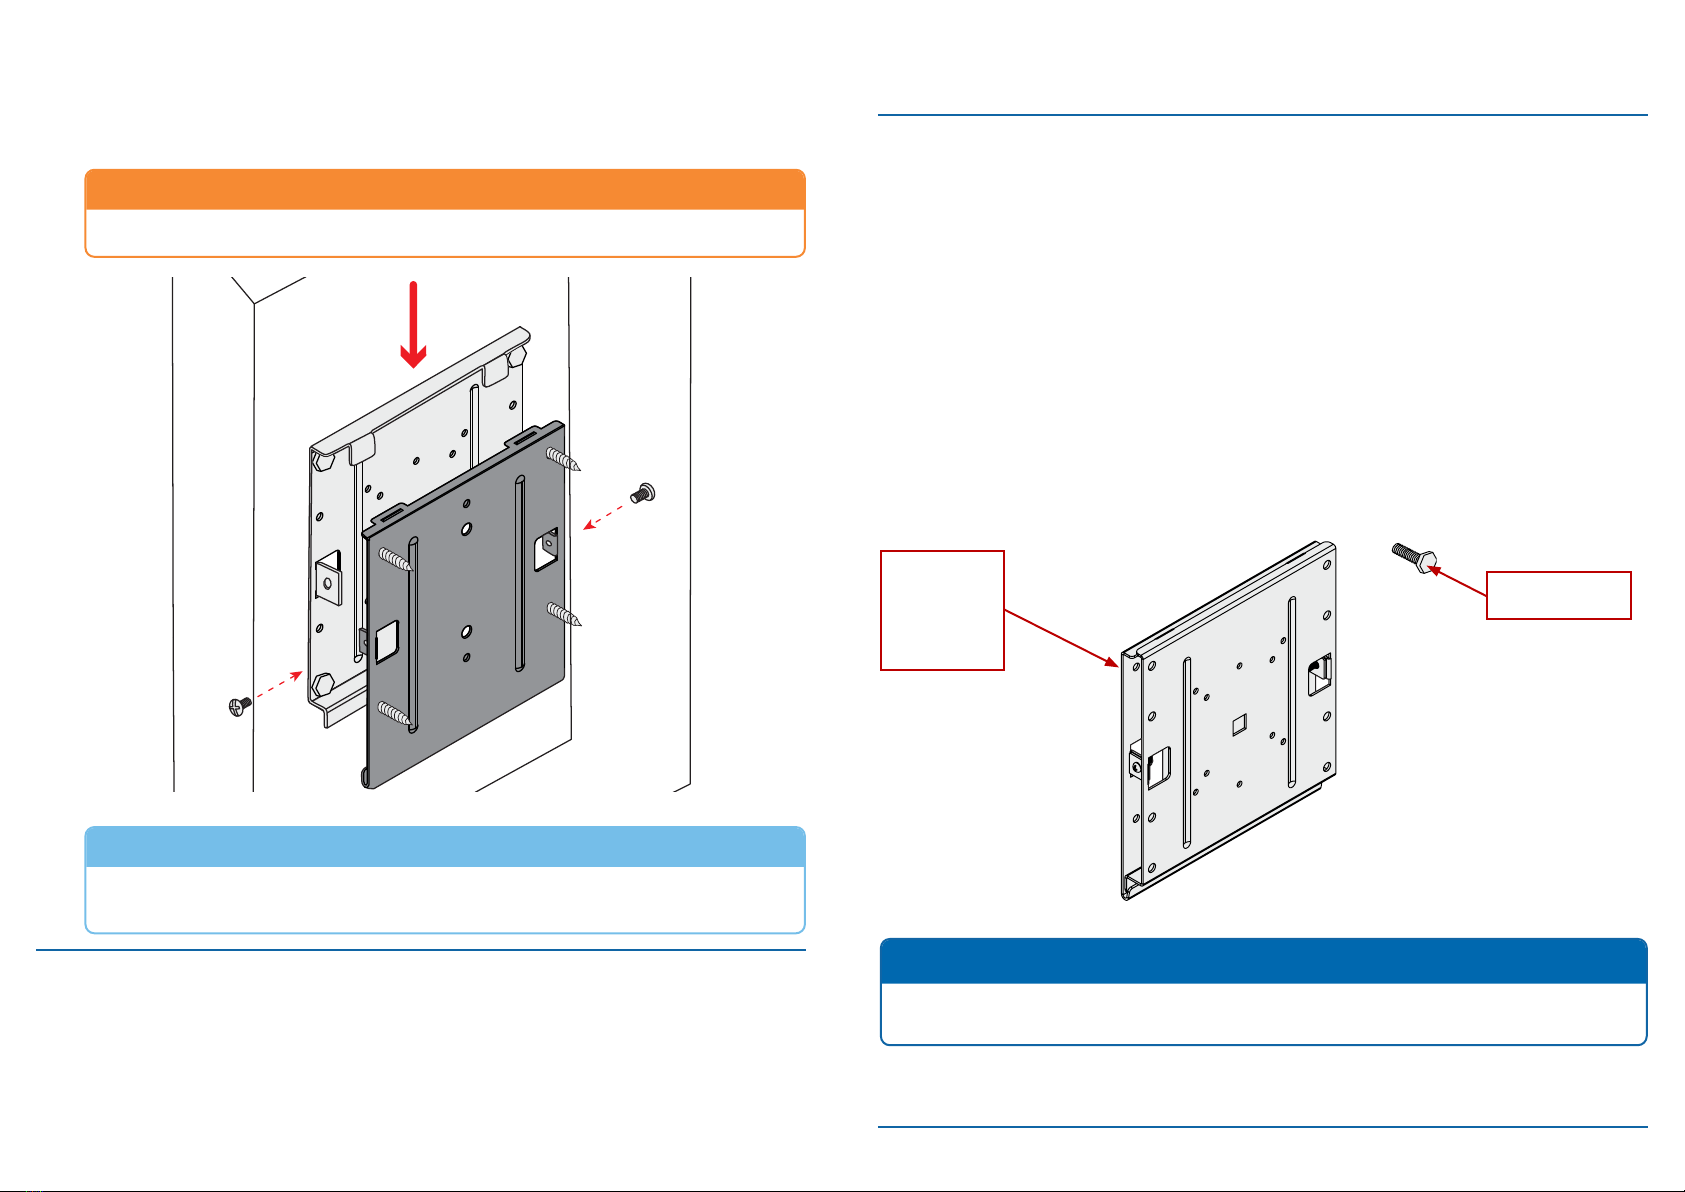
5 Mount monitor
Position the monitor so the VESA plate is vertically aligned with the wall plate. Slide the VESA plate on
top of the wall plate and carefully lower the monitor into place. Replace the retaining screws on the
sides of the mounting bracket assembly.
TIP: Accessing retaining screws
We recommend using a magentic-tipped long screwdriver or a multi-driver tool with a 5-inch bit
extension to access the retaining screws.
Wall mount bracket
assembly 1pc
Includes:
1 VESA plate
1 wall plate
2 retaining screws
M8 1.25x25mm VESA
mounting screw - 4 pcs
NOTE: Wall mounting screws
Due to the variations in installation scenarios, the screws required to secure the wall plate to the mounting
surface are to be provided by the customer.
CAUTION! Retaining screws
To ensure safety, both retaining screws must be installed.


