Prime Design Limited Warranty. Seller’s sole and exclusive warranty (and Buyer’s sole and exclusive remedy and Seller’s entire liability for any breach thereof) with respect to the Goods is set forth in the Limited Warranty document available at primedesign.net/warranty-liability
(the “Prime Design Limited Warranty”).
▪
TM & © 2020 PRIME DESIGN. PROTECTED BY ONE OR MORE OF THE FOLLOWING PATENT NO.’s 6427889, 6764268, 6971563, 8991889, 9415726, 9506292, 9481313, 9776476, 9796340, 10470565, 10486608 AND OTHER PATENTS PENDING
3
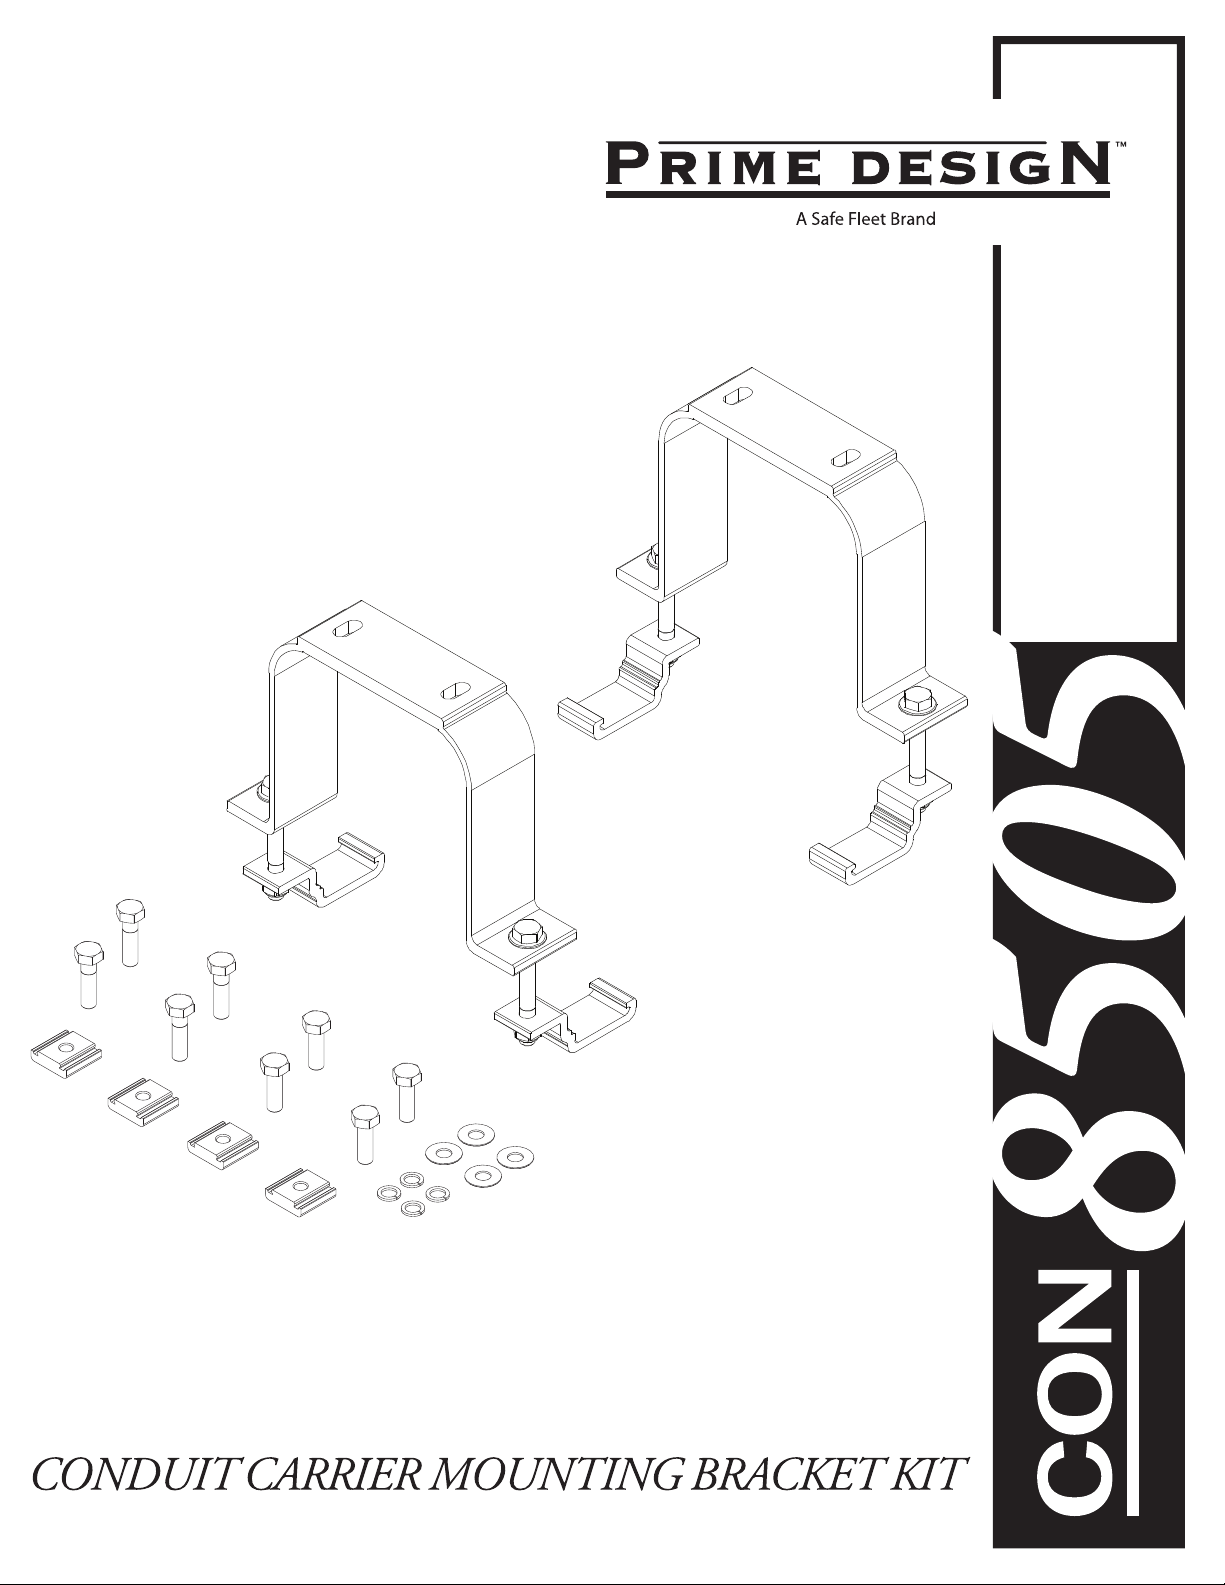
CON-8505 ASSEMBLY INSTRUCTIONS– GEN 1 CONDUIT CARRIER
3
3
1
2
34
5
6
78
9
1
2
1
2
34
5
6
78
9
GEN1 CONDUIT MOUNTING KIT
INSTALLATION SEQUENCE
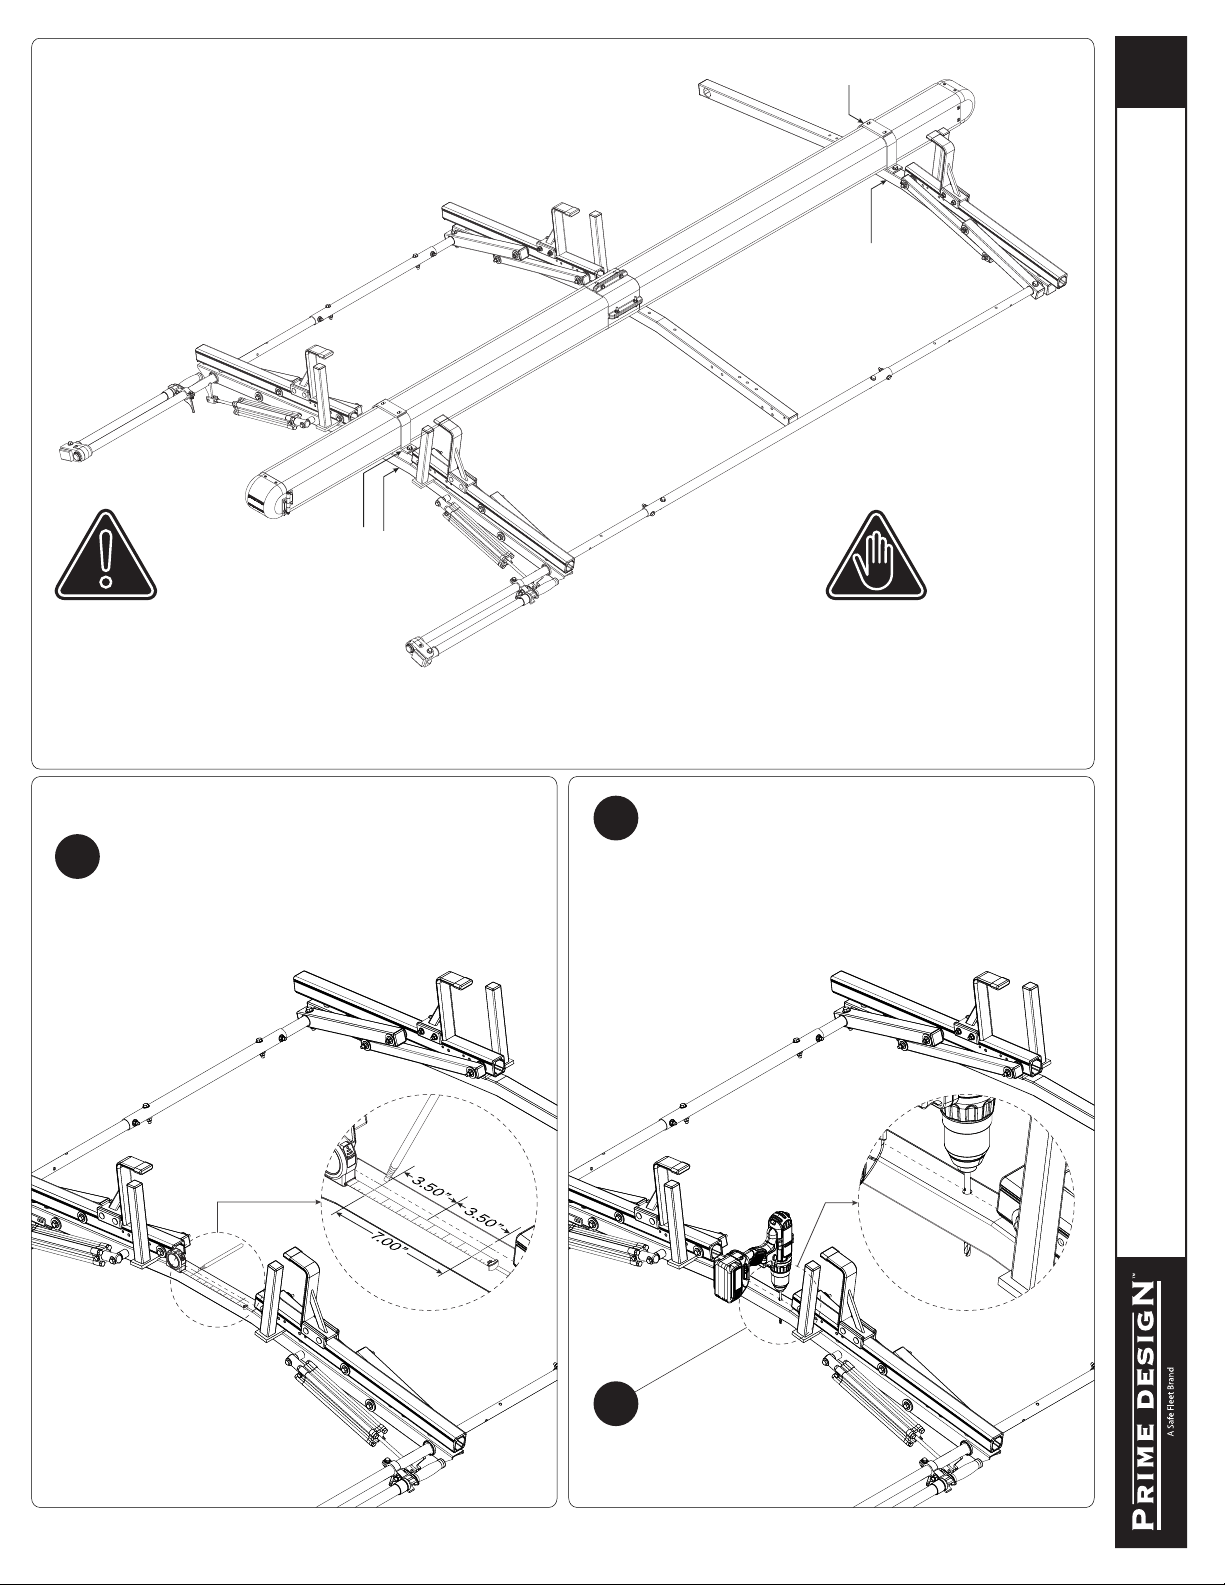
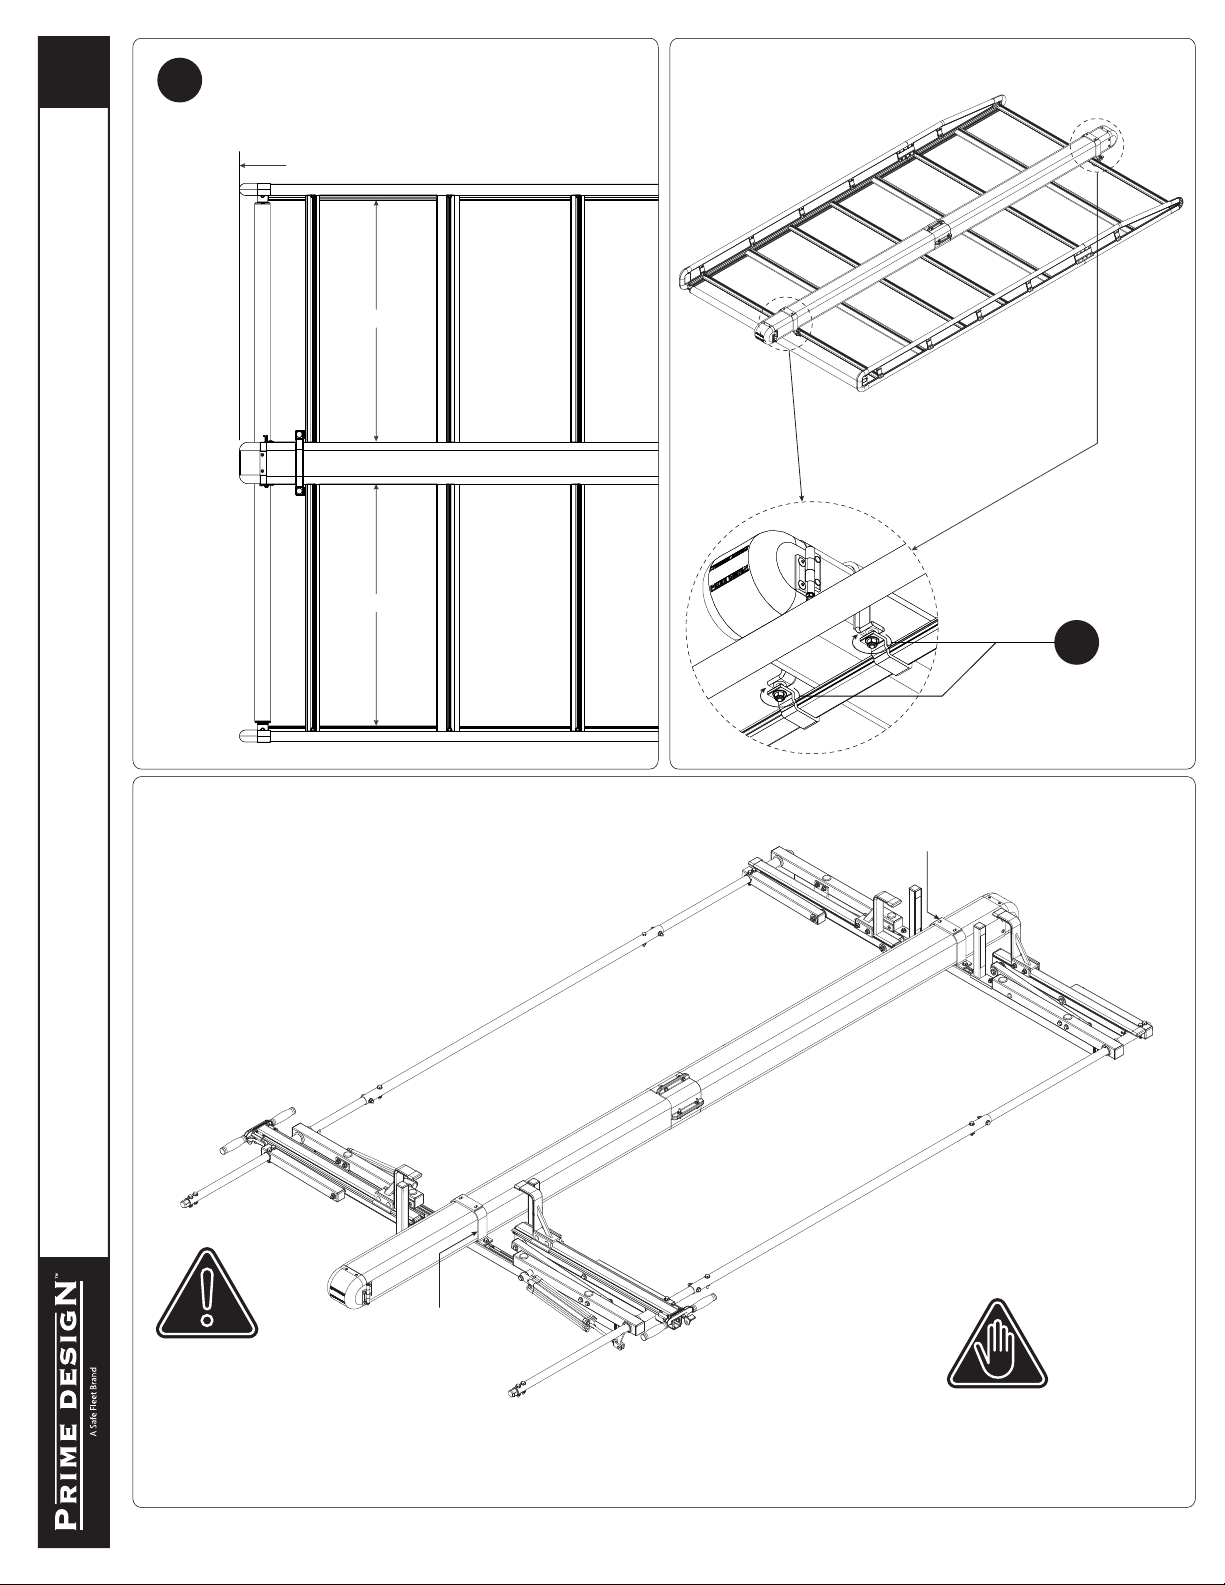
NOTE: Ladder Rack and Conduit Carrier is
shown for illustrative purposes only, and is
not included with this Conduit Mounting Kit.
This Conduit Mounting Kit contains only the
parts needed to repair, replace, or add one
Conduit Carrier.
CROSSBAR PREPARATION-REAR
Find the center of the top of Rear Crossbar between the inner
bends. Using a grease pencil, mark the center, then measure
out 3.50” to the left and right of that center mark and mark
again using the grease pencil. The marked distances will
measure 7.00” across as shown below.
1.1
Prior to drilling, mark a center line along the length of the
Crossbar to ensure the holes are correctly centered.
1.2
Drill holes using a
3/8” steel drill bit.
1.3
NOTE: Not all Gen 1 Crossbars are factory drilled to
receive accessories. If not drilled, prerform Steps 1.1 to
2.3. If factory drilled, proceed to Step 3.1. Additionally,
not all Gen 1 racks will have enough space between
the Rotation Uppers to t a Conduit Carrier. A minimum
of 7.00” is required between the Uppers, and on the
Crossbar’s top, so measure prior to drilling to ensure
there will be no Rotation interference.