3. After the tip of the product is close to the
shape-taking surface, move the product
horizontally to draw the rough outline of the
current surface on the cutting surface.
4. Use a jigsaw to cut off the excess material
along the drawn line.
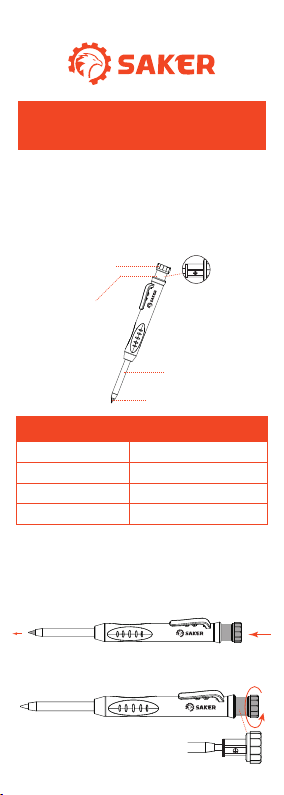
2. Insert the Removable deep
hole pencil(NO.2) vertically
into the Deep hole pencil
holder(NO.1) and rotate the
Deep Hole Pencil Holding
Knob counterclockwise to fix it.
cut plane
shape surface
COMPASS TOOL
Method 1: Take the sharp corner of the
product head as the center of the circle
1. Loosen the Bracket Holding Knob by turning it
counterclockwise, turn the aluminum alloy
bracket (NO.8) around the shaft to a certain
angle, and turn it clockwise to lock it.
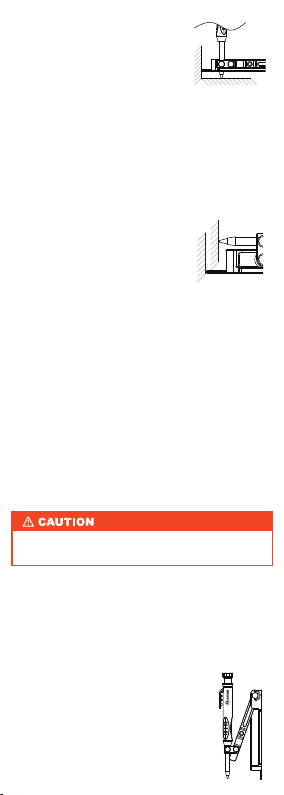
The second case: when the shape taking
surface and the clipping surface are in a
horizontal state.
1. After loosening the Pencil
Holder Angle Adjustment Knob
by rotating counterclockwise,
2. Insert the Removable deep hole pencil (NO.2)
vertically into the Deep hole pencil holder (NO.1)
and rotate the Deep Hole Pencil Holding Knob
counterclockwise to fix the pencil.
3. After the tip of the product is close to the
shape-taking surface, move the product
horizontally to draw the rough outline of the
current surface on the cutting surface.
4. Use a jigsaw to cut off the excess material
along the drawn line.
cut plane
shape surface
rotate the Deep hole pencil holder(NO.1) to adjust
it to be perpendicular to the aluminum alloy
bracket(NO.8), and rotate the Pencil Holder Angle
Adjustment Knob clockwise to lock the Deep hole
pencil holder(NO.1).
2. After loosening the Pencil Holder
Angle Adjustment Knob by turning it
counterclockwise, turn the Deep
hole pencil holder (NO.1) to adjust
the pen to touch the plane, and turn
it clockwise to lock it.
Blade Attachment
Be aware that the tip of the product is very
sharp; careless handling may result in injury.
2