Salicru DC POWER-L Series User manual

UNINTERRUPTIBLE POWER SUPPLIES (UPS) + STABILISERS - STEP-DOWN LIGHT DIMMERS (ILUEST) + POWER SOURCES + STATIC INVERTERS + PHOTOVOLTAIC INVERTERS + LINE VOLTAGE STABILISERS
MANUAL EE671774-1
DC POWER SUPPLY DEVICE.
THYRISTOR-CONTROLLED CHARGER RECTIFIER 12 PULSE.
DC POWER-L Series 12 pulse
DC-75-LP12 110V EE671774-1

2USER MANUAL

3
SALICRU
General index
1. Introduction.
1.1. Thank you letter.
2. Safety information.
2.1. Using this manual.
2.1.1. Conventions and symbols used.
3. Quality assurance and standards.
3.1. Statement by the management.
3.2. Standards.
3.3. Environment.
4. Presentation.
4.1. Views of the devices.
4.1.1. Dimensional drawings.
4.1.2. Nomenclature.
5. Rectifier block diagram and description.
5.1. Structural block diagram.
5.2. Description.
5.2.1. General.
5.2.2. AC input.
5.2.3. Input filter.
5.2.4. Transformer.
5.2.5. Jumper rectifier.
5.2.6. Battery.
5.2.7. Output filter.
5.2.8. DC output.
5.2.9. Control/Display.
5.2.9.1. Control.
5.2.10. Relay interface (X32).
5.2.11. Interface auxiliary contacts (X34).
5.2.11.1.Electronic unit for NIMBUS remote maintenance (optional).
5.2.12. Protection.
5.3. Management of batteries and charging levels.
5.3.1. Charging levels.
5.3.1.1. Float
5.3.1.2. Fast charging.
5.3.1.3. Exceptional charging.
5.3.2. Charging type priorities.
5.3.2.1. Activation and deactivation of charging types.
6. Device reception.
6.1. Reception and unpacking.
6.2. Packing list and contents.
6.3. Storage.
7. Installation.
7.1. Look after your safety.
7.2. Considerations to take into account.
7.3. Earth connection, terminal or strip .
7.4. Connection of the system to the cabinet or battery
bank.
7.5. Connection to the main single-phase or three-phase
AC power supply network.
7.6. Connection of the loads to DC output terminals.
7.6.1. Floating output.
7.6.2. Output with positive connected to earth.
7.6.3. Output with negative connected to earth.
7.7. Connection auxiliary contacts (X34).
8. Rectifier startup and shutdown.
8.1. Startup procedure.
8.2. Shutdown procedure.
9. Control panel.
9.1. Optical indications and alarm.
9.2. Basic functions of the keys and notes of interest.
9.3. Description of the screens.
9.3.1. ‘Home’ screen menu.
9.3.2. ‘Measurements’ menu.
9.3.3. ‘Switching’ menu.
9.3.4. ‘User Parameters’ menu.
9.3.5. ‘Alarms’ menu
9.3.6. ‘Battery Settings’ menu.
9.3.7. ‘Rectifier Settings’ menu.
9.3.8. ‘Password’ menu.
10. Maintenance.
10.1. Basic maintenance guide.
10.1.1. Batteries.
10.1.2. Capacitors.
10.2. Warranty conditions.
10.2.1. Terms of the warranty.
10.2.2. Exclusions.
10.3. Technical services network.
11. Annexes.
11.1. General technical specifications.
11.2. Glossary.

4
SALICRU
1. Introduction.
1.1. Thank you letter.
We thank you in advance for the trust placed in us in the pur-
chasing of this product. Read this instruction manual carefully in
order to familiarise yourself with its content, since the more you
know and understand the device the greater your satisfaction,
level of safety and optimisation of its functionalities will be.
We remain at your disposal for any additional information or que-
ries that you may wish to make.
Yours sincerely.
The device described here is capable of causing sig-
nificant physical injury if improperly handled. For this
reason, its installation, maintenance and/or repair must
be carried out exclusively by our staff or by qualified per-
sonnel.
Although no effort has been spared to ensure that the
information in this user manual is complete and accurate,
we accept no liability for any errors or omissions that may
exist.
The images included in this document are for illustrative
purposes and may not exactly represent the parts of the
device shown. However, any divergence that may arise
will be remedied or solved with the correct labelling on
the unit.
Following our policy of constant evolution, we reserve
the right to modify the characteristics, operations
or actions described in this document without prior
notice.
Any reproduction, copying, assignment to third par-
ties, amendment or total or partial translation of
this manual or document, in any form or by any means,
without the prior written permission of Salicru is pro-
hibited, with the company fully and exclusively reserving
its ownership rights over it.
USER MANUAL

5
SALICRU
2. Safety information.
2.1. Using this manual.
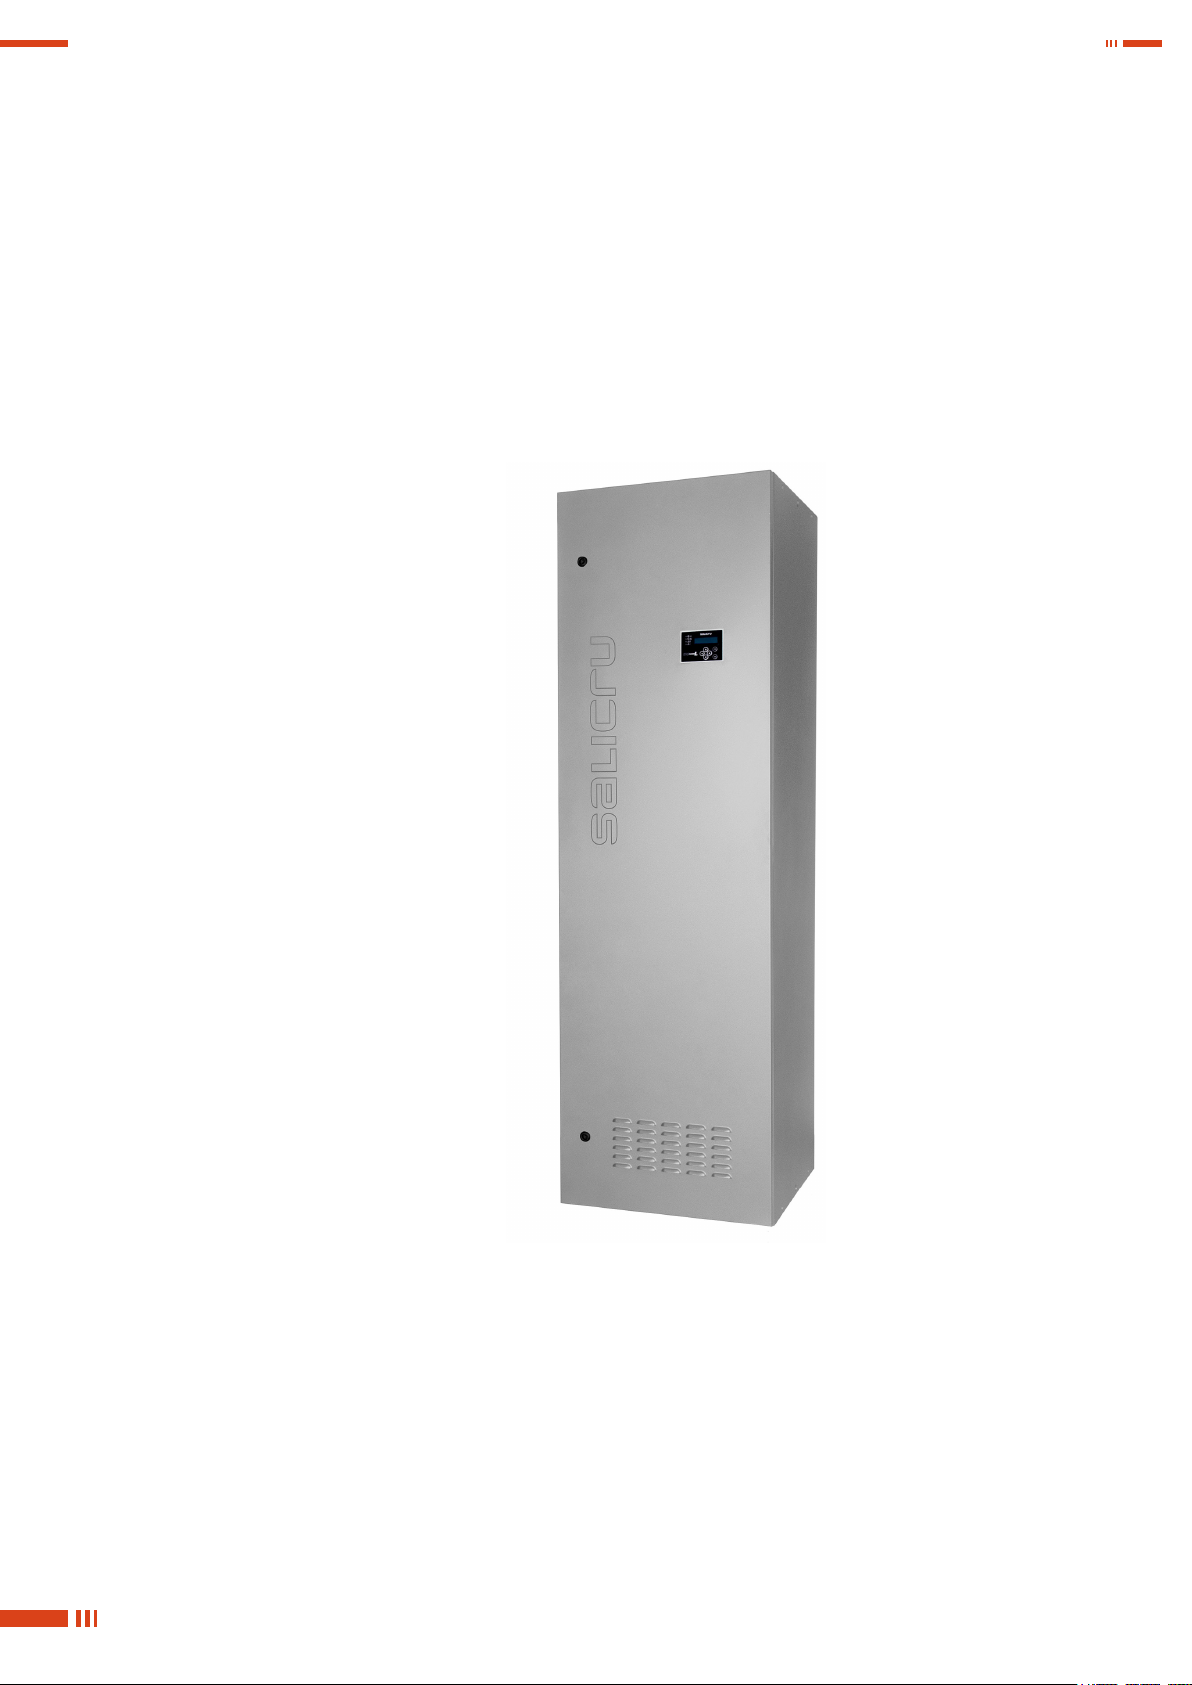
• The purpose of the DC Power-L 12-pulse DC-75-LP12
110V EE671774-1 documentation is to provide information
regarding safety and explanations of the procedures for in-
stallation and operation of the device.
The device’s generic documentation is supplied in digital
format on a pendrive and it includes, among other docu-
ments, the system’s user manual and that of other constit-
uent parts, such as the communications module.
• Supplied with this user manual and included in the same
documentation pendrive is the EK266*08 ‘Safety instruc-
tions’ document.
Before carrying out any action on the device relating to its
installation or startup, change of location, configuration or
handling of any kind, carefully read the safety instructions.
Compliance with the ‘Safety Instructions’ is man-
datory, with the user being legally responsible for
observing and applying them. Read them carefully and follow
the steps indicated in the order established.
• The device is delivered properly labelled for correct identifi-
cation of each of its parts, which, together with the instruc-
tions described in this user manual, allows installation and
startup operations to be performed in a simple and organised
manner without any doubts whatsoever.
Finally, once the device is installed and operating, it is recom-
mended to keep the documentation pendrive in a safe and
easy-to-access location for future reference.
• If a system differs from that shown in the figures in Chapter
4 due to implementing or excluding elements or parts and/or
amending the technical specifications, additional explanatory
annexes will be published if considered appropriate or nec-
essary. These will usually be printed on paper.
• The following terms are used interchangeably in the docu-
ment to refer to:
‘DC Power-L 12-pulse, device, charger-rectifier,
system, DC power system or unit’.- DC power supply
device.
Depending on the context of the term, it can interchange-
ably refer to the charger rectifier assembly itself or to the
device with batteries, regardless of whether they are all
contained in the same cabinet.
‘Batteries or accumulators’ - Bank or set of elements
that stores the flow of electrons by electrochemical
means.
‘T.S.S.’ - Technical Service and Support.
‘User or customer’ - These are used interchangeably
and by extension to refer to the installer and/or operator
who carries out the corresponding actions, with the same
person possibly being responsible for carrying out the re-
spective actions when acting on behalf, or in representa-
tion, of the above.
2.1.1. Conventions and symbols used.
Some symbols may be used and appear on the device, batteries
and/or in the context of the user manual.
For more information, see Section 1.1.1 of the ‘Safety Instruc-
tions’ document EK266*08.

6
3. Quality assurance and
standards.
3.1. Statement by the management.
Our goal is customer satisfaction, therefore this Management
has decided to establish a Quality and Environment Policy,
through the implementation of a Quality and Environmental Man-
agement System that will enable us to comply with the require-
ments demanded in the ISO 9001 and ISO 14001 and also by
our Customers and Stakeholders.
Likewise, the management of the company is committed to the
development and improvement of the Quality and Environmental
Management System, through:
• Communication to the entire company of the importance of
satisfying both the customer's requirements as well as legal
and regulatory requirements.
• The dissemination of the Quality and Environment Policy and
the setting of the Quality and Environment objectives.
• Conducting reviews by the Management.
• Providing the necessary resources.
3.2. Standards.
The DC Power-L 12-pulse DC-75-LP12 110V EE671774-1 is
designed, manufactured and sold in accordance with Quality
Management Systems standard EN ISO 9001 and is certified
by the company SGS. The marking indicates conformity with
EC Directives through the application of the following standards:
• IEC/ EN 61204 -7. - Low-voltage power supplies, d.c. output.
Part 7: Safety requirements.
Reference standard:
IEC/EN 60950-1. - Information technology equipment.
Safety. Part 1: General requirements.
• IEC/EN 61204-3. - Low-voltage power supply devices, d.c.
output.
Part 3: Electromagnetic compatibility.
The manufacturer is not liable in the event of modification
or intervention on the device by the user.
This is a Class A device. In residential, commercial or light
industry environments, it may cause radio interference.
This device is not intended to be installed in a residential, com-
mercial or light industry environment. In the event of connection
to the public electricity supply, the user may be required to take
all appropriate measures to reduce interference.
The product’s CE declaration of conformity is available to
the customer upon express request to our head office.
3.3. Environment.
This product has been designed to respect the environment and
manufactured in accordance with ISO14001.
Recycling of the device at the end of its useful life:
Our company undertakes to use the services of authorised and
regulatory companies to treat the set of products recovered at
the end of their useful life (contact your distributor).
Packaging:
To recycle the packaging, please comply with any legal require-
ments in force.
Batteries:
Batteries pose a serious danger to health and the environment.
The disposal of them shall be carried out in accordance with the
laws in force.
USER MANUAL

7
SALICRU
4. Presentation.
4.1. Views of the devices.
Table 1 shows the voltages and dimensions of the DC Power-L
12-pulse DC-75-LP12 110V EE671774-1model .
The illustrations of the Fig. 2 and Fig. 3 represent the constituent
parts and the dimensions of the cabinet of the model in question.
The illustrations show the external and internal physical arrange-
ment of the standardised cabinet and only the elements of use to
the user, such as the connection terminals and switchgear.
The size or format of the protections and terminals shown in the
figures will vary depending on the power and/or output voltage of
the device, but its physical arrangement in relation to the whole
cabinet will remain the same.
By default, the device is of the type that has floating output and its
protections are two-pole. For requested outputs referenced with
positive or negative to earth, the protection will always be single-
pole so as not to disconnect the pole from earth.
The entry of connection cables is through the base of the cab-
inet. Optionally and on request, cable entry can be through the
top cover, with a conduit for the cables down to the area of the
terminals. In both cases, the connection elements will always be
arranged in the lower part of the cabinet.
If any of the referenced components is not included on your unit,
disregard any description or action on it, and if the device fea-
tures parts not described in this manual, additional explanatory
annexes will be published if necessary. The device will however
be delivered with proper labelling, to which full attention will need
to be paid.
(e)
(a)
(b)
(c)
(d)
(i)
(k)
(h)
(j)
(f)
(g)
Fig. 1. View of the control panel.
Model
Voltage
Charger
current (A)
Cabinet
Input (Vac)
Output (Vdc)
Dimensions
Depth x Width x Height (mm) Total no.
Rectifier Batteries
DC-75-LP 12 110
EE671774 -1
3 x 230 / 3 x 400 (3P + N)
110 75 623 x 803 x 2056 1
Table 1. Standardised DC Power-L 12-pulse DC-75-LP12 110V
EE671774-1model.

8
LCD synoptic
panel
Protective
methacrylate
Lifting eyebolts
Locking
key
COLD START
button
Input circuit
breaker (Q1)
Output circuit
breaker (Q2)
Battery circuit
breaker (Q3)
Input terminals
R, S, T
Battery terminals
+, –
Output terminals
+, –
Cable input gland
Earth Terminal
Alarm interface
X32 (see Table 2)
Interface Aux. Contacts
X34 (refer to Table 3)
Port RS 485
Temperature probe
Fig. 2. Front view of the rectifier cabinet with closed and open
front door 623 x 803 x 2056 mm.
USER MANUAL

9
SALICRU
4.1.1. Dimensional drawings.
• Considerations to take into account:
The cabinet supplied is rack format with a 623 x 803 mm
base.
The dimensions of the rectifier and battery cabinets are
the same and the only external difference is the control
panel on the device.
The device can operate with PbCa or NiCd batteries, ei-
ther sealed or with maintenance.
Fig. 3. Cabinet dimensions 623 x 803 x 2056 mm

10
4.1.2. Nomenclature.
Rectifier.
2/DC-100-L 110-1/2x9AB147/213-3x220E COM EE553000
Battery cabinet
MOD BAT DC L 1/4x18AB147/073 25A EE553000
EE* Rectifier with particular specifications.
COM Potential-free contacts extended version.
E Optional electrolyte level detection.
3x220 Rated input voltage. Disregard for 3x400V.
/213 Last three digits of the code of the type 2 battery.
147 Last three digits of the code of the type 1 battery.
AB Letters of the battery family.
9 Number of batteries in a single branch.
2x Number of branches in parallel of the type 2 battery. Disre-
gard when there is only one battery branch of each type.
1/ Number of branches in parallel of the type 1 battery. Disre-
gard for one branch and only one type of battery.
110 Rated floating output voltage.
-110 Rated output voltage with positive to earth.
+110 Rated output voltage with negative to earth.
L Device series standard version (only single-phase devices
with <5% ripple and no Schuko socket).
LP Device series Premium version (with <1% ripple and
Schuko socket).
LP12 Device series Premium version with 12-pulse rectifier (with
<1% ripple and Schuko socket).
100 Total output current to float voltage.
DC Rectifier.
2 Number of rectifiers in parallel.
EE* Battery module with particular specifications.
25A Protection size.
/073 Last three digits of the code of the type 2 battery.
147 Last three digits of the code of the type 1 battery.
AB Letters of the battery family.
18 Number of batteries in a single branch.
4x Number of branches in parallel of the type 2 battery. Disre-
gard when there is only one battery branch of each type.
1/ Number of branches in parallel of the type 1 battery. Disre-
gard for 1 and only one type of battery.
L Device series.
DC Rectifier
USER MANUAL

11
SALICRU
5. Rectifier block diagram
and description.
5.1. Structural block diagram.
AC input
Input
filter
Input
transformer
Non-return
diode
Battery
Communications
Control /
Display
DC
output
AC / DC converter
(Rectifier)
Output
filter
LC filter
Battery protection
Rectifier
output prot.
Output
switch
Input prot.
switch
Fig. 4. Block diagram.
5.2. Description.
The DC Power-L 12-pulse family of rectifiers has been designed
to offer a variety of fully configurable output voltages ranging
from 24Vdc to 220Vdc and currents up to 800A.
The DC Power-L is a low-frequency full-wave thyristor-controlled
rectifier that converts AC input voltage into stabilised DC voltage.
The DC Power-L rectifier cabinet is built with all of the necessary
elements around the central core of the system.
5.2.1. General.
As thyristor-controlled rectification is a technology of great ro-
bustness and reliability, we have opted for a system with natural
cooling, thus reducing the need to replace components prone to
ageing such as fans and creating a system with superior reliability.
The main function of the system is to supply the output load and,
at the same time, keep the system’s backup battery charged and
in optimum condition so that it can supply power to the load in the
event of input mains failure or output overloads.
5.2.2. AC input.
For greater versatility, the system can be either single-phase or
three-phase.
Regardless of the topology of the mains, protection elements are
installed against voltage peaks that could come from the mains.
5.2.3. Input filter.
The system includes all necessary filters to ensure compliance
with the electromagnetic compatibility standards required for CE
marking. Being a thyristor-controlled rectification system that
generates high input mains distortion, it is possible to have a
device-integrated harmonic filter at the input to reduce reinjec-
tion to levels below 10%.
5.2.4. Transformer.
The system is equipped with a low-frequency input transformer
through which an isolated voltage is obtained. This voltage is
chosen according to the desired output voltage and is the one that
is rectified by the thyristors to obtain the stabilised direct voltage.
5.2.5. Jumper rectifier.
Formed by six thyristors in full-wave three-phase jumper struc-
ture in six-pulse devices or double in 12-pulse devices.
In single-phase devices the jumper consists of four elements. It is
a highly robust low-frequency rectification structure and the part
responsible for rectifying the output voltage to the desired value.
It is equipped with RC networks for protection against transients
and a temperature monitoring system for alarm and shutdown of
the system as self-protection for the device.

12
5.2.6. Battery.
The device will function as a stand-alone power source even
when the AC input mains fail, supplying voltage to the load con-
nected to the output of the device by means of its backup battery.
To keep the battery in an optimum state and ensure a maximum
life, the system monitors the current and voltage of the battery at
all times, as well as the temperature of the battery room in order
to enable the appropriate compensations to be made.
The system can charge all kinds of PbCa or NiCd batteries, ei-
ther sealed or with maintenance. Batteries with maintenance can
optionally include in their cells an electrolyte level detector to pro-
vide low level alarms.
The rectifier cabinet has battery fuses at both poles, which, in ad-
dition to providing the respective protection, facilitate connection
in systems with battery banks external to the device.
5. 2 .7. Output filter.
For output ripple reduction, an LC filter is incorporated to keep
the ripple voltage and current levels within the established limits
and ensure correct operation of the output loads and the ex-
pected life of the battery.
The system also includes all necessary filters to ensure compli-
ance with the electromagnetic compatibility standards required
for CE marking.
5.2.8. DC output.
The isolation offered by the transformer allows a floating output
with respect to the input, which enables earthing of either of the
two output terminals (poles).
5.2.9. Control/Display.
The vital constants of the source are controlled digitally through a
microprocessor which is also responsible for managing the set-
tings and measurements shown on the LCD display.
All rectifiers are identical in operation regardless of the format,
power and input/output voltage.
5.2.9.1. Control.
In normal operating mode, a PID is responsible for regulating the
desired output voltage.
By means of an automatic priority change system (override con-
trol), the control is transferred to another current PID when one of
the current limits is exceeded: batteries or rectifier.
A selective control enables automatic switching between the two
currents to ensure that neither of the two limits is ever exceeded.
5.2.10. Relay interface (X32).
All systems incorporate as standard a relay interface with four
relays (*), a battery temperature sensor for measuring and com-
pensating the float voltage in relation to it and an Ethernet/SNMP
adapter slot, plus three additional relays, an electrolyte level de-
tection input for NiCd batteries and ports RS-232 and RS-485 in
their extended COM version.
(*) The relay table corresponds to the extended COM ver-
sion (relays from 1 to 9).
The standard relays included on the control board are 10, 11, 12
and 13.
Relay nº. Description of relay programming
1Reserved
2 and 10
Groups the following alarms:
- Input failure
- RS and/or ST and/or TR input undervoltage
3 and 11
Groups the following alarms:
- Rectifier overload
- Battery overtemperature
- Battery current high
- Heat sink overtemperature
- Battery voltage low
- Battery overvoltage
- RS and/or ST and/or TR input overvoltage
- Output voltage low
- Output voltage high
- Electrolyte level low
4 and 12
Groups the following alarms:
- Isolation failure + (2)
- Isolation failure – (2)
5 and 13 Reserved
Table 2. Description of standard relay programming (X32).
Other configurations are available on request, but always in the
factory or later by TSS, and associating any of the system alarms
with one of the relays interchangeably and even associating
more than one alarm with the same relay.
5. 2.11. Interface auxiliary contacts (X34).
The system incorporates an interface of auxiliary contacts in
the Input (Q1), Output (Q2) and Batteries (Q3) protections, all of
them wired to terminals.
Terminal Alarm Contact
AInput circuit breaker (Q1) (position) NA
BInput circuit breaker (Q1) (trip) NA
CBattery circuit breaker (Q3) (position) NA
DBattery circuit breaker (Q3) (trip) NA
EOutput circuit breaker (Q2) (position) NA
FOutput circuit breaker (Q2) (trip) NA
Table 3. Description auxiliary contacts (X34).
USER MANUAL

13
SALICRU
5.2.11.1. Electronic unit for NIMBUS remote
maintenance (optional).
The NIMBUS electronic remote management unit enables real
time monitoring, analysis and technical support 24 hours a day,
7 days a week, by members of our staff, thus reducing the mean
time to repair (MTTR) in the event of any unexpected situation.
During monitoring, an events and alarms history is created to
enable a thorough analysis of the device, providing valuable in-
formation on operating tendencies and thus identifying potential
future problems. In addition, a detailed device status report is
sent to the customer every month.
5.2.12. Protection.
The device’s own control includes a current limitation system that
ensures that all components work in the correct mode, thus guar-
anteeing the expected life of the system.
With the input circuit breaker protection, protection against trans-
former overload is guaranteed, preventing overheating and pre-
mature ageing leading to system failures. In addition, the use of an
input circuit breaker enables the user to reset the system, avoiding
technical service interventions for fuse changes that would involve
an unacceptable shutdown period for the application.
The semiconductor temperature control and overtemperature
shutdown system provides added protection by reducing the need
for device interventions in the event of abnormal operation, since
it protects the most important part of the system, preventing failure
and saving on possible expensive repairs.
For the protection of personnel, it also has isolation failure detec-
tion, which provides an alarm if a potentially dangerous situation
arises.
In addition to the protection of batteries by means of fuses in-
dicated above, there is an output fuse in the rectifier assembly
where it joins the accumulator bank and load output.
5.3. Management of batteries and
charging levels.
The charger is fully automatic, capable of operating autono-
mously.
It is designed in such a way that the different output voltage
levels according to the current/voltage characteristic are stabi-
lised at 1% of their rated value for an operating range of 0% to
100% of the rated load in the event of input wave voltage and
frequency variations.
The charger’s output voltage ripple factor does not exceed 1%
defined as the ratio between the peak-to-peak value and the
RMS value of the wave, with the battery connected to its output
or 3% without it for an operating range of 0 to 100% of the rated
load in the event of input wave voltage and frequency variations.
The output current of each charger is equal to the current de-
manded by 100% of the loads plus the maximum charging cur-
rent of the battery according to the current/voltage characteristic
corresponding to fast charging, so that the battery can recover
100% of the capacity transferred during the specified discharge
cycle in a maximum period of 12 hours, with the charger simulta-
neously powering 100% of the loads.
5.3.1. Charging levels.
The device is designed to work at three charging levels and
therefore at three voltage levels:
5.3.1.1. Float
The charger maintains its corresponding stabilised voltage by
means of which it powers the assigned loads and supplies the
current for preserving the battery charge according to the cur-
rent/voltage characteristic.
Under normal conditions, the charger will be in float mode, sup-
plying the battery with a maintenance current, the small current
that is provided to the battery to keep it charged and prevent self-
discharge.
When a mains failure occurs, the battery will discharge according
to the requested consumption.
5.3.1.2. Fast charging.
In this position, the charger provides the permanent load and
battery charging according to the current/voltage characteristic,
keeping its voltage stabilised. When mains power returns, the
rectifier will automatically switch to fast charging mode, supplying
the current requested plus a limited and constant current (equal
to the capacity, in Ah/5) for restoring the charge of the battery.
Once the maximum operating voltage level has been reached,
the battery will gradually absorb less current.
Once the battery recharges, the device will automatically go to
float mode.
The duration of the fast charge will be proportional to the dis-
charged Ah.
This kind of charging can be started automatically or manually
via the control panel.
5.3.1.3. Exceptional charging.
In this position, the charger will switch to exceptional manual
charging of the battery, which has the purpose of homogenising
and regenerating the active substances in the battery electrolyte.
Exceptional charging will only be carried out by manual forcing
via the control panel and with the device out of service if it is con-
sidered harmful for the loads connected to the rectifier output.
The timing of the charging process (24 h) must be set at the start,
so that it will end automatically. Once exceptional charging is fin-
ished, the charger will switch automatically to float mode.
In the event of manual interruption of exceptional charging, the
charger will automatically switch to fast charging mode until the
batteries are fully charged and then float charging.

14
5.3.2. Charging type priorities.
Table 3 below shows the established charging type priorities:
Type Priority Comment
Float Low Less priority than fast
and exceptional charging
Fast
charging Medium Less priority than
exceptional charging
Exceptional
charging High Maximum priority
Table 4. Charging type priorities.
5.3.2.1. Activation and deactivation of charging
types.
Fast charging.
Automatic Manual Periodic
Activation
AC failure and
battery charge
lower than 100%
Via control
panel Yes*
Deactivation
AC OK and
battery charge at
100%
or
AC OK and
charging time
greater than the
time determined
as maximum fast
charging
Via control
panel
AC OK and
battery charge
at 100% and
charging time
greater than the
minimum fast
charging time
or
AC OK and
charging time
greater than the
time determined
as maximum fast
charging
Considerations
*Each automatic
deactivation
automatically
recalculates the
next periodic trip
Table 5. Activation and deactivation of fast charging.
Exceptional charging.
Automatic Manual Periodic
Activation No
Via control
panel and
open output
switch (5)
No
Deactivation
Charging
time exceeds
maximum set
Via control
panel No
(5) The output switch must have an auxiliary contact block (optional), so that it
can inform the control panel of the switch’s opening operation (Off).
Table 6. Activation and deactivation of exceptional charging.
Considerations
The battery is considered to be charged when there is a lack of
mains voltage and it is capable of giving a complete cycle and, at
the end of it, the operating voltage is not lower than the minimum
admissible voltage.
To avoid premature ageing of the battery due to long periods of
float charging without discharging, fast charging can be activated
manually via the control panel (with timed stopping) and periodi-
cally (with timed activation) to restore the full charge of the battery.
USER MANUAL

15
SALICRU
6. Device reception.
6.1. Reception and unpacking.
• On reception of the device, check that it has not been dam-
aged during transportation. If it has been damaged, notify
your supplier or, in their absence, our company. Also check
that the information on the label affixed to the packaging
matches that specified on the order. If it does not, report the
issue as soon as possible, quoting the device’s manufac-
turing number and any delivery note references.
• After reception, if it is not put into service immediately, it is ad-
visable to keep the device in its original packaging to protect
it from impacts, dust, dirt, etc.
• The packaging of the device consists of a wooden pallet (if re-
quested in the order), cardboard box, expanded polystyrene
(EPS) corners, polyethylene cover and polyester strapping.
All of these materials are recyclable, so any disposal must be
carried out in accordance with current laws. We recommend
keeping the packaging for possible future use.
Fig. 5. Unpacking process.
• To unpack the device, follow the steps in Figure 11.
Cut all of the polyester straps «» and remove the cor-
ners «».
Remove the lid «».
Remove the four corners «».
Remove the cardboard box «». To do so, lift it upwards
and remove it completely.
The device will be standing on the pallet wrapped in its
plastic cover «». Remove it by pulling it from above.
In general, cabinet systems are supplied without a pallet,
unless expressly requested in the order, since the base
is designed, among other functions, to enable the entry
of a pallet jack or forklift and facilitate transportation to
the site.

16
For devices ordered with a pallet and/or eyebolts, both only
on request, proceed as follows:
Lift the device using the eyebolts ‘’ (CM)with the me-
chanical means available, taking into account the weight
of the model indicated in the table below and without the
batteries, since these are not supplied pre-installed in-
side the system.
Remove the wooden pallet ().
Before device and/or cabinet or battery cabinet installa-
tion in the final location, check that the floor is adequate
to support the weight.
If as a result of special backups or other specifications,
the weight of the battery cabinet is not shown in the table,
use as a reference the weight indicated on the packag-
ing’s packing list.
For batteries supplied on more than one pallet, add up all
of their weights.
For systems with rechargeable PbCa or NiCd accumu-
lators in which the battery trays are removable, fix it to
the floor using the holes located in the base (BZ) before
installing the batteries.
• Together with the rectifier documentation, 4 trim screws are
supplied to replace the eyebolts (CM) in the cabinet systems
(only if optional eyebolts were ordered). Once the device is
installed or secured to the base or floor, they can be replaced.
6.2. Packing list and contents.
• The number of cabinets varies depending on the device
model, with each one of them having an individual package.
In addition, it is necessary to consider that the batteries are
supplied packed on one or more pallets, depending on their
weights.
Check that the number of packages matches those indicated
in the packing list documentation.
6.3. Storage.
• The device should be stored in a dry, ventilated room and pro-
tected from rain, dust, and water or chemical splashes. It is
advisable to keep devices and batteries in their original pack-
aging, as it has been specifically designed to ensure maximum
protection during transportation and storage.
• The batteries are supplied packed on one or more pal-
lets depending on the model, separated from the DC
Power-L cabinet and/or battery cabinet itself.
Always take note of the diagram provided regarding every-
thing related to the polarity, position, orientation and connec-
tion of each battery and between batteries, as well as between
the accumulator bank and the system itself when they share
a cabinet.
• Regardless of the type of accumulators used in a device, the
design life of the batteries is regulated by the official Euro-
pean body EUROBAT, taking into account, among other char-
acteristics or conditions, temperature, float voltage, number of
charging and discharging cycles, depth of discharge, etc.
Because temperature is a very influential factor in the life ex-
pectancy of batteries, this body recommends that a storage
and operation temperature of 20ºC should not be exceeded
as far as possible, since the degradation will be significantly
higher
• Before using a device with batteries in which the backup is
determined by accumulators, for the first time or after a long
period of time without use (maximum 6 months), it is neces-
sary to connect it to the power supply and leave the batteries
charging for at least 12 hours.
Although the unit can operate without charging them, consider
the risk of a prolonged power cut during the first hours of oper-
ation and the backup time or backup available for the device’s
batteries, which can be reduced.
USER MANUAL

17
SALICRU
7. Installation.
• Supplied with this user manual and included in the same
documentation pendrive is the EK266*08 ‘Safety instruc-
tions’ document.
Before carrying out any action on the device relating to its
installation or startup, change of location, configuration or
handling of any kind, carefully read the safety instructions.
Compliance with the ‘Safety Instructions’ is man-
datory, with the user being legally responsible for
observing and applying them. Read them carefully and follow
the steps indicated in the order established.
• Before installing or commissioning the system, check that all
of the information related to the device is available and close
at hand, otherwise request it.
The user manual and all related information is a guide that
should be kept for reference in case of future queries.
• If you do not fully understand the instructions, es-
pecially those concerning safety, you should not
continue with installation or startup tasks, as this would rep-
resent a risk to your safety and that of others, resulting in
possible serious injury or even death, in addition to
damage to the device and/or loads and installation.
• Local electrical regulations and different restrictions in
the customer’s location may invalidate some recom-
mendations contained in the manuals. Where discrepancies
exist, the relevant local regulations must be complied with.
• Check that the information on the nameplate affixed to the in-
side of the device’s front door is that required for installation.
• The system is supplied in a completely closed cabinet, with
a front door equipped with two locks with ratchet of the type
with 8 mm triangular key. Other lock models can also be sup-
plied, such as key lock with doorknob for quick opening, slot
for flat screwdriver or retractable handle with a ratchet lock or
cams with or without key lock.
Cabinet front
Cabinet with base 623 x 803.
Fig. 6. Machined base of the cabinet.
Fixed to the front door is the control panel, visible and acces-
sible from outside as an interface with the user. To perform
any installation, startup or maintenance operation, open it by
unlocking the two locks.
• Finally, it is obligatory to leave the cover or covers of
the cabinet(s) in position and the front door closed
after any connection and/or startup operations.
• The surface on which the system is to be installed
must be properly prepared to support its weight and
level to prevent the metal structure from having to withstand
unnecessary and harmful mechanical torsion.
Any warping or buckling can represent a serious problem
and hazard depending on the degree, especially for rectifier
cabinets with batteries installed inside or accumulator cabi-
nets themselves, since the greater the weight that the struc-
ture has to withstand, the more it will suffer.
Any inclination of the cabinet with respect to the floor and/
or between the covers and ceiling can be seen optically, this
being the lesser evil in comparison to damage caused to the
structure.
• It is necessary to fix the cabinet or cabinets to a solid and
secure surface (floor), when the battery trays are removable:
It has been found that there is a risk of overturning the
cabinet when removing drawers containing batteries,
with potential serious injury to the operator. Consequently, it is
imperative to affix clearly visible signs to warn of the need
to firmly secure the cabinet to the floor with elements that
ensure total and permanent sturdiness, and to do so be-
fore starting the process of installing the batteries.
Proceed as follows:
Carry out the necessary work to ensure a solid and level
surface, with fixing points consisting of M12.5 threaded
studs with a thread length of approx. 3 cm.
Fig. 6 shows the machining of the base of the cabinets of
623 x 803 mm, seen from below.
Place the device and/or battery cabinet on the floor or
machined surface.
Fix the base of the cabinet to the floor through the ø
12.5mm anchor points provided using M12.5 nuts and
washers.
Repeat the task for each cabinet if there are more than
one unit.
• Even if the actions indicated in the previous point have
been carried out correctly, never remove more than
one tray with batteries, as there is a high risk of mechan-
ical torsion of the frame itself.
7.1. Look after your safety.
• All electrical connections and disconnections of device ca-
bles, including control cables, must be carried out without the
presence of mains power and with the switches and protec-
tions always in standby, position ‘O’ or ‘Off.’
• Before physically installing the accumulators, check that the
protections or disconnectors of the system are in the ‘Off’ po-
sition, especially that of the batteries of the device (Q3) and
its counterpart (Q8) in the battery cabinet, when there is an
external accumulator bank.

18
When the protection consists of fuses, these are supplied
already inserted into the fuse holder base, as the batteries
themselves are not delivered already installed in the cabinet.
This way, any loss or mislaying is avoided.
• The batteries are always supplied in packaging separate to
the device cabinet or accumulator cabinet or cabinets. Con-
sequently, it will be necessary to install and connect them
according to the connection diagram supplied with the docu-
mentation, using the accessories provided, such as strips,
cables and screws.
Start the process by placing the batteries in the lower tray to
secure the cabinet, ensuring that the centre of gravity is as
low as possible, and work your way up as the trays are filled.
• In systems with removable trays, it is advisable to insert
them as they fill up, thus avoiding unnecessary mechanical
stresses on the frame itself, which can lead to structural tor-
sion.
To remove each battery tray, it is necessary to remove
the two screws that fix it like a mechanical lock located
on either side of the front.
Wait until the end to connect the end cables be-
tween levels, otherwise there is a risk of electric
shock.
Fill up the trays with the accumulators one by one, inter-
connect the batteries between them and insert each tray
as individual tasks are completed on each of them.
Fit the two screws which act as a lock and tighten them.
Then connect the batteries between levels, observing
the safety instructions indicated in this document and in
EK266*08.
• Dangerous voltages stored in batteries: Precau-
tions must be taken with the batteries once intercon-
nected, as there may be dangerous voltage between the
terminals of different batteries or between one of them and
the earth, depending on the total voltage of the bank, in-
cluding when the device is disconnected.
• In systems with 0/ or 0A/ backup, the acquisition, installation
and connection of batteries will always be carried out under
the responsibility of the customer. Information concerning
the batteries in terms of number, capacity and voltage is indi-
cated on the battery label affixed next to the device’s name-
plate. Strictly observe this information, the connection
polarity of the batteries and the connection diagram supplied
with the documentation and the DC Power-L.
• Any handling and connection of the batteries should
only be carried out or supervised by suitably quali-
fied personnel.
Before carrying out any action, disconnect the batteries.
Check that no current is present and that there is no dan-
gerous voltage at the ends of the terminals of the battery
bank.
The battery circuit is isolated from the input voltage of devices
with floating output voltage, but not from devices with output
voltage referenced to earth. Dangerous voltages can occur
between the terminals of the battery bank and the earth.
Check that the system does not have input voltage before
working on the batteries, otherwise the rectifier will supply
DC voltage to the cables connected to the accumulator bank,
with the resultant risk.
• It should never be forgotten that the DC Power-L with
batteries is a generator of electrical power, regardless
of whether the batteries are installed in the same cabinet or in
the device itself, so the user must take all necessary precau-
tions against direct or indirect contact.
If the batteries are connected to the device and its protec-
tions are set to ‘On,’ it is irrelevant whether or not the DC
Power-L is connected to the power supply, as is the state or
position (On or Off) of its protection.
The output terminals will supply voltage while the battery
bank has power, unless the output disconnector switch (Q2)
is ‘Off’ or, if there is output distribution, the general protection
of the output distribution or each of the individual output dis-
tribution protections is set to ‘Off.’
• Dangerous voltages stored in capacitors:Precau-
tions must be taken as charged capacitors with dan-
gerous voltages may be installed between the connection
terminals or between one of them and earth, even when the
device is switched off. Wait 30 seconds or more to allow
these to discharge.
7.2 . Considerations to take into
account.
• The location should be spacious, airy and easily accessible.
The slots of the ventilation should never be obstructed, nor
should the device be installed outdoors.
• The cross sections of the input, output and earth cables must
be in accordance with the rated current indicated on the
nameplate, and compliance with the country’s regulations
and legislation is an essential requirement.
• A bad connection or operation can cause faults in the device
and/or the loads connected to it. Read the instructions in this
manual carefully and follow the steps indicated in the order
established.
• The base of the cabinet features a number of wall bushings
(cable glands, Fig. 2), to isolate the routing of the connection
cables through the metal sheet of the cabinet.
Cut them to the appropriate section to enable the respec-
tive input, output and battery cables to pass through them in
models with the accumulators in a separate cabinet.
Upon request, some cabinets can have a slot to serve as a
conduit for cable entry, instead of the wall bushings.
• All of the cables will be fixed to the bar by clips in order to im-
mobilise them and prevent possible pulling that could lead to
false contacts, cable disconnection, etc., and consequently,
to failures of the device and/or possible accidents due to
electric shock.
7.3. Earth connection, terminal or
strip .
• It is advisable, and so required by the regulations or legisla-
tion of the country, to connect the device to earth.
Make sure that all of the device’s loads are only connected
to earth in the form of a terminal or strip. Failure to limit the
earthing of the loads to this single point would create earth
return loops and degrade the quality of the power supplied.
All terminals identified as an earth connection ( ) are linked
together and to the earth of the cabinet.
• For models with batteries in a separate cabinet, connect
the terminal or strip of the earth of the rectifier, to the earth
bonding terminal( ) of the accumulator cabinet, using the
cable provided in the battery connections hose.
USER MANUAL

19
SALICRU
• The DC Power-L can be supplied from the factory with con-
nection of positive to earth, negative to earth or float. On the
nameplate and terminal labelling, the type of connection is
identified by means of symbols ‘+’ or ‘–’ placed before the
value of the output voltage and the symbol for live pole is
indicated.
It is very important to ensure that the loads to be connected
to the device have the same type of connection as this one,
otherwise it would pose a risk to personnel and destroy the
system and associated devices.
By default and if not indicated otherwise, all devices have
floating output voltage.
• It is recommended to use shielded cables for com-
munications, as well as the earth connection of the
screen through the terminal or strip.
7.4. Connection of the system to the
cabinet or battery bank.
• This operation is only intended for the connection between
the battery terminals of a system and the respective ones
of the cabinet or cabinets, or battery bank, regardless of
whether the batteries are owned by the customer or supplied
with the device.
All of the instructions concerning the physical installation of
each of the elements inside the system or battery cabinet are
described in Section 7.1.
• All of the protections or disconnectors of the system must be
in the ‘Off’ position and, in particular, that of the the batteries
of the device (Q3) and its counterpart (Q8) in the accumulator
cabinet, when it has an external battery bank.
Since the fuses of the disconnectors are supplied al-
ready installed to prevent them from being lost or mis-
laid, it is important to check that the disconnectors are open
(Off).
• Connect the cable hose, usually supplied, between termi-
nals of the system and those of the battery cabinet or bank,
respecting the colour of the cables (red for (+), black for (–)
and green-yellow for the earth bonding ( )) as well as the
polarity indicated on the label of the device (see Fig. 7).
• In systems with more than one battery cabinet/bank,
the connection in parallel between them and the
system will be taken into account according to each particular
case. The battery connection diagram supplied with the doc-
umentation will always take precedence.
Battery terminals in
accumulator cabinet.
Battery terminals in
rectifier cabinet.
Fig. 7. Connection of the system to a battery cabinet.
• Do not start the system without having previously con-
nected the batteries to the device.
7.5. Connection to the main single-
phase or three-phase AC power
supply network.
• All of the protections or disconnectors of the system must be
in the ‘Off’ position and, in particular, that of the the batteries
of the device (Q3) and its counterpart (Q8) in the accumulator
cabinet, when it has an external battery bank.
Since the fuses of the disconnectors are supplied al-
ready installed to prevent them from being lost or mis-
laid, it is important to check that the disconnectors are open
(Off).
• The earth connection ( )of the device must be con-
nected to the terminal or strip, making sure that this is
done before connecting the voltage to the input of the device.
• Connect the power supply cables to the terminals indicated
for single-phase devices F, N or for three-phase systems R,
S, T, N, respecting the order of the phase or phases and the
neutral indicated on the labelling of the DC Power-L.
If the phase order is not respected, the three-
phase device will not work.
7.6. Connection of the loads to DC
output terminals.
• The earth connection ( ) of the device must be connected
to the terminal or strip intended for that purpose, making sure
that this is done before connecting the voltage to the input of
the device.
• The DC Power-L can be supplied from the factory with posi-
tive or negative connection referenced to earth, or float. On
the nameplate and terminal labelling, the type of connection
is identified by means of symbols ‘+’ or ‘–’ placed before the
value of the output voltage and the symbol for live pole is
indicated.
By default and if not indicated otherwise, all de-
vices are dispatched from the factory with floating
output voltage.
It is very important to ensure that the loads to be con-
nected to the device have the same type of connec-
tion as this one, otherwise it would pose a risk to personnel
and destroy the system and associated devices.
• The type of output protection is predetermined and estab-
lished as follows:
For floating output, two-pole protection.
For output with positive referenced to earth, single-pole
protection in negative pole.
For output with negative referenced to earth, single-pole
protection in positive pole.
The type of output protection is also applicable to the battery
switch or protection and to any DC distribution protection.
• All of the protections or disconnectors of the system must be
in the ‘Off’ position and, in particular, that of the batteries of
the device (Q3) and its counterpart (Q8) in the accumulator
cabinet, when it has an external battery bank.
Since the fuses of the disconnectors are supplied al-
ready installed to prevent them from being lost or mis-
laid, it is important to check that the disconnectors are open
(Off).

20
7.6.1. Floating output.
• Connect the loads or busbar to the output terminals, re-
specting the colour of the cables (red for positive and black
for negative) and the polarity indicated on the labelling of the
device.
• Connect the load or loads to the earth terminal or strip.
• It is recommended to distribute the output on different lines
and each with protection elements (disconnectors with fuses
or circuit breakers), to be installed by the customer and of
two-pole type.
7.6. 2. Output with positive connected to
earth.
• Connect the loads or busbar to the output terminals, respecting
the colour of the cables (red for positive and black for negative)
and the polarity indicated on the labelling of the device.
• Connect the load or loads to the earth terminal or strip.
• It is recommended to distribute the output on different lines
and each with protection elements (disconnectors with fuses
or circuit breakers), to be installed by the customer and of
single pole in the negative pole type.
7.6. 3. Output with negative connected to
earth.
• Connect the loads or busbar to the output terminals, re-
specting the colour of the cables (red for positive and black
for negative) and the polarity indicated on the labelling of the
device.
• Connect the load or loads to the earth terminal or strip.
• It is recommended to distribute the output on different lines
and each with protection elements (disconnectors with fuses
or circuit breakers), to be installed by the customer and of
single pole in the positive pole type.
7.7. Connection auxiliary contacts (X34).
• When the ‘Circuit breaker trigger or opening alarm is required
for Input (Q1), Output (Q2) and Batteries (Q3)’, it will be nec-
essary to incorporate an auxiliary contacts block (X34) (see
Fig. 2 and Table 3) into the corresponding protection to report
the alarm to the communications module and this in turn to
the control panel with LCD display.
This alarm can be grouped with others already available or
associated with a specific relay.
• In cabinets shared by rectifier and batteries, it will not be nec-
essary to make any implicit connection, since it is internally
connected at the factory.
However, in external battery cabinets where the ‘Battery fuse
trip or opening’ alarm (Q8) is required, it will be necessary to
take the normally closed (NC) contact of this protection to the
rectifier cabinet so that the control panel can inform promptly
and/or send the alarm through the relay interface.
USER MANUAL
Other manuals for DC POWER-L Series
1
This manual suits for next models
1
Other Salicru Power Supply manuals

Salicru
Salicru SLC ADAPT X Series User manual

Salicru
Salicru SPS 16 ATS User manual

Salicru
Salicru DC POWER-L DC-75-L 12P 110V EE671774-1 User manual

Salicru
Salicru ILUEST NE Series Operation instructions

Salicru
Salicru DC POWER-S DC-36-S User manual

Salicru
Salicru SPS One Series User manual

Salicru
Salicru SPS.400.HOME User manual

Salicru
Salicru DC POWER-L Series User manual