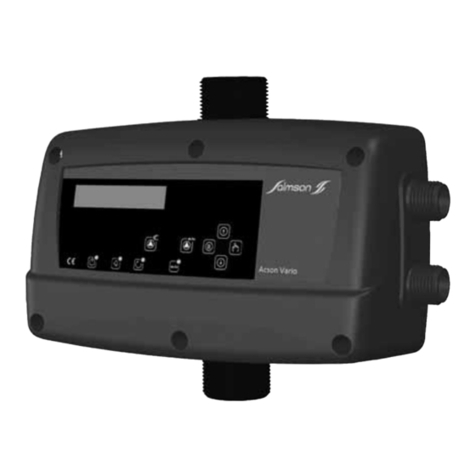
salmson ACSON How to use

ACSON
INSTALLATION ET MISE EN SERVICE
DU DISPOSITIF D’AUTOMATISME ACSON
INSTALLATION AND STARTING INSTRUCTIONS
FOR ACSON AUTOMATIC CONTROL DEVICE
FRANCAIS
ENGLISH
N.M.S.
STOCK N° 4.048.462/Ed.3/08.00

22
DÉCLARATION ”CE” DE CONFORMITÉ
AUX DIRECTIVES ”BASSE TENSION”
& ”COMPATIBILITÉ ÉLECTROMAGNÉTIQUE”
POMPES SALMSON déclare que les matériels désignés dans la présente
notice sont conformes aux dispositions des directives ”BASSE TENSION”
modifiée (Directive 73/23/CEE) et ”COMPATIBILITÉ ÉLECTROMAGNÉTIQUE”
modifiée (Directive 89/336/CEE) et aux législations nationales les transposant.
Ils sont également conformes aux dispositions du projet et des normes euro-
péennes harmonisées suivantes :
EN 60730-2-6 / EN 50.081-1 & 2 / EN 50.082-1 & 2.
FRANCAIS
EC DECLARATION OF COMPLIANCE WITH
THE "LOW VOLTAGE" & "ELECTROMAGNETIC
COMPATIBILITY" DIRECTIVES
POMPES SALMSON declares that the equipment described in this manual
complies with the provisions of the modified ”LOW VOLTAGE” directive
(Directive 73/23/EEC) and with the modified "ELECTROMAGNETIC COMPATI-
BILITY" directive (Directive 89/336/EEC) and with national enabling legislation
based upon them. It also complies with the provisions of the following European
standards and draft standards:
EN 60730-2-6
/ EN 50.081-1 & 2 / EN 50.082-1 & 2.
ENGLISH
DICHIARAZIONE DI CONFORMITA' "CE"
ALLA DIRETTIVA "BASSA TENSIONE"
& "COMPATIBILITA' ELETTROMAGNETICA"
La ditta POMPES SALMSON dichiara che i materiali descritti nel presente
manuale rispondono alle disposizioni delle direttive "BASSA TENSIONE" modi-
ficate (Direttiva 73/23/CEE) e "COMPATIBILITA' ELETTROMAGNETICA" modi-
ficata (Direttiva 89/336/CEE) nonché alle legislazioni nazionali che le transpon-
gono. Sono pure conformi alle disposizioni del seguente progetto e delle seguen-
ti norme europee armonizzate:
EN 60730-2-6
/ EN 50.081-1 & 2 / EN 50.082-1 & 2.
ITALIANO
DECLARACIÓN "C.E." DE CONFORMIDAD CON
LAS DIRECTIVAS "BAJA TENSION" Y
"COMPATIBILIDAD ELECTROMAGNÉTICA"
POMPES SALMSON declara que los materiales citados en el presente folleto
están conformes con las disposiciones de la directiva "BAJA TENSION" modifi-
cada (Directiva 73/23/CEE) y "COMPATIBILIDAD ELECTROMAGNÉTICA"
modificada (Directiva 89/336/CEE) y a las legislaciones nacionales que les son
aplicables. También están conformes con las disposiciones del proyecto y de
las siguientes normas europeas armonizadas:
EN 60730-2-6 / EN 50.081-1 y 2 / EN 50.082-1 y 2.
ESPAÑOL
DECLARAÇÃO "C.E." DE CONFORMIDADE
COM AS DIRECTIVAS "BAIXA TENSÃO"
E COMPATIBILIDADE ELECTROMAGNÉTICA
POMPES SALMSON declara que os materiais designados no presente catálogo
obedecem às disposições da directiva "BAIXA TENS
Ã
O", modificada (Directiva
73/23/CEE) e "COMPATIBILIDADE ELECTROMAGNÉTICA" (Directiva
89/336/CEE) e às legislações nacionais que as transcrevem. Obedecem
igualmente às disposições do projecto e das normas europeias harmonizadas
seguintes:
EN 60730-2-6 / EN 50.081-1 e 2 / EN 50.082-1 e 2.
PORTUGUÊS
EG-ERKLÄRUNG ZUR KONFORMITÄT MIT DER
RICHTLINIE ”NIEDERSPANNUNG” und
”ELEKTROMAGNETISCHE VERTRÄGLICHKEIT”
Die Firma POMPES SALMSON erklärt, daß die in diesem vorliegenden bezeichneten
Ausrüstungen die Bestimmungen der abgeänderten Richtlinie "NIEDERSPANNUNG"
(EG-Richtlinie 73/23) sowie die Bestimmungen der abgeänderten Richtlinie
"ELEKTROMAGNETISCHE VERTRÄGLICHKEIT" (EG-Richtlinie 89/336) sowie die
nationalen Vorschriften, in denen diese Richtlinien umgesetzt werden, einhalten. Sie
stimmen ferner mit den Bestimmungen des folgenden Entwurfs und der folgenden
vereinheitlichten europäischen Normen überein:
EN 60730-2-6 / EN 50.081-1 & 2 / EN 50.082-1 & 2.
DEUTSCH
ERKLÆRING OM OVERENSSTEMMELSE MED EF’s
“LAVSPÆNDINGSDIREKTIV” og
“ELEKTROMAGNETISK KOMPATIBILITETSDIREKTIV”
POMPES SALMSON erklærer, at udstyret, der beskrives i dette brugsanvisning,
er i overensstemmelse med bestemmelserne i det ændrede “
LAVSPÆNDING-
SDIREKTIV
”(Direktiv 73/23/EØF) og det ændrede “ELEKTROMAGNETISK
KOMPATIBILITETSDIREKTIV” (Direktiv 89/336/EØF) samt de nationale
lovgivninger, der indfØrer dem. Det er ligeledes i overensstemmelse med
bestemmelserne i fØlgende forslag og harmoniserede europæiske standarder:
EN 60730-2-6 / EN 50.081-1 & 2 / EN 50.082-1 & 2.
DANKS
"EG" VERKLARING VAN CONFORMITEIT
MET DE RICHTLIJN "LAAGSPANNING" EN
"ELEKTROMAGNETISCHE COMPATIBILITEIT"
POMPES SALMSON verklaart dat het in deze document vermelde materieel
voldoet aan de bepalingen van de gewijzigde richtlijnen "LAAGSPANNING"
(Richtlijn 73/23/EEG) en "ELEKTROMAGNETISCHE COMPATIBILITEIT"
(Richtlijn 89/336/EEG) evenals aan de nationale wetgevingen waarin deze
bepalingen zijn overgenomen. Het materieel voldoet eveneens aan de
bepalingen van de ontwerp-norm en de Europese normen:
EN 60730-2-6 / EN 50.081-1 & 2 / EN 50.082-1 & 2.
NEDERLANDS
¢∏§ø™∏ ¶I™∆√∆∏∆∞™ ”EK” ¶ƒ√™ ∆∏¡
O¢∏°I∞ ™ÃE∆πCA ME TI™ ”XAMH§H TA™H”
& ”∆∏¡ ∏§EKTPOMA°NHTIKH ™YMBATOTHTA”
H POMPES SALMSON ‰ËÁÒvÂÈ fiÙÈ ÔÈ ÂÍÔÁÈÛÌÔ› Ô˘ ·Ó·Ê¤ÚÔÓÙ·È fiÙÔÓ
·ÚfiÓ٠ηٿÁÔÁÔ Â›Ó·È Û‡ÌʈÓÔÈ Ì ÙȘ ‰È·Ù¿ÍÂȘ Ù˘ ÙÚÔÔÈË̤Ó˘ Ô‰ËÁ›·˜
Û¯ÂÙÈο ÌÂÙȘ ”XAMH§H TA™H”
(
O‰ËÁ›· 89/392/EOK) Î·È Ù˘ ÙÚÔÔÔÈË̤Ó˘
Ô‰ËÁ›·˜ Û¯ÂÙÈο Ì ÙËÓ ”∆∏¡ ∏§EKTPOMA°NHTIKH ™YMBATOTHTA”
(
O‰ËÁ›· 89/336/EOK) ηıÒ˜ Î·È Ì ÙȘ ÂıÓÈΤ˜ ÓÔÌÔıÂۛ˜ Ô˘ ÂÍ·ÛÊ·Á›˙Ô‡Ó
ÙËÓ ÚÔÛ·ÚÌÔÁ‹ ÙÔ˘˜. ∂›Ó·È ›Û˘ Û‡ÌʈÓÔÈ Ì ÙȘ ‰È·Ù¿ÍÂȘ ÙÔ˘ ۯ‰›Ô˘ ηÈ
ÙˆÓ ·ÎfiÁÔ˘ıˆÓ ÂÓ·ÚÌÔÓÈÛÌ¤ÓˆÓ Â˘Úˆ·˚ÎÒÓ ÚÔÙ‡ˆÓ :
EN 60730-2-6 / EN 50.081-1 & 2 / EN 50.082-1 & 2.
∂§§∏¡π∫A
QUALITY MANAGEMENT
Robert DODANE

1x220-240 V
;;;
;;;
;;;
HC
HR
1x220-240 V
ou/or
0
1
;;
;;
;;
;;
;
;
;
;
;
;
;;
3
6
3
2
12
1
13
5
FIG. 1
220-240 V
50 - 60 Hz
L1
N
U
M
1
V
481011 9
FIG. 3
FIG. 2
220-240 V
50 - 60 Hz
U-V : 220/240 V
50 / 60 Hz
10A MAX.
3-380/400 V
50 - 60 Hz
L1
L1 L2 L3 N
N
U
M
V
FIG. 4
7
FIG. 5

4
1. GÉNÉRALITÉS
1.1 Applications
L’automatisme Acson est conçu pour automatiser et protéger contre
le manque d’eau, les pompes de surface et les pompes immergées,
il commande la mise en marche et l’arrêt automatiques de la
pompe à l’ouverture et fermeture d’un ou plusieurs robinets d’une
installation.
Cet automatisme peut fonctionner de la même façon avec des cir-
cuits d’eau potable ou non potable. Dans le cas d’installation ou l’on
peut utiliser les deux genres d’eau, il faudra s’assurer que le circuit
d’eau potable n’entrera jamais en contact avec celui d’eau non
potable.
1.2 Caractéristiques techniques
• Liquide véhiculé : eau claire
• Débit maxi : 10 m3/h
• Pression de service maxi : 10 bars
• Plage de température : 0° à + 60° C
• Pression d’enclenchement pompe : 1,5 à 3 bars
• Tension d’alimentation mono : 220-240 V
• Fréquence : 50 Hz - 60 Hz
• Intensité maxi : 10A
• Indice de protection : IP 65
2. SÉCURITÉ
La présente notice devra être lue avec attention avant installation et
mise en service. On veillera en particulier, au respect des points
concernant la sécurité du matériel vis à vis de l’utilisateur
intermédiaire ou final.
2.1 Symboles des consignes du manuel
Signale un risque potentiel, mettant en danger la sécurité des
personnes.
Consignes de sécurité relatives à l’électricité.
Signale une instruction dont la non observation
peut engendrer un dommage pour le matériel et
son fonctionnement.
3. TRANSPORT ET STOCKAGE
Dès réception du matériel, vérifier s’il n’a pas subi de dommages
durant son transport. En cas de défaut constaté, prendre dans les
délais prévus toutes dispositions nécessaires auprès du transporteur.
Si le matériel livré devait être installé ultérieure-
ment, stockez-le dans un endroit sec et protégez-
le contre les chocs et toutes influences extérieures (humidité, gel,
etc...).
4. PRODUITS ET ACCESSOIRES
• DN orifice entrée : 1" mâle
• DN orifice sortie : 1" mâle
4.1 Descriptif technique (Voir FIG. 1 et 5)
1-Orifice d’aspiration avec clapet anti-retour intégré.
2-Orifice de refoulement.
3-Manomètre (0 - 10 bars) de contrôle.
(montage possible à droite ou à gauche).
4-boîtier électrique avec platine électronique intégrant une
protection manque d’eau par arrêt du moteur et boîtier de
raccordement pompe et réseau.
5-Chambre hydraulique avec membrane.
6-Chambre de compensation avec ressort.
7-Vis de réglage de la pression d’enclenchement de la
pompe.
8-bouton de réarmement (RESET).
9-Indicateur lumineux de tension (POWER).
10 - indicateur lumineux de fonctionnement de la pompe (ON).
11 - Indicateur lumineux d’activation du système de sécurité
(ALARM).
12 - Couvercle inférieur
13 - Axe du manomètre.
4.2 Principe de fonctionnement
Dès l’ouverture d’un robinet, la pression dans l’installation chute et la
pompe démarre instantanément au seuil de 1,5 bar pré-réglé en
usine (réglage jusqu’à 3 bars possible sur le site).
Le fonctionnement de la pompe dure tant qu’un débit minimum sub-
siste dans le réseau.
A la fermeture du robinet, la pompe s’arrête automatiquement
après une temporisation de quelques secondes. L’automatisme pro-
tège la pompe contre le manque d’eau par arrêt du moteur. Cet
arrêt est signalé par l’allumage du témoin lumineux ”ALARM”.
Remise en route de la pompe par touche ”RESET”.
4.3 Accesoires (optionnels)
• Kit ACSON •
Kit de connection électrique et hydraulique comprenant :
- 1 câble électrique pour la connexion entre le moteur et l’automa-
tisme.
- 1 câble électrique avec prise normalisée (2 pôles + terre) pour l’ali-
mentation de l’automatisme.
- 1 tuyau flexible Ø 1” pour la liaison du refoulement de l’automatis-
me vers l’alimentation en eau de l’installation.
5. INSTALLATION
5.1 Montage du manomètre (Voir FIG. 1)
ATTENTION !
ATTENTION !
FRANCAIS

5
-Brancher l’automatisme sur le réseau électrique, l’indicateur lumi-
neux de tension va s’allumer (POWER).
-Le temps d’amorçage d’une pompe auto-amorçante aspirant à 8
mètre de profondeur peut atteindre 2 à 3 minutes. Durant cette
opération, maintenir la touche ”RESET” enfoncée.
6.2 Mise en service
-Ouvrir légèrement un robinet de l’installation, la pompe démarre
instantanément.
-Après un temps d’amorçage variant de quelques secondes à 3
minutes suivant les conditions d’installation, lire la pression au
manomètre ; celle-ci doit avoisiner la valeur maximale de la
pompe. Pendant sont fonctionnement, l’indicateur lumineux (ON)
restera allumé.
-Fermer le robinet, la pompe s’arrêtera après 3 à 5 secondes envi-
ron. Seul, l’indicateur de tension (POWER) restera allumé.
-Dès la réouverture d’un robinet, la pompe redémarrera aussitôt et
automatiquement.
Toutes irrégularités de fonctionnement après ces opérations sont
dues à un mauvais amorçage de la pompe. L’indicateur lumineux
d’activation du système de sécurité (ALARM) va s’allumer. Remplir la
pompe. Appuyer sur le bouton de réarmement (RESET).
Réglage de la pression d’enclenchement de l’appareil
Si la colonne d’eau HR ou HC (Voir FIG. 2) est supérieur à 15 m, la
pompe ne peut redémarrer avec la pression d’enclenchement pré-
réglée en usine. Il est alors nécessaire de modifier ce réglage au
moyen de la vis (Voir FIG.5 - rep. 7). Pompe arrêté, robinet ouvert, lire
la pression due à la colonne d’eau sur le manomètre et tourner la vis
dans le sens + jusqu’à démarrage de la pompe.
Affiner le réglage lors d’autre cycles marche-arrêt : lire la pression d’en-
clenchement au manomètre et agir sur la vis dans le sens désiré (+ ou -).
Une différence minimum de 0,5 bar est nécessaire entre la pression
d’’enclenchement et la pression maxi fournie par la pompe.
Attention, l’automatisme régule seulement la pression d’enclenche-
ment de la pompe. Il n’influence pas la pression dans l’installation qui
dépend uniquement des caractéristiques de la pompe.
Contrôle de fonctionnement
Ouvrir et fermer successivement un ou plusieurs robinet du réseau et
s’assurer que le fonctionnement pompe-automatisme est correct.
En cas de coupure du secteur, l’automatisme sera le
cas échéant à réarmer manuellement, en appuyant
sur le bouton de réarmement (RESET), après retour du courant.
7. MAINTENANCE - ENTRETIEN
7.1 Maintenance
Echange standard de l’appareil reconnu défectueurx pendant sa
période garantie.
7.2 Pièce de rechange
Platine électronique.
7.3 Démontage - remontage
Matériel sans entretien.
Selon l’orientation désirée de l’orifice de refoulement, à droite ou à
gauche, monter le manomètre à l’aide des deux vis de fixation, en
ayant au préalable mis en place le joint torique sur l’axe (rep. 13).
Obstruer l’orifice opposé à l’aide de la vis bouchon (sans joint torique
ni téflon).
5.2 Montage (Voir FIG. 2)
Avant de procéder au raccordement hydraulique,
il est indispensable de remplir parfaitement la
pompe.
Monter l’automatisme en position verticale (aspi-
ration verticale - refoulement horizontal).
Il peut être raccordé soit directement sur le refoulement de la
pompe, soit sur une tuyauterie rigide entre la pompe et le premier
robinet.
5.3 Raccordements hydrauliques
L’automatisme peut être raccordé directement sur le refoulement de
la pompe (si DNR 1”) ou sur une tuyauterie rigide (supportée) entre la
pompe et le premier robinet.
Nous recommandons de raccorder une tuyauterie flexible en sortie
de l’automatisme pour éviter toute contrainte sur le corps.
L’automatisme peut être utilisé avec une pompe raccordée sur le
réseau d’eau de ville sans dispositif de protection manque d’eau
(pression de ville inférieure ou égale à 1 bar), celui-ci étant intégré
dans l’automatisme. Pour la même raison un clapet anti-retour au
refoulement entre la pompe et l’automatisme n’est pas nécessaire.
5.4 Raccordements électriques
Les raccordements électriques et les contrôles doivent être
effectués par une électricien agréé et conformément aux
normes locales en vigueur.
-Vérifier que la tension d’alimentation soit 220 - 240 V (50 Hz ou 60 Hz).
Pour accéder au bornier de raccordement, dévisser les quatre vis
du couvercle de la boîte à bornes.
-Branchements électriques par câble à 3 conducteurs avec TERRE
OBLIGATOIRE.
-Raccorder le moteur de la pompe, le réseau d’alimentation selon
le schéma imprimé sur la plaque interne (Voir FIG. 3).
NE PAS OUBLIER DE RACCORDER LES MISES À LA TERRE.
Alimentation triphasé
L’automatisme peut être utilisé avec des pompes triphasés (ou
monophasées dont l’intensité est supérieure à 10A) à l’aide d’un
contacteur-disjoncteur. Dans ce cas, les raccordements seront faits
selon le schéma (Voir FIG. 4).
6. MISE EN ROUTE
6.1 Avant la mise en marche
Contrôler le remplissage de la pompe pour assurer
un amorçage correct.
ATTENTION !
ATTENTION !
ATTENTION !
ATTENTION !
FRANCAIS

6
8. INCIDENTS DE FONCTIONNEMENT
Avant toute intervention METTRE HORS TENSION
l’automatisme.
ATTENTION !
Pendant la période de garantie, si un incident de fonctionnement venait à
persister, nous vous recommandons de vous adresser au SAV SALMSON ou
à notre réseau de réparateurs agréés, seuls habilités à procéder au démon-
tage-remontage de nos matériels (liste sur simple demande).
INCIDENTS
8.1 LE GROUPE POMPE
NE S’ARRÊTE PAS.
8.2 LE GROUPE POMPE
NE DÉMARRE PAS.
8.2 LE GROUPE POMPE
DÉMARRE ET S’AR-
RÊTE À PLUSIEURS
REPRISES.
CAUSES
a) Perte d’eau supérieure à 0,7 l/min. :
b) Mécanisme bloqué par le sable :
c) Panne sur la carte électronique :
d) Raccordement électrique erroné :
a) Manque d’eau d’alimentation. Le sys-
tème de sécurité s’est activé et l’indi-
cateur lumineux (ALARM) est allumé :
b) Pompe bloquée. L’indicateur lumineux
(ALARM) est allumé. Le système de
sécurité à fonctionné. Quant on agit
sur le bouton de réarment, l’indicateur
lumineux (ON) s’allume mais la
pompe ne démarre pas :
c) Panne sur la carte électronique :
d) Manque de tension :
e) La pression de la pompe est insuffisan-
te. Le système de sécurité a agi, l’indi-
cateur lumineux correspondant
(ALARM) est allumé.
f) Entrée d’air dans l’aspiration de la
pompe. Le manomètre va indiquer
une pression inférieure à la normale
ou une oscillation constante. Le systè-
me de sécurité va agir en arrêtant le
fonctionnement de la pompe, l’indi-
cateur lumineux (ALARM) va s’allumer.
g) Les colonnes d’eau HR ou HC sont
supérieures à 15 m et le préréglage
en usine du seuil d’enclenchement
n’a pas été modifié.
a) Petites fuites sur quelques points de
l’installation :
REMÈDES
a) Réviser l’installation.
b) Nettoyer l’intérieur de l’automatisme en démontant le courvercle inférieur
(Voir FIG. 1 - rep. 12).
c)
Procéder à son remplacement.
d) Vérifer le raccordement.
a) Vérifier l’alimentation et mettre en service la pompe avec le bouton de
réarmement (RESET).
b) Contacter le Service Après-Vente.
c) Débrancher l’interrupteur d’alimentation électrique et raccorder de nou-
veau. La pompe doit démarrer, sinon procéder au remplacement de la
carte électronique.
d) Vérifer que l’alimentation électrique est correcte, l’indicateur lumineux de
tension (POWER) doit être allumé.
e) Vérifier que la pression maxi de la pompe est de 0,5 bar supérieure à la
pression d’enclenchement de l’automatisme.
f) Vérifier l’étanchéité des raccords et joints de la tuyauterie d’aspiration.
g) Augmenter le seuil d’enclenchement en tournant la vis (Voir FIG. 5- rep. 7).
a) Vérifier de possibles égouttements des robinets ou chasses d’eau et réparer
ces fuites.
FRANCAIS

7
4.1 Technical description (See FIGS. 1 and 5)
1-Suction port with built-in non-return valve.
2-Discharge port.
3-Test pressure gauge (0-10 bars)
(option of right- or left-mounting).
4-Electronic unit with electronic board including an
anti- dry running protection by engine cut-out
system and pump-to-network connection unit.
5-Hydraulic chamber with diaphragm.
6-Compensation chamber with spring.
7-Pump cut-in pressure adjustment screw.
8-Reset button (RESET).
9-Power check light (POWER).
10 - Pump operation check light (ON).
11 - Safety system activation check light (ALARM).
12 - Lower cover.
13 - Pressure gauge shaft.
4.2 Operating principle
When a tap is opened, the pressure in the installation drops and the
pump starts immediately at the 1.5 bar threshold pre-set in the facto-
ry. (Adjustment up to 3 bars is possible on site).
The pump keeps running for as long as there is at least some mini-
mum flow in the installation.
When the tap is closed, the pump stops automatically after a delay
of three to five seconds. The automatic control protects the pump
against dry running by shutting down the motor. This shutdown is
reported by the "ALARM" check light.
The "RESET" button is used to restart the pump.
4.3 Accessories (optional)
• ACSON kit •
Electrical and hydraulic connection kit consisting of :
- 1 electric cable to connect the motor to the automatic control.
- 1 electric cable with standardised plug (2 poles + earth) to supply
the automatic control.
- 1 1-inch diameter hose to connect the automatic control discharge
with the installation water supply.
5. INSTALLATION
5.1 Fitting of pressure gauge (See FIG. 1)
According to whether the discharge port is required to be facing
right or left, first install the O-ring on the shaft (13), and then secure
the pressure gauge using the two mounting screws. Close off the
opposite port with the plug screw (without O-ring or Teflon).
1. GÉNÉRALITÉS
1.1 Applications
The Acson automatic control is designed to automate surface and
submerged pumps and protect them against dry running. It controls
the automatic stopping and starting of the pump when one or more
taps in an installation is/are opened or closed.
This electronic controller unit can be used either for drinking water or
non-drinking water circuits. In installations where both types of water
are present, make sure that drinking water is not mixed with non-drin-
king water.
1.2 Technical characteristics
• Liquid carried : clear water
• Max. flow rate : 10 m3/h
• Max. operating pressure : 10 bars
• Temperature range : 0° to + 60° C
• Pump cut-in pressure : 1,5 to 3 bars
• Power supply voltage single phase : 220-240 V
• Frequency : 50 Hz - 60 Hz
• Max. current : 10A
• Protection index : IP 65
2. SAFETY
Read these instructions carefully before installing and starting-up. Pay
special attention to the points concerning the safety of the equip-
ment for the intermediate or final user.
2.1 Symbols used in the instructions
Calls attention to a risk affecting the safety of persons.
Safety instructions concerning electricity.
Draws attention to an instruction the non-obser-
vance of which could cause damage to the
equipment or cause it to malfunction.
3. TRANSPORT AND STORAGE
When delivery is taken of the equipment, check that it has not been
damaged in transit. If a fault is discovered, make the necessary arran-
gements with the carrier within a reasonable time.
If the equipment delivered is to be installed at
some later time, store it in a dry place and protect
it from impacts and all external influences (moisture, frost, etc).
4. PRODUCTS AND ACCESSORIES
• DN inlet port : 1" male
• DN outlet port : 1" male
ATTENTION !
ATTENTION !
ENGLISH

8
-After a priming time varying between a few seconds and three
minutes, according to installation conditions, read off the pressure
on the pressure gauge. This should be around the maximum value
for the pump. While it is running, the "ON" check light will remain lit.
-Shut the tap; the pump will stop after about three to five seconds.
Only the voltage indicator ”POWER” will stay lit.
-As soon as a tap is opened again, the pump will restart automati-
cally.
Any operational irregularities after these operations are due to faulty
priming of the pump. The safety system activation check light
”ALARM” will come on. Fill the pump. Press the "RESET" button.
Adjusting the cut-in pressure.
If the head of water HR or HC (See FIG. 2) is higher than 15 m, the
pump cannot start up again at the cut-in pressure pre-set at the fac-
tory. In this case, it is necessary to adjust this setting using the screw
(See FIG. 5 - 7). With the pump stopped and the tap open, read off
the pressure due to the head of water on the pressure gauge and
turn the screw towards +, until the pump starts up.
Fine-tune the setting during other start-stop cycles; read off the cut-
in pressure on the pressure gauge and turn the screw in the desired
direction (+ or -).
The maximum pump pressure should be 0.5 bar higher than the cut-
in pressure of the automatic control.
Take care : The automatic control only regulates the pump cut-in
pressure. It does not affect the pressure in the installation, which
depends only on the characteristics of the pump.
Checking operation
Open and then shut one or more taps in the network and make sure
that the pump-automatic control assembly is operating correctly.
If there is a power cut, the automatic control will
need to be reset manually, by pressing the "RESET"
button, when power returns (only in case of not automatic reset).
7. MAINTENANCE - SERVICING
7.1 Maintenance
The usual conditions apply for exchange of the machine if it proves
defective while under guarantee.
7.2 Spare part
Electronic board.
7.3 Disassembly- Reassembly
Maintenance-free equipment.
5.2 Mounting (See FIG. 2)
Before connecting the hydraulic connector, it is
essential to fill the pump completely.
Put the automatic control in a vertical position
(vertical suction, horizontal discharge).
It can be connected either directly on to the pump discharge or
onto a rigid pipe between the pump and the first tap.
5.3 Hydraulic connections
The automatic control can be connected directly onto the pump
discharge (if DNR is 1") or onto a rigid pipe (supported) between the
pump and the first tap.
We recommend that a flexible tube be fitted at the outlet of the
automatic control to avoid any stress on the body.
The automatic control can be used with a pump connected to the
town water supply without a dry running protection device (with
town pressure not exceeding 1 bar), as this is built in to the automa-
tic control. For the same reason, a non-return or discharge valve bet-
ween the pump and the automatic control is not necessary.
5.4 Electrical connections
Electrical connections and checks must be carried out by a
qualified electrician in accordance with local standards in
force.
-Check that the supply voltage is 220-240 V (50 Hz or 60 Hz). To access
the connection terminal, unscrew the four screws in the terminal box
cover.
-Connections are by three-strand cable WITH OBLIGATORY EART.
-Connect the pump motor and the mains supply in accordance
with the diagram printed on the plate inside. (See FIG 3).
DO NOT FORGET TO CONNECT THE EARTHINGS.
Three phase supply
The automatic control can be used with three phase pumps (or
single phase pumps with current higher than 10 A) using a contactor.
In this case, connections will be made according to the diagram
(See FIG. 4).
6. STARTING UP
6.1 Before starting
Check that the pump is full, to make sure of cor-
rect priming.
-Connect the automatic control to the electricity supply; the power
check light "POWER" will come on.
-Aself-priming pump sucking at a depth of 8 metres can take two to
three minutes to start up. During this operation, keep the "RESET" key
pressed down.
6.2 Operation
-Open the installation tap slightly; the pump will start immediately.
ATTENTION !
ATTENTION !
ATTENTION !
ATTENTION !
ENGLISH

9
8. OPERATING TROUBLE
Before any action, POWER DOWN the ACSON.
ATTENTION !
INCIDENT
8.1 THE PUMP UNIT
DOES NOT STOP.
8.2 THE PUMP UNIT
DOES NOT START.
8.3 THE PUMP UNIT
STARTS AND STOPS
REPEATEDLY.
CAUSE
a) Water loss greater than 0.7 l/min. :
b) Mechanism blocked by sand :
c) Electronic card fault :
d) Mistaken electrical connection :
a) No water supply. The safety system
has been activated and the ”ALARM”
check light is on :
b) Pump blocked. The ”ALARM” check
light is on. The safety system has ope-
rated. When the reset button is pres-
sed, the ”ON” light comes on, but the
pump does not start up :
c) Faulty electronic card :
d) No power :
e) Pump pressure is insufficient. The safe-
ty system has operated and the cor-
responding check light ”ALARM” is on.
f) Air is entering the pump suction. The
pressure gauge indicates a lower than
normal pressure or constant oscilla-
tion. The safety system prevents pump
operation and the check light
”ALARM” comes on.
g) The HR or HC heads of water are
higher than 15 m and the factory pre-
set cut-in threshold has not been
adjusted.
a) Small leaks at some points in the ins-
tallation :
REMEDY
a) Service the installation.
b) Clean the inside of the automatic control after removing the lower cover
(See FIG. 1 -12).
c)
Replace it.
d) Check the connection.
a) Check the supply and start up the pump with the reset button ”RESET”.
b) Contact After-Sales Service.
c) Disconnect the electricity supply switch, then reconnect it. The pump
should start; otherwise replace the electronic card.
d) Check that the electric power is correct. The voltage check light ”POWER”
should be on.
e) Check that the maximum pump pressure is 0.5 bar higher than the cut-in
pressure of the automatic control.
f) Check that the connections and suction piping seals are watertight.
g) Increase the cut-in threshold by turning the screw (See FIG. 5 -7).
a) Check for possible leaking taps or flushes and repair these leaks.
ENGLISH

10
NOTES

11
NOTES

CB.N° 4.044.542/Ed.1
CE MANUEL DOIT ETRE REMIS A
L'UTILISATEUR FINAL ET ETRE TOUJOURS
DISPONIBLE SUR SITE.
FRANCAIS
ENGLISH
THIS LEAFLET HAS TO BE GIVEN TO THE
END USER AND MUST BE LEFT ON SITE.
POMPES SALMSON
53, BOULEVARD DE LA REPUBLIQUE - ESPACE LUMIÈRE - F-78403 CHATOU CEDEX
TEL. : +33 (0) 1 30 09 81 81 - FAX : +33 (0) 1 30 09 81 01
www.salmson.fr
POMPES SALMSON - SAS AU CAPITAL DE 16.775.000 €SIREN 313 986 838 RCS VERSAILLES - APE 291C
W.S.P. - UNITED KINGDOM
Centrum 100 - Burton-on-trent
GB-Staffordshire - DE14 2WJ
TEL. : (44) 12 83 52 30 00
FAX : (44) 12 83 52 30 90
PORTUGAL
Rua de Camões, 310
4000 - 139 Porto
TEL. : (351) 22 208 0350
FAX : (351) 22 200 1469
P. S. (SEA) Pte Lte SINGAPORE
1 Claymore Drive
10-03 Orchard Towers - 229594
TEL. : (65) 834 0688
FAX : (65) 834 0677
salmson_pumps@pacific.net.sg
SALMSON IRELAND
Enterprise center
Childers Road - Ire - Limerick
TEL. : (353) 61 41 09 63
FAX : (353) 61 41 47 28
SALMSON ITALIA
Via J. PeriI 80
41100 MODENA
TEL. : (39) 059 280 380
FAX : (39) 059 280 200
W.S.L. LEBANON
Bou Khater building, Mazda Center
Jal El Dib Highway - Ground Floor
PO Box 175 224 - BEIRUTH
TEL. : (961) 04 722 280/281
FAX : (961) 04 722 285
SALMSON ARGENTINA
OTERO 172/4
(1427) Buenos Aires
TEL.: (54) 11 48 56 59 55
FAX : (54) 11 48 56 49 44
salmson@overnet.com.ar
SALMSON VIETNAM
C3-319,Ly Thuong Kiet
Ph. 15 Q. 11 Hochiminhville
TEL. : (84-8) 864 52 80
FAX : (84-8) 864 52 82
Table of contents
Languages:
Other salmson Controllers manuals
Popular Controllers manuals by other brands

Homematic IP
Homematic IP HmIP-FSI16 Installation instructions and operating manual

Simrad
Simrad 301 DP user guide

Zapi
Zapi SMART CONSOLE instructions

Tech Controllers
Tech Controllers EU-WiFi OT user manual

Evenheat
Evenheat Set-Pro operating manual

Leroy-Somer
Leroy-Somer CONVERSTAT CVA 80 L Installation and Maintenance

Festo
Festo VPPM C1 Series operating instructions

GeoVision
GeoVision GV-AS100 quick start guide

SEW-Eurodrive
SEW-Eurodrive MOVIPRO PHE Series operating instructions

resideo
resideo Braukmann VA2400 quick start guide

Troll systems
Troll systems VLSG-01 installation guide

Munters
Munters Farm Center Manual for use and maintenance