1
2
3
4
5
6
7
8
9
10
11
12
13
14
15
16
1718
19
20
salonco.com.au
4
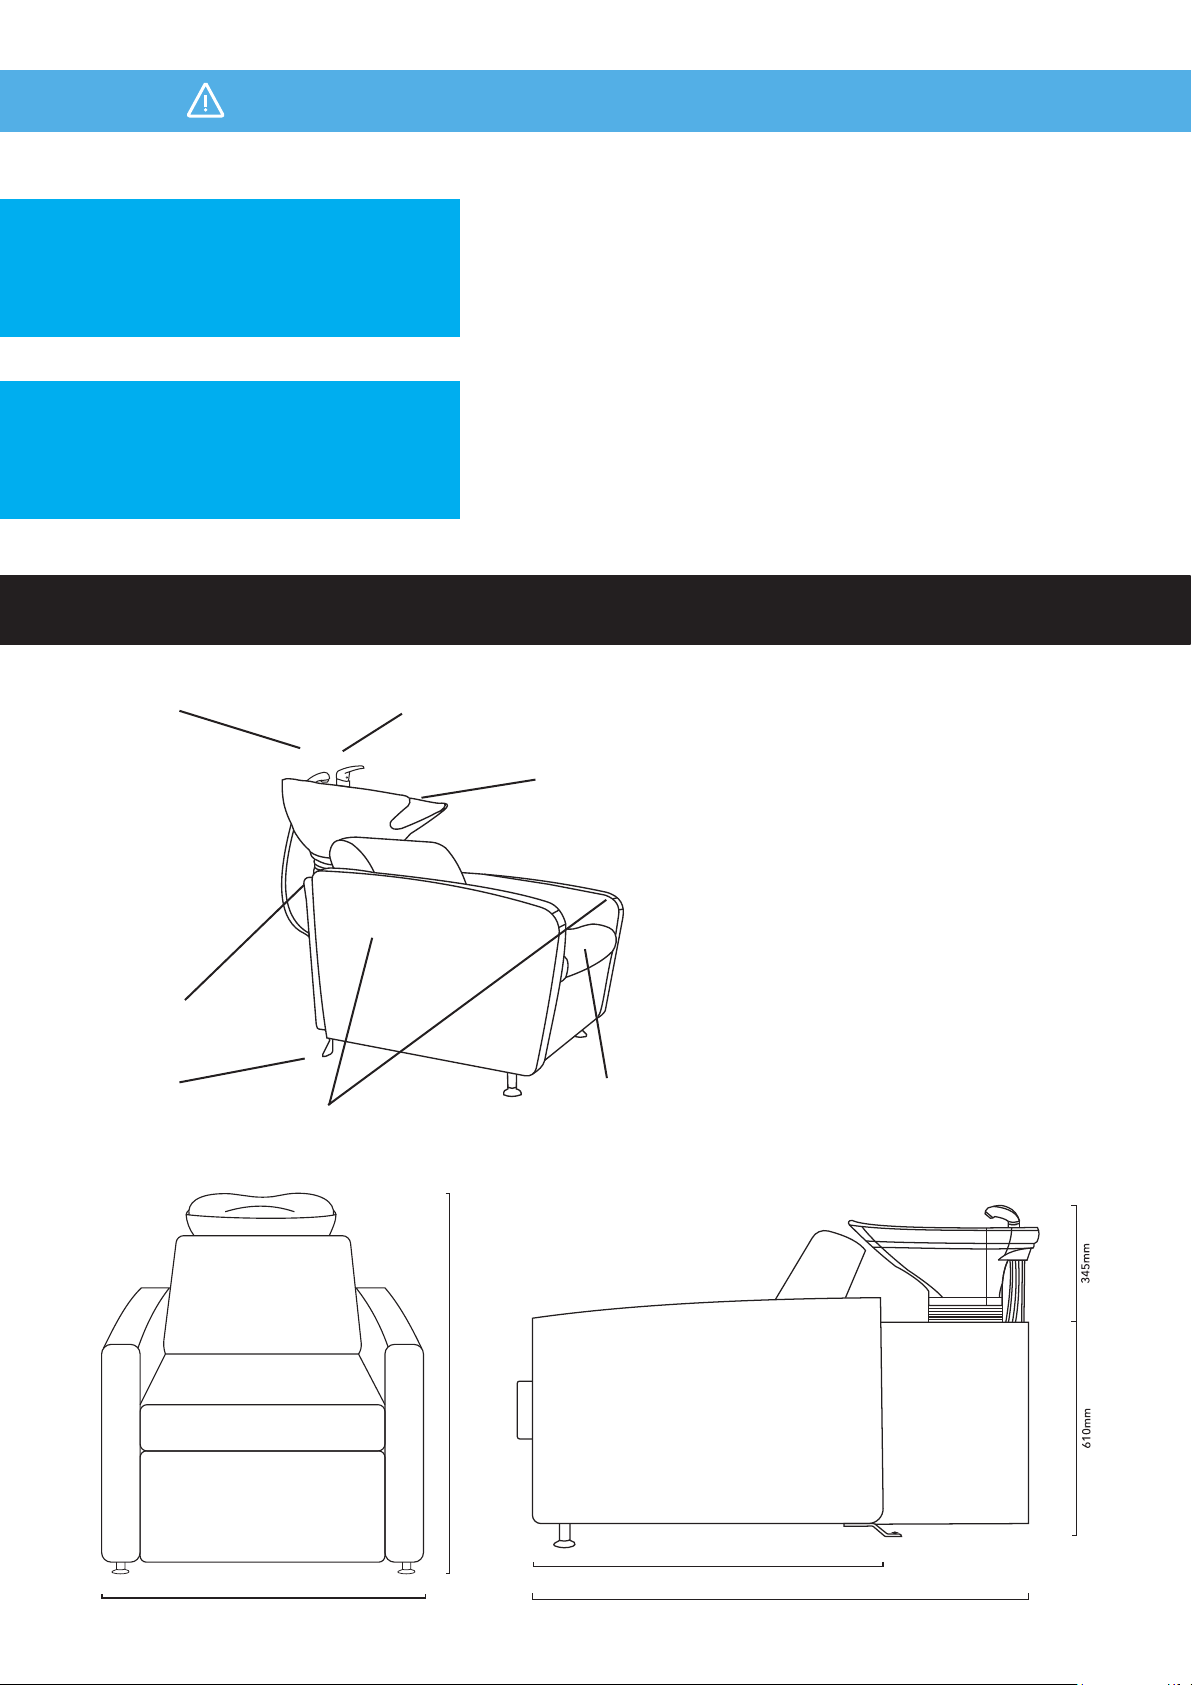
Assembly
Basin Assembly
1. Flick mixer
2. Shower head
3. Shower hose basin collar
4. Neck cushion
5. O-ring
6. Foam washers
7. Plastic nut
8. Flat seal
9. Fitted ange
10.2 x dyna bolts (Not Supplied)
11.Flexible waste pipe
12.Flange
13.Seal
14.P trap (not supplied)
15.Hot & cold braided hoses
16.Long nut
17.Plastic washers
18.Metal washers
19.O-ring
20.Back panel
Unit Assembly
Basin MUST be secured to the oor. Secure to oor
using 2 x dyna bolts (not supplied).
Basin Assembly
1. Unscrew back panel with phillips-head
screwdriver (not provided) and remove the back
planel.
2. Place ceramic basin & tilt mechanism onto the
basin stand with neck rest facing the seat.
3. Apply washers and nuts to bolts underneath the
tilt mechanism where the bolts come through
the cavity in the basin stand.
4. Install ick mixer using o-ring, plastic and metal
washers, long nut, and shower head using the
shower hose basin collar, o-ring, foam washer
and plastic nut as indicated.
5. Place ick mixer and shower head through the
holes in the basin.
6. Connect exible waste pipe to plug and waste
pipe which is already installed making use of the
at seal and tted ange.
Plumbing Connection
1. Connect Flexible Waste Pipe to P trap (not
supplied) making use of Seal and Flange.
2. Connect hot and cold (0.5” connection) braided
hoses to respective supplies.
3. Please attach neck cushion to the basin.