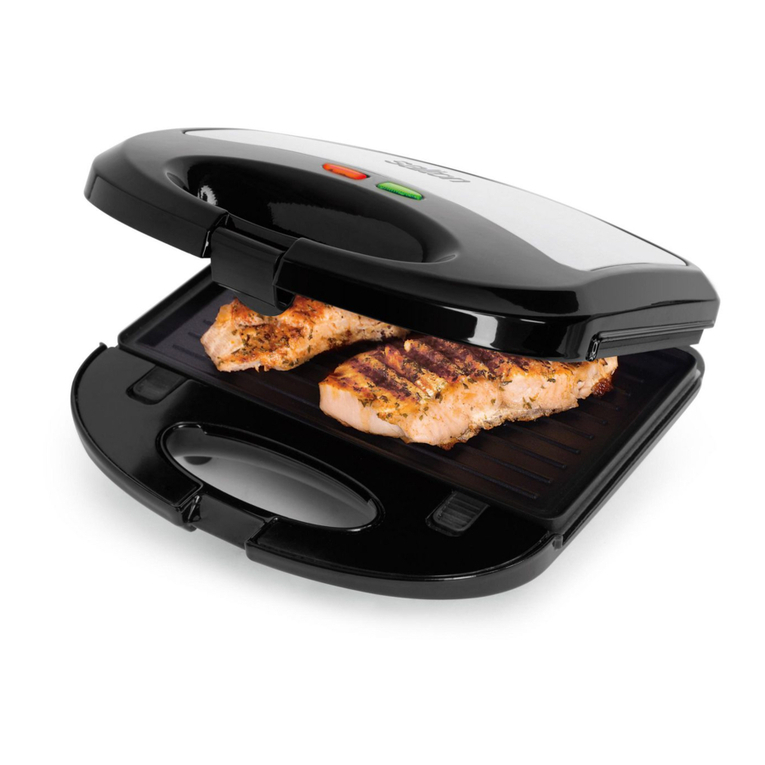
Salton SM-1012 User manual

Model: SM-1012
®
Sandwich Maker
Instruction Booklet
Booklet SM-1012 v2 eng.indd 1 12/12/05 4:38:06 PM

IMPORTANT SAFEGUARDS
When using electrical appliances, basic safety precautions should always be
followed including the following:
1. Read all instructions.
2. Do not touch hot surfaces. Use handles or knobs.
3. To protect against electrical hazards, do not immerse cord, plugs, or the appliance
in water or other liquid.
4. Close supervision is necessary when any appliance is used by or near children.
5. Unplug from outlet when not in use and before cleaning. Allow to cool before
putting on or taking off parts, and before cleaning the appliance.
6. Do not operate any appliance with a damaged cord or plug or after the appliance
malfunctions, or has been damaged in any manner. Return appliance to Salton
for examination, repair or adjustment. See Warranty.
7. The use of accessories or attachments not recommended by Salton may
cause hazards.
8. Do not use outdoors.
9. Do not let cord hang over edge of table or counter, or touch hot surfaces.
10. Do not place on or near a hot gas or electric burner, or in a heated oven.
11. Extreme caution must be used when moving an appliance containing hot oil or
other hot liquids.
12. Always attach plug to appliance first, then plug cord into the wall outlet.
To disconnect, turn any control to ‘OFF’, then remove plug from wall outlet.
13. Do not use appliance for other than intended use.
14. Do not leave appliance unattended while in use.
15. Never use the Sandwich Maker with the Lid open.
2
HOUSEHOLD USE ONLY
SAVE THESE INSTRUCTIONS
Booklet SM-1012 v2 eng.indd 2 12/12/05 4:38:07 PM

GROUNDED PLUG
To reduce the risk of electric shock this appliance has a grounded plug.
(2 blades and 1 pin) If the plug does not fit fully into the electrical outlet
contact a qualified electrician. Do not modify the plug in any way or use
an adaptor.
DESCRIPTION OF PARTS
1. Lid
2. Base
3. Cooking Plates
4. Carrying Handles
5. Lock
6. Lock Release
7. Indicator Light
(not shown)
3
4
1
2
4
3
5
6
Booklet SM-1012 v2 eng.indd 3 12/12/05 4:38:08 PM

BEFORE FIRST USE
1. Read al instruction carefully and keep them for future reference.
2. Remove all packaging.
3. Clean the cooking plates by wiping with a sponge or cloth dampened
in warm water. DO NOT IMMERSE THE UNIT AND DO NOT RUN
WATER DIRECTLY ONTO THE COOKING SURFACE.
4. Dry with a cloth or paper towel.
5. Before cooking for the first time, the non-stick Cooking Plates must be
‘seasoned’. Brush a small amount of oil, butter or margarine on the
Cooking Plates and wipe off excess with a paper towel. Your Sandwich
Maker is now ready to use.
HOW TO USE
Assembling the Grill
1. Plug unit into a 120V AC outlet, the Indicator Light will come on.
2. Close Lid until the unit has preheated and the Indicator Light goes out.
3. Open the Lid by pressing the Lock Release and place a slice of bread in
the bottom half of the Cooking Plate. (If you are using buttered bread,
place buttered side against the Cooking Plates.) Place filling on bread
pressing down to fill the Cooking Plate cavity. Cover with a slice of bread.
4. Close Lid carefully and push down until you hear the Lock snap closed.
Cooking time should be approximately 3-5 minutes. Exact cooking time
depends on your taste. The Indicator Light will go on and off as the
thermostat maintains the correct cooking temperature.
5. When sandwiches are cooked, remove with a wooden or plastic spatula.
Never touch the Cooking Plates with sharp, pointed or metal utensils.
4
Booklet SM-1012 v2 eng.indd 4 12/12/05 4:38:08 PM

HINTS
• Always preheat the Sandwich Maker before using.
• Select bread that will fit the Cooking Plates.
• Use approximately 1/3 (85 ml) cup of filling for each sandwich.
• It is not necessary to butter bread, however, the Cooking Plates should
be seasoned lightly with oil/butter occasionally. See #5 in the ‘Before First
Use’ section.
• Do not use processed cheese as it melts too quickly.
• When using sweet filling a teaspoon of sugar on the buttered side of the
bread will add flavour and make the outside of the sandwiches crispier.
• Raisin bread or other sweet breads brown quickly so adjust cooking
time accordingly.
• Pastry may be used instead of bread.
CARE AND CLEANING
1. Unplug the Sandwich Maker and allow it to cool.
2. Wipe the Cooking Plates with paper towels or a soft cloth dampened in
warm soapy water. DO NOT IMMERSE THE UNIT AND DO NOT RUN
WATER DIRECTLY ONTO THE COOKING SURFACE. If some of the fill-
ing has adhered to the Cooking Plates, pour a small amount of cooking
oil onto the baked-on food and allow to stand for 5 to 10 minutes. Wipe
with paper towels.
3. Wipe the outside of the Sandwich Maker with a soft cloth dampened in
warm soapy water.
4. Rinse with a dampened clean cloth and dry.
5
Booklet SM-1012 v2 eng.indd 5 12/12/05 4:38:08 PM

6
RECIPES
Garlic Butter
4 oz. (125 ml) butter, softened
1 clove garlic, crushed
Salt and freshly ground pepper
Combine all ingredients until smooth.
Herb Butter
1/2 cup (125 ml) butter, softened
1 tsp.(5 ml) parsley, chopped
1 tsp. (5 ml) chives, chopped
1/2 tsp. (3 ml) rosemary, chopped
Salt and freshly ground pepper
Combine all ingredients until smooth.
Lemon Butter
1/2 cup (125 ml) butter, softened
2 tsp. (10 ml) lemon juice
1 tsp (5 ml) grated lemon rind
dash of cayenne pepper
Combine all ingredients until smooth.
Ham/Cheese/Tomato Sandwich
4 slices bread, buttered on one side
4 slices cheese (not processed cheese)
2 slices tomato, cut in half
1/4 cup (60 ml) chopped ham
Preheat Sandwich Maker. Place 2 slices of bread, buttered side down on the
Cooking Plates. Cover each piece of bread with 2 slices of cheese, 2 pieces of
tomato and 1/2 of the chopped ham. Cover with remaining bread, buttered
side up. Close and lock Lid.Cook approximately 3 minutes.
Booklet SM-1012 v2 eng.indd 6 12/12/05 4:38:08 PM

7
Mushroom Pizza
4 slices bread, buttered one side
2 tsp. (10 ml) pizza sauce
4 canned whole mushrooms, sliced
1/4 cup (60ml) grated mozarella cheese
Preheat Sandwich Maker. Place 2 slices of bread, buttered side down on
Cooking Plates. Make 4 small pockets by pressing bread down with the back of
a spoon. Fill cavity with pizza sauce, mushrooms and cheese.Top with remaining
2 slices of bread. Close and lock Lid. Cook for approximately 3 minutes.
Chicken Sandwich
4 slices of bread, one side buttered with garlic butter
2 oz. (50 g) cooked chicken, sliced or small cubes
1/4 green pepper, sliced
2 mushrooms, sliced
Preheat Sandwich Maker.Place 2 slices of bread, buttered side down on the
Cooking Plates. Spread chicken, green pepper and mushrooms over bread and
cover with remaining slice of bread. Close and lock Lid. Cook for approximately
3 minutes.
Tuna with Cheese
1/2 can tuna, drained
1-1/2 tbsp. (45 ml) mayonnaise
1 tsp. (5 ml) sweet mixed pickle, chopped
4 slices bread, buttered one side
2 slices of cheese (not processed cheese)
Preheat Sandwich Maker. Combine tuna, mayonnaise and pickle. Divide tuna
mixture evenly on unbuttered side of 2 slices of bread.Top with tomatoslices
and cheese and remaining bread. Place sandwiches on Cooking Plates. Close
and lock Lid. Cook for approximately 3 minutes.
Booklet SM-1012 v2 eng.indd 7 12/12/05 4:38:09 PM

Apple/Cinnamon Treats
4 slices of sweet bread,
buttered one side and sprinkled with sugar
1/2 cup apple pie filling
dash of cinnamon
Preheat Sandwich Maker. Place 2 slices of bread, buttered side down on
the Cooking Plates. Distribute the pie filling evenly between the 4 cavities.
Sprinkle with cinnamon. Cover with remaining 2 slices of bread. Close and
lock Lid. Cook for approximately 3 minutes.
Blueberry French Toast
2 eggs
2 tbsp. (30 ml) milk
4 slices bread
1/4 cup (60 ml) blueberries
1 tsp. (5 ml) sugar
Preheat Sandwich Maker. Beat eggs and milk together. Dip bread in the egg
mixture. Brush a small amount of butter on the Cooking Plates. Place 2 slices
of bread onto the Cooking Plates. Make a small cavity by pressing bread
down with the back of a spoon. Distribute blueberries evenly in each cavity.
Cover with remaining bread and sprinkle with sugar. Close and lock Lid. Cook
for approximately 4 minutes.
9
Booklet SM-1012 v2 eng.indd 8 12/12/05 4:38:09 PM

SALTON CANADA
Customer Service Department
81A Brunswick,Dollard-des-Ormeaux,
Quebec, Canada H9B 2J5
website: www.salton.com
Fax: 514-685-8300
Tel: 514-685-3660
®
*Return/exchange policies at each retailer vary and may differ from the Salton Canada 1 year limited
warranty period.
A short supply cord is provided to reduce the hazards of becoming entangled
in or tripping over a long cord. Extension cords may be used if care is exercised
in their use. If an extension cord is used, the marked electrical rating of the
detachable power-supply cord or extension cord should be at least as great
as the electrical rating of the appliance. If the appliance is of the grounded
type, the extension cord should be a grounded 3-wire cord. The extension cord
should be arranged so that it will not drape over the counter top or table top,
where it can be pulled on by children or tripped over.
LIMITED WARRANTY
Salton Canada warrants that this appliance shall be free from defects in material
and workmanship for a period of one year from the date of purchase. During this
‘in-warranty’ period, defective products will be repaired or replaced at the discre-
tion of the retailer and/or Salton Canada. A defective product should be returned
to the original place of purchase within the retailer’s stipulated return/exchange
period*. If you do not wish or are unable to have a defective product replaced
under warranty by the retailer, Salton Canada will repair or replace the defective
product without charge. You may contact us for assistance by mail, e-mail, fax or
telephone as listed below.
This warranty covers normal domestic usage and does not cover damage which
occurs in shipment or failure which results from alteration, accident, misuse, abuse,
glass breakage, neglect, commercial use or improper maintenance.
To ensure prompt ‘in-warranty’ service be sure you have an original proof of purchase.
You may be asked to return the product to us along with a description of the defect
and your address, zip/postal code.
For repairs not covered by the warranty, please contact us for assistance.
Booklet SM-1012 v2 eng.indd 9 12/12/05 4:38:09 PM
Table of contents
Other Salton Kitchen Appliance manuals

Salton
Salton JEB-10 User manual

Salton
Salton SP1963 User manual

Salton
Salton Melted Bliss SGCM1 User manual

Salton
Salton SFP85 Installation guide

Salton
Salton DH1000 User manual

Salton
Salton DH1246 VitaPro User manual

Salton
Salton SA8BLK User manual

Salton
Salton Juiceman II User manual

Salton
Salton SWOK30 Installation guide

Salton
Salton CP1247 User manual

Salton
Salton MP1206 User manual

Salton
Salton HB1737 User manual

Salton
Salton CM-7 User manual

Salton
Salton SBS35 Installation guide

Salton
Salton MC1353 User manual

Salton
Salton VitaPro DH1273A User manual

Salton
Salton EG-1 User manual

Salton
Salton DH-1171 User manual

Salton
Salton SP05 Installation guide
Salton
Salton DH-1043 User manual