manuals.online logo
Brands
  1. Home
  2. •
  3. Brands
  4. •
  5. Sam4s
  6. •
  7. Cash Register
  8. •
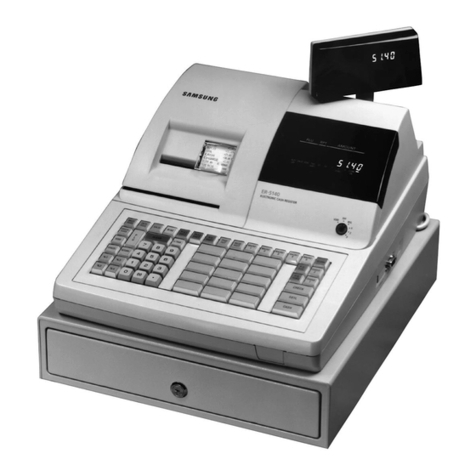
  9. Sam4s ER-390M User manual

Sam4s ER-390M User manual

Lit-79
SAM4s ER-390M Quick Start Programming Guide
There are a few areas that need planning before you can begin to program the register. These areas are:
1. Keyboard Layout.
There are 60 item keys that can be programmed (keys 1-60).
2. Item Descriptions.
Item descriptions can be up to 12 characters in length.
3. Item price settings. An item can either be open, or preset.
Open:
An open item does not have a specific dollar amount assigned to it. The price of an open item is entered manually. A
good example of an open item would be a daily lunch special that has frequent price changes.
Preset:
A preset item is assigned a specific dollar amount, which can either be taxable or non-taxable.
4. Item groups
A group is where an item(s) reports its totals to. Some group examples are beverages, appetizers, and desserts.
5. Preamble and postamble messages.
Preamble:
The preamble is printed on the top of the receipt and usually includes the name of the store. There are six, sixteen
character preamble lines
Postamble:
The postamble is printed after the transaction totals, i.e. Thank You. There are six, sixteen character postamble lines.
* When you are programming the register, use the Ckey. During business hours use the REG key for safety purposes. The REG key
does not have access to the programming areas of the register. The key type is located on the head of the key.
Use the keyboard below to help layout the item locations. You can use any key that is not crossed out. This keysheet can be
cut out and placed over the register’s keyboard while programming. You will still use the X/TIME, SBTL, and CASH keys for
programming even though they are crossed out. When you have finished writing the items on the keyboard, proceed to the next page.
Use this page to help layout all of the programming information. In the Open/Preset & tax value # column, enter the number that
corresponds with the tax and price settings, see below:
Preset Taxable = 6 Open Taxable = 0
Preset No Tax= 7 Open No Tax = 1
*Only 42 out of 60 items are listed, make copies of this page if you are using more than 42 items.
PLU # Item
Description
Open/Preset
&
Tax Value # Groups
(2 digits per group) Preset Price Group #
1 __ __ __ __ __ __ __ __ __ __ __ __ __ __, __ __, __ __ 1 __ __ __ __ __ __ __ __ __ __ __ __
2 __ __ __ __ __ __ __ __ __ __ __ __ __ __, __ __, __ __ 2 __ __ __ __ __ __ __ __ __ __ __ __
3 __ __ __ __ __ __ __ __ __ __ __ __ __ __, __ __, __ __ 3 __ __ __ __ __ __ __ __ __ __ __ __
4 __ __ __ __ __ __ __ __ __ __ __ __ __ __, __ __, __ __ 4 __ __ __ __ __ __ __ __ __ __ __ __
5 __ __ __ __ __ __ __ __ __ __ __ __ __ __, __ __, __ __ 5 __ __ __ __ __ __ __ __ __ __ __ __
6 __ __ __ __ __ __ __ __ __ __ __ __ __ __, __ __, __ __ 6 __ __ __ __ __ __ __ __ __ __ __ __
7 __ __ __ __ __ __ __ __ __ __ __ __ __ __, __ __, __ __ 7 __ __ __ __ __ __ __ __ __ __ __ __
8 __ __ __ __ __ __ __ __ __ __ __ __ __ __, __ __, __ __ 8 __ __ __ __ __ __ __ __ __ __ __ __
9 __ __ __ __ __ __ __ __ __ __ __ __ __ __, __ __, __ __ 9 __ __ __ __ __ __ __ __ __ __ __ __
10 __ __ __ __ __ __ __ __ __ __ __ __ __ __, __ __, __ __ 10 __ __ __ __ __ __ __ __ __ __ __ __
11 __ __ __ __ __ __ __ __ __ __ __ __ __ __, __ __, __ __ 11 __ __ __ __ __ __ __ __ __ __ __ __
12 __ __ __ __ __ __ __ __ __ __ __ __ __ __, __ __, __ __ 12 __ __ __ __ __ __ __ __ __ __ __ __
13 __ __ __ __ __ __ __ __ __ __ __ __ __ __, __ __, __ __ 13 __ __ __ __ __ __ __ __ __ __ __ __
14 __ __ __ __ __ __ __ __ __ __ __ __ __ __, __ __, __ __ 14 __ __ __ __ __ __ __ __ __ __ __ __
15 __ __ __ __ __ __ __ __ __ __ __ __ __ __, __ __, __ __ 15 __ __ __ __ __ __ __ __ __ __ __ __
16 __ __ __ __ __ __ __ __ __ __ __ __ __ __, __ __, __ __ 16 __ __ __ __ __ __ __ __ __ __ __ __
17 __ __ __ __ __ __ __ __ __ __ __ __ __ __, __ __, __ __ 17 __ __ __ __ __ __ __ __ __ __ __ __
18 __ __ __ __ __ __ __ __ __ __ __ __ __ __, __ __, __ __ 18 __ __ __ __ __ __ __ __ __ __ __ __
19 __ __ __ __ __ __ __ __ __ __ __ __ __ __, __ __, __ __ 19 __ __ __ __ __ __ __ __ __ __ __ __
20 __ __ __ __ __ __ __ __ __ __ __ __ __ __, __ __, __ __ 20 __ __ __ __ __ __ __ __ __ __ __ __
21 __ __ __ __ __ __ __ __ __ __ __ __ __ __, __ __, __ __
22 __ __ __ __ __ __ __ __ __ __ __ __ __ __, __ __, __ __
23 __ __ __ __ __ __ __ __ __ __ __ __ __ __, __ __, __ __ Line Type Line #
24 __ __ __ __ __ __ __ __ __ __ __ __ __ __, __ __, __ __ Pre 1 __ __ __ __ __ __ __ __ __ __ __ __ __ __ __ __
25 __ __ __ __ __ __ __ __ __ __ __ __ __ __, __ __, __ __ Pre 2 __ __ __ __ __ __ __ __ __ __ __ __ __ __ __ __
26 __ __ __ __ __ __ __ __ __ __ __ __ __ __, __ __, __ __ Pre 3 __ __ __ __ __ __ __ __ __ __ __ __ __ __ __ __
27 __ __ __ __ __ __ __ __ __ __ __ __ __ __, __ __, __ __ Pre 4 __ __ __ __ __ __ __ __ __ __ __ __ __ __ __ __
28 __ __ __ __ __ __ __ __ __ __ __ __ __ __, __ __, __ __ Pre 5 __ __ __ __ __ __ __ __ __ __ __ __ __ __ __ __
29 __ __ __ __ __ __ __ __ __ __ __ __ __ __, __ __, __ __ Pre 6 __ __ __ __ __ __ __ __ __ __ __ __ __ __ __ __
30 __ __ __ __ __ __ __ __ __ __ __ __ __ __, __ __, __ __ Post 7 __ __ __ __ __ __ __ __ __ __ __ __ __ __ __ __
31 __ __ __ __ __ __ __ __ __ __ __ __ __ __, __ __, __ __ Post 8 __ __ __ __ __ __ __ __ __ __ __ __ __ __ __ __
32 __ __ __ __ __ __ __ __ __ __ __ __ __ __, __ __, __ __ Post 9 __ __ __ __ __ __ __ __ __ __ __ __ __ __ __ __
33 __ __ __ __ __ __ __ __ __ __ __ __ __ __, __ __, __ __ Post 10 __ __ __ __ __ __ __ __ __ __ __ __ __ __ __ __
34 __ __ __ __ __ __ __ __ __ __ __ __ __ __, __ __, __ __ Post 11 __ __ __ __ __ __ __ __ __ __ __ __ __ __ __ __
35 __ __ __ __ __ __ __ __ __ __ __ __ __ __, __ __, __ __ Post 12 __ __ __ __ __ __ __ __ __ __ __ __ __ __ __ __
36 __ __ __ __ __ __ __ __ __ __ __ __ __ __, __ __, __ __
37 __ __ __ __ __ __ __ __ __ __ __ __ __ __, __ __, __ __
38 __ __ __ __ __ __ __ __ __ __ __ __ __ __, __ __, __ __ Tax %
39 __ __ __ __ __ __ __ __ __ __ __ __ __ __, __ __, __ __ 1) __ . __ __ __
40 __ __ __ __ __ __ __ __ __ __ __ __ __ __, __ __, __ __ 2) __ . __ __ __
41 __ __ __ __ __ __ __ __ __ __ __ __ __ __, __ __, __ __ 3) __ . __ __ __
42 __ __ __ __ __ __ __ __ __ __ __ __ __ __, __ __, __ __ 4) __ . __ __ __
Line Description
Group
Description
Preamble & Postamble
1. Load Printer Paper
a. Load the roll of paper into the printer.
The paper must unroll from the side
closest to you. You must load the roll
of paper before continuing.
2. Clear The Register’s Memory
a. Turn power off.
b. Turn the C key to the S position
which is located at 6 o’clock.
c. Press and hold the CHECK key.
d. Turn on the register while holding
down the CHECK key. After the
register makes a single beep noise,
release the CHECK key.
e. Press the upper left key (1), then the
lower left key (6), then the upper
right (Clerk #), and finally the lower
right key (Cash). Wait for the printer
to print: “RAM ALL CLEAR OK!”
before you proceed to step f.
f. Turn the key counterclockwise to the
REG position.
g. Enter 1, then press the CLERK # key
3. Date and Time
a. a. Turn the key to the PGM position.
b. Enter 1300, then press the SBTL key.
c. Enter the time using the 24 hr.format.
d. Press the X/TIME key.
e. Enter the date using the DD/MM/YY
format.
f. Press the X/Time key.
g. Press the CASH key.
4. Tax
a. Turn the key to the PGM position.
b. Enter the tax percentage rate. Use the
decimal key and make sure there are
3 digits after it. i.e. 6.500
c. Enter 0.
d. Enter 0.
e. Press the TAX 1 SHIFT key.
f. Press the CASH key.
5. Item Group Descriptions
a. Turn the key to the PGM position.
b. Enter 910, then press the SBTL key.
c. Enter the group number you would
like to program (1-20).
d. Press the X/TIME key.
e. Enter the name of the group, up to 12
characters in length. i.e. Beverages
f. Press the SBTL key.
g. Repeat from step 5.c to 5.f for the
remaining groups. Then proceed to
step 5.i.
h. Press the CASH key once all of the
group descriptions have been
programmed.
6. Item Descriptions
Place the Keyboard that has the item
locations over the register’s keyboard.
a. Turn the key to the PGM position.
b. Enter 300, then press the SBTL key.
c. Press one of the items that needs a
description programmed to it.
d. Enter the item description, up to 12
characters in length.
e. Press the X/TIME key.
f. Repeat from step 6.c to 6.e for the
remaining items. Then proceed to
step 6.g.
g. Press the CASH key when all of the
item descriptions have been
programmed.
7. Item Tax and Preset/Open Status
a. Turn the key to the PGM position.
b. Enter 100, then press the SBTL key.
c. Press one of the item keys that needs
to be programmed.
d. Enter the number that corresponds
with the tax and preset options, see
below:
Preset Taxable = 6
Preset No Tax = 7
Open Taxable = 0
Open No Tax = 1
e. Press the X/TIME key.
f. Repeat from step 7.c to 7.e for the
remaining items. Then proceed to
step 7.g.
g. Press the CASH key once all items
have been programmed.
8. Item Group Assignment
a. Turn the key to the PGM position.
b. Enter 150, then press the SBTL key.
c. Press the item that needs to be
assigned to a group.
d. Enter up to 3 groups. Use 2 digits per
group. i.e. 01.00.00 (group 1),
010300 (groups 1,3) 010304 (groups
1,3,4). All items have a default
setting of group 1.
e. Press the X/TIME key.
f. Repeat from step 8.c to 8.e for the
remaining items. Then proceed to
step 8.g.
g. Press the CASH key once all items
have been assigned to a group to
report its totals to.
9. Item Preset Price
Skip this step for all open items.
a. Turn the key to the PGM position.
b. Enter 200, then press the SBTL key.
c. Press an item on the keyboard that is
going to have a preset price.
d. Enter the preset price value without
using the decimal key.
e. Press the X/TIME key.
f. Repeat from step 9.c to 9.e for the
remaining preset items. Then proceed
to step 9.g.
g. Press the CASH key when all preset
items have been programmed.
10. Preamble & Postamble Description
The pre & postamble both have 6, 16
character lines. You need to manually center
each line by spacing in before you enter the
first letter. When counting the total number
of characters being used per line, remember
to include the space between words. Use the
2 step formula below to figure out how many
initial spaces need to be entered before the
first letter.
Step 1) 16 – (# of characters used) = X
Step 2) X÷2 = # of initial spaces
i.e. SNACK NOW = 9 characters
Step 1) 16 – 9 = 7
Step 2) 7÷2 = 3.5, round up = 4 initial spaces
a. Turn the key to the PGM position.
b. Enter 700, then press the SBTL key.
c. Enter the pre or post amble line
number that you would like to
program, see below:
Pre line 1 = 1………..Pre line 6 =6
Post line 1 = 7…….Post line 6 = 12
d. Press the X/TIME key.
e. Enter the initial spaces and the line
description. Use the double key (48)
before each character, including
spaces.
i.e. SNACK NOW
double, space, double, space, double,
space, double, space, double, S,
double, N, double, A, double, C,
double, K, double, space, double, N,
double, O, double, W.
If you make a mistake use the
BACKSPACE key (60) to erase the
last character entered.
f. Press the SBTL key after you have
entered the line description.
g. Repeat from step 10.c to 10.g for the
remaining pre & postamble lines.
Then proceed to step 10.i when
finished.
h. Press the CASH key.
i. If you are not using integrated credit,
you are done programming your
register. Turn the key to the OFF
position and remove it from the
register for security purposes. If you
are using integrated credit, proceed to
the next section.
11. MCR Setup (credit)
Skip this section if you are not using
integrated credit.
a. Turn the C key to the S position
which is located at 6 o’clock.
b. Enter 70, then press the SBTL key.
c. Enter 123, then press the CHARGE
key.
d. Press the CASH key.
e. Turn the C key to the PGM position.
f. Enter 70, then press the SBTL key.
g. Enter 21, then press the CHARGE
key.
h. Press the CASH key.
i. Enter 30, then press the SBTL key.
j. Enter 27, then press the X/TIME key.
k. Enter 2, then press the SBTL key.
l. Enter 29, then press the X/TIME key.
m. Enter the number that corresponds
with the MCR location. See below.
The MCR location is where the credit
card will be swiped.
DataTran = 0
Register = 2
n. Press the SBTL key.
o. Press the CASH key.
p. Turn the key to the S Position.
q. Enter 81, then press the SBTL key.
r. Enter 1, then press the X/TIME key.
s. Enter 2, then press the CASH key.
t. Enter 5, then press the X/TIME key.
u. Enter 10, then press the CASH key.
v. Plug the DataTran into serial port 2
on the register.
w. You’re done! Turn the key to the
OFF position and remove it from the
register.

Other manuals for ER-390M

4

Other Sam4s Cash Register manuals

Sam4s SPS-300 Series Owner's manual

Sam4s

Sam4s SPS-300 Series Owner's manual

Sam4s ER-900 Series Troubleshooting guide

Sam4s

Sam4s ER-900 Series Troubleshooting guide

Sam4s ER-5100? SERIES Owner's manual

Sam4s

Sam4s ER-5100? SERIES Owner's manual

Sam4s SPS-300 Series User manual

Sam4s

Sam4s SPS-300 Series User manual

Sam4s ER-900 Series User manual

Sam4s

Sam4s ER-900 Series User manual

Sam4s ER-180U Series Owner's manual

Sam4s

Sam4s ER-180U Series Owner's manual

Sam4s SER-7000 User manual

Sam4s

Sam4s SER-7000 User manual

Sam4s ER-5200M Owner's manual

Sam4s

Sam4s ER-5200M Owner's manual

Sam4s SPS-520 Assembly instructions

Sam4s

Sam4s SPS-520 Assembly instructions

Sam4s ER-5100? SERIES User manual

Sam4s

Sam4s ER-5100? SERIES User manual

Sam4s ER-390M Troubleshooting guide

Sam4s

Sam4s ER-390M Troubleshooting guide

Sam4s ER-390M Troubleshooting guide

Sam4s

Sam4s ER-390M Troubleshooting guide

Sam4s ER-650 User manual

Sam4s

Sam4s ER-650 User manual

Sam4s ER-420M Troubleshooting guide

Sam4s

Sam4s ER-420M Troubleshooting guide

Sam4s SER 7000 User manual

Sam4s

Sam4s SER 7000 User manual

Sam4s ER-380 Troubleshooting guide

Sam4s

Sam4s ER-380 Troubleshooting guide

Sam4s ER-180U Series Owner's manual

Sam4s

Sam4s ER-180U Series Owner's manual

Sam4s ER-285M Owner's manual

Sam4s

Sam4s ER-285M Owner's manual

Sam4s NR-500 Series Owner's manual

Sam4s

Sam4s NR-500 Series Owner's manual

Sam4s ER-230 Series Troubleshooting guide

Sam4s

Sam4s ER-230 Series Troubleshooting guide

Sam4s ER-380 Troubleshooting guide

Sam4s

Sam4s ER-380 Troubleshooting guide

Sam4s ER-900 Series User manual

Sam4s

Sam4s ER-900 Series User manual

Sam4s SER-7000 User manual

Sam4s

Sam4s SER-7000 User manual

Sam4s ER-900 Series User manual

Sam4s

Sam4s ER-900 Series User manual

Popular Cash Register manuals by other brands

TREMOL S25 user manual

TREMOL

TREMOL S25 user manual

Klemsan Klecard user guide

Klemsan

Klemsan Klecard user guide

Veeder-Root TLS Series Application guide

Veeder-Root

Veeder-Root TLS Series Application guide

DIEBOLD NIXDORF BEETLE /iSCAN EASY user manual

DIEBOLD NIXDORF

DIEBOLD NIXDORF BEETLE /iSCAN EASY user manual

Casio 130CR user manual

Casio

Casio 130CR user manual

STAMONY ST-DOC-300 user manual

STAMONY

STAMONY ST-DOC-300 user manual

Sharp XE-A202 - Electronic Cash Register quick start guide

Sharp

Sharp XE-A202 - Electronic Cash Register quick start guide

Epson DM-D500 Series Start here

Epson

Epson DM-D500 Series Start here

Sanyo ECR365 Insruction manual

Sanyo

Sanyo ECR365 Insruction manual

Casio FE-700 MEX Service manual

Casio

Casio FE-700 MEX Service manual

Olivetti ECR 7100 user guide

Olivetti

Olivetti ECR 7100 user guide

Olympia CM 910 Operating Instructions Programming Instructions

Olympia

Olympia CM 910 Operating Instructions Programming Instructions

Casio PCR-204 Operator's instruction manual

Casio

Casio PCR-204 Operator's instruction manual

Casio QT-7300 Series Service manual

Casio

Casio QT-7300 Series Service manual

Digitron D110 user manual

Digitron

Digitron D110 user manual

Azkoyen CASHLOGY CONNECTOR user manual

Azkoyen

Azkoyen CASHLOGY CONNECTOR user manual

Sharp ER-A330 installation manual

Sharp

Sharp ER-A330 installation manual

WeP BP 1100 JOY user manual

WeP

WeP BP 1100 JOY user manual

manuals.online logo
manuals.online logoBrands
  • About & Mission
  • Contact us
  • Privacy Policy
  • Terms and Conditions

Copyright 2025 Manuals.Online. All Rights Reserved.