Samson Meteor Mic User manual


You
Tube
facebook

Table
of
Contents
Introduction.
...............
.
...............................
1
Meteor
Mic Layout
............................................
4
Installing
the
Meteor
Mic
.......................................
6
Quick
Start. . . . . . . . . . . . . . . . . . . . . . . . . . . . . . . . . . . . . . . . . . . . . . . . 10
Recording Techniques . . . . . . . . . . . . . . . . . . . . . . . . . . . . . . . . . . . . . . . .
12
Specifications. . . . . . . . . . . . . . . . . . . . . . . . . . . . . . . . . . . . . . . . . . . . . . 16
Polar Pattern &Frequency Response . . . . . . . . . . . . . . . . . . . . . . . . . . . . . . . 17
v1.0
©201
0 Samson Technologies Corp.

_M
...
e
...
te
....
o_r_M_i
...
c_._u_s_B_S_t_u_d_io_c_o_n_d_e_n_se_r_M_ic_r_o._p_h_o_n_e~---!l!l!l&'!
li&"";
:wl
tM!M£tKHMMW@W.
c
W"i'%
?
.t
:
.·
;-:;
,
,
"
"'.
''
"
'·
·
·
·
·
··.
··
·:
Introduction
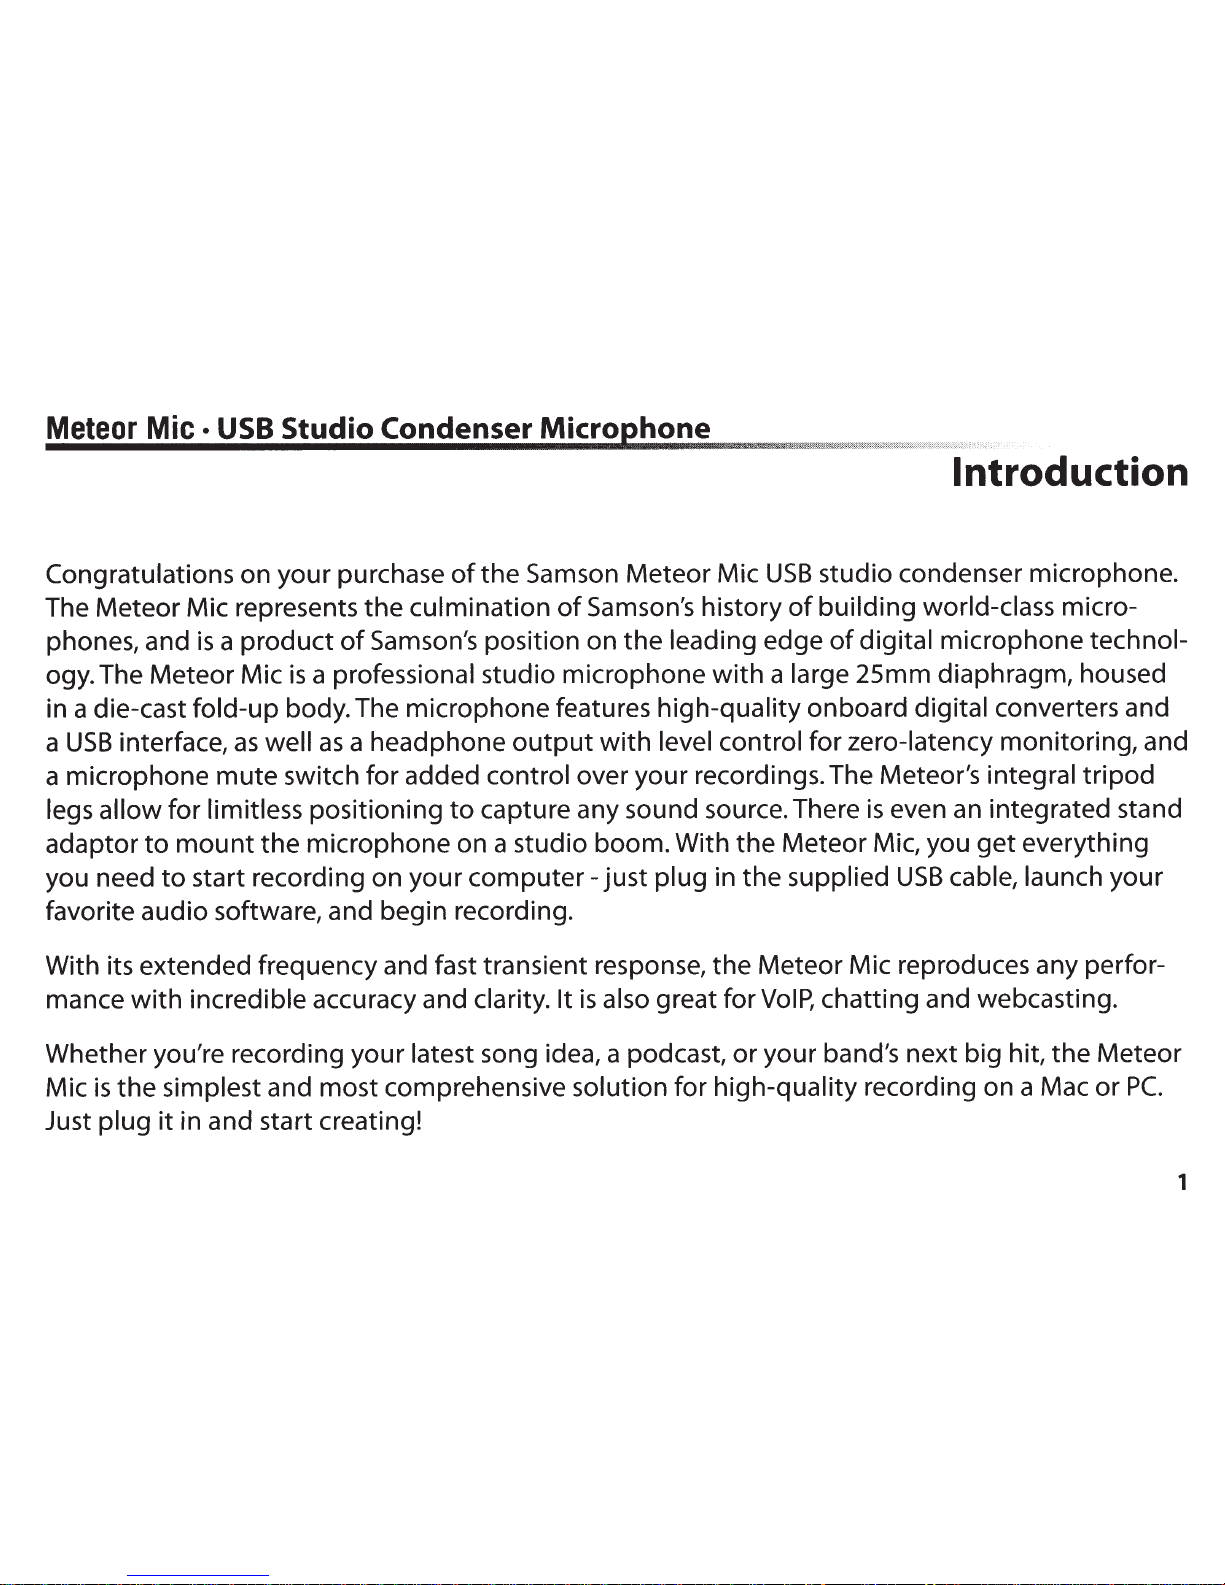
Congratulations on your purchase
of
the
Samson MeteorMic
USB
studio condenser microphone.
The MeteorMic represents the culmination
of
Samson's history
of
building world-class micro-
phones, and
is
a product
of
Samson's position on the leading edge
of
digital microphone technol-
ogy.The MeteorMic
is
a professional studio microphone
with
a large 25mm diaphragm, housed
in adie-cast fold-up body.The microphone features high-qualityonboard digital converters and
a
USB
interface,
as
well
as
a headphone
output
with
level control for zero-latency monitoring,and
amicrophone
mute
switch
for
added control over your recordings.The Meteor's integral
tripod
legs allow
for
limitless positioning
to
capture any sound source.There
is
even
an
integrated stand
adaptor
to
mount
the
microphone on a studio boom.With
the
Meteor Mic, you
get
everything
you need
to
start recording on your
computer-
just
plug in the supplied
USB
cable, launch your
favorite audio software, and begin recording.
With its extended frequency and fast transient response,
the
Meteor Mic reproduces any perfor-
mance
with
incredible accuracy and clarity. It
is
also greatfor
VoiP,
chatting and webcasting.
Whether you're recording your latest song idea, apodcast,
or
your band's next big hit,
the
Meteor
Mic
is
the simplest and most comprehensive solution
for
high-quality recording on a Mac or
PC.
Just plug
it
in and start creating!
1

Introduction
In this manual, you'll find adetailed description
of
thefeatures
of
your
MeteorMic
USB
studio
condenser microphone,
as
well
as
step-by-step instructions for its setup and
use,
and full specifi-
cations.
If
your MeteorMic was purchased in the United States, you'll also
find
awarranty card enclosed.
Don't forget
to
fill
it
out
and mail it!This will enable you
to
receive onlinetechnical
support
and
allow
us
to
send you updated information
about
this and
other
Samson products.With proper
care,
your MeteorMic will operate trouble-free for many
years.
Should your
unit
ever require
servicing, a Return Authorization
(RA)
number
must be obtained before shipping your
unit
to
Samson.
Without
this number,
the
unit
will
not
be
accepted. Please call Samson
at
1-800-3SAM-
SON
(1-800-372-6766)
for
an
RA
number
prior
to
shipping your unit.
Please
retain the original
packing materials and,
if
possible, return the
unit
in its original carton.
If
your MeteorMic was pur-
chased outside
of
the
United States, contact your local distributor
for
warranty details and service
information. Also, be sure
to
check
out
our
website (www.samsontech.com)
for
information
about
our
full product line.
We
recommend you record
your
serial
number
in the space provided belowfor future reference.
2

Meteor
Mic
·
USB
Studio Condenser Micro hone
Meteor
Mic Features
• Professional, large diaphragm, studio condenser
USB
microphone
•
l-inch
(25mm) microphone capsule
•
On
board 1/a-inch headphone
output
with
vol-
ume control
for
zero latencydirect monitoring
• High-quality
A/0
and
0/
A converters
• Compatible
with
Mac and
PC
computers; no
special drivers
or
external powersupplies
are
required
• Microphone
mute
switch for privacy, and
to
silence noise
during
playback
• Computer-controlled analog
Input
Gain
• Power,
Peak,
and
Mute
LED
indicator
•
USB
cable and carry pouch included
3

MeteorMic Layout
1. Capsule- Large,
l-inch
(25mm) diaphragm
with
Cardioid polar pattern.
2. Windscreen -Dual stage grille protects
the
cap-
sule and helps reduce
wind
noise and p-popping.
3. LED-Three-color
LED
illuminates blue
to
indi-
cate power, amber
to
indicate
that
the
micro-
phone
is
muted, and flashes red when
the
input
signal
is
clipping.
4. Headphone
Volume-
Controls
the
overall level
of
the MeteorMic's headphone
output.
5. Microphone
Mute
Button -Mutes
the
output
of
the microphone
to
the
computer
and head-
phone
output.
The
LED
will
illuminate amber
when
the
microphone
is
muted.
6. Stand
Mount-
Standard 5/8-inch thread
mount
to
attach
the
MeteorMic
to
a microphone stand.
4

Meteor Mic •
USB
Studio
Condenser
Microphone
Meteor
Mic
Layout
7.
Headphone
Jack-
1
/s-inch (3.5mm) stereojack
for
connecting headphones
or
studio monitors.
8. USB- Mini-B size
USB
connector
for
interfacing-
with
your
PC
or
Mac.
5

Installing the Meteor Mic
Installing
the
Meteor
Mic
is
a
simple
procedure
that
takes
just
a
few
minutes. Simply
connect
the
included
USB
cable and
begin
recording.The
following
sections
of
this manual
provide
detailed
instructions
on
setting
up
your
Meteor
Mic
in MAC
OS
or
Windows.
Windows 7
&
WindowsVista
1.
The first
tii11e
you
plug
the
Meteor
Mic
into
a
USB
port,
Windows
7
or
Vista
will
install
the
universal drivers
for
that
port.
A
balloon
will
pop
up,
telling
you
the
computer
has
found
the
Meteor
Mic.
2. When
it
is
finished installing
the
drivers, a
balloon
pop
up
will
say"Your device
is
installed and
ready
to
use:'
Note:
This
balloon
will
only
pop
up
when
you
first
plug
the device
into
a
particular
USB
port.
3.
To
set
the
Meteor
Micas
your
default
device
for
sound playbackand recording,
or
to
change
its settings, click
the
Start
button,
click ControlPaneland
then
clickSound.
Under
the
Playback
and Recording tabs,
you
can select
the
Samson
Meteor
Mic
from
the
menus and use
the
Set
Default
button
to
set
it
as
the
default
device.
4.
To
set
the
gain
of
the
microphone, click
the
Properties
button,
and
then
select
the
Levels tab.
You
can choose
to
view
the
Microphone
volume
level
as
either
a percentage
or
in dB,
by
right
6

Meteor
Mic
·USB Studio Condenser Microphone
~~~~~~
d~-!Wt&$JnW!ilil!ffi
'®Th[;'<f~'"JJ'j;
"@@i\''"''""""
Installing
the
MeteorMic
clicking on the numberbox.
If
you find that the microphone red clip
LED
is
lighting frequently,
turn
this control
down
until the
LED
no longerflashes
red.
5.
Select the
Playback
tab, then select the
Level
tab and set the computer's MasterVolume
to
1
00°!0.
Use
the Meteor Mic's front panel Volume knob
to
control the overall
output
from the
headphones
or
speaker.
6.
Adjust the direct monitoring level in the
Playback
tab by moving the fader labeled Micro-
phone. A good place
to
start
is
to
set the monitoring level equal
to
the microphone gain.
Remember
that
the monitoring level
is
not
the
same
as
the microphone gain.
If
the
input
signal
is
clipping, lowerthe microphone gain.
WindowsXP
1.
The first
time
you plug the MeteorMic into a
USB
port,Windows will install the universal
drivers for
that
port. A balloon will
pop
up, telling you the computer
has
"Found new Hard-
ware:'
2.
When
it
is
finished installing
the
drivers, a balloon
pop
up
will
say
"Your new hardware
is
installed and ready
to
use:'
Note: This
balloon
will
only
pop
up
when
you
first
plug
thedevice
into
a
particular
USB
port.
7

Installing the
Meteor
Mic
3.
To
set
the
Meteor Micas yourdefaultdevicefor sound playback and recording,
or
to
change
its settings, click
the
Start
button, click ControlPanel and then clickSounds
and
Audio
De-
vices. In the
Audio
tab, select
the
Samson MeteorMic from
the
drop-down menu.
4.
To
set the gain
of
the
microphone, click
the
Volume
button
in the Sound recording section
to
make
the
Microphone slider appear. Itwill
say
"Samson Meteor Mic"in the status bar at
the bottom. Moving this slider will adjust
the
analog amplifiercircuitry in
the
microphone.
5.
To
set
the
.headphone level, click the Volume
button
in
the
Sound playback section, and set
the Speaker slider
to
the
maximum position.
Use
the Meteor Mic's
front
panel Volume knob
to
control
the
overall
output
from
the
headphones orspeakers.
6.
To
set the direct monitoring level in the headphones, click the Volume
button
in
the
Sound
playback section. Adjusting
the
Microphone slider changes
the
microphone monitoring
level, and will
not
affect the microphone level sent
to
your software.
8
Note:
If
the Microphonesection does
not
appear
at
first, clickOptions
and
then Properties,
and
click the checkbox
next
to
Microphone.

Meteor
Mic
·USB Studio Condenser Microphone
,~~"jj!$;
....
,._"'"'1"''!
'"'"'"m""@@\J!M\
!
,,
d,.,,,,,,,.,
,,
.,,.
..
...
..
...
Installing the
Meteor
Mic
Apple
MAC OSX
1.
To
start using
the
Samson MeteorMic, simply plug
it
in.The
LED
will illuminate
to
indicate
it
is
receiving
USB
power.The
MAC
will recognize
the
USB
audio device and automatically
install a universal driver.
2.
To
select
the
Meteor
Micas
the
computer's audio input, open System Preferences from
the
dock
or
the
main Apple Menu.
3.
Next, open
the
Sound preferences, choose
the
Input
tab
and select MeteorMic.
To
set
the
gain
of
the
microphone, adjust
the
Input
volume slider at
the
bottom
of
the
Sound dialog
box.The
Input
Level meterwill show
the
recording level.
4.
To
set the playback volume, click in
the
Output
tab and select MeteorMic, adjust
the
Output
volume slider at
the
bottom
of
the Sound dialog box
to
the maximum setting and use
the
MeteorMic's
front
panel Volume knob
to
control
the
overall
output
from
the
headphones
or
speakers.
5.
To
turn
direct
monitoring
on
or
off, open
the
Audio/MIDI Setup
utility
located in the Utility
folder inside
the
Applications folder.Then click
the
checkbox in
the
Thru column in
Audio/
MIDI Setup.
9

Quick Start
There are many ways
to
use
the
microphone, and
our
quickstart example
is
atypical setup
for
recording vocals. Just
follow
the
simple steps
below
to
begin recording.
1.
Unfold
the
legs
of
the
MeteorMic, and position
the
microphone on your desktop.The legs can be adjusted
to
set
the
angle
of
the
microphone.
2. Next, connect your headphones
to
the
Headphone
output
located on
the
rear
of
the
MeteorMic.
3.
Plug
the
mini-B size (small) end
of
the included
USB
cable
into
the
USB
socket on
the
rear
of
the
MeteorMic.
4.
Plug
the
other
end
of
the
USB
cable
into
an available
USB
port
on your computer.
10
Note:
Be
sure
to
check theinstallation guide for Windows
and
Mac
OS
in this
manual
to confirm
your
computer
has
recognized theMeteorMic. Also, makesure
your
computer's
output
level
is
setto
maximum
for
fullvolume in theMeteor
Mic
headphonemonitor.

Meteor
Mic
·USB
Studio Condenser Microeho11e
=:::::
QuickStart
5.
Launch your
DAW,
turn
the microphone's
Volume knob down,and select the MeteorMic
for the
input
and output.
6.
Set
up
a
mono
record track in
your
DAW
for
the
vocal track.
7.
Next, set the level
of
the Meteor M
ic.
There
are few ways
to
do
this depending on
your
preference and computer setup. One way
to
control
the
gain
is
to
set the microphone's in-
put
level in the Sound playback in Windows,
or
--..-~
.i.\'!=it.i in
the
Sound dialog box in System Preferences,
I \
if
you are using a
MAC
OS.
You
may also set the
gain
of
the microphone by raising
the
Input
level control in your
DAW.
If
you
see
the
Power/
Peak
LED
illuminate red, your signal will be distorted.Turn
the
MIC
level control
down
until
it
does
not
flash red.
8.
Speak
or
sing
into
the mic and raise the Meteor Mic's Volume knob until you reach a com-
fortable listening level.
11

The Meteor Mic
is
agreat microphone choice for many instrument miking situations. Below
is
a
briefguide on using the Meteor Mic in some typical applications:
Vocals
Position the microphonedirectly in front
of
the
artist
so
that
the microphone grille
is
between
6
to
24 inches away. The closer
the
artist moves
to
the microphone, the more the
bass
or
low
response increases; this
is
called proximityeffect.
To
achieve the
fullest sound, thevocalist should aim
the
microphone center
line towards
their
mouth.
If
p-popping
(turbulent bursts
of
air
produced when uttering consonants)
is
occurring, rotate
the
mi-
crophone a little
bit
awayfrom
the
artist
so
that
sound arrives at
the microphone slightly off-center.
If
space allows,
it
is
preferable
to
prevent p-
popping
through
the
use
of
an
external
pop
filter
like the Samson
PS01.
If
recording a
group
of
singers, ensure
that
they position themselves around
the
front
of
the microphone
close
to
one another.
12

_M_e_t_e_o_r_M_i
c_._u_s_B_S_t_u_d_io_c_o_n_d_e_n_se_r
_M_i_c
_ro....p_h_o_n_e
__
IIWflii
ll
!i!ilillll!iiii!'BR'
!!&l®ni\!W!i!WWM'IfMtl!li!IIIW!@i[;
,YgJMlt!iliE
/,,
,
,
1
,
,
,
,
,,_,~,
,,,,
,, ,
'
,
Recording Techniques
Acoustic Guitar
There are avariety
of
ways
that
the MeteorMic can be used
to
mike
an
acoustic guitar. Optimal
microphone placement will depend
on
the
type
of
instrument, and
what
kind
of
sound you're
looking
to
capture.
It
may be necessary
to
experiment
with
various positions
to
achieve full and balanced tone.When
miking astandard steel string acoustic,
it
is
suggested
that
you
begin
with
the
microphone at adistance
of
6-12
inches from
the sound hole, positioned slightly off-axis, and pointing
to-
wards
the
edge
of
the
fingerboard. From this position, moving
the
microphone towards the sound hole will cause the mic
to
capture more
low
frequencies.
If,
instead, you wish
to
capture
more high-end,
or
to
remove any unwanted boominess, move
the microphonetoward the fingerboard. Unlike asteel string acoustic guitar, the sound
of
a nylon
string acoustic guitar
that
is
played
by
finger picking
is
usually naturally warmer.
To
record
an
even, full tone,
it
is
suggested
that
you begin by positioning
the
microphone
3-6
inches above
the center
of
the
bridge.This will help emphasize
the
higherfrequencies and pick
up
the
attack
sound
of
the
finger picking.
If
the microphone
is
picking
up
too
much
low
frequency from
the
sound hole, move
the
microphone
so
that
it
is
slightly off-axis from the guitar.
If
you have a pair
of
13

Recording Techniques
Meteor Mics,
try
one positioned atthe fingerboard and the second over the bridge
of
the guitar,
or have one microphone positioned close
to
the guitarand the second afew feet away
to
pick
up
the sound
of
the
room, blending the
two
sources together.
Piano
The grand piano
is
avery challenging instrument
to
capture, and can be miked in avariety
of
ways.
For
close miking the piano, position
the
Meteor Mic
just
inside the piano, centered be-
tween the soundboard and
the
open lid.The closer you move the microphonetoward the instru-
ment
the more
low
frequencies
the
microphone will pick up.
For
an
ambient recording like
that
used in aclassical performance, position the microphone outside
the
piano, facing into
the
open
lid. For a more contemporary ensemble sound, place
two
Meteor Mics in the piano, positioning
one overthe
low
strings and one overthe high strings at adistance
of
6-12
inches apart.When
miking
an
upright
piano
with
a single microphone, position
the
microphone
just
above and in
front
of
the piano
with
the
top
open, centered overthe instrument.
If
you have a pair
of
Meteor
Mics, position the microphone over
the
open
top
of
the piano
with
one microphone over
the
bass
strings and one over
the
high strings.
You
can
also position
two
mics in front
of
the
kickboard
area
approximately 8 inches over
the
bass
and high strings.
14

_M_e_te_o_r_M_ic_·_U_S_B_S_tu_d_i_o_C_o_n_d_e_n_s_e_r_M_ic_r_o
..
p_h_o
_n_e
__
~Zmw!MI!i\\Th~"'~'*WW~
l\l*Mffi'\'&
mm.,,·,,,.,,ws""'"'''·"
Recording Techniques
Guitar Amp
Placement
of
the
microphone when recording an electric guitarcan impact
the
tone
as
much
as
the
choice
of
instrumentand amplifier. Guitar amps are usually close-miked
but
consideration
must be made for
the
type
of
signal
the
amp
will produce. While condenser microphones like
the
Meteor Mic have fast transient response,
they
cannot handle extreme high
SPL's.
The MeteorMic
should be placed approximately4 inches from
the
grill
of
the
amp.
For
a brighter sound,
the
mi-
crophone should face
the
center
of
the
amplifier's speaker cone.
By
moving
the
microphone
off
of
the
center
of
the
speaker,
the
sound becomes mellow, rolling
off
some
of
the
high frequencies.
To
add more
of
the
room sound,
the
microphonecan be angled away from
the
amplifier,
or
placed
further awayfrom
the
speaker.
Overhead Drum Kit
Because
of
its extended high frequency response and fast transient response,
the
MeteorMic
performs exceptionally well when used
as
an overhead
drum
set microphone.
You
can position
the
microphone approximatelycentered 5 feet in
front
of
the
drum
kit
12-24
inches above
the
kit. For stereo miking, use
two
microphones placed over
the
drum
set at a distance
of
three
to
five
feet.
Even
though
overhead mics are mostlyfor
the
cymbals, you can
get
the
entire kit
to
sound
great
with
just
two
microphones.
You
should experiment
with
the
exact placement depending on
the
size
of
the
room and whetheryou're looking for
an
ambient
or
close-miked sound.
15

Polar Pattern . . . . . . . . . . . . . . . . . . . Cardioid
Capsule
.......................
1-inch (25
mm)
condenser capsule
Frequency Response . . . . . . . . . . . . . .
20Hz-
20kHz
Max
SPL
. . . . . . . . . . . . . . . . . . . . . . 120dB
Sample Rate. . . . . . . . . . . . . . . . . . . .
44.1
/48kHz
Bit Rate . . . . . . . . . . . . . . . . . . . . . . .
16bit
Power Requirements
..............
SV
70mA (idle), 1
OOmA
(peak)
Controls . . . . . . . . . . . . . . . . . . . . . .
Headphone
Volume,
Microphone
Mute
Switch
Output
. . . . . . . . . . . . . . . . . . . . . . . 1
/8"TRS
Headphone Impedance . . . . . . . . . . . . 16
ohms
Headphone
Output
...............
85mW
at
16ohms
THO
.........................
0.01
o/o
unloaded,
0.04o/o@
32
ohms
Headphone Frequency Response . . . . . .
20Hz-
20kHz
Signal
to
Noise
..................
96dB
(A)
Dimensions . . . . . . . . . . . . . . . . . . . . 1.92"x 3.9"
(49mm
x 1
OOmm)
Weight
. . . . . . . . . . . . . . . . . . . . . . .
.571bs
(263g)
16
Other manuals for Meteor Mic
2
Table of contents
Other Samson Microphone manuals

Samson
Samson Meteor Mic User manual

Samson
Samson Q1U User manual

Samson
Samson SE60x User manual

Samson
Samson Meteorite User manual

Samson
Samson C05 User manual

Samson
Samson QKICJ User manual

Samson
Samson DE50 Series User manual

Samson
Samson G Track User manual

Samson
Samson S12 User manual

Samson
Samson CL5 User manual