3
Samsung SDS
Digital Door Lock SHP-A30 Samsung SDS
Digital Door Lock SHP-A30
2
|Safety Precautions
Warning: This section contains important information to ensure the user’s safety and
prevent potential damage to property. Please, read this section carefully and use the
product accordingly.
Do not use the excessive force or sharp objects to push the lock buttons.
Do not operate this product with wet hands, and keep liquids such as water or beverages away from
this product. It may malfunction or be damaged.
Do not use water, benzene, or alcohol when cleaning the product. Use a soft dry cloth.
Make sure that the door is completely closed when going outside.
Make sure that no unauthorized person has access to the PIN Code. Change it regularly.
Be sure to correctly match the polarities(+/-) of batteries when installing the batteries. Installing the
batteries incorrectly may result in the batteries leaking (without acid), or the batteries may burst.
When the battery replacement alarm voice sounds, replace all new batteries instead of the used
batteries.
Batteries may consume more energy depending on the wireless communication environment.
Radio interference may occur when this product is used, or from other devices.
If this radio system has radio interference during operation, it may not function properly.
Much dew condensation may affect the performance of this product.
It is not recommended to install this product in a rainy, humid, or salty place (e.g. coastal area), or a
place exposed to direct sunlight for a long period of time. Long-term exposure to direct sunlight may
cause a crack on the touch pad. Avoid exposure to direct sunlight.
Much dew condensation may affect the performance of this product.
You must not repair this product without authorization.
Before installing an IoT door lock, check your Wi-Fi environment. Depending on the indoor Wi-Fi
environment, an IoT door lock may not be installed or its service may not be supported. To check your
Wi-Fi environment, you need a smartphone and a Wi-Fi access point (AP) in your house.
Install the door lock while the door is open. Even after completing the installation, do not close the door
until you check if the door lock is operating properly.
While installing this product, do not let the door lock fall to the ground. If this product falls or is dropped
during installation, you may be injured or the product may be damaged.
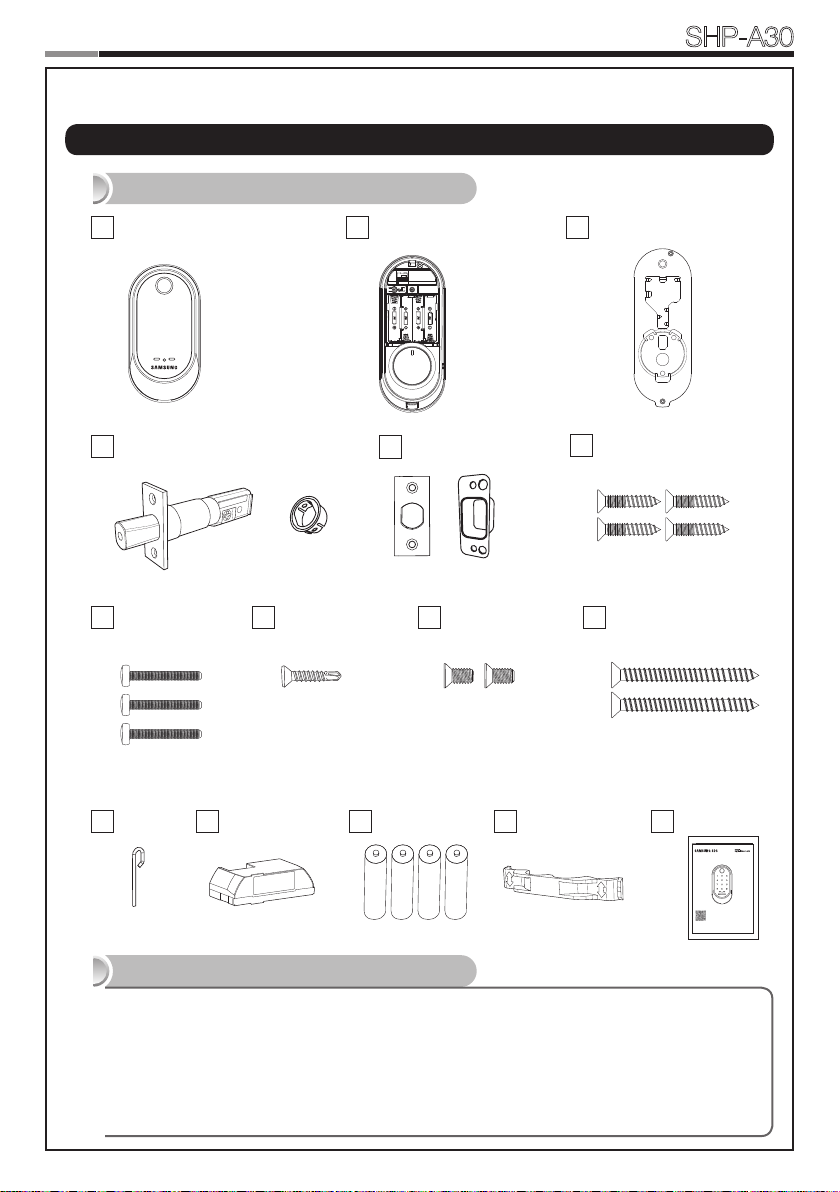
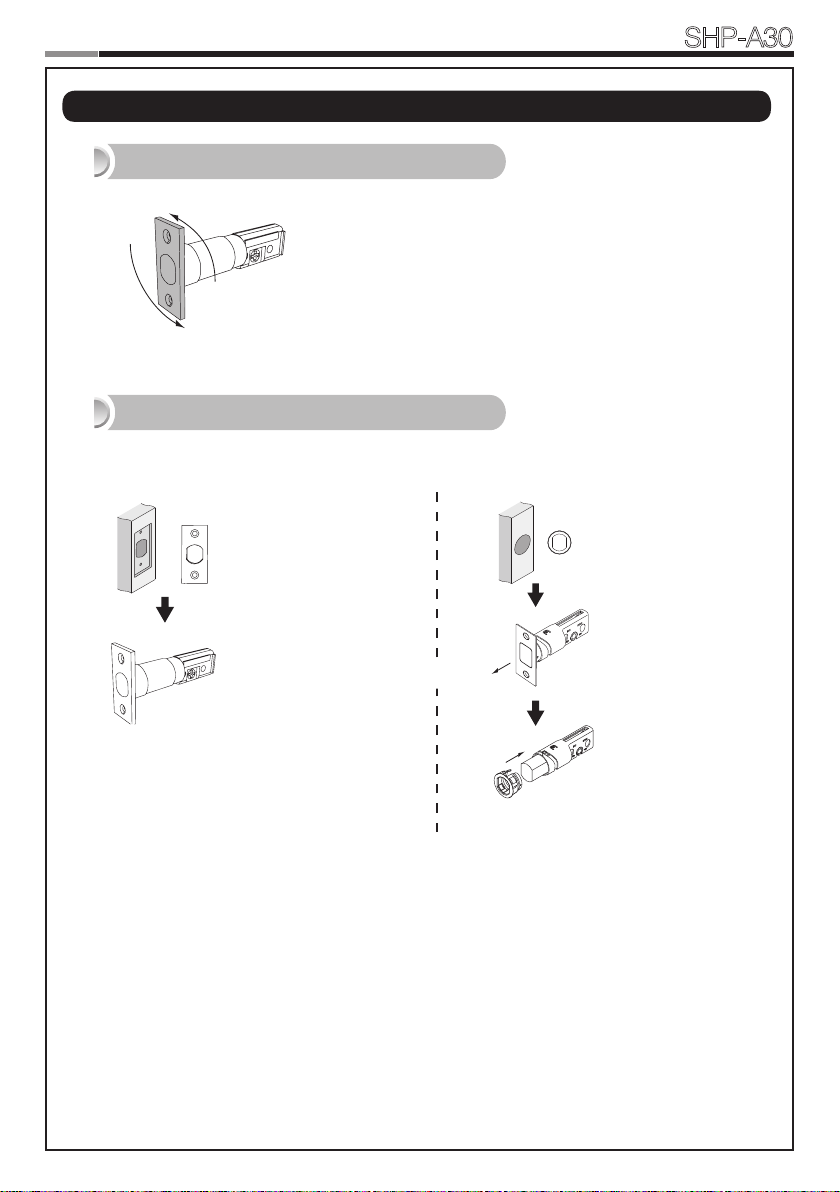
Precaution when Installing Product
Precaution when Using Product