manuals.online logo
Brands
  1. Home
  2. •
  3. Brands
  4. •
  5. Samtec
  6. •
  7. Crimping Tools
  8. •
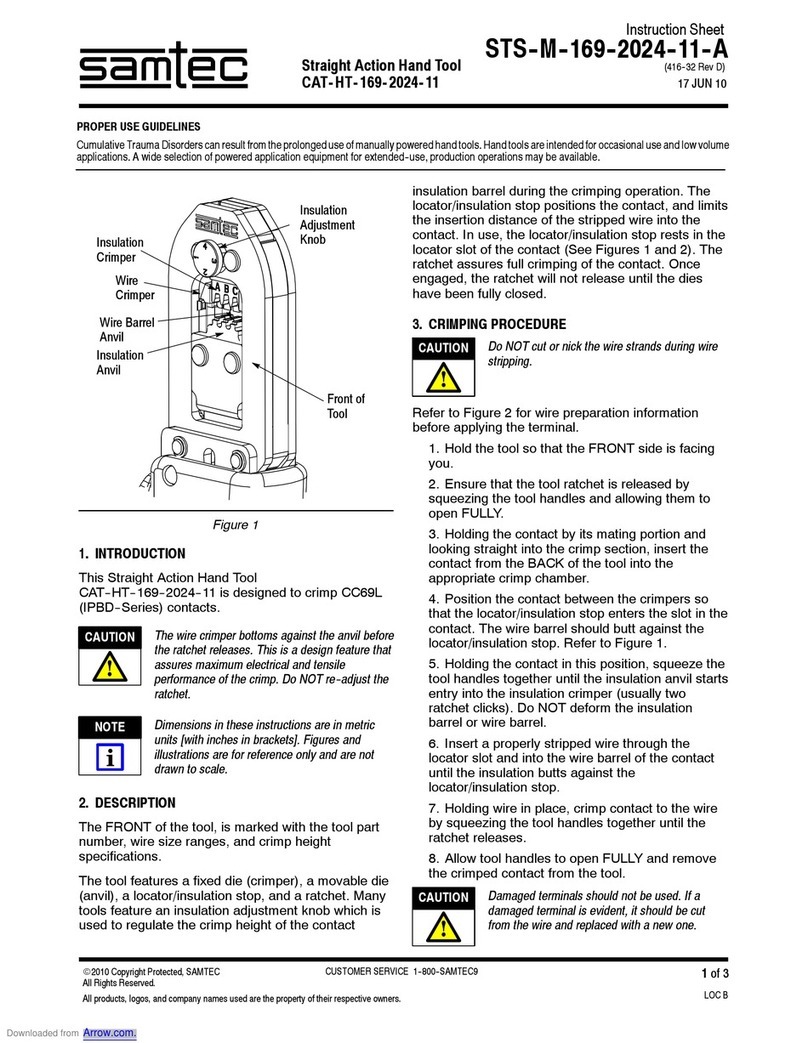
  9. Samtec CAT-HT-169-1620-11 User manual

Samtec CAT-HT-169-1620-11 User manual

Figure 1
CAT–HT–169–1620–11 (straight–action hand tool)
was designed to crimp C&69/(IP%'–Series)
FRQWDFWs.
The front of the tool, is marked with the tool part
number, wire size ranges, and crimp height
specifications.
The tool features a fixed die (crimper), a movable die
(anvil), a locator/insulation stop, and a ratchet. Many
tools feature an insulation adjustment knob which is
used to regulate the crimp height of the contact
insulation barrel during the crimping operation. The
locator/insulation stop positions the contact, and limits
the insertion distance of the stripped wire into the
contact. In use, the locator/insulation stop rests in the
locator slot of the contact (See Figures 1 and 2). The
ratchet assures full crimping of the contact. Once
engaged, the ratchet will not release until the dies
have been fully closed.
Refer to Figure 2 for wire preparation information
before applying the terminal.
1. Hold the tool so that the front side is facing you.
2. Ensure that the tool ratchet is released by
squeezing the tool handles and allowing them to
open
fully
.
3. Holding the contact by its mating portion and
looking straight into the crimp section, insert the
contact from the
back
of the tool into the
appropriate crimp chamber.
4. Position the contact between the crimpers so
that the locator/insulation stop enters the slot in the
contact. The wire barrel should butt against the
locator/insulation stop. Refer to Figure 1.
5. Holding the contact in this position, squeeze the
tool handles together until the insulation anvil starts
entry into the insulation crimper (usually two
ratchet clicks). Do not deform the insulation barrel
or wire barrel.
6. Insert a properly stripped wire through the
locator slot and into the wire barrel of the contact
until the insulation butts against the
locator/insulation stop.
7. Holding wire in place, crimp contact to the wire
by squeezing the tool handles together until the
ratchet releases.
8. Allow tool handles to open
fully
and remove the
crimped contact from the tool.
Figure 2
9. If a terminal becomes jammed in a crimp nest,
open the tool jaws using the“Emergency Ratchet
Release Button” on the moving handle lever.
On many tools, the insulation barrel crimp height is
regulated by the insulation adjustment knob
(Figure 3). The insulation crimp should hold the
insulation firmly without cutting into the insulation.
To determine the proper insulation crimp setting, test
crimp a loose piece contact using the setting which
corresponds to the insulation diameter: (1) –– small;
(2) and (3) –– medium; or (4) –– large. If the crimped
insulation barrel is too tight or loose, change the
setting by pulling out and rotating the adjustment
knob to the desired setting.
Figure 3
It is recommended that a maintenance and inspection
program be performed periodically to ensure
dependable and uniform terminations. Frequency of
inspection depends on:
The care, amount of use, and handling of the
hand tool,
The presence of abnormal amounts of dust and
dirt,
Your own established standards.
The hand tool is inspected before being shipped;
however, it is recommended that the tool be inspected
immediately upon its arrival at your facility to ensure
that the tool has not been damaged during shipment.
1. Remove dust, moisture, and other contaminants
with a clean brush, or a soft, lint–free cloth. Do not
use objects that could damage the tool.
2. Make certain that the retaining pins are in place
and that they are secured with retaining rings.
3. All pins, pivot points, and bearing surfaces
should be protected with a thin coat of any good
SAE 20 oil. Do not oil excessively.
4. When the tool is not in use, keep handles closed
to prevent objects from becoming lodged in the
crimping jaws.
5. Store the tool in a clean, dry area.
Lubricate all pins, pivot points, and bearing surfaces
with SAE 20 oil as follows:
Tools used in daily production – lubricate daily
Tools used daily (occasional) – lubricate weekly
Tools used weekly – lubricate monthly
Wipe excess oil from tool, particularly from crimping
area. Oil transferred from the crimping area onto
certain terminations may affect the electrical
characteristics of an application.
1. The hand tool may be immersed (handles
partially closed) in a reliable commercial
degreasing compound (suitable for plastics) to
remove accumulated dirt, grease and foreign
matter.
2. Close tool handles until the ratchet releases and
then allow the handles to open freely. If they do not
open quickly and fully, the spring is defective and
must be replaced.
3. Inspect the head assembly for worn, cracked, or
broken jaws. If damage is evident, return it for
evaluation and repair.
This inspection requires the use of micrometer with a
modified anvil as shown in Figure 4.
A recommended Crimp Height Comparator is
RS–1019–5LP, which can be purchased from:
Proceed as follows:
1. Select a contact and a wire (maximum size) for
each crimp section.
2. Refer to the Section 3, and crimp the contact(s).
3. Using a crimp height comparator, measure wire
barrel crimp height as shown in Figure 4. If the
crimp height conforms to that marked on the tool,
the tool is considered dimensionally correct.
Figure 4
The ratchet feature on these hand tools should be
checked to ensure that the ratchet does not release
prematurely, allowing the crimping dies to open before
they have fully bottomed. Obtain a 0.025–mm
[.001–in.] shim that is suitable for checking the
clearance between the bottoming surfaces of the
crimping dies. Proceed as follows:
Proceed as follows:
1. Select the maximum size wire and strip it
according to the dimensions listed in the drawing
shipped with the tool.
2. Select the contact and crimp section
corresponding to the selected wire size (refer to
the drawing shipped with the tool).
3. Position the contact and wire in the crimping
dies, as described in Section 3, CRIMPING
PROCEDURE.
4. Hold the wire in place and squeeze the handles
until the ratchet releases. Hold the handles in this
position, maintaining just enough tension to keep
the dies closed.
5. Check the clearance between the bottoming
surfaces of the wire crimper and the wire anvil. See
Figure 1. If the clearance is 0.025 mm [.001 in.] or
less (on at least two of the bottoming surfaces), the
ratchet is satisfactory. If clearance exceeds
0.025 mm [.001 in.], the ratchet is out of
adjustment and must be repaired.
Refer to Figure 5 for tool dimensions.
Since the previous release of this document, the
following changes have been made:
Updated document to corporate requirements
Changed views in Figure 5
Changed titles in table in Figure 2
Figure 5

Other Samtec Crimping Tools manuals

Samtec XCede HDTF Series User manual

Samtec

Samtec XCede HDTF Series User manual

Samtec CAT-HT-203-2830-12 User manual

Samtec

Samtec CAT-HT-203-2830-12 User manual

Samtec CAT-HT-203-2832-11 User manual

Samtec

Samtec CAT-HT-203-2832-11 User manual

Samtec CAT-MA Instruction manual

Samtec

Samtec CAT-MA Instruction manual

Samtec CAT-HT-169-2024-11 User manual

Samtec

Samtec CAT-HT-169-2024-11 User manual

Samtec CAT-HT-144-2830-12 User manual

Samtec

Samtec CAT-HT-144-2830-12 User manual

Samtec CAT- HT- 203- 2832- 11 15 JUN 10 User manual

Samtec

Samtec CAT- HT- 203- 2832- 11 15 JUN 10 User manual

Popular Crimping Tools manuals by other brands

TE Connectivity 2063528-1 instruction sheet

TE Connectivity

TE Connectivity 2063528-1 instruction sheet

Milwaukee M18 Operator's manual

Milwaukee

Milwaukee M18 Operator's manual

TE Connectivity 46447 instruction sheet

TE Connectivity

TE Connectivity 46447 instruction sheet

BEL Stewart 2940252-01 operating instructions

BEL

BEL Stewart 2940252-01 operating instructions

Danfoss ET4000 Operator's manual

Danfoss

Danfoss ET4000 Operator's manual

KUDOS HD-BGD3 SAFETY OPERATING & MAINTENANCE INSTRUCTIONS

KUDOS

KUDOS HD-BGD3 SAFETY OPERATING & MAINTENANCE INSTRUCTIONS

TE Connectivity PDT-48-00 instruction sheet

TE Connectivity

TE Connectivity PDT-48-00 instruction sheet

Textron Klauke K 94 instruction manual

Textron

Textron Klauke K 94 instruction manual

Tyco Electronics PRO-CRIMPER III instruction sheet

Tyco Electronics

Tyco Electronics PRO-CRIMPER III instruction sheet

Hilti NPR 032 IE-A22 operating instructions

Hilti

Hilti NPR 032 IE-A22 operating instructions

TE Connectivity SDE-SA instruction sheet

TE Connectivity

TE Connectivity SDE-SA instruction sheet

Klauke TEXTRON K502 instruction manual

Klauke TEXTRON

Klauke TEXTRON K502 instruction manual

Textron Klauke K 15 instruction manual

Textron

Textron Klauke K 15 instruction manual

Textron EK1240CL Operation manual

Textron

Textron EK1240CL Operation manual

Staubli PV-CZM Series operating instructions

Staubli

Staubli PV-CZM Series operating instructions

Cembre B540ND-BVA Operation and maintenance manual

Cembre

Cembre B540ND-BVA Operation and maintenance manual

molex Avikrimp 64005-3000 manual

molex

molex Avikrimp 64005-3000 manual

Cembre B1320 Operation and maintenance manual

Cembre

Cembre B1320 Operation and maintenance manual

manuals.online logo
manuals.online logoBrands
  • About & Mission
  • Contact us
  • Privacy Policy
  • Terms and Conditions

Copyright 2025 Manuals.Online. All Rights Reserved.