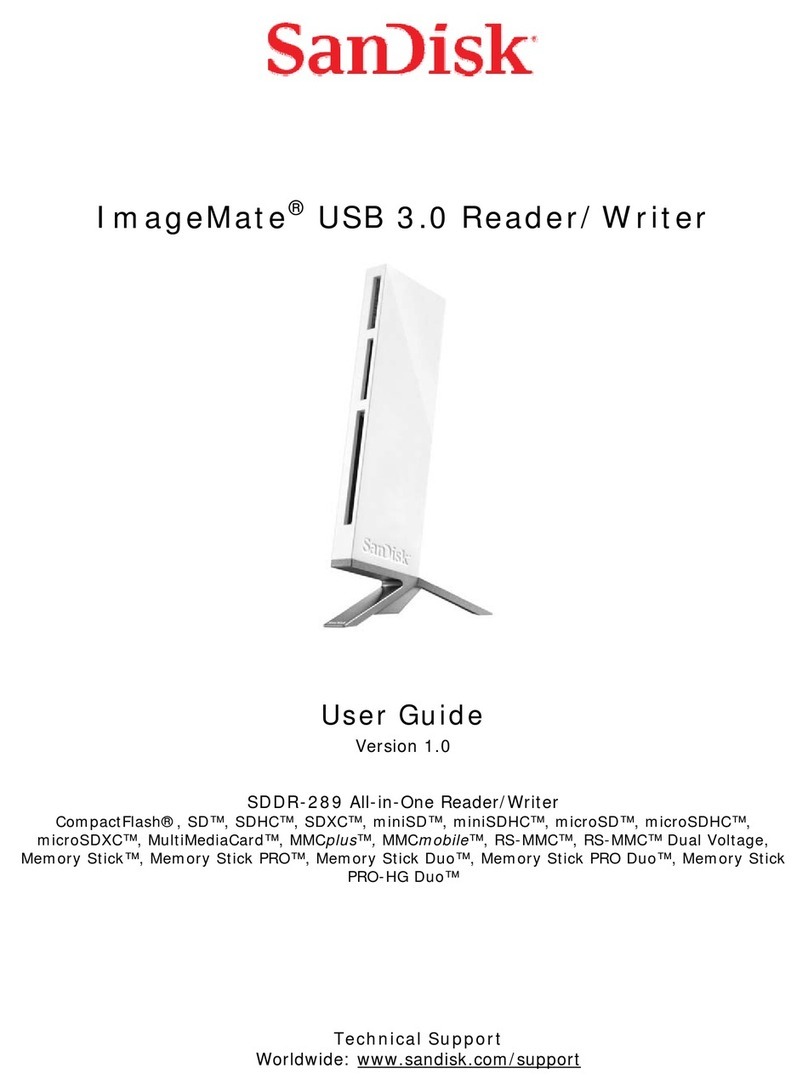
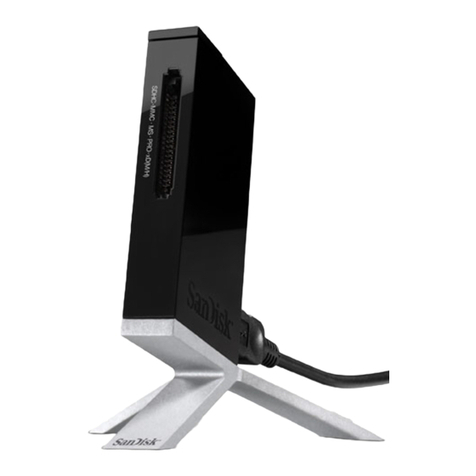
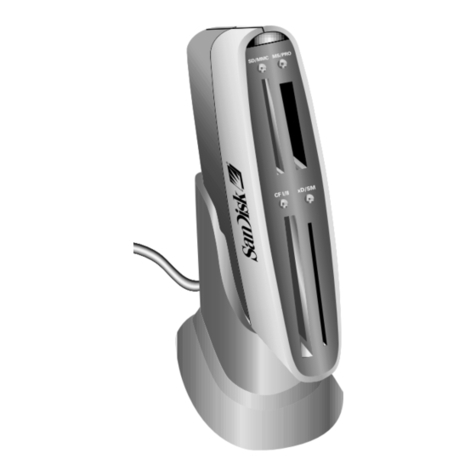
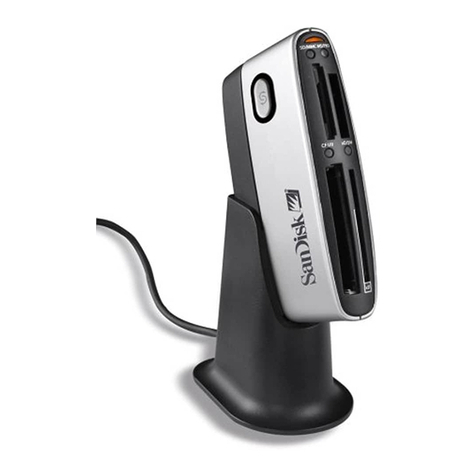
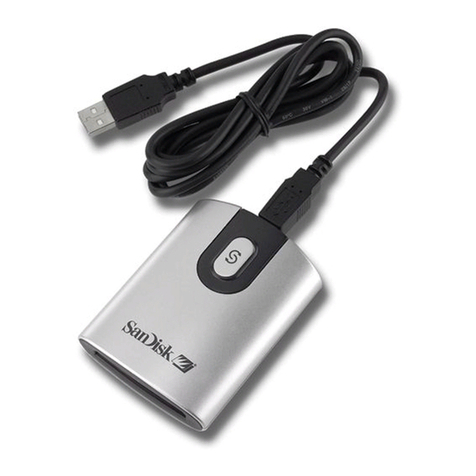
SanDisk SDDR-92-A15 - ImageMate USB 2.0 Reader/Writer Card... User manual

ImageMate®USB 2.0
Reader/Writer
User Guide
The Multi-Function Hi-Speed USB 2.0 Reader/Writer for:
SDDR-92: CompactFlash®Type I/II
SDDR-99: SD™, SDHC™, MultiMediaCard™, MMCplus™, MMCmobile™,
RS-MMC™, RS-MMC Dual Voltage, Memory Stick™,
Memory Stick PRO™ and xD & xD Type M & H
English ................................................. 2
Deutsch ................................................ 9
Français.............................................. 16
Italiano................................................ 23
Español .............................................. 30
Nederlands......................................... 37
êÛÒÒÍËÈ.............................................. 44
Polski.................................................. 51
Português........................................... 58
âesky ................................................. 65
Românæ.............................................. 72
Eesti ................................................... 79

How do I find the USB port?
The USB ports are often located on the front or back of your PC, or on a USB hub. On a laptop computer or a
Macintosh, the USB port may be located on the side. The USB port looks like this.
What is the difference between Hi-Speed USB 2.0 and Full Speed USB 1.1?
Hi-Speed USB 2.0 supports the transfer of data up to 480 megabits per second (Mbps), and Full Speed USB 1.1
supports data transfer up to 12 Mbps. Hi-Speed USB 2.0 provides a dramatic improvement in data transfer
performance compared to Full Speed USB 1.1. USB 2.0 is backward compatible with USB 1.1 ports. The ImageMate
USB 2.0 Reader/Writer supports both USB 2.0 and USB 1.1.
Installing
Before connecting the ImageMate USB 2.0 Reader/Writer to your computer, you may need to install a device driver.
•You can skip this section if your operating system is Windows XP, ME, 2000 or Vista (and proceed to Installing
the Button Application), Mac OS 9.2+ or Mac OS 10.1.2+ (and proceed to Connecting).
Install the Windows 98SE Driver
1. Insert the CD included with the ImageMate USB 2.0 Reader/Writer device into the CD-ROM of your computer.
2. Left-click on the START menu and open the RUN menu. Click BROWSE to locate the drive letter of your
CD-ROM.
3. Select the \Win98\setup.exe file and click OK. Follow the on-screen directions.
Installing the Button Application
(the button application only supports Windows 98SE, ME, 2000 and XP)
1. Insert the CD included with the ImageMate USB 2.0 Reader/Writer device into the CD-ROM of your computer.
2. Left-click on the START menu and open the RUN menu. Click BROWSE to locate the drive letter of your
CD-ROM.
3. Select the \Button Application\setup.exe file and click OK. Follow the on-screen directions.
3
English
System Requirements
Connection
•USB 2.0 port for Hi-Speed data transfer
Minimum Operating System Support
•Windows
•Windows 98SE (driver installation required)
•Windows ME
•Windows 2000
•Windows XP
•Windows Vista
•Macintosh
• Mac OS 9.2+, 10.1.2+
Unpacking Package Contents
•ImageMate USB 2.0 Reader/Writer (storage media not included)
•Installation CD with Button Application and Windows 98SE driver
•USB cable
•Quick Start Guide
Checking
1. Unpack the packaging. Make sure you have everything listed in the PACKAGE CONTENTS.
2. Check your system requirements. Refer to SYSTEM REQUIREMENTS or the outside of the packaging.
3. Locate the USB port on your computer. See UNDERSTANDING.
Understanding
What’s a USB port?
The Universal Serial Bus (USB) port is an easy way to connect a new device like the ImageMate USB 2.0 Reader/
Writer to your computer. Connecting a device to the USB port doesn’t require that you open your computer to install
an add-in card or set complicated switches.You just plug it in and get started.
2

5
Connecting
Connecting the ImageMate USB 2.0 Reader/Writer to the USB port is simple. You don’t need to turn off or restart
your computer when attaching the ImageMate USB 2.0 Reader/Writer. Since the ImageMate USB 2.0 Reader/Writer
is powered by the USB connection, an AC/DC power adapter is not needed.
•Before connecting the ImageMate USB 2.0 Reader/Writer, complete the device driver installation. See
INSTALLING.
Use the USB cable to connect your ImageMate to the computer directly.
When the ImageMate USB 2.0 Reader/Writer is connected for the first time, your computer may display a message
that the device is being installed (may vary slightly depending on your operating system).
Windows Disk Icons
When you connect the ImageMate USB 2.0 Reader/Writer on a Windows operating system, a newly assigned
removable disk icon drive letter representing the card slot will be shown in My Computer.
Macintosh Disk Icons
When you connect the ImageMate USB 2.0 Reader/Writer on a Macintosh operating system, a removable disk icon
labeled “untitled” representing the card slot will show on the desktop when a card is inserted.
Using
The ImageMate USB 2.0 Reader/Writer has one card slot that is used for different types of cards.
•SDDR-92: CompactFlash Type I /II
•SDDR-99: SD, SDHC, MultiMediaCard, MMCplus, MMCmobile, RS-MMC, RS-MMC Dual Voltage,
Memory Stick, Memory Stick PRO and xD & xD Type M & H
Inserting Cards
To insert a card into the ImageMate USB 2.0 Reader/Writer slot, insert the connecter end of the card with the card
label side facing up. DO NOT force the card into the slot.
LED Activity
SDDR-92 (CompactFlash Reader/Writer):
•Windows XP/Vista: The LED indicator turns on when a card is inserted correctly.
•Windows 98SE/ME/2000: The LED indicator turns on when double-click on "Removable Disk" when a card is
inserted correctly.
•Macintosh OS: A drive icon appears on the desktop when a card is inserted correctly.
•All operating systems: The LED indicator blinks when data is transferred from or to the card.
4
SDDR-99 (5-in-1 Reader/Writer):
When the ImageMate USB 2.0 Reader/Writer is installed correctly, the GREEN LED turns on. If the LED is not on:
•Check to make sure the ImageMate USB 2.0 Reader/Writer is connected and the card is inserted properly.
The activity LED indicator (orange) blinks when data is transferred from or to the card.
NEVER remove the card when the ACTIVITY LED is FLASHING or BLINKING
Using it on a PC with the button application
1. Insert the Media Card.
2. Press the button on the reader.
3. The button application will load.
4. If you wish to save the files to your PC choose the “Transfer all Files” button. This will allow you to either copy or
move the files to the PC.
5. If you wish to Select, Rename, Print, E-mail or use for Screen Saver any or all of the photos choose the “Use
Photo Tools” Icon.
Using it on a PC without the button application
Here is the way to create a Folder on your Desktop and Copy and Paste your photos to it.
1. How to create a FOLDER on your Desktop
A. Place your mouse pointer somewhere on the Desktop but not on an icon.
B. Click once with the RIGHT mouse button, move your mouse pointer over NEW then click FOLDER with the
LEFT mouse button.
C. This will create a NEW FOLDER on your Desktop. At this time you can name anything you like, i.e. My
Pictures or Photos, by typing the name in. When you are finished typing press the ENTER key on your
keyboard. Now the folder name is saved.
2. How to copy and paste your photos into a folder
A. Double click on the icon "My Computer".
B. Double click on the removable disk drive (for the ImageMate USB 2.0 Reader/Writer), i.e. F: or G: or maybe E:
Now you should see a DCIM folder (that stands for Digital Camera Images).
C. Double click on the DCIM folder. Now you should see your camera folder, i.e. 100Olymp or 100Canon or
100Fuji.
D. Double click on the camera folder. Now you should see your pictures or picture file names (depending on what
Operating System you are using).
E. Go up to the menu bar where it says "EDIT" and click on "SELECT ALL". You will see all your pictures
HIGHLIGHTED.
F. Go back to "EDIT" and now click "COPY". Close or minimize this window.
G. Double click on the folder you created on your Desktop, go to "EDIT" then click "PASTE" and you should see
the pictures being copied to the folder.
H. To View your Pictures Double click on the File name and the Picture will open up.

Troubleshooting
For FAQs on error messages please go to our website at http://www.sandisk.com/retail/support.asp.
For technical support and warranty service, please go to www.sandisk.com/techsupport to find a number in your area.
SanDisk's 2 Year Limited Warranty
SanDisk warrants that this product will be free from material defects in design and manufacture and will substantially
conform to the published specifications under normal use for two years from your date of purchase, subject to the
conditions below. This warranty is provided to the original end user purchasing from SanDisk or an authorized reseller,
and is not transferable. Proof of purchase may be required. This product must be used with memory cards that are
compliant with the specifications of the SD Card Association, the MultiMediaCard Association, or Memory Stick or
TransFlash requirements as applicable; use with any other product voids this warranty. SanDisk is not responsible for
any failure or defect caused by any third party product or component, whether authorized or not. This warranty does not
apply to any third party software provided with the product and you are responsible for all service and repair needed
for such software. This warranty is void if the memory card is not used in accordance with the product instructions, or if
it is damaged as a result of improper installation, misuse, unauthorized repair, modifications or accident.
You must return the product in tamper resistant packaging, freight prepaid, as instructed by SanDisk.You must obtain
a tracking confirmation number, which you may be required to provide to SanDisk. SanDisk will, at its option, repair
or replace the product with new or refurbished product of equal or greater capacity and functionality, or refund the
purchase price. The warranty duration on replaced product will be that time period remaining on the original product.
THIS CONSTITUTES SANDISK'S ENTIRE LIABILITY AND YOUR EXCLUSIVE REMEDY FOR BREACH OF THIS
WARRANTY.
SanDisk does not warrant, and shall not be responsible for, any lost data or images contained in any product
(including in any returned product), regardless of the cause of the loss. SanDisk's products are not warranted to
operate without failure. SanDisk products should not be used in the life support systems or other applications where
failure could threaten injury or life. This warranty gives you specific legal rights, and you may also have other rights
which vary by jurisdiction.
THE FOREGOING IS SANDISK'S SOLE WARRANTY. SANDISK DISCLAIMS ALL OTHER EXPRESS AND IMPLIED
WARRANTIES TO THE FULLEST EXTENT PERMITTED BY APPLICABLE LAW. THE IMPLIED WARRANTIES
OF MERCHANTABILITY AND FITNESS FOR A PARTICULAR PURPOSE ARE LIMITED TO THE DURATION OF
THE EXPRESS WARRANTY. SOME JURISDICTIONS DO NOT ALLOW LIMITATION ON HOW LONG AN IMPLIED
WARRANTY LASTS, SO THE ABOVE LIMITATION MAY NOT APPLY TO YOU. IN NO EVENT SHALL SANDISK OR
ANY AFFLIATED OR SUBSIDIARY COMPANY BE LIABLE UNDER ANY CIRCUMSTANCES FOR ANY DIRECT,
INDIRECT, OR CONSEQUENTIAL DAMAGES, ANY FINANCIAL LOSS OR ANY LOST DATA OR IMAGE, EVEN
IF SANDISK HAS BEEN ADVISED OF THE POSSIBILTY OF SUCH DAMAGE. SOME JURISDICTIONS DO NOT
ALLOW THE EXCLUSION OR LIMITATION OF INCIDENTAL OR CONSEQUENTIAL DAMAGES, SO THE ABOVE
LIMITATION OR EXCLUSION MAY NOT APPLY TO YOU. IN NO EVENT WILL SANDISK'S LIABILITY EXCEED THE
AMOUNT PAID BY YOU FOR THE PRODUCT.
7
Using it on Macintosh without the button application
(The button application is not compatible with the Macintosh operating systems)
1. Connect the ImageMate USB 2.0 Reader/Writer to the USB port on your Mac (do not connect to Monitor or
Keyboard).
2. To transfer files place a card into the Reader/Writer unit. A new drive will appear on your desktop called “untitled”.
3. Drag and drop files to and from the new drive as you would to any other disk or folder.
Removing Card
To remove the card in Windows:
1. Double click on the icon "My Computer".
2. Right-click on the corresponding ImageMate USB 2.0 Reader/Writer drive icon.
3. Select Eject (this is not needed for Windows 98SE, XP or Vista).
4. Pull the card out of the slot.
To remove the card on a Macintosh:
1. Drag the “untitled” icon into the Trash.
2. Pull the card out of the slot.
Disconnecting
You don’t need to shut down your computer to disconnect the ImageMate USB 2.0 Reader/Writer, but you should
NEVER remove the device from the USB port without first reading the steps below.
If a drive window is open or the ImageMate USB 2.0 Reader/Writer is active, close any associated windows before
attempting to remove the ImageMate.
Windows
Use the hotplug icon in the notification area of the taskbar to safely stop the device before unplugging it. The
notification area is on the right side of the taskbar where you usually see the time displayed.
•These steps are not required for Windows 98SE or XP
1. In the notification area, right-click on the hotplug icon.
2. Select the device you want to unplug then click STOP.
3. When Windows notifies you that it is safe to do so, unplug the ImageMate USB 2.0 Reader/Writer from your
computer.
Macintosh
1. Drag the ImageMate USB 2.0 Reader/Writer “untitled” icon into the Trash.
2. Unplug the device.
6

Failure to register your product will not diminish the rights you have under the product warranty.
SanDisk, the SanDisk logo, Store Your World in Ours, and CompactFlash are trademarks of SanDisk Corporation,
registered in the United States and other countries. TransferMate is a trademark of SanDisk Corporation. Memory
Stick, Memory Stick Duo, Memory Stick PRO, Memory Stick PRO Duo, and Memory Stick PRO-HG Duo are
trademarks of the Sony Corporation. RS-MMC is a trademark of the MultiMediaCard Association. The SD,
miniSD, microSD, SDHC, miniSDHC marks and logos are trademarks. SanDisk is an authorized licensee of the
MultiMediaCard trademark. Adobe, the Adobe Logo and Photoshop are either trademarks or registered trademarks
of Adobe Systems Incorporated in the United States and/or other countries. The USB-IF logo is a trademark of
Universal Serial Bus Implementers Forum, Inc. Other brand names mentioned herein are for identification purposes
only and may be trademarks of their respective holders(s).
© 2007 SanDisk Corporation. All rights reserved.
8
Deutsch
Systemanforderungen
Verbindung
•USB 2.0-Anschluss für Hochgeschwindigkeits-Datenübertragung
Unterstützte Betriebssysteme
•Windows
•Windows 98SE (Treiberinstallation erforderlich)
•Windows ME
•Windows 2000
•Windows XP
•Windows Vista
•Macintosh
• Mac OS 9.2+, 10.1.2+
Packungsinhalt
•ImageMate USB 2.0 Reader/Writer (Speichermedium nicht inbegriffen)
•Installations-CD mit Tasten-Anwendung und Treiber für Windows 98SE
•USB-Kabel
•Kurzanleitung
Überprüfen des Packungsinhalts
1. Packen Sie alle Teile aus. Vergewissern Sie sich, dass alle unter PACKUNGSINHALT aufgelisteten Teile
vorhanden sind.
2. Überprüfen Sie Ihre Systemanforderungen. Siehe SYSTEMANFORDERUNGEN oder die Außenseite des
Produktkartons.
3. Stellen Sie fest, wo sich der USB-Anschluss an Ihrem Computer befindet. Siehe ERKLÄRUNGEN.
Erklärungen
Was ist ein USB-Anschluss?
Über den USB-Anschluss (Universal Serial Bus) können Sie neue Geräte wie den ImageMate USB 2.0 Reader/
Writer schnell und einfach an Ihren Computer anschließen. Beim Anschließen eines Geräts an den USB-Anschluss
ist es nicht erforderlich, den Computer zu öffnen, um eine Zusatzkarte zu installieren oder komplizierte Schalter zu
setzen. Sie stecken das Gerät einfach ein, und schon kann es losgehen.
9

10
11
Wo finde ich den USB-Anschluss?
Der USB-Anschluss befindet sich häufig an der Vorder- oder Rückseite Ihres PC oder an einem USB-Hub. Bei einem
Laptop-Computer oder einem Macintosh befindet sich der USB-Anschluss möglicherweise an der Seite. Die folgende
Abbildung zeigt, wie der USB-Anschluss aussieht.
Was ist der Unterschied zwischen Hi-Speed USB 2.0 und Full Speed USB 1.1?
Hi-Speed USB 2.0 unterstützt die Übertragung von Daten mit einer Geschwindigkeit von bis zu 480 Megabit pro
Sekunde (MBit/s), während Full Speed USB 1.1 Datenübertragungen bis zu 12 MBit/s ermöglicht. Hi-Speed USB 2.0
bietet im Vergleich zu Full Speed USB 1.1 eine dramatische Verbesserung in der Datenübertragungsleistung.
USB 2.0 ist mit USB 1.1-Anschlüssen abwärts kompatibel. Der ImageMate USB 2.0 Reader/Writer unterstützt sowohl
USB 2.0 als auch USB 1.1.
Installation
Vor dem Anschließen des ImageMate USB 2.0 Reader/Writer an Ihren Computer müssen Sie unter Umständen
einen Gerätetreiber installieren.
•Sie können diesen Abschnitt überspringen, wenn Sie eines der folgenden Betriebssysteme verwenden:
Windows XP, ME, 2000 oder Vista (fahren Sie mit dem Abschnitt Installieren der Tasten-Anwendung fort),
Mac OS 9.2+ oder Mac OS 10.1.2+ (fahren Sie mit dem Abschnitt Anschließen fort).
Installieren des Treibers für Windows 98SE
1. Legen Sie die mit dem ImageMate USB 2.0 Reader/Writer gelieferte CD in das CD-ROM-Laufwerk Ihres
Computers ein.
2. Klicken Sie mit der linken Maustaste auf das Menü Start und öffnen Sie das Menü Ausführen. Klicken Sie auf
Durchsuchen, um den Laufwerkbuchstaben für Ihr CD-ROM-Laufwerk ausfindig zu machen.
3. Wählen Sie die Datei \Win98\setup.exe aus und klicken Sie auf OK. Folgen Sie den Bildschirmanweisungen.
Installieren der Tasten-Anwendung
(die Tasten-Anwendung wird nur unter Windows 98SE, ME, 2000 und XP unterstützt)
1. Legen Sie die mit dem ImageMate USB 2.0 Reader/Writer gelieferte CD in das CD-ROM-Laufwerk Ihres
Computers ein.
2. Klicken Sie mit der linken Maustaste auf das Menü Start und öffnen Sie das Menü Ausführen. Klicken Sie auf
Durchsuchen, um den Laufwerkbuchstaben für Ihr CD-ROM-Laufwerk ausfindig zu machen.
3. Wählen Sie die Datei \Button Application\setup.exe aus und klicken Sie auf OK. Folgen Sie den
Bildschirmanweisungen.
Anschließen
Der ImageMate USB 2.0 Reader/Writer lässt sich problemlos und schnell an den USB-Anschluss anschließen. Es ist
nicht einmal erforderlich, Ihren Computer auszuschalten oder neu zu starten. Ein Wechselstrom-/Gleichstromadapter
erübrigt sich ebenfalls, da der ImageMate USB 2.0 Reader/Writer über den USB-Anschluss mit Strom versorgt wird.
•Bevor Sie den ImageMate USB 2.0 Reader/Writer anschließen, sollten Sie den eventuell erforderlichen
Gerätetreiber installieren. Siehe Installation.
Verwenden Sie das USB-Kabel, um den ImageMate direkt mit dem Computer zu verbinden.
Wird der ImageMate USB 2.0 Reader/Writer zum ersten Mal angeschlossen, zeigt Ihr Computer unter Umständen
die Meldung an, dass das Gerät installiert wird (diese Meldung variiert von Betriebssystem zu Betriebssystem).
Windows-Datenträgersymbole
Beim Anschließen des ImageMate USB 2.0 Reader/Writer unter einem Windows-Betriebssystem erscheint ein neues
Datenträgersymbol. Dieses Symbol, das den Kartensteckplatz des ImageMate als austauschbaren Datenträger
kennzeichnet, wird unter Arbeitsplatz angezeigt.
Macintosh-Datenträgersymbole
Wenn Sie den ImageMate USB 2.0 Reader/Writer unter einem Macintosh-Betriebssystem anschließen, wird auf
dem Desktop beim Einschieben einer Karte ein Symbol für einen austauschbaren Datenträger mit der Bezeichnung
„Ohne Titel“ angezeigt.
Verwendung
Der ImageMate USB 2.0 Reader/Writer verfügt über einen Kartensteckplatz für unterschiedliche Kartentypen.
•SDDR-92: CompactFlash Typ I/II
•SDDR-99: SD, SDHC, MultiMediaCard, MMCplus, MMCmobile, RS-MMC, RS-MMC Dual Voltage,
Memory Stick, Memory Stick PRO und xD & xD Typ M & H
Einschieben einer Karte
Beim Einschieben einer Karte in den Steckplatz des ImageMate USB 2.0 Reader/Writer muss darauf geachtet
werden, dass das Kartenende, an dem sich die Verbindungskontakte befinden, zuerst in den Steckplatz eingeführt
wird und das Etikett nach oben zeigt. Drücken Sie die Karte NICHT gewaltsam in den Steckplatz.
LED-Aktivität
SDDR-92 (CompactFlash Reader/Writer):
•Windows XP/Vista: Die LED-Anzeige beginnt zu leuchten, wenn eine Karte korrekt eingeführt wurde.
•Windows 98SE/ME/2000: Die LED beginnt zu leuchten, wenn eine Karte korrekt eingeführt wurde und Sie
auf den austauschbaren Datenträger doppelklicken.
•Macintosh-Betriebssystem: Auf dem Schreibtisch erscheint ein Laufwerksymbol, wenn eine Karte korrekt
eingeführt wurde.

12
13
•Alle Betriebssysteme: Die LED-Anzeige beginnt zu blinken, wenn Daten von der Karte oder auf die Karte
übertragen werden.
SDDR-99 (5-in-1 Reader/Writer):
Wenn der ImageMate USB 2.0 Reader/Writer richtig installiert ist, beginnt die GRÜNE LED zu leuchten. Wenn die
LED nicht leuchtet:
•Überprüfen Sie, ob der ImageMate USB 2.0 Reader/Writer angeschlossen ist und die Karte richtig im
Steckplatz sitzt.
Die LED-Aktivitätsanzeige (orange) beginnt zu blinken, wenn Daten von der Karte oder auf die Karte übertragen werden.
Ziehen Sie die Karte NIEMALS heraus, während die AKTIVITÄTS-LED BLINKT.
Verwendung auf einem PC mit der Tasten-Anwendung
1. Schieben Sie die Medienkarte ein.
2. Drücken Sie die Taste am Lesegerät.
3. Die Tasten-Anwendung wird geladen.
4. Wenn Sie die Dateien auf Ihrem PC speichern möchten, wählen Sie die Taste „Transfer all Files“ (Alle Dateien
übertragen). Sie können nun die Dateien auf den PC kopieren oder verschieben.
5. Wenn Sie eines der Fotos oder alle Fotos auswählen, umbenennen, drucken, per E-Mail versenden oder als
Bildschirmschoner verwenden möchten, wählen Sie das Symbol „Use Photo Tools“ (Foto-Tools verwenden).
Verwendung auf einem PC ohne die Tasten-Anwendung
Sie können folgendermaßen vorgehen, um einen Ordner auf dem Desktop zu erstellen, in den Sie Ihre Fotos
einfügen können:
1. So erstellen Sie einen ORDNER auf Ihrem Desktop
A. Platzieren Sie den Mauszeiger an einer beliebigen Stelle auf dem Desktop, an der sich kein Symbol befindet.
B. Klicken Sie einmal mit der RECHTEN Maustaste, bewegen Sie den Mauszeiger über die Option Neu, und
klicken Sie dann mit der LINKEN Maustaste auf Ordner.
C. Dadurch wird ein NEUER ORDNER auf dem Desktop erstellt. Sie können jetzt einen beliebigen Namen für
den Ordner eingeben, z.B. „Meine Bilder“ oder „Fotos“. Drücken Sie anschließend die EINGABETASTE auf
der Tastatur. Der Ordnername wird dadurch gespeichert.
2. So fügen Sie Fotos in einen Ordner ein
A. Doppelklicken Sie auf das Symbol Arbeitsplatz.
B. Doppelklicken Sie auf das als austauschbarer Datenträger angezeigte Laufwerk (für den ImageMate USB
2.0 Reader/Writer), z.B. „F:“ oder „G:“ oder möglicherweise „E:“. Sie sollten jetzt einen Ordner mit der
Bezeichnung „DCIM“ (für „Digital Camera Images“, d.h. „Digitale Kamerabilder“) sehen.
C. Doppelklicken Sie auf den DCIM-Ordner. Sie sollten jetzt den Ordner für Ihre Kamera sehen, z.B. e. 100Olymp
oder 100Canon oder 100Fuji.
D. Doppelklicken Sie auf den Kameraordner. In dem geöffneten Ordner können Sie jetzt Ihre Bilder bzw. die
Namen Ihrer Bilddateien sehen (je nach verwendetem Betriebssystem).
E. Gehen Sie zur Option Bearbeiten in der Menüleiste und klicken Sie auf Alles markieren. Daraufhin werden
alle Ihre Bilder HERVORGEHOBEN.
F. Gehen Sie zurück zur Menüoption Bearbeiten und klicken Sie auf Kopieren. Schließen oder minimieren Sie
dieses Fenster.
G. Doppelklicken Sie auf den Ordner, den Sie auf dem Desktop erstellt haben, gehen Sie zur Menüoption
Bearbeiten und klicken Sie auf Einfügen. Ihre Bilder werden nun in den Ordner eingefügt.
H. Doppelklicken Sie auf den Dateinamen eines Bildes, das Sie ansehen möchten. Das Bild wird daraufhin
geöffnet.
Verwendung auf einem Macintosh ohne die Tasten-Anwendung
(Die Tasten-Anwendung ist nicht kompatibel mit dem Macintosh-Betriebssystem.)
1. Schließen Sie den ImageMate USB 2.0 Reader/Writer an den USB-Anschluss Ihres Macintosh an (schließen Sie
ihn nicht an den Bildschirm oder die Tastatur an).
2. Schieben Sie zum Übertragen von Dateien eine Karte in den Reader/Writer. Auf dem Schreibtisch wird daraufhin
ein neues Laufwerk mit der Bezeichnung „Ohne Titel“ angezeigt.
3. Sie können Dateien auf gewohnte Weise auf das neue Laufwerk ziehen und ablegen und von dort verschieben.
Entfernen der Karte
So entfernen Sie die Karte unter Windows:
1. Doppelklicken Sie auf das Symbol Arbeitsplatz.
2. Klicken Sie mit der rechten Maustaste auf das Laufwerksymbol für den ImageMate USB 2.0 Reader/Writer.
3. Wählen Sie Auswerfen (gilt nicht für Windows 98SE, XP oder Vista).
4. Ziehen Sie die Karte aus dem Steckplatz.
So entfernen Sie die Karte bei einem Macintosh:
1. Ziehen Sie das Symbol mit der Bezeichnung „Ohne Titel“ in den Papierkorb.
2. Ziehen Sie die Karte aus dem Steckplatz.
Verbindung trennen
Um den ImageMate USB 2.0 Reader/Writer vom Computer zu trennen, brauchen Sie den Computer nicht
auszuschalten. Aber Sie SOLLTEN UNBEDINGT die nachstehenden Schritte beachten, bevor Sie das Gerät vom
USB-Anschluss trennen.
Wenn ein Laufwerkfenster geöffnet oder der ImageMate USB 2.0 Reader/Writer aktiv ist, schließen Sie zuerst alle
zugehörigen Fenster, bevor Sie den Reader/Writer entfernen.
Windows
Verwenden Sie das Hotplug-Symbol im Infobereich der Taskleiste, um das Gerät anzuhalten, bevor Sie es abtrennen.
Der Infobereich befindet sich rechts auf der Taskleiste in dem Bereich, in dem gewöhnlich die aktuelle Uhrzeit
angezeigt wird.
•Für Windows 98SE oder Windows XP sind diese Schritte nicht erforderlich.

14
15
1. Klicken Sie im Infobereich mit der rechten Maustaste auf das Hotplug-Symbol.
2. Wählen Sie das Gerät, das Sie vom Computer trennen möchten, und klicken Sie auf Beenden.
3. Wenn die Windows-Meldung angezeigt wird, dass Sie das Gerät entfernen können, ziehen Sie den Stecker des
ImageMate USB 2.0 Reader/Writer aus dem Computer.
Macintosh
1. Ziehen Sie das Symbol „Ohne Titel“, das für den ImageMate USB 2.0 Reader/Writer steht, in den Papierkorb.
2. Trennen Sie das Gerät ab.
Fehlerbehebung
Fragen und Antworten zu den Fehlermeldungen finden Sie auf unserer Website unter
http://www.sandisk.com/retail/support.asp.
Telefonnummern für den technischen Support und Garantieservice in Ihrer Region finden Sie unter
www.sandisk.com/techsupport.
2 Jahre beschränkte Garantie von SanDisk
SanDisk garantiert, dass dieses Produkt für die Dauer von zwei Jahren ab dem Kaufdatum frei von Material-,
Konstruktions- und Herstellungsschäden ist und bei normaler Verwendung im Wesentlichen den veröffentlichten
Spezifikationen entspricht. Im Einzelnen gelten dabei die unten aufgeführten Bedingungen. Diese Garantie wird
dem Erstkäufer gewährt, der das Produkt direkt bei SanDisk oder bei einem autorisierten Händler erworben hat.
Die Garantie ist nicht übertragbar. Unter Umständen ist ein Kaufnachweis erforderlich. Dieses Produkt muss
mit Speicherkarten verwendet werden, die den Spezifikationen der SD Card Association, der MultiMediaCard
Association oder den jeweiligen Anforderungen für Memory Stick oder TransFlash entsprechen. Bei Verwendung
mit anderen Produkten erlischt die Garantie. SanDisk trägt keine Verantwortung, wenn ein Fehler oder Schaden
durch Produkte oder Komponenten von Drittanbietern verursacht wird, unabhängig davon, ob die Verwendung
mit diesen Produkten oder Komponenten autorisiert ist oder nicht. Die Garantie erstreckt sich nicht auf Software
von Drittanbietern, die mit dem Produkt geliefert wird. Sie sind für alle im Zusammenhang mit dieser Software
anfallenden Wartungs- und Reparaturarbeiten selbst verantwortlich. Diese Garantie ist nichtig, wenn die
Speicherkarte nicht in Übereinstimmung mit den Produktanleitungen verwendet wird oder aufgrund von falscher
Installation, Missbrauch, unbefugter Reparatur, Veränderungen oder durch einen Unfall beschädigt wird.
Sie müssen das Produkt in einer sicheren Verpackung und entsprechend den Anweisungen von SanDisk auf eigene
Kosten zurücksenden. Sie müssen darauf achten, dass Sie eine Bestätigungsnummer zur Verfolgung der Sendung
erhalten. Diese Nummer müssen Sie gegebenenfalls SanDisk mitteilen. Es steht SanDisk frei, das Produkt nach
eigenem Ermessen entweder zu reparieren, durch ein neues oder überarbeitetes Produkt mit der gleichen oder
mit besserer Kapazität und Funktionalität zu ersetzen oder den Kaufpreis zurückzuerstatten. Die Garantie für das
Ersatzprodukt gilt für den verbleibenden Zeitraum der ursprünglichen Garantie. DIE GESAMTE HAFTUNG VON
SANDISK UND IHRE AUSSCHLIESSLICHEN ANSPRÜCHE BEI EINEM VERSTOSS GEGEN DIESE GARANTIE
DURCH SANDISK SIND AUF DIE GENANNTEN MASSNAHMEN BESCHRÄNKT.
SanDisk übernimmt keine Garantie und ist nicht verantwortlich für verloren gegangene Daten oder Bilder, die auf
einem Produkt (einschließlich zurückgesendeter Produkte) gespeichert waren. Die Ursache für den Verlust spielt
dabei keine Rolle. Es wird keine Garantie dafür gewährt, dass die Produkte von SanDisk jederzeit fehlerfrei arbeiten.
SanDisk-Produkte sollten nicht in lebenserhaltenden Systemen oder anderen Anwendungen verwendet werden, bei
denen ein Geräteversagen zu Personenverletzungen oder zum Tod führen könnte. Aufgrund dieser Garantie stehen
Ihnen bestimmte Rechte zu. Je nach geltender Gesetzgebung stehen Ihnen möglicherweise noch andere Rechte zu.
DIE OBIGEN ANGABEN BESCHREIBEN DIE GARANTIEVERPFLICHTUNGEN VON SANDISK IN VOLLEM
UMFANG. SANDISK LEHNT IM GESETZLICH ZULÄSSIGEN RAHMEN ALLE WEITEREN AUSDRÜCKLICHEN
UND STILLSCHWEIGENDEN GARANTIEN AB. DIE STILLSCHWEIGENDEN GARANTIEN DER
MARKTFÄHIGKEIT UND EIGNUNG FÜR EINEN BESTIMMTEN ZWECK GELTEN NUR FÜR DIE DAUER DER
AUSDRÜCKLICHEN GARANTIE. IN MANCHEN RECHTSGEBIETEN IST DIE ZEITLICHE BESCHRÄNKUNG
EINER STILLSCHWEIGENDEN GARANTIE NICHT ZULÄSSIG. DIE OBEN GENANNTE BESCHRÄNKUNG TRIFFT
DARUM EVENTUELL NICHT AUF SIE ZU. SANDISK ODER VERBUNDENE BZW. TOCHTERUNTERNEHMEN
HAFTEN UNTER KEINEN UMSTÄNDEN FÜR DIREKTE, INDIREKTE ODER FOLGESCHÄDEN, FÜR
FINANZIELLE VERLUSTE ODER FÜR DEN VERLUST VON DATEN BZW. BILDERN. DIESE EINSCHRÄNKUNG
GILT AUCH DANN, WENN SANDISK AUF DIE MÖGLICHKEIT SOLCHER SCHÄDEN HINGEWIESEN WURDE.
IN MANCHEN RECHTSGEBIETEN IST DER AUSSCHLUSS ODER DIE BESCHRÄNKUNG VON ZUFÄLLIGEN
ODER FOLGESCHÄDEN NICHT ZULÄSSIG. DER OBIGE HINWEIS AUF EINE BESCHRÄNKUNG ODER EINEN
AUSSCHLUSS TRIFFT DARUM MÖGLICHERWEISE NICHT AUF SIE ZU. UNTER KEINEN UMSTÄNDEN
ÜBERSTEIGT DIE HAFTUNG VON SANDISK DEN BETRAG, DEN SIE FÜR DAS PRODUKT BEZAHLT HABEN.
Sie verlieren keinerlei Rechte, die Ihnen im Rahmen der Produktgarantie zustehen, falls Sie die Registrierung nicht
durchführen.
SanDisk, das SanDisk-Logo, „Store Your World in Ours“ und CompactFlash sind Handelsmarken der SanDisk
Corporation und sind in den USA und in anderen Ländern eingetragen. TransferMate ist eine Handelsmarke der
SanDisk Corporation. Memory Stick, Memory Stick Duo, Memory Stick PRO, Memory Stick PRO Duo und Memory
Stick PRO-HG Duo sind Handelsmarken der Sony Corporation. RS-MMC ist eine Handelsmarke der MultiMediaCard
Association. Die SD-, miniSD-, microSD-, SDHC, miniSDHC-Zeichen und -Logos sind Handelsmarken. SanDisk ist
ein autorisierter Lizenznehmer der Handelsmarke MultiMediaCard. Adobe, das Adobe-Logo und Photoshop sind
Handelsmarken oder eingetragene Handelsmarken von Adobe Systems Incorporated in den USA und/oder anderen
Ländern. Das USB-IF-Logo ist eine Handelsmarke von Universal Serial Bus Implementers Forum, Inc. Andere
Markennamen werden nur zu Identifikationszwecken verwendet und sind unter Umständen Handelsmarken der
jeweiligen Inhaber.
© 2007 SanDisk Corporation. Alle Rechte vorbehalten.
16
17
Français
Configuration système
Connexion
•Port USB 2.0 pour le transfert de données haute vitesse
Systèmes d’exploitation pris en charge
•Windows
• Windows 98SE (installation du pilote requise)
• Windows ME
• Windows 2000
• Windows XP
• Windows Vista
•Macintosh
• Mac OS 9.2+, 10.1.2+
Contenu de l’emballage
•Lecteur-graveur USB 2.0 ImageMate (support de stockage non inclus)
•CD d’installation avec application de boutons et pilote Windows 98SE
•Câble USB
•Guide de démarrage rapide
Vérification du contenu
1. Ouvrez l’emballage. Assurez-vous qu’il contient tous les articles répertoriés à la rubrique CONTENU DE
L’EMBALLAGE.
2. Vérifiez la configuration de votre système. Reportez-vous à la rubrique CONFIGURATION SYSTÈME ou à
l’étiquette de l’emballage.
3. Repérez le port USB sur votre ordinateur. Voir DÉFINITIONS.
Définitions
Qu’est-ce qu’un port USB ?
Le port USB (Universal Serial Bus, soit bus série universel) permet de connecter facilement un nouveau
périphérique, tel que le lecteur-graveur USB 2.0 ImageMate, à un ordinateur. Il n’est pas nécessaire d’ouvrir celui-ci
pour y installer une carte complémentaire ou faire des réglages compliqués de commutateurs. Il suffit de brancher le
périphérique et le tour est joué.
16
Où se trouve le port USB ?
Le port USB se trouve souvent sur la face avant ou au dos du PC ou sur un concentrateur USB. Sur un portable ou
un Macintosh, le port USB peut se trouver sur le côté. Le port USB ressemble à ceci :
Quelle est la différence entre les connexions USB 2.0 haute vitesse (Hi-Speed) et USB 1.1 pleine vitesse (Full
Speed) ?
La connexion USB 2.0 haute vitesse assure le transfert de données à une vitesse allant jusqu’à 480 mégabits par
seconde (Mb/s) tandis que USB 1.1 pleine vitesse les transfère à une vitesse maximale de 12 Mb/s. Par rapport à
celle-ci, USB 2.0 haute vitesse offre donc une amélioration significative. De plus, USB 2.0 est rétrocompatible avec
les ports USB 1.1. Le lecteur-graveur USB 2.0 ImageMate prend en charge USB 2.0 et USB 1.1.
Installation
Avant de raccorder le lecteur-graveur USB 2.0 ImageMate à l’ordinateur, il sera peut-être nécessaire d'installer le
pilote du périphérique.
• Vous pouvez sauter cette étape si votre système d’exploitation est Windows XP, ME, 2000 ou Vista (et passer à
la rubrique Installation de l’application de boutons), ou bien Mac OS 9.2+ ou Mac OS 10.1.2+ (et passer à la
rubrique Connexion).
Installation du pilote pour Windows 98SE
1. Insérez le CD du lecteur-graveur USB 2.0 ImageMate dans le lecteur de CD-ROM de l’ordinateur.
2. Cliquez sur le menu DÉMARRER et ouvrez le menu EXÉCUTER. Cliquez sur PARCOURIR pour repérer le
lecteur de votre CD-ROM.
3. Sélectionnez le fichier \Win98\setup.exe et cliquez sur OK. Suivez les consignes affichées à l’écran.
Installation de l’application de boutons
(l’applications de boutons prend seulement en charge Windows 98SE, ME, 2000 et XP)
1. Insérez le CD du lecteur-graveur USB 2.0 ImageMate dans le lecteur de CD-ROM de l’ordinateur.
2. Cliquez sur le menu DÉMARRER et ouvrez le menu EXÉCUTER. Cliquez sur PARCOURIR pour repérer le
lecteur de votre CD-ROM.
3. Sélectionnez le fichier \Button Application\setup.exe et cliquez sur OK. Suivez les consignes affichées à
l’écran.
17

18
19
Connexion
La connexion du lecteur-graveur USB 2.0 ImageMate au port USB est simple. Il est inutile d’éteindre ou de
redémarrer l’ordinateur. De plus, comme le lecteur-graveur USB 2.0 ImageMate est alimenté par la connexion USB,
aucun adaptateur secteur n'est nécessaire.
•Avant de connecter le lecteur-graveur USB 2.0 ImageMate, terminez l’installation du pilote. Reportez-vous à
INSTALLATION.
Reliez directement le lecteur-graveur ImageMate à l’ordinateur à l'aide du câble USB.
Lorsque le lecteur-graveur USB 2.0 ImageMate est connecté pour la première fois, il est possible que l’ordinateur
affiche un message indiquant que le périphérique est en cours d’installation. (Ce message peut varier légèrement en
fonction du système d’exploitation.)
Icônes de disque Windows
Lorsque vous connectez le lecteur-graveur USB 2.0 ImageMate à un système d’exploitation Windows, une icône de
disque amovible s’affiche dans Poste de travail avec la lettre de lecteur venant d’être affectée au logement de carte.
Icônes de disque Macintosh
Lorsque vous connectez le lecteur-graveur USB 2.0 ImageMate à un système d’exploitation Macintosh, une icône
de disque amovible intitulée « sans titre » correspondant au logement de support s’affiche sur le bureau quand une
carte est insérée.
Utilisation
Le lecteur-graveur USB 2.0 ImageMate comporte un logement qui accepte différents types de cartes.
•SDDR-92 : CompactFlash Type I /II
•SDDR-99 : SD, SDHC, MultiMediaCard, MMCplus, MMCmobile, RS-MMC, RS-MMC à tension duelle,
Memory Stick, Memory Stick PRO et xD & xD types M et H
Insertion des cartes
Pour installer une carte dans le logement du lecteur-graveur USB 2.0 ImageMate, introduisez la partie de la carte
dotée des connecteurs, en veillant à orienter l’étiquette vers le haut. NE FORCEZ PAS la carte dans le logement.
Témoin lumineux
SDDR-92 (lecteur-graveur de carte CompactFlash) :
• Windows XP/Vista : le témoin s’allume lorsque la carte est insérée correctement.
• Windows 98SE/ME/2000 : le témoin s’allume lorsque vous cliquez deux fois sur « Disque amovible » après
avoir inséré correctement la carte.
• Macintosh OS : une icône de lecteur s’affiche sur le bureau lorsque la carte est insérée correctement.
• Tous les systèmes d’exploitation : le témoin clignote lorsque des données sont transférées depuis ou vers
la carte.
18
SDDR-99 (lecteur-graveur 5-en-1) :
Lorsque le lecteur-graveur USB 2.0 ImageMate est installé correctement, le TEMOIN VERT s’allume. S’il ne s’allume
pas :
• Vérifiez si le lecteur-graveur est bien connecté et si la carte est insérée correctement.
Le témoin lumineux orange clignote lorsque des données sont transférées depuis ou vers la carte.
Veillez à ne JAMAIS retirer la carte lorsque le TÉMOIN CLIGNOTE.
Utilisation du lecteur-graveur sur un PC avec l’application de boutons
1. Insérez la carte Media.
2. Appuyez sur le bouton du lecteur.
3. L’application de boutons se charge.
4. Si vous désirez enregistrer les fichiers sur le PC, cliquez sur le bouton « Transfer all files » (Transférer tous les
fichiers). Vous pouvez alors copier ou déplacer les fichiers sur l’ordinateur.
5. Si vous désirez sélectionner, renommer, imprimer, envoyer par courrier électronique ou utiliser en écran de veille
l’une ou toutes les photos, cliquez sur l’icône « Use Photo Tools » (Utiliser les outils photo).
Utilisation du lecteur-graveur sur un ordinateur de bureau sans l’application de boutons
Pour créer un dossier sur votre bureau afin d’y copier-coller des photos, procédez comme suit :
1. Création d’un DOSSIER sur le bureau
A. Placez le pointeur de la souris n’importe où sur le bureau sauf sur une icône.
B. Cliquez une fois avec le bouton DROIT de la souris, placez le pointeur de la souris sur NOUVEAU puis
cliquez sur DOSSIER avec le bouton GAUCHE de la souris.
C. Un NOUVEAU DOSSIER est créé sur votre bureau. Vous pouvez taper son nom, par ex., Mes photos.
Appuyez ensuite sur la touche ENTRÉE du clavier. Le nom du dossier est enregistré.
2. Copie-collage des photos dans un dossier
A. Cliquez deux fois sur l’icône « Poste de travail ».
B. Cliquez deux fois sur la lettre désignant le lecteur de disque amovible (pour le lecteur USB 2.0 ImageMate),
par ex. F: G: ou peut-être E:. Vous devriez voir un dossier DCIM (Digital Camera Images).
C. Cliquez deux fois sur le dossier DCIM. Vous devriez voir le dossier de votre appareil photo, par ex. 100Olymp,
100Canon ou 100Fuji.
D. Cliquez deux fois sur le dossier de l’appareil photo. Vous devriez voir vos photos ou leurs noms (selon le
système d’exploitation utilisé).
E. Dans la barre de menus, sélectionnez ÉDITION et cliquez sur SÉLECTIONNER TOUT. Toutes les photos sont
mises en SURBRILLANCE.
F. Dans ÉDITION, cliquez sur COPIER. Fermez ou réduisez cette fenêtre.
G. Cliquez deux fois sur le dossier que vous avez créé sur votre bureau, sélectionnez ÉDITION et cliquez sur
COLLER. Toutes les photos devraient être copiées dans le dossier.
H. Pour voir vos photos, cliquez deux fois sur leur nom de fichier. Les fichiers d’images s’ouvrent.
19

20
21
Utilisation du lecteur-graveur sur un Macintosh sans l’application de boutons
(L’application de boutons n’est pas compatible avec les systèmes d'exploitation Macintosh)
1. Connectez le lecteur-graveur USB 2.0 ImageMate au port USB du Mac (ne le connectez pas au moniteur ou au
clavier).
2. Pour transférer les fichiers, insérez une carte dans le lecteur-graveur. Un nouveau lecteur apparaît sur le bureau,
intitulé « sans titre ».
3. Glissez et déposez les fichiers vers ou depuis le dossier comme vous le feriez avec n’importe quel disque ou
dossier.
Retrait de la carte
Pour retirer la carte avec Windows :
1. Cliquez deux fois sur l’icône « Poste de travail ».
2. Cliquez, avec le bouton droit de la souris, sur l’icône du lecteur du périphérique USB 2.0 ImageMate.
3. Sélectionnez Éjecter (cela n’est pas nécessaire sous Windows 98SE, XP ou Vista).
4. Retirez la carte du logement.
Pour retirer la carte avec Macintosh :
1. Faites glisser l’icône « sans titre » dans la corbeille.
2. Retirez la carte du logement.
Déconnexion
Il n’est pas nécessaire d’éteindre l’ordinateur pour déconnecter le lecteur-graveur USB 2.0 ImageMate, mais veillez à
NE JAMAIS débrancher le périphérique du port USB sans avoir pris connaissance de la procédure ci-dessous.
Si une fenêtre de lecteur est ouverte ou que le lecteur-graveur USB 2.0 ImageMate est actif, fermez-les avant
d’effectuer le retrait.
Windows
Utilisez l’icône de déconnexion à chaud, dans la zone de notification de la barre des tâches, pour éjecter le
périphérique en toute sécurité avant de le déconnecter. Cette zone de notification se trouve à droite de la barre des
tâches, là où l’heure s’affiche normalement.
• Il n’est pas nécessaire de suivre les étapes suivantes pour Windows 98SE ou XP.
1. Dans la zone de notification, cliquez, avec le bouton droit de la souris, sur l’icône de déconnexion à chaud.
2. Sélectionnez le périphérique que vous désirez débrancher, puis cliquez sur STOP.
3. Lorsque Windows vous indique que vous pouvez le faire en toute sécurité, débranchez le lecteur-graveur USB 2.0
ImageMate de l’ordinateur.
Macintosh
1. Faites glisser l’icône « sans titre » du lecteur USB 2.0 ImageMate dans la corbeille.
2. Débranchez le périphérique.
20
Dépannage
Pour consulter la Foire aux questions au sujet des messages d’erreur, visitez notre site Web à
http://www.sandisk.com/retail/support.asp.
Pour bénéficier du support technique et du service sous garantie, visitez notre site Web à
www.sandisk.com/techsupport où vous trouverez un numéro de téléphone local.
Garantie limitée de deux ans de SanDisk
SanDisk garantit ce produit contre tout vice de fabrication et de main d’œuvre. Elle garantit en outre qu’il est
conforme aux caractéristiques publiées dans des conditions normales d’utilisation, et ce pour une durée de deux
ans à compter de la date d’achat, sous réserve des stipulations ci-dessous. Cette garantie est offerte à l’utilisateur
final initial achetant son produit auprès de SanDisk ou d’un distributeur agréé, et elle n’est pas transférable. Il est
possible qu’une preuve d’achat soit demandée. Ce produit doit être utilisé avec des cartes mémoire conformes aux
spécifications de la SD Card Association et MultiMediaCard Association, ou aux stipulations des cartes Memory
Stick ou TransFlash, le cas échéant ; toute utilisation d’un autre produit annulerait cette garantie. SanDisk n’est pas
responsable des défaillances ou défauts causés par tout produit ou composant de partie tierce, qu’il soit autorisé
ou non. Cette garantie ne couvre aucun logiciel de partie tierce fourni avec le produit ; l’utilisateur est responsable
de l’entretien et des réparations nécessaires pour ledit logiciel. Cette garantie est nulle et non avenue si la carte
mémoire n’est pas utilisée conformément au mode d’emploi du produit, ou si elle est endommagée à la suite d’une
installation incorrecte, d’un mauvais usage, d’une réparation ou modification non autorisée ou d'un accident.
Le produit devra être renvoyé dans un emballage inviolable, fret prépayé, selon les instructions de SanDisk. Vous
devrez obtenir un numéro de confirmation de suivi qu’il vous faudra peut-être fournir à SanDisk. SanDisk pourra,
à sa discrétion, réparer le produit, le remplacer par un produit neuf ou réusiné d’une capacité et fonctionnalité
égales ou supérieures, ou rembourser le prix d’achat. La durée de garantie du produit remplacé correspondra à la
période restante de la durée de garantie du produit d'origine. CECI CONSTITUE L’ENTIÈRE RESPONSABILITÉ DE
SANDISK ET VOTRE SEUL RECOURS EN CAS DE RUPTURE DE GARANTIE.
SanDisk ne garantit pas et ne saurait être responsable de toute perte de données ou d’images contenues dans un
produit (y compris un produit renvoyé), quelle que soit la cause de cette perte. SanDisk ne garantit pas ses produits
contre le risque de défaillance. Les produits SanDisk ne doivent pas être utilisés dans les équipements de maintien
des fonctions vitales ou toute application où une défaillance pourrait causer des blessures ou la mort. Cette garantie
vous donne des droits spécifiques, et il se peut que vous bénéficiiez d’autres droits, qui varient selon la juridiction.
LES STIPULATIONS CI-DESSUS CONSTITUENT LA SEULE GARANTIE DE SANDISK. SANDISK DÉCLINE
TOUTES AUTRES GARANTIES EXPRESSES ET IMPLICITES DANS LES LIMITES PERMISES PAR LA LOI EN
VIGUEUR. LES GARANTIES IMPLICITES DE QUALITÉ MARCHANDE ET D’APTITUDE À UN USAGE PARTICULIER
SONT LIMITÉES À LA DURÉE DE LA GARANTIE EXPRESSE. CERTAINES JURIDICTIONS N’AUTORISANT
PAS LA LIMITATION DE LA DURÉE D’UNE GARANTIE IMPLICITE, LA LIMITATION SUSMENTIONNÉE PEUT NE
PAS S’APPLIQUER À VOTRE CAS. EN AUCUN CAS SANDISK OU TOUTE FILIALE OU SOCIÉTÉ AFFILIÉE NE
21

22
SERA RESPONSABLE, DANS QUELQUES CIRCONSTANCES QUE CE SOIT, DE TOUS DOMMAGES DIRECTS,
INDIRECTS OU CONSÉQUENTIELS, DE TOUTES PERTES FINANCIÈRES OU PERTES DE DONNÉES OU
D’IMAGES, MÊME SI SANDISK A ÉTÉ AVERTIE DE LA POSSIBILITÉ DE TELS DOMMAGES. CERTAINES
JURIDICTIONS N’AUTORISANT PAS L’EXCLUSION OU LA LIMITATION DES DOMMAGES ACCESSOIRES OU
CONSÉQUENTIELS, LA LIMITATION OU EXCLUSION SUSMENTIONNÉE PEUT NE PAS S’APPLIQUER À VOTRE
CAS. EN AUCUN CAS LA RESPONSABILITÉ DE SANDISK N’EXCÉDERA LE MONTANT QUE VOUS AUREZ PAYÉ
POUR LE PRODUIT.
Les droits qui vous sont accordés dans le cadre de la garantie du produit sont protégés même si vous ne
l’enregistrez pas.
SanDisk, le logo SanDisk, Store Your World in Ours et CompactFlash sont des marques commerciales de SanDisk
Corporation, déposées aux États-Unis et dans d'autres pays. TransferMate est une marque commerciale de SanDisk
Corporation. Memory Stick, Memory Stick Duo, Memory Stick PRO, Memory Stick PRO Duo et Memory Stick
PRO-HG Duo sont des marques commerciales de Sony Corporation. RS-MMC est une marque commerciale de
MultiMediaCard Association. Les marques et logos SD, miniSD, microSD, SDHC et miniSDHC sont des marques
commerciales. SanDisk est un titulaire autorisé de la marque commerciale MultiMediaCard. Adobe, le logo Adobe
Logo et Photoshop sont des marques commerciales ou des marques déposées de Adobe Systems Incorporated,
aux États-Unis et/ou dans d’autres pays. Le logo USB-IF est une marque commerciale de Universal Serial Bus
Implementers Forum, Inc. Les autres marques mentionnées ici le sont uniquement à titre indicatif et peuvent être les
marques commerciales de leurs détenteurs respectifs.
© 2007 SanDisk Corporation. Tous droits réservés.
22
Italiano
Requisiti del sistema
Connessione
•Porta USB 2.0 per il trasferimento dati ad alta velocità
Computer e sistema operativo
•Windows
•Windows 98SE (occorre installare un driver)
•Windows ME
•Windows 2000
•Windows XP
•Windows Vista
•Macintosh
• Mac OS 9.2+, 10.1.2+
Contenuto della confezione
•Unità di lettura/scrittura ImageMate USB 2.0 (i supporti di memorizzazione non sono inclusi)
•CD di installazione con applicazione a pulsante e driver Windows 98SE
•Cavo USB
•Guida di avviamento rapido
Verifica
1. Aprire la scatola e verificare che siano presenti tutti gli articoli elencati nella sezione “Contenuto della
confezione”.
2. Verificare i requisiti del sistema che si intende usare. Vedere la sezione “Requisiti del sistema” o quanto
riportato sull’esterno della scatola.
3. Individuare la porta USB del computer. Vedere la sezione “Concetti base”.
Concetti base
Cos’è una porta USB?
La porta USB (Universal Serial Bus) offre un modo semplice per collegare al computer una nuova periferica, come
l’unità di lettura/scrittura ImageMate USB 2.0, in quanto per installare l’unità non occorre né aprire il computer né
installare una scheda aggiuntiva né impostare interruttori complicati: basta collegarla e si può cominciare a usarla.
23

24
25
Come si individua la porta USB?
Spesso le porte USB sono situate sul pannello anteriore o posteriore del PC o su un hub USB. In un computer
portatile o in un Macintosh, possono essere situate lateralmente. La porta USB è illustrata nella figura.
Qual è la differenza tra Hi-Speed USB 2.0 e Full Speed USB 1.1?
Con lo standard Hi-Speed USB 2.0 la trasmissione dei dati può raggiungere la velocità di 480 megabit al secondo
(Mbit/s), mentre con Full Speed USB 1.1 la massima velocità di trasmissione dati è 12 Mbit/s. Hi-Speed USB 2.0
offre quindi un notevole miglioramento rispetto a Full Speed USB 1.1 per quanto riguarda la velocità di trasmissione
dati, e inoltre è retrocompatibile con le porte USB 1.1. L’unità di lettura/scrittura ImageMate USB 2.0 funziona con
entrambi gli standard.
Installazione
Prima di collegare l’unità di lettura/scrittura ImageMate USB 2.0 al computer, può essere necessario installare un
driver.
•Si può saltare questa sezione se si usa il sistema operativo Windows XP, ME, 2000 o Vista (e passare alla
sezione “Installazione dell’applicazione a pulsante”), Mac OS 9.2+ o Mac OS 10.1.2+ (e passare alla sezione
“Collegamento”).
Installazione del driver per Windows 98SE
1. Inserire nell’unità CD-ROM del computer il CD accluso all’unità di lettura/scrittura ImageMate USB 2.0.
2. Fare clic sul menu AVVIO e aprire il menu ESEGUI. Fare clic su SELEZIONA per individuare la lettera dell’unità
CD-ROM.
3. Selezionare il file \Win98\setup.exe, fare clic su OK e seguire le istruzioni sullo schermo.
Installazione dell’applicazione a pulsante
(questa applicazione funziona solo con Windows 98SE, ME, 2000 e XP)
1. Inserire nell’unità CD-ROM del computer il CD accluso all’unità di lettura/scrittura ImageMate USB 2.0.
2. Fare clic sul menu START/AVVIO e aprire il menu ESEGUI. Fare clic su SELEZIONA per individuare la lettera
dell’unità CD-ROM.
3. Selezionare il file \Button Application\setup.exe, fare clic su OK e seguire le istruzioni sullo schermo.
Collegamento
Il collegamento dell’unità di lettura/scrittura ImageMate USB 2.0 alla porta USB è semplice: non è necessario né
spegnere né riavviare il computer. E poiché l’unità è alimentata attraverso la porta USB, non occorre alcun adattatore
di corrente alternata.
•Prima di collegare l’unità di lettura/scrittura ImageMate USB 2.0, completare l’installazione del driver. Vedere la
sezione “Installazione”.
Adoperare il cavo USB per collegare l’ImageMate direttamente al computer.
Quando si collega per la prima volta l’unità di lettura/scrittura ImageMate USB 2.0, il computer potrebbe visualizzare un
messaggio – che può variare leggermente a seconda del sistema operativo – relativo all’installazione dell’unità stessa.
Icone delle unità a disco Windows
Quando si collega l’unità di lettura/scrittura ImageMate USB 2.0 a un computer con sistema operativo Windows, in
“Risorse del computer” compare una nuova lettera identificativa di un’unità a disco rimovibile, che rappresenta lo slot
per schede presente sull’unità .
Icone delle unità a disco Macintosh
Quando si collega l’unità di lettura/scrittura ImageMate USB 2.0 a un computer con sistema operativo Macintosh,
ogni volta che si inserisce una scheda nello slot dell’unità compare l’icona di un disco rimovibile denominato “senza
titolo” che rappresenta lo slot.
Utilizzo
L’unità di lettura/scrittura ImageMate USB 2.0 ha uno slot, utilizzabile per vari tipi di schede.
• SDDR-92: CompactFlash tipo I/II
•SDDR-99: SD, SDHC, MultiMediaCard, MMCplus, MMCmobile, RS-MMC, RS-MMC Dual Voltage,
Memory Stick, Memory Stick PRO e xD, e xD Tipo M e H
Inserimento delle schede
Per inserire una scheda nello slot dell’unità di lettura/scrittura ImageMate USB 2.0, introdurre l’estremità con il
connettore, con l’etichetta sulla scheda rivolta verso l’alto. NON forzare la scheda nello slot.
Segnalazioni del LED
SDDR-92 (unità di lettura/scrittura CompactFlash)
•Windows XP/Vista: il LED si accende quando si inserisce una scheda correttamente.
•Windows 98SE/ME/2000: il LED si accende quando si fa doppio clic su "Disco rimovibile" se la scheda è
inserita correttamente.
•Macintosh OS: sul desktop compare l’icona di un’unità a disco quando si inserisce correttamente una scheda.
•Tutti i sistemi operativi: il LED lampeggia quando è in corso un trasferimento di dati fra il computer e la
scheda.

26
27
SDDR-99 (unità di lettura/scrittura 5 in 1)
Quando l’unità di lettura/scrittura UBSB 2.0 è installata correttamente, si accende il LED verde. Se il LED non si
accende:
•controllare che l’unità di lettura/scrittura ImageMate USB 2.0 sia collegata e che la scheda sia inserita
correttamente.
Il LED indicatore di attività (arancione) lampeggia quando è in corso un trasferimento di dati fra il computer e la
scheda.
MAI estrarre la scheda quando il LED DI ATTIVITÀ LAMPEGGIA.
Utilizzo su un PC mediante l’applicazione a pulsante
1. Inserire la scheda.
2. Premere il pulsante sull’unità di lettura/scrittura.
3. Viene caricata l'applicazione a pulsante.
4. Per salvare i file sul PC scegliere il pulsante “Transfer all Files”. Ciò permette di copiare o spostare i file sul PC.
5. Per selezionare, rinominare, stampare, inviare per e-mail o usare come salvaschermo una o più delle foto,
selezionare l’icona “Use Photo Tools”.
Utilizzo su un PC senza l’applicazione a pulsante
Le seguenti procedure mostrano come creare una cartella sul desktop e copiare le foto nella cartella stessa.
1. Creazione di una cartella sul desktop
A. Portare il cursore del mouse su un punto qualsiasi del desktop, eccetto che su un’icona.
B. Fare clic con il pulsante DESTRO del mouse, spostare il cursore su NUOVO e poi fare clic su CARTELLA con
il pulsante SINISTRO del mouse.
C. Sul desktop viene creata una nuova cartella, rinominabile digitando il nuovo nome, p. es. Immagini oppure
Foto. Al termine premere il tasto INVIO; il nome della cartella viene salvato.
2. Copiatura delle foto in una cartella
A. Fare doppio clic sull’icona "Risorse del computer".
B. Fare doppio clic sull’unità a disco rimovibile (per l’unità di lettura/scrittura ImageMate USB 2.0), cioè F: oppure
G: o anche E:. A questo punto si visualizza la cartella DCIM (sigla di Digital Camera Images).
C. Fare doppio clic sulla cartella DCIM. Si visualizza la cartella della fotocamera in uso, p. es. 100Olymp o
100Canon oppure 100Fuji.
D. Fare doppio clic sulla cartella della fotocamera. Si visualizzano i nomi dei file delle immagini o delle foto (a
seconda del sistema operativo).
E. Andare in su nella barra dei menu, a "MODIFICA", e fare clic su "SELEZIONA TUTTO". Tutte le immagini
vengono evidenziate.
F. Ritornare a “MODIFICA” e fare clic su "COPIA”. Chiudere o ridurre a icona questa finestra.
G. Fare doppio clic sulla cartella creata sul desktop, andare a “MODIFICA” e poi fare clic su “INCOLLA”; le
immagini vengono copiate nella cartella.
H. Per visualizzare un’immagine, fare doppio clic sul nome del relativo file.
Utilizzo su un Macintosh senza l’applicazione a pulsante
(questa applicazione non è compatibile con i sistemi operativi Macintosh)
1. Collegare l’unità di lettura/scrittura ImageMate USB 2.0 alla porta USB del Mac (fare attenzione a non collegarla
alla porta del monitor o della tastiera).
2. Per trasferire dei file, inserire una scheda nell’unità di lettura/scrittura; sul desktop compare una nuova unità
denominata “senza titolo”.
3. Trascinare i file tra il computer e l’unità come si farebbe con qualsiasi altra unità o cartella.
Rimozione della scheda
Per rimuovere la scheda in Windows:
1. fare doppio clic sull’icona "Risorse del computer";
2. fare clic con il pulsante destro del mouse sull’icona dell’unità di lettura/scrittura ImageMate USB 2.0;
3. selezionare Rimuovi (questa operazione non è necessaria con Windows 98SE, XP o Vista);
4. tirare la scheda fuori dello slot.
Per rimuovere la scheda da un Macintosh:
1. trascinare l’icona “senza titolo” nel cestino;
2. tirare la scheda fuori dello slot.
Scollegamento
Per scollegare l’unità di lettura/scrittura ImageMate USB 2.0 non occorre spegnere il computer, ma non si deve MAI
scollegarla dalla porta USB senza prima avere compiuto le operazioni ai punti seguenti.
Se la finestra di un’unità è aperta o se l’unità di lettura/scrittura ImageMate USB 2.0 è attiva, chiudere tutte le finestre
correlate prima di procedere a scollegare l’unità.
Windows
Usare l’icona delle periferiche collegabili, nell’area di notifica della barra delle operazioni, per arrestare l’unità in
sicurezza prima di scollegarla. L’area di notifica si trova sul lato destro della barra delle operazioni, dove in genere è
mostrata l’ora.
•Queste operazioni non sono necessarie per Windows 98SE o XP.
1. Nell’area di notifica, fare clic con il pulsante destro del mouse sull’icona delle periferiche rimovibili a sistema
acceso.
2. Selezionare la periferica da scollegare e poi fare clic su STOP.
3. Quando Windows avvisa che si può scollegare la periferica, scollegare l’unità di lettura/scrittura ImageMate
USB 2.0 dal computer.
Macintosh
1. Trascinare l’unità di lettura/scrittura ImageMate USB 2.0 sul cestino.
2. Scollegare l’unità .

28
29
Soluzione dei problemi
Per leggere le domande frequenti (FAQ) sui messaggi di errore, andare al nostro sito web:
http://www.sandisk.com/retail/support.asp.
Per richiedere assistenza tecnica e intervento in garanzia, andare al sito www.sandisk.com/techsupport per reperire
il numero telefonico locale.
Garanzia limitata di 2 anni SanDisk
La SanDisk garantisce che questo prodotto sarà esente da difetti materiali di progettazione e produzione e sarà
sostanzialmente conforme ai dati tecnici pubblicati, in condizioni di uso normale, per un periodo di due anni a
decorrere dalla data di acquisto, secondo le condizioni seguenti. Questa garanzia viene offerta all’utente finale
originale che ha acquistato il prodotto presso la SanDisk o un rivenditore autorizzato, e non è trasferibile. Può essere
richiesto lo scontrino. Questo prodotto deve essere utilizzato con schede di memoria conformi alle specifiche della
SD Card Association o della MultiMediaCard Association oppure, se pertinente, che soddisfano i requisiti relativi
a Memory Stick o TransFlash; l’utilizzo con qualsiasi altro prodotto annulla questa garanzia. La SanDisk non sarà
responsabile in alcun modo di un guasto o difetti causati da un qualunque prodotto o componente di terzi, anche
se l’uso fosse stato autorizzato. Questa garanzia non si applica ad alcun software di terzi fornito con il prodotto e
l’utente è responsabile di tutte le operazioni di manutenzione o riparazione necessarie per tale software. Questa
garanzia è nulla se la scheda di memoria non viene adoperata seguendo le istruzioni per l’uso del prodotto o se
viene danneggiata in seguito a installazione impropria, abuso, riparazione non autorizzata, modifica o incidente.
Occorre restituire il prodotto in un imballaggio a prova di manomissione, franco destinatario, secondo le istruzioni
fornite dalla SanDisk, e procurarsi inoltre un numero di conferma utilizzabile per la ricerca della spedizione, che può
essere necessario comunicare alla SanDisk. A sua discrezione la SanDisk riparerà o sostituirà il prodotto con un
prodotto nuovo o ricostruito di capacità e funzionalità uguali o superiori, oppure rimborserà il prezzo di acquisto. La
durata di validità della garanzia del prodotto sostitutivo sarà uguale al periodo di garanzia rimanente per il prodotto
originale. QUESTA GARANZIA STABILISCE L’INTERA RESPONSABILITÀ DELLA SANDISK E L’ESCLUSIVO
RIMEDIO A DISPOSIZIONE DELL’UTENTE IN CASO DI INADEMPIENZA.
La SanDisk non garantisce contro perdite di dati o immagini contenuti in qualsiasi prodotto (incluso un prodotto
restituito), né sarà responsabile della loro perdita qualunque ne sia la causa. Non si garantisce che i prodotti
SanDisk funzionino senza guasti ed essi non devono essere adoperati nell'ambito di sistemi di assistenza delle
funzioni vitali o di altre applicazioni in cui un guasto potrebbe avere conseguenze anche fatali. Questa garanzia dà
specifici diritti legali; a seconda della nazione in cui risiede, l’utente potrebbe avere anche altri diritti.
QUESTA GARANZIA È L’UNICA GARANZIA OFFERTA DALLA SANDISK. LA SANDISK DECLINA IN MODO
ASSOLUTO, SECONDO QUANTO PERMESSO DALLE NORME DI LEGGE, TUTTE LE ALTRE GARANZIE,
ESPRESSE E IMPLICITE. LE GARANZIE IMPLICITE DI COMMERCIABILITÀ E IDONEITÀ PER UNO SCOPO
PARTICOLARE SONO LIMITATE ALLA DURATA DELLA GARANZIA ESPLICITA. ALCUNE NAZIONI NON
CONSENTONO LIMITAZIONI ALLA DURATA DI UNA GARANZIA IMPLICITA, QUINDI LA LIMITAZIONE
PRECEDENTE POTREBBE NON APPLICARSI. NÉ LA SANDISK NÉ UNA SUA QUALSIASI AFFILIATA SARANNO
RESPONSABILI, IN NESSUN CASO, DI DANNI DIRETTI O INDIRETTI, PERDITE FINANZIARIE O PERDITA
DI DATI O IMMAGINI, ANCHE SE LA SANDISK FOSSE STATA AVVISATA DELLA POSSIBILITÀ DI TALI DANNI.
ALCUNE NAZIONI NON CONSENTONO L’ESCLUSIONE O LA LIMITAZIONE DI DANNI INCIDENTALI O
INDIRETTI, QUINDI L’ESCLUSIONE O LA LIMITAZIONE DI CUI SOPRA POTREBBE NON APPLICARSI. LA
RESPONSABILITÀ DELLA SANDISK NON SUPERERÀ IN NESSUN CASO L’IMPORTO PAGATO DALL’UTENTE
PER IL PRODOTTO.
La mancata registrazione del prodotto non riduce i diritti concessi dalla garanzia del prodotto stesso.
SanDisk, il logotipo SanDisk, Store Your World in Ours e CompactFlash sono marchi della SanDisk Corporation,
depositati negli Stati Uniti e in altre nazioni. TransferMate è un marchio della SanDisk Corporation. Memory Stick,
Memory Stick Duo, Memory Stick PRO, Memory Stick PRO Duo e Memory Stick PRO-HG Duo sono marchi della
Sony Corporation. RS-MMC è un marchio della MultiMediaCard Association. I marchi e i logotipi SD, miniSD,
microSD, SDHC e miniSDHC sono di proprietà dei rispettivi titolari. SanDisk è un licenziatario del marchio
MultiMediaCard. Adobe, il logotipo Adobe and Photoshop sono marchi o marchi registrati della Adobe Systems
Incorporated negli Stati Uniti e/o in altre nazioni. Il logotipo USB-IF è un marchio della Universal Serial Bus
Implementers Forum, Inc. Altri nomi commerciali qui menzionati hanno solo scopo identificativo e possono essere
marchi dei rispettivi titolari.
© 2007 SanDisk Corporation. Tutti i diritti sono riservati.

30
31
Español
Requisitos de sistema
Conexión
•Puerto USB 2.0 para transferencia de datos de alta velocidad
Soporte mínimo de sistemas operativos
•Windows
•Windows 98SE (se requiere la instalación del driver)
•Windows ME
•Windows 2000
•Windows XP
•Windows Vista
•Macintosh
•Mac OS 9.2+, 10.1.2+
Desembalado del contenido del paquete
•Lector/grabador ImageMate USB 2.0 (no incluye medios de almacenamiento)
•CD de instalación con aplicación de botones y driver Windows 98SE
•Cable USB
•Guía de inicio rápido
Verificación
1. Desembale el paquete. Asegúrese de que esté todo lo indicado en la sección CONTENIDO DEL PAQUETE.
2. Verifique los requisitos de su sistema. Consulte la sección REQUISITOS DE SISTEMA o la parte exterior del
paquete.
3. Localice el puerto USB de su ordenador. Consulte la sección EXPLICACIÓN.
Explicación
¿Qué es un puerto USB?
El puerto Universal Serial Bus (USB) es una manera fácil de conectar a su ordenador un dispositivo nuevo, como
el Lector/grabador ImageMate USB 2.0. La conexión de un dispositivo al puerto USB no requiere que usted abra
el ordenador para instalar una tarjeta adicional ni que configure interruptores complicados. No tiene más que
enchufarlo y empezar a usarlo.
30 31
¿Cómo encuentro el puerto USB?
Los puertos USB están situados con frecuencia en la parte frontal o posterior del PC, o en un puerto concentrador
USB. En un ordenador portátil o en un Macintosh el puerto USB puede estar situado en la parte lateral. El puerto
USB tiene el siguiente aspecto.
¿Cuál es la diferencia entre un puerto USB 2.0 de alta velocidad y un puerto USB 1.1 de velocidad completa?
El puerto USB 2.0 de alta velocidad permite la transferencia de datos a una velocidad máxima de 480 megabits por
segundo (Mbps), mientras que la velocidad máxima del puerto USB 1.1 es de 12 Mbps. El puerto USB 2.0 de alta
velocidad supone una mejora drástica en transferencia de datos con respecto al puerto USB 1.1. El puerto USB 2.0
es retrocompatible con los puertos USB 1.1. El Lector/grabador ImageMate USB 2.0 acepta tanto puertos USB 2.0
como USB 1.1.
Instalación
Antes de conectar el Lector/grabador ImageMate USB 2.0 a su ordenador, es posible que tenga que instalar un
driver de dispositivo.
•Podrá saltarse esta sección si su sistema operativo es Windows XP, ME, 2000 o Vista (y pasar a la sección
Instalación de la aplicación de botones), Mac OS 9.2+ o Mac OS 10.1.2+ (y pasar a la sección Conexión).
Instalación del driver Windows 98SE
1. Introduzca el CD incluido con el Lector/grabador ImageMate USB 2.0 en la unidad de CD-ROM de su ordenador.
2. Haga clic con el botón izquierdo del ratón en el menú START (Inicio) y abra el menú RUN (Ejecutar). Haga clic
en BROWSE (Explorar) para localizar la letra de la unidad de su CD-ROM.
3. Seleccione el fichero \Win98\setup.exe y haga clic en OK (Aceptar). Siga las instrucciones en pantalla.
Instalación de la aplicación de botones
(la aplicación de botones sólo acepta Windows 98SE, ME, 2000 y XP)
1. Introduzca el CD incluido con el Lector/grabador ImageMate USB 2.0 en la unidad de CD-ROM de su ordenador.
2. Haga clic con el botón izquierdo del ratón en el menú START (Inicio) y abra el menú RUN (Ejecutar). Haga clic
en BROWSE (Explorar) para localizar la letra de la unidad de su CD-ROM.
3. Seleccione el fichero \Button Application\setup.exe y haga clic en OK (Aceptar). Siga las instrucciones en
pantalla.

32
33
Conexión
La conexión del Lector/grabador ImageMate USB 2.0 al puerto USB es muy sencilla. No es necesario apagar o
reiniciar el ordenador al acoplar el Lector/grabador ImageMate USB 2.0. Dado que el Lector/grabador ImageMate
USB 2.0 se alimenta a través de la conexión USB, no es necesario un adaptador de AC/DC.
•Antes de conectar el Lector/grabador ImageMate USB 2.0, lleve a cabo la instalación del driver de dispositivo.
Consulte la sección INSTALACIÓN.
Use el cable USB para conectar directamente el ImageMate al ordenador.
Cuando el Lector/grabador ImageMate USB 2.0 se conecta por primera vez, podrá aparecer en la pantalla del
ordenador un mensaje que indica que se está instalando el dispositivo (podrá variar ligeramente dependiendo del
sistema operativo).
Iconos de disco de Windows
Cuando el Lector/grabador ImageMate USB 2.0 se conecta a un sistema operativo Windows, aparece en My Computer
(Mi PC) la letra de unidad del icono nuevo asignado de disco extraíble que representa a la ranura de tarjetas.
Iconos de disco de Macintosh
Cuando el Lector/grabador ImageMate USB 2.0 se conecta a un sistema operativo Macintosh, al insertar una tarjeta
aparecerá en el escritorio un icono denominado untitled (sin título) que representa a la ranura de tarjetas.
Utilización
El Lector/grabador ImageMate USB 2.0 tiene una ranura de tarjetas que se usa para diferentes tipos de tarjetas.
•SDDR-92: CompactFlash, Tipo I /II
•SDDR-99: SD, SDHC, MultiMediaCard, MMCplus, MMCmobile, RS-MMC, RS-MMC Dual Voltage,
Memory Stick, Memory Stick PRO y xD & xD Type M & H
Inserción de tarjetas
Para introducir una tarjeta en la ranura del Lector/grabador ImageMate USB 2.0, introduzca el extremo de la tarjeta
que tiene el conector, con la etiqueta de la tarjeta mirando hacia arriba. NO FUERCE la tarjeta para que entre en la
ranura.
Actividad de los indicadores LED
SDDR-92 (Lector/grabador CompactFlash):
•Windows XP/Vista: El indicador LED se enciende cuando se inserta correctamente una tarjeta.
•Windows 98SE/ME/2000: El indicador LED se enciende cuando se hace clic dos veces en "Removable Disk"
(Disco extraíble) al insertar correctamente una tarjeta.
•Macintosh OS: Aparece un icono de unidad en el escritorio cuando se inserta correctamente una tarjeta.
•Todos los sistemas operativos: El indicador LED parpadea cuando se transfieren datos desde o a la tarjeta.
32
SDDR-99 (Lector/grabador 5-en-1):
Cuando se instala correctamente el Lector/grabador ImageMate USB 2.0, se enciende el INDICADOR LED VERDE.
Si el indicador no se enciende:
•Verifique que el Lector/grabador ImageMate USB 2.0 esté conectado y que la tarjeta esté insertada
correctamente.
El indicador LED de actividad (naranja) parpadea cuando se transfieren datos desde o a la tarjeta.
NUNCA quite la tarjeta cuando el indicador LED de ACTIVIDAD esté INTERMITENTE o PARPADEE.
Uso en un PC con la aplicación de botones
1. Introduzca la tarjeta de medios.
2. Pulse el botón en el lector.
3. Se cargará la aplicación de botones.
4. Si desea guardar los ficheros en su PC, seleccione el botón “Transfer all Files” (Transferir todos los ficheros). Esto
le permitirá copiar o trasladar los ficheros al PC.
5. Si desea Seleccionar, Renombrar, Imprimir, Enviar por correo electrónico o usar como Salvapantallas alguna de
las fotografías, seleccione el icono “Use Photo Tools” (Usar herramientas de fotos).
Uso en un PC sin la aplicación de botones
Ésta es la manera de crear una Carpeta en su Escritorio, y de Copiar y Pegar sus fotos en ella.
1. Cómo crear una CARPETA en su Escritorio
A. Coloque el puntero del ratón en un lugar del Escritorio, pero no en un icono.
B. Haga clic una vez con el botón DERECHO del ratón, desplace el puntero del ratón a NEW (Nuevo) y,
seguidamente, haga clic en FOLDER (Carpeta) con el botón IZQUIERDO del ratón.
C. De esta manera se creará una CARPETA NUEVA en el Escritorio. Podrá darle el nombre que desee, por
ejemplo, Mis fotos o Fotos, escribiendo el nombre con el teclado. Cuando termine de escribirlo, oprima la
tecla ENTER (Intro) de su teclado. De esa manera, se salvaguarda el nombre de la carpeta.
2. Cómo copiar y pegar sus fotos en una carpeta
A. Haga clic dos veces en el icono "My Computer" (Mi PC).
B. Haga clic dos veces en la unidad de disco extraíble (correspondiente al Lector/grabador ImageMate USB 2.0),
por ejemplo, F: o G:, o quizás E: Ahora deberá ver una carpeta DCIM (Imágenes de cámara digital).
C. Haga clic dos veces en la carpeta DCIM. Ahora deberá ver la carpeta de su cámara, por ejemplo, 100Olymp,
100Canon o 100Fuji.
D. Haga clic dos veces en la carpeta de la cámara. Ahora deberá ver las fotos o los nombres de los ficheros de
fotos (dependiendo del sistema operativo que esté usando).
E. Vaya a la barra de menú donde dice "EDIT" (Editar) y haga clic en "SELECT ALL" (Seleccionar todos). Verá
que se resaltan todas las fotos.
F. Vuelva a "EDIT" y ahora haga clic en "COPY" (Copiar). Cierre o minimice esta ventana.
33

34
35
G. Haga clic dos veces en la carpeta que creó en su Escritorio, vaya a "EDIT", haga clic en "PASTE" (Pegar) y
deberá ver que las fotos se copian a la carpeta.
H. Para ver las fotos, haga clic dos veces en el nombre del fichero y la foto se abrirá.
Uso en Macintosh sin la aplicación de botones
(La aplicación de botones no es compatible con los sistemas operativos de Macintosh)
1. Conecte el Lector/grabador ImageMate USB 2.0 al puerto USB de su Mac (no lo conecte al monitor o teclado).
2. Para transferir ficheros, introduzca una tarjeta en la unidad del Lector/grabador. Aparecerá en su escritorio una
nueva unidad denominada “untitled” (sín título).
3. Arrastre y suelte ficheros desde y a la nueva unidad como lo haría con cualquier otro disco o carpeta.
Extracción de la tarjeta
Para extraer la tarjeta en Windows:
1. Haga clic dos veces en el icono "My Computer" (Mi PC).
2. Haga clic con el botón derecho del ratón sobre el icono correspondiente a la unidad del Lector/grabador
ImageMate USB 2.0.
3. Seleccione Eject (Expulsar). Esto no es necesario para Windows 98SE, XP o Vista.
4. Saque la tarjeta de la ranura.
Para extraer la tarjeta de un Macintosh:
1. Arrastre el icono “untitled” (sin título) al icono Trash (Papelera).
2. Saque la tarjeta de la ranura.
Desconexión
No es necesario apagar el ordenador para desconectar el Lector/grabador ImageMate USB 2.0, aunque no se debe
quitar NUNCA el dispositivo del puerto USB sin haber leído primero los pasos que figuran a continuación.
Si está activa una ventana de unidad de disco o el Lector/grabador ImageMate USB 2.0, cierre todas las ventanas
asociadas antes de intentar desconectar el ImageMate.
Windows
Utilice el icono hotplug (de conexión directa) en la zona de notificación de la barra de tareas para detener con
seguridad el dispositivo antes de desenchufarlo. La zona de notificación está situada en el lado derecho de la barra
de tareas, donde normalmente aparece la hora.
•Estos pasos no son necesarios para Windows 98SE o XP.
1. En el área de notificación, haga clic con el botón derecho del ratón en el icono de conexión directa.
2. Seleccione el dispositivo que desea desenchufar y, seguidamente, haga clic en STOP (Parar).
3. Cuando Windows le notifique que es seguro hacerlo, desenchufe el Lector/grabador ImageMate USB 2.0 del
ordenador.
34
Macintosh
1. Arrastre el icono “untitled” (sin título) del Lector/grabador ImageMate USB 2.0 al icono Trash (Papelera).
2. Desenchufe el dispositivo.
Solución de problemas
Para ver las preguntas más frecuentes sobre mensajes de error, visite nuestra página web en:
http://www.sandisk.com/retail/support.asp.
Para recibir asistencia técnica y servicio de garantía, por favor diríjase a www.sandisk.com/techsupport donde
encontrará un número de teléfono local.
Garantía limitada de 2 años de SanDisk
SanDisk garantiza que este producto carece de defectos esenciales en diseño y fabricación, y que se ajusta
sustancialmente a las especificaciones publicadas en condiciones de uso normales durante dos años a partir de la
fecha de su compra, sujeto a las condiciones indicadas a continuación. Esta garantía se concede al usuario final
original que compre el producto a SanDisk o a un distribuidor autorizado, y no es transferible. Podría requerirse
comprobante de compra. Este producto debe usarse con tarjetas de memoria que cumplan con las especificaciones
de la Asociación de Tarjetas SD, la Asociación MultiMedicaCard o los requisitos de las tarjetas Memory Stick o
TransFlash, según corresponda; su uso con cualquier otro producto anula esta garantía. SanDisk no es responsable
de ningún fallo o defecto causado por productos o componentes fabricados por terceros, ya estén o no autorizados.
Esta garantía no se aplica a software de terceros que se incluya con el producto y usted será responsable de todo
el servicio de mantenimiento y reparaciones necesarios para dicho software. Esta garantía será nula si la tarjeta de
memoria no se usa de conformidad con las instrucciones del producto o si resulta dañada como consecuencia de su
instalación inadecuada, uso indebido, reparación no autorizada, modificación o accidente.
Deberá devolver el producto embalado de una manera segura, con portes pagados, según las instrucciones de
SanDisk. Deberá obtener un número de confirmación de seguimiento, que quizás deba proporcionar a SanDisk.
SanDisk, a su entera discreción, podrá reparar o reemplazar el producto por otro nuevo o restaurado de igual o
mayor capacidad y funcionalidad, o devolverle el importe del producto. La duración de la garantía del producto
de reemplazo será la que le quede al producto original. ESTO CONSTITUYE LA RESPONSABILIDAD TOTAL DE
SANDISK Y EL RECURSO EXCLUSIVO A DISPOSICIÓN DE USTED EN CASO DE QUE NO SE CUMPLAN LOS
TÉRMINOS DE ESTA GARANTÍA
SanDisk no garantiza ni será responsable de la pérdida de datos o imágenes contenidos en un producto cualquiera
(incluido cualquier producto devuelto), al margen de la causa de dicha pérdida. No se garantiza que los productos
de SanDisk funcionen sin fallo alguno. Los productos de SanDisk no se deben usar en sistemas de soporte vital u
otras aplicaciones cuyo fallo podría amenazar la vida o provocar lesiones. Esta garantía le otorga derechos legales
específicos, aparte de aquellos otros derechos que pudiera tener según la jurisdicción.
35

36
LA INFORMACIÓN PRECEDENTE CONSTITUYE LA ÚNICA GARANTÍA DE SANDISK. SANDISK DENIEGA
TODAS LAS DEMÁS GARANTÍAS EXPRESAS E IMPLÍCITAS EN LA MEDIDA EN QUE LO PERMITA LA
LEGISLACIÓN VIGENTE. LAS GARANTÍAS IMPLÍCITAS DE COMERCIABILIDAD E IDONEIDAD PARA
UN PROPÓSITO DETERMINADO SE LIMITAN A LA DURACIÓN DE LA GARANTÍA EXPRESA. ALGUNAS
JURISDICCIONES NO PERMITEN LIMITACIONES EN CUANTO A LA DURACIÓN DE LAS GARANTÍAS
IMPLÍCITAS. POR ELLO, LA LIMITACIÓN PRECEDENTE PODRÍA NO APLICARSE EN SU CASO. SANDISK, ASÍ
COMO SUS COMPAÑÍAS AFILIADAS O SUBSIDIARIAS, NO SERÁN RESPONSABLES DE NINGUNA MANERA
Y BAJO NINGUNA CIRCUNSTANCIA DE NINGÚN DAÑO DIRECTO, INDIRECTO NI ACCESORIO, PÉRDIDA
ECONÓMICA O PÉRDIDA DE DATOS O IMÁGENES, AUNQUE SANDISK HAYA SIDO ADVERTIDA DE LA
POSIBILIDAD DE DICHOS DAÑOS. ALGUNAS JURISDICCIONES NO PERMITEN LA EXCLUSIÓN NI LIMITACIÓN
DE DAÑOS Y PERJUICIOS CONCOMITANTES O ACCESORIOS. POR ELLO, LA LIMITACIÓN PRECEDENTE
PODRÍA NO APLICARSE EN SU CASO. LA RESPONSABILIDAD DE SANDISK NO EXCEDERÁ, EN NINGÚN
CASO, DE LA CANTIDAD QUE USTED PAGÓ POR EL PRODUCTO.
Los derechos que usted tiene de conformidad con la garantía del producto no se verán afectados por no registrar
el producto.
SanDisk, el logotipo de SanDisk, Store Your World in Ours y CompactFlash son marcas comerciales de SanDisk
Corporation, registradas en los Estados Unidos y otros países. TransferMate es una marca comercial de SanDisk
Corporation. Memory Stick, Memory Stick Duo, Memory Stick PRO, Memory Stick PRO Duo y Memory Stick
PRO-HG Duo son marcas comerciales de Sony Corporation. RS-MMC es una marca comercial de la MultiMediaCard
Association. Las marcas y logotipos de SD, miniSD, microSD, SDHC, miniSDHC son marcas comerciales. SanDisk
es licenciatario autorizado de la marca comercial MultiMediaCard. Adobe, el logotipo de the Adobe y Photoshop
son marcas comerciales o registadas de Adobe Systems Incorporated en los Estados Unidos y otros países. El
logotipo de USB-IF es una marca comercial de Universal Serial Bus Implementers Forum, Inc. Los nombres de otros
productos mencionados en el presente documento se utilizan únicamente con fines de identificación y pueden ser
marcas comerciales de sus respectivos titulares.
© 2007 SanDisk Corporation. Reservados todos los derechos.
36
Nederlands
Systeemvereisten
Aansluiting
•USB 2.0-poort voor snelle gegevensoverdracht
Ondersteunde besturingssystemen
•Windows
•Windows 98SE (installatie stuurprogramma vereist)
•Windows ME
•Windows 2000
•Windows XP
•Windows Vista
•Macintosh
•Mac OS 9.2+, 10.1.2+
Uitpakken van de doos
• ImageMate USB 2.0 Reader/Writer (exclusief geheugenkaart)
• Installatie-cd met knopapplicatie en stuurprogramma Windows 98SE
• USB-kabel
• Beknopte gebruiksaanwijzing om van start te gaan
Inspectie
1. Maak de verpakking leeg. Controler of alles er in zit wat vermeld staat onder INHOUD VAN DE VERPAKKING.
2. Kijk naar uw systeemvereisten. Zie SYSTEEMVEREISTEN of de buitenkant van de doos.
3. Kijk waar de USB-poort op uw computer zit. Zie UITLEG.
Uitleg
Wat is een USB-poort?
De USB-poort (USB is een afkorting van Universal Serial Bus) vormt een eenvoudige methode voor aansluiting van een
nieuw apparaat zoals de ImageMate USB 2.0 Reader/Writer op uw computer. Voor aansluiting van een apparaat op
de USB-poort hoeft u uw computer niet te openen om een extra kaart te installeren of ingewikkelde schakelaars te
verstellen. U steekt gewoon de stekker in het contact en gaat van start.
37

38
39
Waar kan ik de USB-poort vinden?
De USB-poort bevindt zich meestal op de voor- of achterkant van uw pc of op een USB-hub. Op een laptop of een
Macintosh zit de USB-poort soms op de zijkant. Zo ziet een USB-poort er uit:
Wat is het verschil tussen Hi-Speed USB 2.0 en Full Speed USB 1.1?
Hi-Speed USB 2.0 ondersteunt gegevensoverdracht tot een snelheid van 480 megabits per seconde (Mbps);
Full Speed USB 1.1 ondersteunt gegevensoverdracht tot maximaal 12 Mbps. Hi-Speed USB 2.0 is een enorme
verbetering wat betreft gegevensoverdracht vergeleken met Full Speed USB 1.1. USB 2.0 is terugwaarts compatibel
met USB 1.1-poorten. De ImageMate USB 2.0 Reader/Writer ondersteunt zowel USB 2.0 als USB 1.1.
Installatie
Voordat u de ImageMate USB 2.0 Reader/Writer op uw computer aansluit, zal het soms nodig zijn om het
stuurprogramma voor het apparaat te installeren.
•U kunt dit gedeelte overslaan als uw besturingssysteem Windows XP, ME, 2000 of Vista is (ga in dat geval naar
‘Installeren van de knopapplicatie’) of Mac OS 9.2+ of Mac OS 10.1.2+ (ga in dat geval naar ‘Aansluiting’).
Installeer het stuurprogramma Windows 98SE
1. Plaats de cd-rom die is meegeleverd met de ImageMate USB 2.0 Reader/Writer in het cd-rom-station van uw
computer.
2. Klik met de linkermuisknop op het menu START en open het menu UITVOEREN. Klik op BLADEREN om de
stationsletter van uw cd-rom-station te vinden.
3. Selecteer het bestand \Win98\setup.exe en klik op OK. Volg de aanwijzingen op het scherm.
Installeren van de knopapplicatie
(De knopapplicatie ondersteunt alleen Windows 98SE, ME, 2000 en XP.)
1. Plaats de cd-rom die is meegeleverd met de ImageMate USB 2.0 Reader/Writer in het cd-rom-station van uw
computer.
2. Klik met de linkermuisknop op het menu START en open het menu UITVOEREN. Klik op BLADEREN om de
stationsletter van uw cd-rom-station te vinden.
3. Selecteer het bestand \Button Application\setup.exe en klik op OK. Volg de aanwijzingen op het scherm.
Aansluiting
Aansluiten van de ImageMate USB 2.0 Reader/Writer op de USB-poort is uitermate eenvoudig. U hoeft uw computer
niet uit te zetten of opnieuw te starten wanneer u de ImageMate USB 2.0 Reader/Writer aansluit. En omdat de
ImageMate USB 2.0 Reader/Writer via de USB-aansluiting gevoed wordt, hebt u ook geen netspanningsadapter nodig.
• Voltooi de installatie van het stuurprogramma voordat u de ImageMate USB 2.0 Reader/Writer aansluit. Zie
INSTALLATIE.
Gebruik de USB-kabel om uw ImageMate direct op uw computer aan te sluiten.
Als de ImageMate USB 2.0 Reader/Writer voor de eerste keer wordt aangesloten, zal op uw computer soms
een bericht verschijnen om aan te geven dat het apparaat geïnstalleerd wordt (dit varieert afhankelijk van uw
besturingssysteem).
Schijfpictogrammen in Windows
Wanneer u de ImageMate USB 2.0 Reader/Writer op een Windows besturingssysteem aansluit, wordt er in
Apparaatbeheer voor de kaartsleuf een nieuwe stationsletter weergegeven met het pictogram voor de verwisselbare
schijf.
Schijfsymbolen voor Macintosh
Wanneer u de ImageMate USB 2.0 Reader/Writer op een Macintosh besturingssysteem aansluit, geeft een symbool
van een verwijderbare schijf met de aanduiding ‘untitled’ de kaartsleuf aan op het bureaublad wanneer er een kaart
ingestoken wordt.
Gebruik
De ImageMate USB 2.0 Reader/Writer heeft een enkele kaartsleuf die voor verschillende kaarttypen gebruikt wordt.
• SDDR-92: CompactFlash type I /II
• SDDR-99: SD, SDHC, MultiMediaCard, MMCplus, MMCmobile, RS-MMC, RS-MMC Dual Voltage,
Memory Stick, Memory Stick PRO en xD & xD Type M & H
Kaarten insteken
Om een kaart in de sleuf van de ImageMate USB 2.0 Reader/Writer te steken, steekt u deze in met het
connectoruiteinde van de kaart naar voren en het etiket op de kaart omhoog. Druk de kaart NIET met geweld in
de sleuf.
Werking van het ledje
SDDR-92 (CompactFlash Reader/Writer):
• Windows XP/Vista: Het ledje gaat branden als er een kaart goed is ingestoken.
• Windows 98SE/ME/2000: Het ledje gaat branden als er dubbel geklikt is op ‘Verwisselbare schijf’ nadat een
kaart goed is ingestoken.
Other manuals for SDDR-92-A15 - ImageMate USB 2.0 Reader/Writer Card...
1
This manual suits for next models
2
Table of contents
Languages:
Other SanDisk Card Reader manuals

SanDisk
SanDisk SDDR-89-E15 User manual

SanDisk
SanDisk SDDR-92-A15 - ImageMate USB 2.0 Reader/Writer Card... User manual

SanDisk
SanDisk Photo Album User manual

SanDisk
SanDisk ImageMate SDDR-89 User manual

SanDisk
SanDisk MobileMate Micro Memory User manual

SanDisk
SanDisk ImageMate SDDR-73 Instruction Manual

SanDisk
SanDisk Photo Album User manual

SanDisk
SanDisk SDDR-01 - ImageMate External Parallel CompactFlash Card... User manual

SanDisk
SanDisk ImageMate SDDR-289 User manual

SanDisk
SanDisk MicroMate User manual