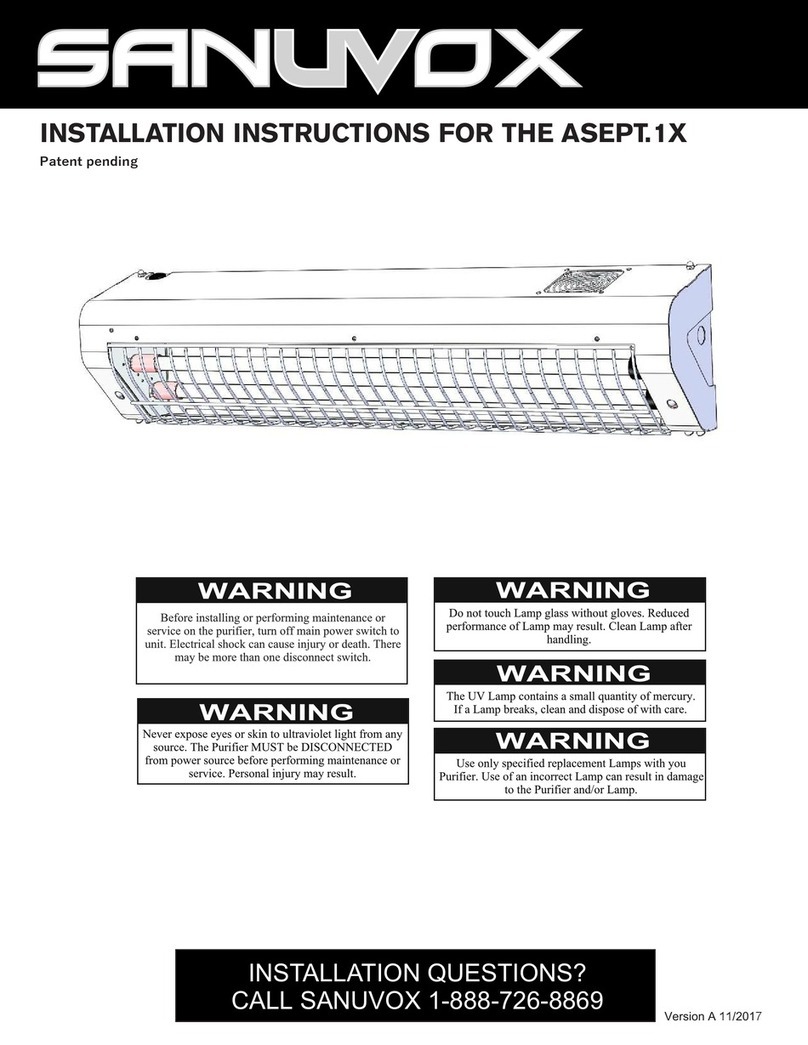
Sanuvox ASEPT.1X User manual

Sanuvox Technologies Inc, © 2021 All rights reserved. March 2021 EN v.8
Instruction Manual
Photos illustrating products are non contractual.
ASEPT.1X MAX
24/7 AUTOMATED PROTECTION UNIT AGAINST PATHOGENS
Medical Model
IMPORTANT SAFETY INSTRUCTIONS
READ AND SAVE THESE SAFETY INSTRUCTIONS BEFORE USING THIS PRODUCT.
Read and follow all instructions contained in
this manual before using the product. Failure
to comply with these instructions may result
in personal injuries or damage to the unit or
system.
1. Installation and servicing of this equipment
can be hazardous due to electrical components.
Only trained and qualied service personnel
such as certied electricians should install,
repair or service equipment.
2. Untrained personnel can perform basic
maintenance functions such as replacing
UVC lamps. All other operations should be
performed by trained service personnel such
as certied electricians.
3. When working on the unit or system, observe
precautions in the literature, tags and labels
attached to the unit or system, and all other
safety precautions considered as best practices
in the industry.
4. When applicable, local regulation may
comprise more restrictive installation and/or
certication requirements. The afore mentioned
requirements prevail on those of this document
and the installer agrees to conform to these at
his own expense.
5. Follow all the safety instructions outlined in this
document and respect all local and national
codes applicable.
6. Never expose eyes or skin to ultraviolet
light from any source. Never start the
disinfection cycle with someone in the room.
Therefore, before installing or performing
maintenance on the unit or system, TURN
OFF AND DISCONNECT the unit or system
from all power sources (there may be more
than one switch to disconnect).
CAUTION: Electrical shock may cause
personal injuries or possibly death.
7. UV rays may overtime damage or discolour
certain types of polymer or plastic.
8. When installing or performing maintenance on
the UV unit or system, it is recommended to
wear safety glasses and gloves. In order to
avoid reduced performance of lamp(s), do not
touch lamp glass without gloves.
9. Just like conventional uorescent lamps, UV
lamps contain a small quantity of mercury: if a
lamp breaks, clean and dispose of with care.
UV lamps can be disposed/recycled after use in
the same way as any other uorescent lamps.
Contact and follow your local and national
authorities’ specic instructions.
10. Use only specied SANUVOX branded
replacement UV lamps with your unit or
system. Use of any other lamps will void your
warranty and can result in damage to the unit,
system and/or lamp(s).
11. Most UV units or systems are not waterproof.
DO NOT INSTALL OUTDOORS OR IN WET
LOCATION unless specied otherwise.
12. Do NOT hang onto the device.
13. Risk of falling: the disinfection cassette may
fall when the rear lock is disengaged. Always
make sure it is in place.
14. Risk of rapid opening of the protective
envelope door when hung on the ceiling and
wall.
15. Risk of back pain when installing the
machine. Working at height with heavy
equipment can cause back injury. Make sure
you work in the most ergonomic position
possible.
16. Risk of falling during installation. Beware of
the risk of falling when working on a stepladder
during installation or maintenance.
SAVE THESE INSTRUCTIONS
Installation Date: _______________ Installed by: _________________
Installer Contact Info.: _________________________________________
REGISTER
YOUR WARRANTY
ONLINE AT
www.sanuvox.com

2
Instruction Manual for ASEPT.1X Max
1-888-726-8869www.sanuvox.com
TABLE OF CONTENTS
IMPORTANT SAFETY INSTRUCTIONS 1
TABLE OF CONTENTS 2
ABOUT THE PRODUCT 3
COMPONENTS 3
How it Works 3
ACCESSORIES & KITS 3
USAGE SCENARIOS 4
Optimal Location 4
Inadequate Locations 5
SETUP & INSTALLATION 6
What you will need 6
What’s included 6
Step by Step Magnetic Door Detector Set Installation 6
Step by Step Protective Envelope Installation 7
Option to Replace Spring & Support 7
Step by Step Spring Replacement 7
Step by Step Support Replacement 8
Step by Step Wall-Mounted Installation 9
Setup for Ceiling-Mounted Installation 11
Step by Step Ceiling-Mounted Installation 15
Step by Step Disinfection Cassette Installation 17
Step by Step UV Lamp Installation 18
Multiple Units Connected to Multiple Doors 19
OPERATION 20
How to Operate your Product 20
Step by Step Unit Activation 20
Step by Step Operating Test with Dosimeter 21
MAINTENANCE 21
How to Replace Lamp(s) 21
Step by Step Lamp Replacement 21
How to Replace Ballast 23
Step by Step Ballast Replacement 23
Step by Step Magnetic Door Detector Set Replacement 25
How to Clean your Product 26
STORAGE 26
ULTRAVIOLETS: UVC 26
RANGE OF ENVIRONMENTAL CONSIDERATIONS 26
ELECTRICAL RATINGS, POWER CONSUMPTION & AVAILABLE VOLTAGE 27
TROUBLESHOOTING 27
Problems & Solutions Table 27
A. Step by Step Test Procedure 28
Analysis of the Test Procedure Results 29
WARRANTY 30
CUSTOMER SERVICE 30

A
B
C
D
E
3
Instruction Manual for ASEPT.1X Max
1-888-726-8869www.sanuvox.com
ABOUT THE PRODUCT
The ASEPT.1X Max is a surface disinfection unit operating with UVC. The ASEPT.1X Max unit pushes the limits of surface
disinfection by automatically disinfecting patient bathrooms, which are a well-known reservoir of nosocomial diseases in hospitals.
For information or recommendations on how to size your specic application, please call SANUVOX at 1-888-726-8869.
COMPONENTS
How it Works
Completely automated, the ASEPT.1X Max unit includes the following safety features: redundant passive infrared motion
sensors (02 PIR) and magnetic door detector set. This allows the unit to only operate when no one is in the patient bathroom,
for a minimum of 5-minute disinfection cycles after each use. Cycle time can be increased at the factory to account for larger
room size. ASEPT.1X Max can disinfect up to 99.9999% of contaminants such as VRE, C.difcile, MRSA and Inuenza A virus,
by sterilizing the most commonly touched areas if adequate exposure time allows the delivery of sufcient UVC dose. Consult
factory representative for adequate sizing. The ASEPT.1X Max can be installed on the ceiling or wall-mounted.
More details are available in the product specication sheet and in the ‘Medical’ section of our website: www.sanuvox.com
A. Disinfection cassette with
redundant passive infrared motion sensors (02 PIR)
B. UV lamps
C. Magnetic door detector set
D. Cover
E. Protective envelope
ACCESSORIES & KITS
The following optional accessories and/or kits work great with your product (sold separately).
Dosimeters
Dosimeter stickers to test UV disinfection level on specic
installations.
Stick the dosimeters to critical targeted surfaces to assess if adequate UV
dose is delivered.
For instruction manuals or information about your optional accessories and/or kits, please call SANUVOX at 1-888-726-8869
or visit www.sanuvox.com.

4
Instruction Manual for ASEPT.1X Max
1-888-726-8869www.sanuvox.com
USAGE SCENARIOS
Objective: To maximize the unit effectiveness with the adequate dose of UV, it is necessary to identify which surfaces are most
likely to be contaminated. Place the unit so that it is closest to all of these surfaces. The closer a surface is to the lamp, the
greater the UV dose for a given exposure time.
A minimum dose of 50mJ/cm2, is recommended to disinfect a hard surface of the majority of microorganisms such as MRSA ,
Clostridium sordellii, VRE, C-Difcile spores, Enterococcus faecalis and Norovirus. Surfaces must be directly exposed to UV
light to be disinfected.
In order to optimize the location of the ASEPT.1X Max, identify key surfaces to be disinfected.
For example, in a bathroom, the 3 most important key surfaces that must be in the disinfection area are:
• Toilet
• Sink
• Door handle
The following gures illustrate optimal and inadequate locations for the installation of the unit, with the areas where the minimum
level of UV irradiation is present.
Optimal Location
The disinfection area covers the toilet, sink and door handle.
FIG.A

5
Instruction Manual for ASEPT.1X Max
1-888-726-8869www.sanuvox.com
Inadequate Locations
The door handle and toilet are not in the disinfection area.
The door handle is not in the disinfection area.
The sink is not completely in the disinfection area.
FIG.B
FIG.D
FIG.C

6
Instruction Manual for ASEPT.1X Max
1-888-726-8869www.sanuvox.com
SETUP & INSTALLATION
What you will need
A utility knife to unpack all components, a drill with drill bits, a level, a measuring tape, a marker, a stepladder.
CAUTION: Handle your product with care to avoid breaking parts. Make sure you have a free and safe space to unpack,
install and setup your product. Conrm you have access to the necessary power source for the product requirements (see unit
or system label). If you have any questions regarding the installation instructions, call SANUVOX at 1-888-726-8869.
What’s included
The ASEPT.1X Max (disinfection cassette, cover and protective envelope), (2) UV lamps and a basic installation kit.
The installation kit includes: a UV caution decal, a maintenance decal, a pair of cotton gloves, (1) magnetic door detector set
with its (4) screws, a standoff and a spring with its screw.
Step by Step Magnetic Door Detector Set Installation
1. Install the magnetic housing on the top of the door frame (side of the
door handle), as close as possible to the door (bottom of the frame).
3. Connect the wires to the protective envelope by passing the detector
wires through the same hole as the power supply.
Connect the black wire with the yellow one, and the red wire with the
other red one.
2. Install the other magnetic housing on the door just below the magnetic
housing installed on the frame.
NOTE: The two housings should be centered one above the other.
STEP 1
STEP 3
STEP 2

7
Instruction Manual for ASEPT.1X Max
1-888-726-8869www.sanuvox.com
Step by Step Protective Envelope Installation
1. Take the protective envelope out of the box. Be sure to pull the unit by
the back.
Two installation types are possible. Refer to the section corresponding
to your choice: on the ceiling or wall-mounted.
STEP 1
Option to Replace Spring & Support
The ASEPT.1X Max comes with the option of using rigid springs or support to hold the cover of the protective envelope. Sanuvox
recommends the use of two springs if the unit is hung from the ceiling, and a support if hung on the wall. These steps should be
performed when installing the protective envelope on the wall or ceiling.
Step by Step Spring Replacement
1. Unscrew the bolt that holds the support and remove the support.
Recommended nut socket size: 7/16
2. Screw the cylindrical standoff.
STEP 1
STEP 2

8
Instruction Manual for ASEPT.1X Max
1-888-726-8869www.sanuvox.com
Step by Step Support Replacement
1. Remove the spring from the cylindrical standoff.
2. Unscrew the spring with the cover in one of the holes.
3. Unscrew the cylindrical standoff.
4. Install the support.
Helical
Washer Washer NutSupport
STEP 1
STEP 2
STEP 3
STEP 4
3. Screw the spring to the cover in one of the holes.
Recommended screw size: 8-32
4. Place the spring on the cylindrical standoff.
STEP 3
STEP 4

21 21
32
"
Wall installation
There should now be 2 screw anchors on which the ASEPT.1X MAX must be mounted
9
Instruction Manual for ASEPT.1X Max
1-888-726-8869www.sanuvox.com
Step by Step Wall-Mounted Installation
1. Cut the power supply of the room.
NOTE: Dedicated external breaker with a 10A minimum rating.
3. Mark the location of the screws.
NOTE: There should be 2 screw
anchors on which the unit must be
mounted. Anchors not included.
2. Remove ONE of the knockouts corresponding to where the electrical
wires will pass.
STEP 1
STEP 3
STEP 2
5. Hang the protective envelope: Align the screws with the holes.
STEP 5
4. Tighten the two screws and leave a space of about 1/4“ between the
screw head and the wall.
Recommended screw size: 8-32
STEP 4 1/4" vertical clearance
for all screws

10
Instruction Manual for ASEPT.1X Max
1-888-726-8869www.sanuvox.com
6. Slide the protective envelope to the left until the screw heads reach the
end of the slots.
7. Tighten the screws.
STEP 6
STEP 7
8. Connect the power wires via the removed knockout: Connect the door
sensor wires.
9. Then connect the power wires (black wire with hot wire, white wire with
neutral, green wire with ground).
STEP 8
STEP 9
Slide protective envelope
to the left

MDF covering outer edges of plywood
Recommended 1/4in thick sheets
Plywood sheets (x2)
Recommended 3/4in thick sheets
ASEPT.1X MAX
Ceiling anchors must not coincide with the positions of the 4 holes
12,25
36,00
0,75
10,83
1,00 34,10
21,65
7,03
Drill to fit 8-32 wood screws (x4)
0,75
Anchors into concrete ceiling
NOTES:
1- Leave 5mm of screw head free to allow mounting of ASEPT.1X MAX
2- If available, use ASEPT.1X outer box to mark positions of holes
11
Instruction Manual for ASEPT.1X Max
1-888-726-8869www.sanuvox.com
Refer to these drawings if you are installing on a plywood sheets or MDF ceiling.
Setup for Ceiling-Mounted Installation
Before performing a ceiling installation, be sure to identify the type of ceiling, and thus obtain the necessary installation material.

Drywall
ASEPT.1X MAX
Drywall installation
Plywood sheets (x2)
Recommended 3/4in thick sheets
Embedded between 2x4 beams
Plywood sheets (x2)
Recommended 3/4in thick sheets
Embedded between 2x4 beams
2x4 beams (x3)
Cut to required length
43,00
6,25
6,25
43,00
34,10
5,00
10,83 1,92
21,65 11,03
1,25
Drill to fit 8-32 wood screws (x4)
NOTES:
1- Leave 5mm of screw head free to allow mounting of ASEPT.1X MAX
2- If available, use ASEPT.1X outer box to mark positions of holes
Drywall
12
Instruction Manual for ASEPT.1X Max
1-888-726-8869www.sanuvox.com
Refer to these drawings if you are installing on a drywall ceiling.

ASEPT.1X MAX
Acoustic ceiling tile
Acoustic ceiling 2x4 frame
Plywood sheets (x2)
Recommended 3/4in thick sheets
True ceiling
Height of beam depends on
distance from acoustic tile to true ceiling
Anchor frame to ceiling
True ceiling
NOTES:
1- Leave 5mm of screw head free to allow mounting of ASEPT.1X MAX
2- If available, use ASEPT.1X outer box to mark positions of holes
Acoustic ceiling tile
13
Instruction Manual for ASEPT.1X Max
1-888-726-8869www.sanuvox.com
Refer to these drawings if you are installing on a true ceiling or an acoustic ceiling.

14,00
43,00
5,00 34,10
21,65
11,03
1,25 10,83
Drill to fit 8-32 wood screws (x4)
0,75
2x4 beams
3 pairs (12 total)
40,00
7,00
NOTES:
1- Leave 5mm of screw head free to allow mounting of ASEPT.1X MAX
2- If available, use ASEPT.1X outer box to mark positions of holes
14
Instruction Manual for ASEPT.1X Max
1-888-726-8869www.sanuvox.com
Refer to these drawings if you are installing on beams.

Ceiling installation
There should now be 4 screw anchors on which the ASEPT.1X MAX must be mounted
15
Instruction Manual for ASEPT.1X Max
1-888-726-8869www.sanuvox.com
1. Cut the power supply of the room.
4. Mark the anchor holes on the
ceiling in the desired location.
NOTE: There should be 4 screw
anchors on which the unit must be
mounted. Anchors not included.
3. Remove ONE of the knockouts corresponding to where the electrical
wires will pass.
2. Optional step: Remove the cover.
First, remove the spring. Then, unscrew the white corner. And nally,
remove the cover.
STEP 1
STEP 4
STEP 3
STEP 2
Step by Step Ceiling-Mounted Installation

16
Instruction Manual for ASEPT.1X Max
1-888-726-8869www.sanuvox.com
5. Tighten the four screws and leave a space of about 1/4" between the
screw head and the plate.
Recommended screw size: 8-32
STEP 5
6. Hang the protective envelope: Align the screws with the holes.
7. Slide the protective envelope to the right until the screw heads reach the
end of the slots.
STEP 6
STEP 7
Slide protective envelope
to the right
1/4" vertical clearance
for all screws
8. Tighten the screws to secure the unit to the ceiling.
STEP 8
9. Connect the power wires via the removed pad: Connect the door sensor
wires.
10. Then connect the power wires (black wire with hot wire, white wire with
neutral, green wire with ground).
STEP 9
STEP 10

17
Instruction Manual for ASEPT.1X Max
1-888-726-8869www.sanuvox.com
Step by Step Disinfection Cassette Installation
1. Take the disinfection cassette out of the packaging.
CAUTION: Do not pull on the triangle-shaped boxes, they contain
the lamps and they are fragile. DO NOT remove the protective lm from
the reective surface.
STEP 1
2. Open the lid.
NOTE: If installed on the wall, lock the cover open with the support
provided inside.
STEP 2
11. If you removed the cover, reinstall it.
Reinsert the cover on the white plastic cylinders, then replace the white
corner. Install another spring on the door (See “Option to Replace
Spring & Support” section on page 7). And nally, put the springs back
on the metal cylinders.
STEP 11

18
Instruction Manual for ASEPT.1X Max
1-888-726-8869www.sanuvox.com
4. Push the disinfection cassette into the bottom of the protective envelope.
Make sure that the rear lock is properly inserted in the rear support.
CAUTION: YOU MUST HEAR A “CLICK”.
3. Place the disinfection cassette in the protective envelope. Insert the
media into the slots on the disinfection cassette.
STEP 4
STEP 3
CLICK!CLICK!
Step by Step UV Lamp Installation
5. Connect the white connectors together. Place them behind the
disinfection cassette.
6. Remove the protective lm from the reective surface.
1. Take the lamps out of the package. Check that the new lamps are in
good condition.
2. Open the cover.
NOTE: If installed on the wall, lock the cover open with the support
provided inside.
STEP 5
STEP 6
STEP 1
STEP 2
3. Install the lamps to the connectors: First insert the end of the lamp
without the power supply end into the hole without the connector.
STEP 3

19
Instruction Manual for ASEPT.1X Max
1-888-726-8869www.sanuvox.com
4. Then, insert the power supply lamp tip into the connector. Push in all the
way so that the metal end is no longer visible.
STEP 4
5. Close the cover and lock it with a at screwdriver.
Once installation is complete, restore the power supply of the room.
Then, activate and test your unit before use: See “Unit Activation” on
page 20.
STEP 5
A room with multiple doors (3). Example: Connection diagram for door detectors (3) and units (3).
FIG.A FIG.B
Multiple Units Connected to Multiple Doors
Installing multiple units can be a bit more complicated. Here are some guidelines to help you. However, it is strongly recommended
to contact Sanuvox customer service (see last page) for assistance and advice for your specic installation.
IF A ROOM HAS MULTIPLE DOORS (FIG. A):
1. Each door has its detector.
2. All detectors are connected in series.
IF A ROOM HAS SEVERAL ASEPT.1X MAX (FIG. B):
1. The door detectors are connected in series with each other.
2. The door detectors are connected in parallel on the units to maintain the same 3.3V voltage.
Door Detector
Door Detector
Door Detector
Door Detector
Door Detector
Door Detector

20
Instruction Manual for ASEPT.1X Max
1-888-726-8869www.sanuvox.com
The new ASEPT.1X Max is now ready to operate automatically.
OPERATION
How to Operate your Product
Once installed, activate and test your unit before use. If tests are successful, the ASEPT.1X Max will automatically operate a
disinfection cycle after each visit in the room.
CAUTION: The suggested operating temperature range is 10 to 50°C (50 to 122°F). Operating the ASEPT.1X Max outside
this range will result in decreased performance.
Step by Step Unit Activation
STEP 1
STEP 2
STEP 3
STEP 4
STEP 5
1. Turn ON the ASEPT.1X Max by pushing the power button on the unit
and conrm that there is proper voltage (120V or 230V) at the orange
connectors with the black wire.
2. Conrm that the door contact works well: door closed, circuit closed OR
door open, circuit open.
3. Leave the room and close the door.
CAUTION: Never try to start a disinfection cycle with someone in the
room as the motion sensors (PIR) will prevent it.
4. Wait 2 ½ minutes. The lamps light up after 2 minutes.
5. Open the door. You will notice a blue light shutting down indicating that
the unit was on and automatically turned off when you entered the room,
interrupting the disinfection cycle.
If the tests have been successful, you can now use your new ASEPT.1X
MAX. Please read the safety instructions carefully before rst use.
Other manuals for ASEPT.1X
1
Table of contents
Other Sanuvox Medical Equipment manuals
Popular Medical Equipment manuals by other brands

BCD microtechnique
BCD microtechnique COVIDAIR S/T EASY quick start guide

Respironics
Respironics REMstar Plus with C-Flex user manual

HANS RUDOLPH
HANS RUDOLPH V2 Mask 6500 Series Instructions for use

Masimo
Masimo sedline Quick reference guide

Sanyo
Sanyo MLS-3780 Usage instructions

OPTIKON
OPTIKON PULSAR2 ESP Installation and operating manual