Sanyo DC D30 User manual

m
INSTRUCTION
MANUAL
DC D30
MINI COMPONENT SYSTEM

ril ‘--%
1
-1
CAUTION -USE OF CONTROLS OR ADJUSTMENTS OR PERFORMANCE OF PROCEDURES OTHER THAN THOSE
SPECIFIED IN THE OPERATING INSTRUCTIONS MAY RESULT IN HAZARDOUS RADIATION EXPOSURE.
THE COMPACT DISC PIAYER SHOULD NOT BE ADJUSTED OR REPAIRED BY ANYONE EXCEPT PROPERLY
QUALIFIED PERSONNEL. PRECAUTIONS
-If water should enter the unit, electrical shock or malfunction may -Sudden changes in the ambient temperature may cause condensa-
result. Always use it in aplace where there is low humid”~ and little tion to form on the optical lens inside the unit. Ifthis happens, take out
dust. the disc, leave the unit with the disc tray extended for about 1hov
-Do not use where there are extremes of temperature (below 5°C or and then proceed to operate.
exceeding 35°C) or where direct sunlight may strike it. -The system’s speakers use powerful magnets. Do not place time-
-Because of the CD player’s extremely low noise and wide dynamic pieces, credit cards, cassette tapes or video tapes, etc. near the
range, there might be atendency to set the volume on the amplifier speakers.
unnecessarily high. Doing so may produce an excessively large
output from the amplifier which could damage your speakers.
ARRANGEMENT
Example 1Lch speaker Rch speaker
Caasette deck/Amplifier CD player/Tuner/lImer
Example 2
-1-

CONNECTIONS
Iii
I
II
CD player~uner/Timer
Note:
I
.,
.
Rch speaker Lch speaker
\l
r.
/
:?
em
,mm,
-9.
To an AC outlet
\
Cassette declr/Amplifler
1.
To connect, push the middle of
Do not connect the mains lead to an AC outlet until all connections the plug and insert it until To disconnect
have been made. it clicks.
The system is not disconnected from the mains unless the mains lead is
unplugged from the AC outlet.
Speakers
When connecting the speakers, make sure that (+) and (-) polarities are
matched properly. Othetwise, the sound may appear to be lacking in the
‘.-ss range and in stability.
Gonnect the speaker wire with the stripe to the red terminal (+) and the
other wire to the black terminal (-).
Headphones
Connect stereo headphones (8 ohms to 10 kohms, not supplied) to the
PHONES socket for monitoring or for private listening. The speakers are
automatically disconnected when headphones are connected.
Note:
Before connecting external equipment, please refer to the instruction
manual provided your equipment.
-2-

Aerials
FM outdoor aerial
T
FM indoor aerial AM loop aerial
-J P
Q
,
I
FM aerial
In areas close to atransmitter the simple indoor aerial is sufficient to
receive FM broadcasts. Extend the aerial wire as straight as possible and,
while listening to the sound from the system, secure it in aposition which
yields minimal distortion and noise.
In fringe areas or where reception is distorted or noisy, an FM outdoor
aerial (not supplied) should be connected instead of the simple indoor
aerial. Consult your dealer.
AM loop aerial
Assemble ?he loop aerial as shown in figure.
Unwind the aerial wiras (about 3turns), then connect them to the AM
LOOP ANT. terminals. Place the loop aarial in aposition which yields the
best AM reception, or attach itto awall or other surface as shown infigure.
Note:
To minimize noise, the speaker, flat connection and any other leads
should not come closa to the FM indoor or outdoor aerial lead and AM
loop aerial. Do not place the aerial leads close to the system.
CONTROLS
Cassette deck/Amplifier
234567 8910 11
1.
2.
3.
4.
5.
6.
7,
8.
9.
10,
11,
12,
13,
25
F
24
—12
‘~13
14
[jl{l ‘1
17 16 15
Standby indicator (STANDBY)
Power switch (POWER)
Bass expander switch/indicator (BASS)
Display switch (DISPLAY)
Preset sound style switch (PRESET)
Frequency/Memory switch (FREQ/MEMO)
Equalizer up/down switches (AEQ Y)
Display
Function indicators (CD/TAPE/TUNER/PHONO~lDEO)
Function switch (FUNCTION)
Volume controls (DOWN VOLUME UP)
Balance control (BALANCE)
Deck Bcassette holder
14.
15.
16.
17.
18.
19.
20.
21.
22.
23.
24.
25.
26.
Deck Beject button (&EJECT)
Fast wind switches (44 REW/FFWD *)
Stop switch (■STOP)
Play switches/indicators (dPIAY D)
Record/Record pause switch/indicator (REC/PAUSE)
Record muting switch (REC MUTE)
High-speed dubbing switch (DUBBING HIGH)
Dolby noise reduction switch (DOLBY NR)
Reverse mode switch (REVERSE MODE)
Deck select switch/indicators (~ DECK ❑)
Deck Aeject button (4EJECT)
Deck Acassette holder
Headphones socket (PHONES)
-3-

CD player/Tuner/Timer
1.
2.
3.
4.
5,
5.
7.
8.
9.
10.
11.
12.
2?3iz 2’120 lb 18
Remote sensor (IR)
Clock switch (CLOCK)
Sleep timer switch (SLEEP)
ON/OFF timer switch (TIMER)
Wake-up timer switch (WAKE UP)
Display
Memory switch (MEMORY)
Set/Clear switch (SET/CLEAR)
Band select switch (BAND)
FM/Tuning mode switch (FM/TUNE MODE)
Tuning switches (VTUNING A)
Preset/Automatic preset tuning switches (VPRE-
SET/AUTO PRESET TUNING A)
17 16
13.
14.
15.
16.
17.
18.
19.
20,
21.
22.
23.
Play/Pause switch (D/ II PLAY/PAUSE)
Skip/Search switches (W/44 SKIP/SEARCH */
w)
Stop/Clear switch (9STOP/CLEAR)
Disc tray open/close switch (A)
Disc tray
Repeat play switch (REPEAT)
CD memory switch (CD MEMORY)
Random play switch (RANDOM)
Computer recording switch (COMP. REC)
Time/Fade-out switch (TIME/FADE)
Edit switch (EDIT)
Controls
1
3
4
6
7
REMOTE CONTROL
2
5
8
1.
2.
3.
4.
5.
6.
7.
8.
Power switch (POWER)
Deck controls
REC MUTE: Record muting switch
●/11: Record/Record pause switch
DECK A/B: Deck select switch
4➤:Play switches
s:Stop switch
44 w: Fast wind switches
CD player controls
MEMORY: CD memory switch
REPEAT: Repeat play switch
}/11 :Play/Pause switch
■:Stop/Clear switch
144/44 */~ :Skip/Search switches
Sleep timer switch (SLEEP)
Tuner controls
PRESET: Preset tuning switch
TUNER/BAND: Tuner function/Band select switch
Function controls
VIDEO: Video function switch
PHONO: Phono function switch
CD: CD function switch
Audio muting switch (MUTE)
Volume controls ( - VOL +)
-4-

Inserting batteries
APJSLfM-3/R6 X2
(not supplied)
2
Note:
Always remove batteries ifthe remote control is notto be used fora month
or more. Batteries left in the unit may leak and cause damage.
Remote control range iii
Remote sensor
Operation
By using the remote control, you can operate the system inthe same way
as with the controls on the main unit.
ADJUSTING THE CLOCK
The clock display blinks when the mains lead is connected to the AC 5. Press the MEMORY switch. The clock starts.
outlet for the first time.
Example: To set “7:30PM”,
1. Press the CLOCK switch for 1or more seconds. ~
~1 -whenatimesignalisheard.
The time can be set accurately by pressing the MEMORY switch
1
The “CLOCK’ and hours displays blink. These operations can be done, even if the power is off.
2. Press the Vor ATUNING switch to set the “hours.” The clock operation and memory are backed up even with apower
~-
failure lasting 30 seconds or less.
When apower failure lasts for more than 30 seconds, the memory
contents will be retained for afew days, but the clock display will blink.
3. Press the MEMORY switch. Reset the time when the display blinks because of apower failure.
m
Reset the timer ON/OFF times as well.
The minutes display blinks.
4. Press the Vor ATUNING switch to set the “minutes.”
m
-5-

E
BEFORE OPERATION
Turning the power on and off
Press the POWER switch. The displays light and the STANDBY indicator
goes out.
To turn offthe power, press the POWER switch again. The clock display
remains lit and the STANDBY indicator lights.
-When the mains lead is connected to the AC outlet, the STANDBY
indicator lights and the unit will respond to commands from the
remote control.
Selecting the function
Press the FUNCTION switch to light the desired function indicator.
The function is automatically selected when CD play or tape playback is
started, or when the BAND switch have been operated.
When the function selection is changed, the graphic display appears
and scrolls for afew seconds on the display as follows:
Cd: CD TAPE: TAPE
TunER: TUNER PHono: PHONO
VldEo: VIDEO
When the function selection is changed, CD play, tape playback or
recording is automatically stopped (except during tape dubbing).
When “CD” or “TUNER” isselected, the clock display disappears. To
display the clock, press the CLOCK switch for less than 1second.
Press the switch again to return the original display.
4djusting the volume
Aess the UP or DOWN VOLUME control, or “+” or” -” VOL control on
the remote control.
-When operating the control, the volume level setting appears on the
display for 1second. MAX
—
—
—
-9-—
----
---9—
----—
----9—
------
----9- .M~N
w
To reduce the volume temporarily (muting)
Press the MUTE switch on the remote control (“MuTE” appears and
scrolls for afew seconds on the display). “MUTE” blinks.
The muting function will be retained for afew days, even if the unit is
turned off or the mains lead is disconnected.
The volume is restored to its previous level by pressing the same switch
again.
Adjusting the left/right speaker balance
Use the BALANCE control to adjust the Ieft,hight speaker balance.
3ass expander system
Press the BASS switch to enhance the bass sound.
Spectrum analyzer
Indicates the input level of each sound range in the following 5display
modes.
Bar-graph mode Peak hold mode
+100 .+10.
o.
0-
00
:
-
00
-0:--
“0
--- 00-0
.- .00 --- ●
.--0 0--- 0
0-----o 0---- -0
0----- --0 0-----0
0----- --0
-10------ --- -----o
.,0: ----- --0
60 150 400 lk 2.4k Ok 15k 60 150 400 lk 2.4k 6k 15k
Peak dots mode
+10. .
0-‘a
-0
: --- 0
00
0----- ●
o- -0
0-- --0
0-0
0- 0
-10. ●
60 150 4WJ lk 2.4k 6k 15k
Shower mode
+100 --- D---
o----- --
0----- --
‘c 9----
0-----
0. ---
0---
0- --
0---
0--
-10. -
60 150 4LH3 lk 2.4k 6k 15k
.
0
0
0
0
.
0
0
0
0
.
Square mode
+10. ●
o-----o
09 -0
0- -0
0: =-0
-.
0- -0
0- -0
0- -0
-----o
–10: .
60 150 4W Ik 2.4k 6k 15k
Each time the DISPLAY switch is pressed, the display mode changes as
follows:
~Bar-graph =<Peak hold ~e~ dots 7
Ifthe DISPLAY switch is pressed for 1,5 or more seconds, the display
enters the demonstration mode. “DEMO” appears and scrolls, then
the sound style displays, etc. will sequentially appear. To cancel this
mode, press the switch again in one touch.
WHAT TO DO IF ...
Ifthe operation ofthe unit or display is not normal or when all the memory
contents are to be cleared, disconnect the mains lead from the AC :utlet
and press the appropriate RES~ button (rear ofeach unit)for20seconds
or more.
For CD player/tuner/timer For cassette decldamplifier
(
N/’
\
N/
\ /
‘vI
-6-

ii
ADJUSTING THE SOUND QUALITY (SOUND STYLE)
The graphic equalizer has been programmed with the sound styles
matching the following seven types of music and up to 3user preset
sound styles can be programmed to suit your own requirements.
When the switch is pressed, the display changes from the spectrum
analyzer to the graphic equalizer.
After 3seconds, the spectrum analyzer display reappears.
User preset sound style programming
POP:Pops, etc.
+10 :.
0
JAZ Jezz, etc.
+10. .
00
00
.‘a 1.
2.
3.
4.
5.
6.
Pre& the PRES~ switchto select~he position-(PRESET ❑A, ❑B
or ❑C) to be memorized.
Press the FRECVMEMO switch to specify afrequency. The blinking
indicator shifts each time tha switch is pressed.
_Blinking
+1O* .
0 0
0
;\l/ o
0
0------ ---
:0:% o
0
00
00
-10. .
60 150 4W Ik 2.4k 6k 15k
Press the Aor ~EQ switch to set the desired level.
Repeat steps 2-3 to set the other frequency levels.
Press the PRES!3 switch or allow 3seconds to elapse.
Repeat steps 1-5 to memorize the remaining preset positions.
If the next step is not taken within 3seconds during steps 1-4, the
display returns to the spectrum analyzer. Press the FRECVMEMO
switch to continue.
If the memory contents are lost due to apower failure or otl
;- -0
0---- -*
o-0
00
‘a o
-10: 0
.
0
.
-10: .
60 150 400 ?k 2.4k 6k 15k 60 150 400 lk 2.4k 6k 15k
CLASSIC: Classical music, etc.
ROCK: Rock music, etc.
+10. .
.0+10. .
00
00
0- 0
0- 9-0
O* -.
0-- 0
00
00
0
.10: .
60 150 4W lk 2.4k 8k 15k
00
0
.10: .
60 150 4CQ lk 2.4k 6k 15k
VOCAL: Vocal, etc.
+10. ●
o0
0.0
00
-0
0: D--.
0- .
00
00
-10: 0
.
60 750 4CQ Ik 2,4k 6k 15k
DISCO: Disco music, etc.
+10.o-:
00
0-9 -0
0-- 0
0. -.
00
00
00
0
-?0: .
60 154 400 Ik 2.4k 6k 15k ~–– __ ———— ———. —
PRESET ❑A, ❑Band ❑C
I+10* .
1: :
1: 0
00 ------ -:
1: 0
0
condition, programme the sound styles again.
Manual equaiizer settings
Specify afrequency with the FRECVMEMO switch, then set the desired
level with the Aor ~EQ switch.
This operation is possible while using any sound style and this setting
is memorized instead of the previously programmed levels.
When switching off the power, the sound styles (except user preset
sound styles) will be reset to the original programmed levels.
BGM: Back ground music, etc.
+1O* .
0 0
“o
;o
0- 0
O* -9 ●
09-0
0-0
0- 0
-10: 0
.
60 150 400 Ik 2.4k 6k 15k
1: 0
0
-10. .
60 150 403 Ik 2.4k 6k ?5k
Select the sound style matching the music to be listened to by pressing
the PRES13 ewtich on the cassette decldamplifier unit.
Each time the switch is pressed, the display changes as follows:
—POP —JAzz— ROCK —CIASSIC
—VOCAL—
c%&T~A DISCO J
—. PRESfl~ B- PRES13~C
CD PLAY
Use compact discs bearing the symbol ehown below. In addition to 4.
conventional 12 cm CDs, this system can be used to play 8cm CDs
without an adapter.
Press the ~switch again to close the disc tray.
The total number oftracks, total playtime and whole number oftra
on the disc are displayed. —
If the disc contains 16 or more tracks, “➤“appears on the right
WE!!
DIGITALAUDIO
of the “15” indication.
Press the PLAY/PAUSE switch.5.
10,01
TRACK
123456789101 t121314 15> D
Select “CD” function by pressing the FUNCTION switch, or press the
CD switch on the remote control.
“NO dlSC” appaars on the display.
Prees the ~switch.
The disc tray slides out and “OPEN” appears on the display.
Place the disc with the label facing upon the disc tray.
1.
2.
3.
“p“appears, and play starts from the first track. The track number
and elapsed play time for the current track are displayed.
If you press the PLAY/PAUSE switch while the tray is still open, it
will close, and play will begin automatically.
To start play from the desired track, select the track by using the
SKIP/SEARCH switches, then press the PLAY/PAUSE switch.
Press the STOP/CLEAR switch to end disc play.
The total number of tracks and total play time are displayed.
When the last track has been played, the player automatically stops.
When the ~switch is pressed during play, play will stop and the
disc tray will slide out.
6.
-7-

Notes on handling compact discs
Do not expose the disc to direct sunlight, high humidity or high
temperatures for extended periods of time.
Discs should be returned to their cases after use.
Do not apply paper or write anything on the disc surface.
Handle the disc by its edge. Do not touch the playing surface (glossy
side).
Fingerprints and dust should be carefully wiped off the playing
surface of the disc with asoft cloth.
Wipe in astraight motion from the centre to the outside of the disc.
Never use chemicals such as record cleaning sprays, antistatic sprays
or fluids, benzine or thinner to clean compact discs.
Temporarily stopping play
Press the PLAY/PAUSE switch. “b“blinks on the display. To resume
play, press the switch again.
Skip play
To skip to track 6while track 3is playing, press the W/~SKlp/
SEARCH switch repeatedly until “6” appears in TRACK on the display.
To skip back to track 3while track6 is playing, press the K/44 SKIP/
SEARCH switch repeatedly until “3” appears.
Search (forward/reverse)
Ifthe ~/~or w/44 SKIP/SEARCH switch is pressed during
play, the player will search at high speed in the forward or reverse
direction while the switch is being pressed. When the switch is released,
normal play will continue.
Random play
Press the RANDOM switch to begin random play. The player will auto-
matically select and play tracks on the disc at random. “RANDOM”
appears on the display.
Ifthe RANDOM switch is pressed during random play, the player will
select the next random track.
Repeat play
Press the REPEAT switch during play. The player will play all the tracks,
all the programmed tracks or all the random play tracks repeatedly.
“REPEAT” appears on the display.
To cancel repeat play, press the REPEAT switch again. “REPEAT”
disappears.
PROGRAMMED PLAY
Up to 24 selections on adisc can be programmed for play in any order.
To begin the programming procedure, select “CD” function first.
-The tracks are programmed in the stop mode.
-The same track can be programmed more than once.
Example:
To programme tracks 5,2,6 and 10
1. Press the CD MEMORY switch.
1Pr. 1
\l/ TR4CK
PRCI$ .12345678910
2.
3,
4.
5,
6,
7
Select track 5by pressing the w/~SKIP/SEARCH switch 4
times.
5Pr. 1
TRAcK
12345678910
Press the CD MEMORY switch.
5Pr. 1
TR4CK
PROG. 5
Select track 2by pressing the K/44 SKIP/SEARCH switch 3
times.
~
Press the CD MEMORY switch.
~d
The remaining tracks are programmed in the same way.
Press the PLAY/PAUSE switch to start play.
~
When all programmed selections have played, the player stops
automatically. The total programmed time appears.
Ifthe total programmed time exceeds 99 minutes 59 seconds, “NO
dlSP” appears.
-The programme contents are retained in memory.
Any attempt to programme more than 24 selections will result in
“FULL” being displayed and discontinuation of the programming.
The programme is cleared in the following cases:
When the STOP/CLEAR switch is pressed in the stop mode
When the EDIT switch is pressed in the stop mode
When the ~switch is pressed
When the mains lead has been disconnected
Checking the programme
Each time the CD MEMORY switch is pressed in the stop mode, the
programmed details sequentially appear on the display.
Changing aprogramme
To add anew selection to aprogramme:
1. In the stop mode, press the CD MEMORY switch repeatedly until
“.. . ... .“is displayed.
2. Select atrack number as explained above.
To change aselection:
1. In the stop mode, press the CD MEMORY switch repeatedly until the
selection to be replaced is displayed.
2. Select atrack number as explained above.
Note:
Programmed details cannot be partially deleted or inserted.
-8-

LISTENING
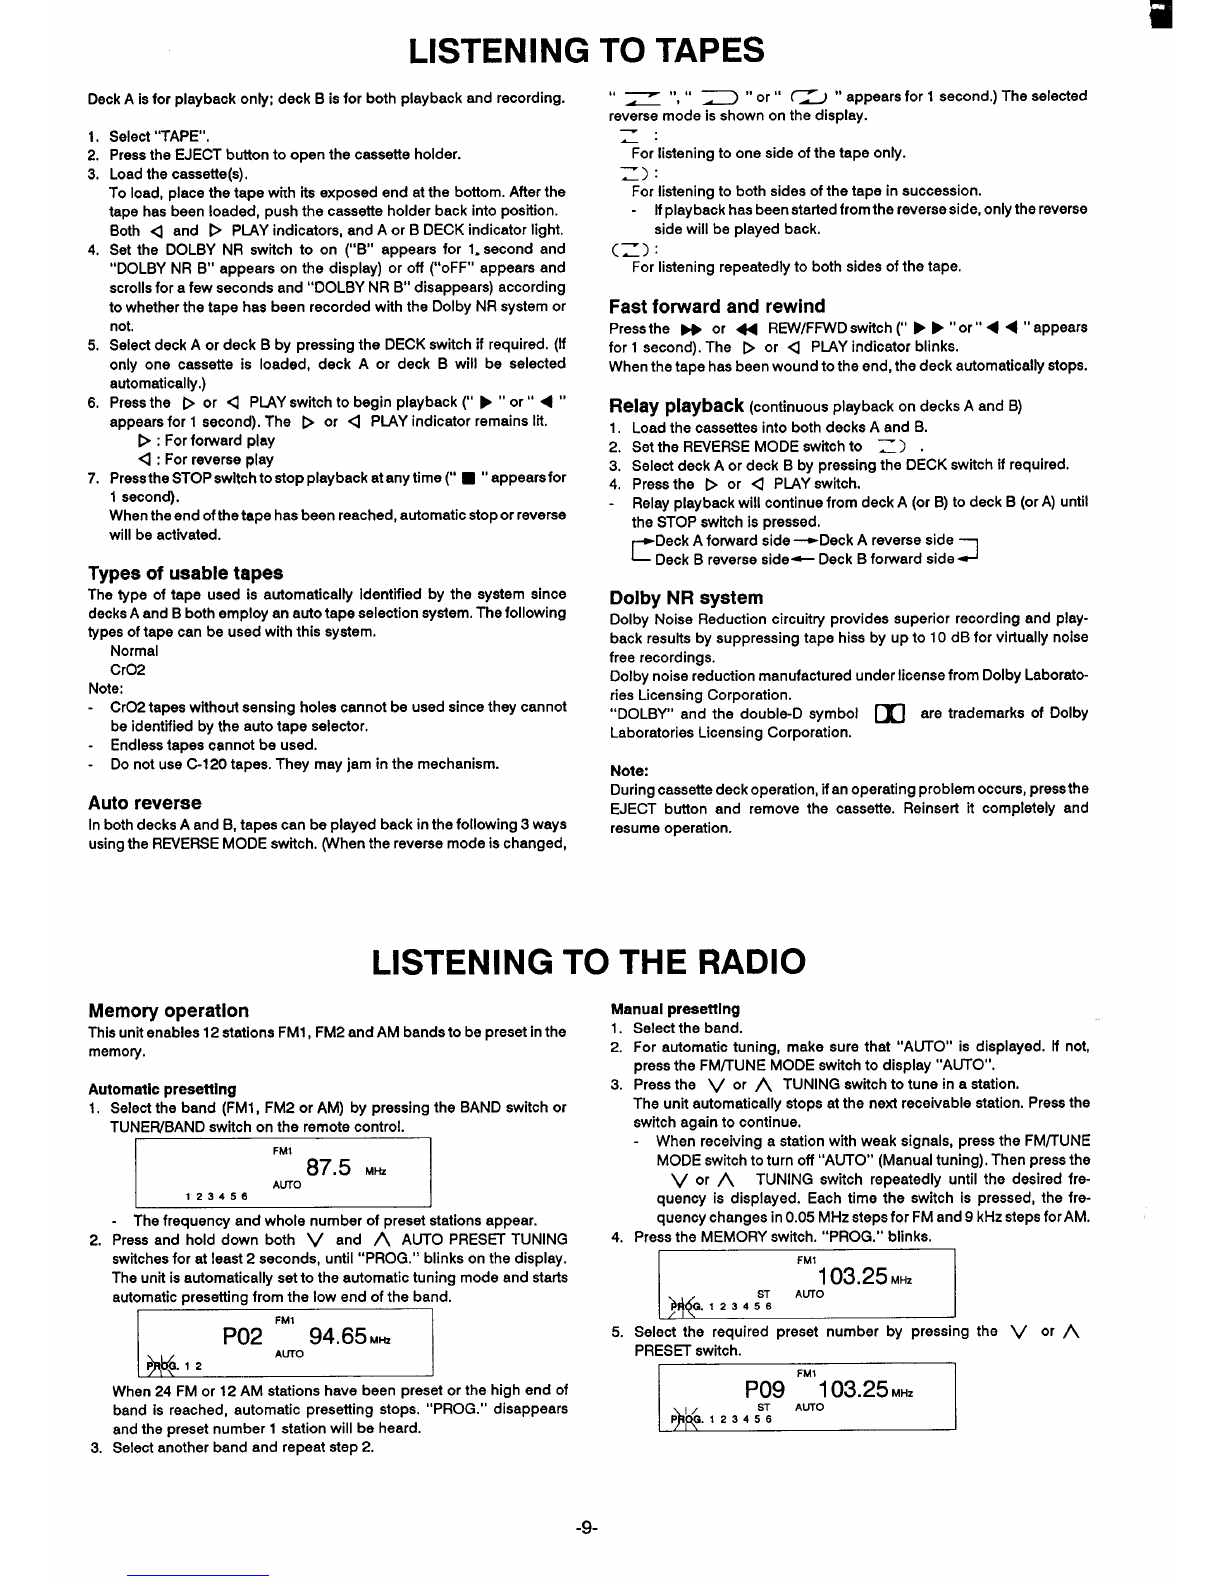
Deck Aie for playback only; deck Bis for both playback and recording.
1.
2.
3.
4,
5.
6.
7.
Select “TAPE”.
Press the EJECT button to open the cassette holder.
Load the cassette(s).
To load, place the tape wkh its exposed end at the bottom. After the
tape has been loaded, push the cassette holder back into position.
Both <and DPIAY indicator, and Aor BDECK indicator light.
Set the DOLBY NR switch to on (“B” appears for 1. second and
“DOLBY NR B“ appears on the display) or off (“oFF” appears and
scrolls for afew seconds and “DOLBY NR B“ disappears) according
to whether the tape has been recorded with the Dolby NR system or
not.
Select deck Aor deck Bby pressing the DECK switch if required. (If
only one cassette is loaded, deck Aor deck Bwill be selected
automatically.)
Press the por <PLAY switch to begin playback (“ F“or” <“
appears for 1second). The bor 4PIAY indicator remains lit.
D:Forforwardplay
<: For reverse play
Press the STOP ewltch to stop playback at any time (“ ■“appearefor
1second).
When the end ofthe tape has been reached, automatic stop or reverse
will be activated.
Types of usable tapes
The type of tape used is automatically Identified by the system since
decke Aand Bboth employ an auto tape selection system. The following
types of tape can be used with this system.
Normal
Cr02
Note:
-Cr02 tapes without sensing holes cannot be used since they cannot
be identified by the auto tape selector.
-Endless tapes cannot be used.
-Do not use Cl 20 tapes. They may jam in the mechanism.
Auto reverse
In both decks Aand B, tapes can be played back in the following 3ways
using the REVERSE MODE switch. (When the reverse mode is changed,
TO TAPES
“—“ “ ~“or” ~~ “appears for 1second.) The selected
rev=m~de ie shown on the display.
For listening to one side of the tape only.
z) :
For listening to both sides of the tape in succession.
Ifplayback has been started from the reverse eide, only the reverse
side will be played back.
(z) :
For listening repeatedly to both sides of the tape.
Fast forward and rewind
Press the wor 44 R13V/FFWD switch (“ FF“or” << “appears
for 1second). The bor qPLAY indicator blinks.
When the tape has been wound to the end, the deck automatically stops.
Relay playback (continuous playback on decks Aand B)
1.
2.
3.
4.
Load the cassettee into both decks Aand B.
Set the REVERSE MODE switch to ~) .
Select deck Aor deck Bby preesing the DECK switch if required.
Press the bor QPLAY switch.
Relay playback will continue from deck A(or B) to deck B(or A) until
the STOP switch is pressed.
rDeck Aforward side +Deck Areverse side
Deck Breverse side- Deck Bforward side J
Dolby NR system
Dolby Noise Reduction circuitry provides superior recording and play-
back results by suppressing tape hiss by up to 10 dB for virtually noise
free recordings.
Dolby noise reduction manufactured under license from Dolby Laborato-
ries Licensing Corporation.
“DOLBY” and the double-D symbol mare trademarks of Dolby
Laboratories Licensing Corporation.
Note:
During cassette deck operation, ifan operating problem occurs, press the
EJECT button and remove the cassette. Reinsert it completely and
resume operation.
LISTENING TO THE RADIO
Memory operation
This unit enables 12 stations FM1, FM2 and AM bands to be preset in the
memory,
Automatic presetting
1.
2.
3.
Select the band (FM1, FM2 or AM) by pressing the BAND ewitch or
TUNEFUBAND stitch on the remote control. -
~
-The frequency and whole number of preeet stations appear.
Press and hold down both Vand AAUTO PRESET TUNING
switches for at least 2seconds, until “PROG.” blinks on the display.
The unit is automatically set to the automatic tuning mode and starts
automatic presetting from the low end of the band.
,
IFM1
P02 94.65MH2 I
AUTO
P&&12
When 24 FM or 12 AM stations have been preset or the high end of
band is reached, automatic presetting stops. “PROG.” disappears
and the preset number 1station will be heard.
Select another band and repeat step 2.
Manual presetting
1.
2.
3.
4.
5.
Select the band.
For automatic tuning, make sure that “AUTO” is displayed. If not,
prese the FM/TLfNE MODE ewitch to display “AUTO”.
Press the Vor ATUNING switch to tune in astation.
The unit automatically stops at the next receivable station. Press the
switch again to continue.
-When receiving astation with weak signals, press the FM/TUNE
MODE switch to turn off “AUTO” (Manual tuning). Then press the
Vor ATUNING switch repeatedly until the desired fre-
quency is displayed. Each time the switch is pressed, the fre-
quency changes in 0.05 MHz steps for FM and 9kHz steps for AM.
Press the MEMORY switch. “PROG.” blinks.
~
Select the required preset number by pressing the Vor A
PRES~ ewitch.
IFM*
I...
p09 Awj 03.25 M141
.,/ ST
P~G. 123456
-9-

6. Press the MEMORY switch to preset the station. “PROG.” disappears. -If the memory contents are lost due to apower failure or other
If the next step is not taken within 10 seconds in the steps 4-6, condition, programme the stations again.
“PROG.” disappears and the memory operation is cancelled.
Press the MEMORY switch to continue. Listening to the preset station
7. Repeat steps 1-6, to add more preset stations. 1. Select the band.
Clearing the memory 2. Select the desired preset number by pressing the Vor A
PRESET switch.
1,
2.
3.
Select the band.
Select the preset number to be cleared by pressing the Vor A.For receiving an FM stereo broadcast, make sure that “AUTO” is
PRES~ switch. displayed. If not, press the FMflUNE MODE switch to display
Press the MEMORY switch, then press SH/CLEAR. “-- --“ appears “AUTO”.
for 2seconds. “ST” appears when an FM stereo broadcast is received.
Note: Ifthe signals from an FM stereo station are weak and reception is poor,
Ifanew station is programmed into aband and preset number already press the FM/TUNE MODE switch to change to monaural reception.
containing aprogrammed station, the previously programmed station (“ST” is replaced by “MONO” in the display.)
will be cleared.
LISTENING TO RECORDS OR VIDEO SOURCES
1. Select “PHONO” or “VIDEO”. 2. Follow the instructions supplied with the turntable or video equip
ment.
BEFORE RECORDING AND DUBBING
Recording copyright material without permission of the copyright
owners Is usually an infringement. If you wish to re-record copyright
material, permission from the copyright owner is necessary. SANYO
does not approve of, and cannot be held responsible for, any unlaw-
ful use of this machine.
Note:
The record muting function does not operate during CD computer
recording or tape high-speed dubbing.
To create an unrecorded blank of any length, hold down the REC
MUTE switch for the required time. The deck enters the record pause
mode when the switch is released.
Use deck Bfor recording. Accidental erasure prevention tabs (for protecting valuable
1.
2.
3.
Press the EJECT button and load the cassette for recording.
Set the DOLBY NR switch to on or off as desired.
Set the REVERSE MODE switch position.
For recording one side only.
~) :
For recording both sides in succession.
If recording has been started from the reverse side, only the
reverse side will be recorded.
If atape with one of its tabs already broken out is used for
recording, the tape will not be reversed automatically, and it will
stop,
If the REC/PAUSE, COMP. REC or DUBBING HIGH switch is
pressed during (~) mode, the reverse mode will set automati-
cally to ~) mode.
recordings)
Accidental erasure can be prevented by breaking out the tabs on the end
of the cassette tape (where the tape is not exposed) using ascrewdriver
or similar implement.
If atab is broken out in error and you wish to re-record the tape, simply
block the tab hole using adhesive tape and the tape can be used for
recording again.
_Side AFor Cr02 tape
*%
Recording will start in the forward direction under the following condi-
tions:
-When CD computer recording is used
-When tape high-speed dubbing is used
-When using the timer for unattended recording
Automatic record muting
Undesirable parts of aprogramme can be omitted while recording.
Press the REC MUTE switch once while recording. The REC/PAUSE
indicator blinks and a5-second unrecorded blank space is created, then
the cassette deck enters the record pause mode.
To resume recording, press the REC/PAUSE switch.
Break out tab Afor side A.
Break out tab Bfor side B.
-1o-

RECORDING COMPACT DISCS ii
COMPUTER RECORDING
Wth computer recording, aCD can be automatically recorded on a
cassette by pressing one switch.
1.
2.
3.
4.
Load the CD to be recorded.
Load ablank cassette into deck B.
Select “CD”.
Press the COMP. REC switch (“ ●“appearsforl second on the
display). The system automatically-performs the following functions:
Deck B:
-The tape rewinds to the beginning.
-Recording starts.
CD player:
-The player searches for the first track to be recorded, then enters
the pause mode.
-CD play starts.
The DECK B, REC/PAUSE and bPLAY indicators light, “COM-
PUTER REC’ and “SIDE A“ appear on the display as recording
begins.
Note:
.Recording atarts automatically after 8seconds, so the recording will
not be interrupted by the leader tape at the beginning of sides Aand
B,
A5-second blank space is automatically recorded at the end of each
track.
The highest track number which can be edited is 24. Track numbers
25 and above cannot be edited (except with backward skip edit),
To stop computer recording at any time, press the STOP/CLEAR
switch ofthe CD player orthe STOP switch of deck. The CD player and
deck Bwill stop. (The time edit, programme edit or fade-out edit mode
is still operational.)
To release the editing mode, press the STOP/CLEAR switch ofthe CD
player.
Select” ~) “mode during computer recording.
To record material from adifferent position on the tape, continue
recording manually.
Types of edit recording
The following edit recording operations can be performed during com-
puter recording.
A.
B.
c.
D.
Time edit recording
Programme edit recording
Fade-out edit recording
Backward skip edit recording
Time edit recording When the track 8is not recordable within the specified time, select any
recordable track after track 7.
I/Unrecorded blank
SIDE A25 min. ~1
1H21.1 3II 4u5H‘
9,
13 1“1 10 q> Auto reverse
81] 7[] 6
1TI
I1IOm~ the track 9, SIDE B25 min.
IWhen the track 11 is not recordable within the specified time, select any
recordable track after track 12.
Unrecorded blank
The tracks that will fii within aselected time period are automatically
programmed for recording on sides Aand Bof the tape. (The tracks are
edited so that the remaining time on the tape is reduced to aminimum).
Example:
To record onto a50-minute tape
1.
2.
Press the EDIT switch to select the recording tape length,
-Each time the EDIT switch is pressed, the tape length display
changes in the following sequence:
PC-46 ~C-54 -C-60 -C-74+ C-901
~(Released)— C--- ~
-To set the desired tape length up to C-99, use the SKIP/SEARCH
switches.
To set “C-50”, select “C-46”, then press the P/~ SKIP/
SEARCH switch 4times, “C-50” appears on the display.
Press the TIME/FADE switch once.
WA
24.55
TIME EOIT
PROG. 12345 9
The track numbers and play time for side Aare displayed,
u
24.5094<’
TIME EDIT
PROG. 678 10 13
The track numbers and total play time for both sides are displayed. -
3. Press the COMP. REC switch.
-The track numbers and play time for side Aare displayed.
-The track numbers and play time for side Bare displayed.
-Recording starts automatically from track 1.
COMPUTER REC SIDE A
10.01
TRACK TIME EDT
PROG. 12345 9D
-The edit mode remains operational when recording ends. To cancel
the edit mode, press the STOP/CLEAR switch of the CD player.
The track numbers and play time for side Bare displayed.
-11-

Programme edit recording 6
SIDE A23 min. Unrecorded blank
521“1 3~~:
H~> Auto reverse
4 1
Unrec&rded blank SIDE B23 min.
The desired selections can be rearranged and recorded on the tape 5. Repeat steps 3-4 to programme the tracks to be recorded onto side
within adesignated tape length. A. If atrack exceeding the remaining time on side Ais selected, its
Example: play time blinks on the display.
To record onto a46-minute taDe When the CD MEMORY switch is pressed, “SIDE A“ disappears
1.
2.
3.
4.
Press the EDIT switch until “C-46” appears.
Press the CD MEMORY switch.
Select the track to be recorded by using the SKIP/SEARCH switches.
~
The remeinino time on side Ais shown on the time display.
.
Press the CD MEMORY switch.
SIDE A
5-13.00
TtWCK EDiT
PROG. 5
and “SIDE B“ appears. The remaining time on side Bappears on
the time display. This and subsequent tracks are recorded on side
B.
6. Repeat steps 3-4 to programme the tracks to be recorded onto side
B. If atrack exceeding the remaining time on side Bis programmed,
“Err” will appear in the display for 4seconds.
7. Press the COMP. REC switch.
The track numbers and play time for side Aare displayed.
The track numbers and play time for side Bare displayed.
Recording starts automatically from the first programmed track.
Fade-out edit recording
Fade out (1Osec.)
SIDE A30 min. I
1II 2H3H4H5H6
11 II 1..1 Hq> Auto reverse
11 10 9816
I
Fade out (10 sec.) Record from the beginning of atrack. SIDE B30 min.
The sound is automatically faded out at the end of sides Aand B,
according to the selected tape length. When the tape reverses from side
Ato B, recording continues from the beginning of the last track played.
Example:
To record onto a60-minute tape
_1. Press the EDIT switch until “C-60” appears.
2. Press the TIME/FADE switch twice.
~
This shows that 5minutes 35 seconds of track 6will be recorded on
side A. o
11 7.05 ‘+(’
TRACK FADE EDIT
676910
This shows that 7minutes 5seconds of track
side B. will be recorded on
3. The track numbers and total play time for both sides are displayed.
Press the COMP. REC switch.
The tracks to be recorded onto side Aare shown.
-The tracks to be recorded onto side Bare shown.
Recording starts from the beginning of track 1.
‘~
“FADE” blinks during fade-out (1Oseconds).
The sound is also faded out when atrack is interrupted at the end of
side B.
If “ENd” appears during step 2, itindicates that the disc will reach the
end before the end of the tape. In this case, the last track on the disc
will not be faded out.
No recording is made on the last 15 seconds of the tape.
-12-

Backward skip edit recording The track 4will be interrupted,
“DEA~’:::rse
Record from the beginning of atrack.
The track 8will be interrupted.
This type of recording isthe easiest to perform and the tape length setting Press the COMP. REC switch. Recording starts on side Awith track 1.
is not required. When the tape automatically reverses, the display changes from “SIDEA”
to “SIDE B“ and recording continues from the beginning of the last track
played.
MANUAL RECORDING
-For programmed recording, programme the material in advance (as -When the CD player issetto the stop or pause mode during recording,
described under “PROGRAMMED PIAY”). the deck Bpauses. When CD play is resumed, deck Brecording also
1. Press the REC/PAUSE switch of the deck. (The deck Benters the resumes.
record pause mode.) -This method produces agap in recording when the tape reverses.
2. Press the PLAY/PAUSE switch of the CD player. CD recording starts. -If the TIME/FADE switch is pressed during recording, the sound
begins to fade out from that point (about 10 seconds). The CD player
pauses and the deck Bis placed in the record pause mode.
TAPE DUBBING (DECKAto DECK B)
High-speed dubbing
For simple, automatic dubbing in one-half the time, compared to
normal speed dubbing.
Manual (normal-speed) dubbing
For dubbing while listening to the playback from deck A.
-Load the playback tape into deck Aand ablank tape into deck B.
-Itis recommended to use the same length cassettes in both decks for
the dubbing operation.
-You may listen to any other function (CD, radio etc.) during dubbing.
High-speed dubbing
Press the DUBBING HIGH switch (“ ●“appears for 1second on the
display).
The system performs the steps below and automatically starts deck A
playback and deck Brecording.
1. Deck A: Tape rewinds.
2. Deck B: Tape rewinds.
3. Deck B: Erases the first few seconds of the tape, then rewinds again.
4. Deck B: Automatically advances the tape past the leader.
The REC/PAUSE indicator blinks and the DECKA and PPIAY indica-
tors light as dubbing begins.
Automatic stop during high-speed dubbing
~mode:
When deck Aor deck Bstops automatically, the other deck will also
stop.
~) mode:
When deck Atape is longer than deck B:
When deck Bstops automatically, deck Aenters the fast forward
mode. When the end of side Ais reached, high-speed dubbing
continues from the beginning of side B.
When deck Btapeis longer than deck A:
When deck Astops automatically, deck Berases the tape to the end
of side A. When the end of side Ais reached, high-speed dubbing
continues from the beginning of side B,
Before pressing the DUBBING HIGH switch, check that both decks A
and Bare in the stop mode.
To stop dubbing, press the STOP switch. The tape will not stop during
high-speed dubbing if the REC/PAUSE switch is pressed.
During high-speed dubbing, normal monitoring is not possible.
During dubbing, the DOLBY NR switch has no effect to the copied
tape.
Ahigh-pitched sound maybe recorded ifhigh-speed dubbing is used
near alV which has been switched on. Ifthis happens, switch off the
TV or place the system at adistance from the TV.
High-speed dubbing must start from the selection 1. To start dubbing
fro-mapposition in the middle of the tape, use manual dubbing.
Manual (normal-speed) dubbing
1,
2.
3.
4.
5.
Select “TAPE”.
Set the REVERSE MODE switch to Z
Deck B: Locate the tape position where recording will begin,
Deck A: Select bor <(to match the deck B), then locate the
selection of the tape to be dubbed.
Press the REC/PAUSE switch. .-
The REC/PAUSE and DECK Bindicators Iightandthe bor ~PLAY
indicator blinks.
Note:
Ifthe blinking indicator does not match the desired direction, press the
bor 4PIAY switch to change the direction,
Press the DECK switch to select deck A.
The DECK Bindicator goes out and DECK Aindicator lights,
Press the bor dPLAY switch whose indicator is blinking. Manual
dubbing starts.
Both decks run in the same direction.
Automatic stop during manual dubbing
If deck Aor deck Bstops automatically, the other deck will also stop.
-13-

RECORDING FROM THE TUNER, PHONO OR VIDEO INPUT
1. Tune in the radio station to be recorded, or play arecord, video 4. Press the REC/PAUSE switch to temporarily stop recording. Press the
cassette or video disc. switch again to continue.
2. Press the REC/PAUSE switch (“ 11 “appears for 1second). The REC/ 5. Press the STOP switch to stop recording.
PAUSE indicator lights and the bor QPLAY indicator blinks.
When using the remote control, press the ●/II switch. When beat interference is heard
3, Press the REC/PAUSE switch again or press the bor <PLAY Ahigh-pitched noise called “beat” is sometimes heard during the record-
switch whose indicator is blinking. (“ ●“appears for 1second). ing of radio broadcasts.
The recording starts. The bor QPLAY indicator remains lit. In cases Iikethis, set the BEAT CANCEL switch at the rear ofthe unitto the
-To record inthe opposite direction to that indicated by the blinking position (1 or 2) which will reduce the level of the beat noise.
indicator, press once the switch whose indicator is not blinking,
check that the other indicator is now blinking, and press the same
switch again.
TIMER OPERATION
ON/OFF timer:
This enables radio programmed to be recorded unattended. CD play
or tape playback can be started and stopped at the selected times.
WAKE UP timer:
This wakes you up to the sound of aCD, tape or radio.
SLEEP timer:
This allows you to fall asleep to the sound of aCD, tape or radio.
‘Note:
Make absolutely sure that the clock shows the correct time before setting
the timer.
The TIMER, WAKE UP and SLEEP switches do not function while the
clock display is blinking.
USING THE ON/OFF TIMER
Set the ON and OFF times, then select the source to be used (for tuner,
select the band and apreset station). Operation will startwith the selected
source at the ON time and the power will be switched off at the OFF time.
The timer settings are stored in the memory and retained even when the
timer operation has been completed.
Each time the ON/OFF timer is to be used, set the unit to the timer
operation standby mode.
1.
-2.
3.
4.
Press the TIMER switch.
~
The previous timer ON time setting appears.
Press the MEMORY switch within 5seconds.
~
Set the timer ON time by pressing the Vor ATUNING switch,
then press the MEMORY switch (as described under “ADJUSTING
THE CLOCK’) .
I10:2{!. I
TM’.
The previous timer OFF time setting appears.
Set the timer OFF time as described in step 3.
~o
1
5. Select the source bv pressing the Vor ATUNING switch.
For radio reception (or for unattended recording)
The station used during timer operation must be preset.
a. Perform step 5above until “TU” blinks. (Select “TU REC” for
unattended recording.)
I(
L
b. Press the MEMORY switch.
~
The band, preset number and frequency of the previous timer
operation are displayed.
c. Select the band using the BAND switch, then indicate the desired
preset number using the Vor ATUNING switch.
6. Press the MEMORY switch.
The original display returns, then the timer operation standby mode is
activated. “TIMER” (or “TIMER REC”) remains lit.
7, Prepare the sources to be used.
Note:
-For tape playback: Select Por QIftapes have been loaded
into both decks, select deck Aor deck B.
-Recording will start only from the forward side.
8. Press the POWER switch to switch off the power.
Ifthe power is not switched off, the timer will not be activated at the set
time and the timer mode will be released.
To switch offthe power during atimer controlled operation, press the
POWER switch. The ON/OFF timer will then be released.
To check the timer settings
Press the TIMER switch repeatedly. The timer settings are displayed inthe
following order:
-ON time
-OFF time
-Source (If the tuner is being used as the source, the band, preset
number and frequency are displayed.)
-Original display returns.
To change the settings, press the TIMER switch to select the setting to be
changed, then press the MEMORY switch so that the display blinks.
Change the setting as explained above.
The previous source setting blinks.
-14-

To set the timer again using the same settings
1.Press the TIMER switch. The timer ON time is displayed.
2. Press the SET/CLEAR switch within 5seconds.
Every time steps 1and 2are repeated, the mode alternates
between timer standby and timer off modes.
3. Press the POWER switch to switch off the power.
Note:
If the SEVCLEAR switch is pressed while the timer is being set, the
original display returns.
The timer mode is released if apower failure occurs during timer
controlled operation.
The timer will not operate if apower failure lasts for more than 30
seconds durina standbv mode.
USiNG THE WAKE UP TiMER
Setthewake-uptime, source to be heard and volume level. Atthe settime,
the set source will be heard. The sound will be gradually increased from
ano-sound level to the volume setting (fade-in). The power will turn off
after 60 minutes. The WAKE UP timer will function every day unless it is
released.
1.
2.
3.
4.
5.
6.
7.
8.
9.
Press the WAKE UP switch.
I I
IWAKE UP 5:30 AM I
The previous wake-up time setting appears.
Press the MEMORY switch within 5seconds.
W)+(UP
Setthewake-uptime by pressing the Vor ATUNING switch, then
mess the MEMORY switch.
I I
I\l/
w9KffP
II
t#1/
\l/
Vwv I
The previous source setting blinks.
Select the source using the Vor ATUNING switch.
rCd_TA_TU~
For waking up to radio sound
Perform step 4above until “TU” blinks on the display. Then follow the
steps “b” and “c” of “For radio reception” under “USING THE ON/
OFF TIMER”.
Press the MEMORY switch. I
The previous volume level setting blinks.
Select the volume level using the Vor ATUNING switch.
0eje2m3w4w~6w7
To check the actual sound level, it is recommended that the timer
beset once and the level heard. This can be checked by setting the
timer 2minutes later than the present time.
The sound will not be faded in at the “O” level. In this case, the
sound will be heard at the previous VOLUME control setting.
Except setting the “0” level, the audio muting function will not
operate at the set time even if it is on (“MUTE” is blinked).
Press the MEMORY switch.
The original display returns, then the wake-up standby mode is
activated. “WAKE UP” remains lit.
Prepare the sources to be used.
Press the POWER switch to switch off the power.
Press the POWER switch to switch off the power after the power is
turned on at the wake-up time.
Even after the WAKE UP timer operation has completed, “WAKE UP”
remains lit and the standby mode continues.
To check the timer settings
Press the WAKE UP switch repeatedly. The timer settings are displayed
in the following order:
-Wake-up time
Source (Ifthe tuner is being used as the source, the band, preset
number and frequency are displayed.)
-Volume level
-Original disday returns.
To chang~the sett~ng~,press the WAKE UP switch to select the setting to
be changed, then press the MEMORY switch so that the display blinks.
Change the setting as explained above.
To release the WAKE UP timer
Press the WAKE UP switch, then press the S=/CLEAR switch. “WAKE
UP” disappears.
USiNG THE SLEEP TiMER
This timer automatically switches off the power after apreset time has
elapsed. The volume will gradually be reduced (fade-out) during the 1-
minute period before the unitturns off.There are 7time periods available:
90, 60, 50, 40, 30, 20 and 10 minutes.
1.
2.
3.
Press the SLEEP switch.
I
IJ
The previous sleep time setting blinks.
Press the SLEEP switch within 5seconds to select the desired sleep
time.
P90 -D60 ~50~40-30-20 -10- (released) 1
If the SET/CLEAR switch is pressed, the original display returns
and the SLEEP timer setting mode is released.
Allow 5seconds to elapse or press the MEMORY switch.
The original display returns and the SLEEP timer starts. “SLEEP”
remains lit.
To check the remaining sieep time
Press the SLEEP switch. The remaining time is displayed. After several
seconds, the original display returns.
To reiease the SLEEP timer whiie in operation
Press the SLEEP switch, then press S~/CLEAR. The timer is also
released if the power is switched off.
Timer priorities
The ON/OFF timer settings are released ifthe actual time reaches the
ON time setting during WAKE UP timer operation.
During ON/OFF timer operation, the WAKE UP timer will not operate
but the WAKE UP timer setting is retained.
The SLEEP timer has priority over the ON/OFF and WAKE UP timers.
The power is switched off by the SLEEP timer. The ON/OFF timer
setting is released, but the WAKE UP timer setting is retained.
-15-

MAINTENANCE
Cleaning the decks Aand Bheads Cotton swab
To ensure playback and recording with good-quality sound, use cotton
swab to clean the heads, pinch rollers and capstans of the decks after
about every 10 hours of use.
If the dirt persists, soak the swab in alittle methylated spirit or head Pin
cleaning fluid and then clean.
Main unit
Use asoft cloth to remove dirt on the main unit.
If the dirt persists, dip asoft cloth into adiluted solution of neutral
detergent, wring itout, wipe away the dirt, and then take up any moisture
with adry cloth.
Do notuse benzine, thinners or alcohol since they will marthefinish ofthe
surfaces. Iler
/Erase head in DECK B
Record/Play head (Play head in DECK A)
-16-

Cassette deck/Amplifler
Cassette deck
Track system:
4-track, 2-channel stereo
Frequency response:
Chrome tapes: 40 Hz to 13.5 kHz
Normal tapes: 40 Hz to 12.5 kHz
Signal-to-noise ratio:
60 dB (with Dolby NR ON)
Wow/f Iutter:
0.14% (WRMS)
Fast forward/rewind time:
Approx. 120 sec. (C-60)
Amplifier
Output power:
27 Wx 2 (at 8ohms, 10% distortion)
Graphic equalizer:
7band electronic
Spectrum analyzer:
7band
Inputs:PHONO: 2.5 mV/50k ohms
VIDEO: 250 mV/50k ohms
outputs:
SUPER WOOFER OUT: 600 mV
SPEAKERS: 8ohms
PHONES: 8ohms
Power requirements:
AC 230-240 V, 50 Iiz
Power consumption:
75 w
Dimensions:
270(W) x178(H) x317(D) mm
Weight:
5.2 kg
SPECIFICATIONS
CD player/Tuner/Timer
CD player
Channels:
2-channel stereo
Sampling frequency:
44.1 kHz
Pick-up:
Optical 3-beam semiconductor laser
Frequency response:
20 liz to 2U kHz
Wow/flutter:
Below measurable limits
Tuner
Reception frequency:
FM: 87.5 to 108 MHz
AM: 531 to 1701 kHz
Dimensions:
270(W) x178(H) x278(D) mm
Weight:
2.9 kg
Speaker systems
Type: 2way bass reflex
Unit used:
Woofer: 13 cm cone type
Tweeter: 5cm cone type
Maximum power-handling capacity:
40 W(peak)
Nominal impedance:
8ohms
Dimensions:
178(W) x356(H) x220(D) mm
Weight:
3.6 kg (per speaker)
Specifications subject to change without notice.
iii
-17-

(AU) 1AD6P1 OA22605
Suyuif
o
SANYO Electric Co., Ltd.
Printed in Singapore
Other manuals for DC D30
1
Table of contents
Other Sanyo Stereo System manuals

Sanyo
Sanyo DC-DA1450M User manual

Sanyo
Sanyo G-2915NK User manual

Sanyo
Sanyo DC-D40 User manual

Sanyo
Sanyo DC-MCR80M User manual

Sanyo
Sanyo DC-DA3000 User manual

Sanyo
Sanyo DC-DA1000 User manual

Sanyo
Sanyo DC-DA1400M User manual

Sanyo
Sanyo DC-X801 User manual

Sanyo
Sanyo DC-UB1470 User manual

Sanyo
Sanyo DC-MX41i User manual

Sanyo
Sanyo DC-DA1000 User manual

Sanyo
Sanyo DC-DV610KR User manual

Sanyo
Sanyo DC-DA1450M User manual

Sanyo
Sanyo DTA-150 User manual

Sanyo
Sanyo DC-E200/AU User manual

Sanyo
Sanyo DC-F430AV User manual

Sanyo
Sanyo DC-BM300 User manual

Sanyo
Sanyo MAJ-R70 User manual

Sanyo
Sanyo DC-D27 User manual

Sanyo
Sanyo MCD-UB575M User manual