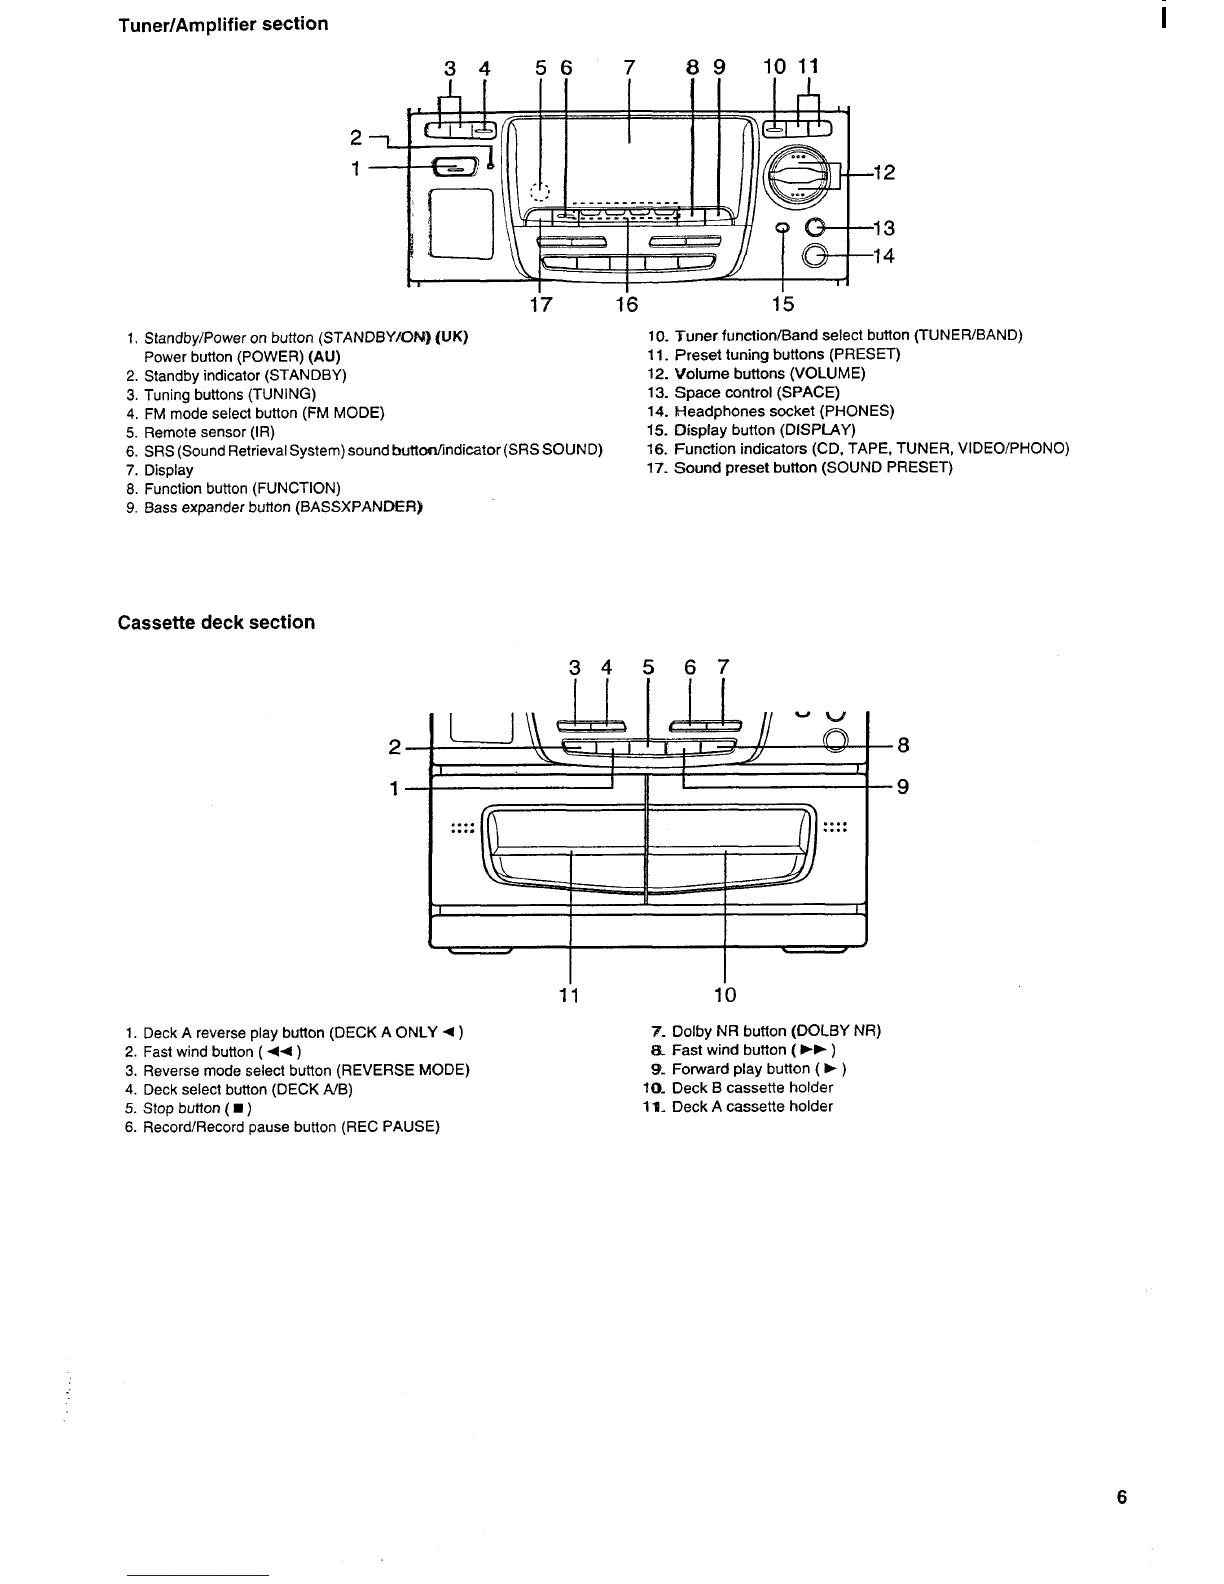
IN,G THE CLOC,K: ,, d’ ,.
Using the remote comtml
Example: To set “6:30- (“AM 6:30).
1.
2.
3.
4.
5.
P~ess the CLOCK b&ton. The’Clock display appears.
After connectk-igthe mains lead for the first time, when you press
the CLOCK brAton, the clock display blinks.
Press the ADJtJS button within 10 seconds.
\l/
n-m l-i For AU: The clock is 12-hour
l_f L-r L1 display. Example AM 12:00
The hours dispiay blinks.
Press the +or –TIME SET button to set the “hours.”
Press the ADJUST button.
Xi/
~:~~
The minutes dispby blinks.
Press the +or –TfME SET button to set the “minutes.”
%1/
E1311
6. F%ess the ADJUST button. The clock starts.
6:3G
-The time can be set accurately by pressing the ADJUST button
when atime signal is heard.
-T%ese operations can be done, even if in standby.
-Tmdisplay theclockduring operation. press the CLOCK button. Press
it?again to return to the original display.
When the display blinks because of apower failure, reset the time.
For UK: Changing the clock to the 12-hour display
1. FWess the STANDBY/ON button to turn the power off.
2. While pressing the MEMORY button on the front panel, press the ■
STOP button (CD section) on the front panel.
Example: 1300 —PM 1:00
To re%rrn the original setting, repeat steps above.
~PEi$3AT10N~
.. . ..-,”.......,.,.... . ..
Turning the power on and off
Press the STANDBYfON button. The indicators and displays light and the
STANDBY indicator goes out. (After connecting the mains lead, when you
press the STANDBY/ON button for the first time, the volume reset feature
automatically sets the initial volume level.)
Totumoff the power, press the STANDBY/ON button again. The STANDBY
indicator lights. The dock display remains lit.
For AU: Use the POWER button instead of the STANDBY/ON
button.’ .. .. .. .. . .
-When the mains lead is connected to the AC outlet, the STANDBY
indicator lights and the unit will respond to commands from the remote
control.
Smart start function
Ifthe following buttons are pressed when the unit is in standby, the unit
turns on automatically and the selected function is set.
CD player section ➤/11PLAY/PAUSE, DISC 1, DISC2, DISC3,
OPEN/CLOSE
Tuner section TUNEWBAND
Cassette section ➤,DECK AONLY +
Selecting the function
Press the F~NCTION button to select the desired function. The selected
function indicator lights in red.
The function is automatically selected when CD play or tape playback is
started, or when the TUNER/BAND button has been pressed (except
during recording or tape dubbing).
When the function selection is changed, CD play or tape playback is
automatically stopped.
Adjusting the volume
Press the ~or~ VOLUME button, or press the+ or-VOLUME button on
the remote control. The volume level appears on the display (VOL 0- VOL
1o).
To reduce the volume temporarily (muting)
Press the MUTE button on the remote control. ‘MUTE” blinks on the
display.
To restore the previous volume setting, press the MUTE button again.
“MUT13 disappears.
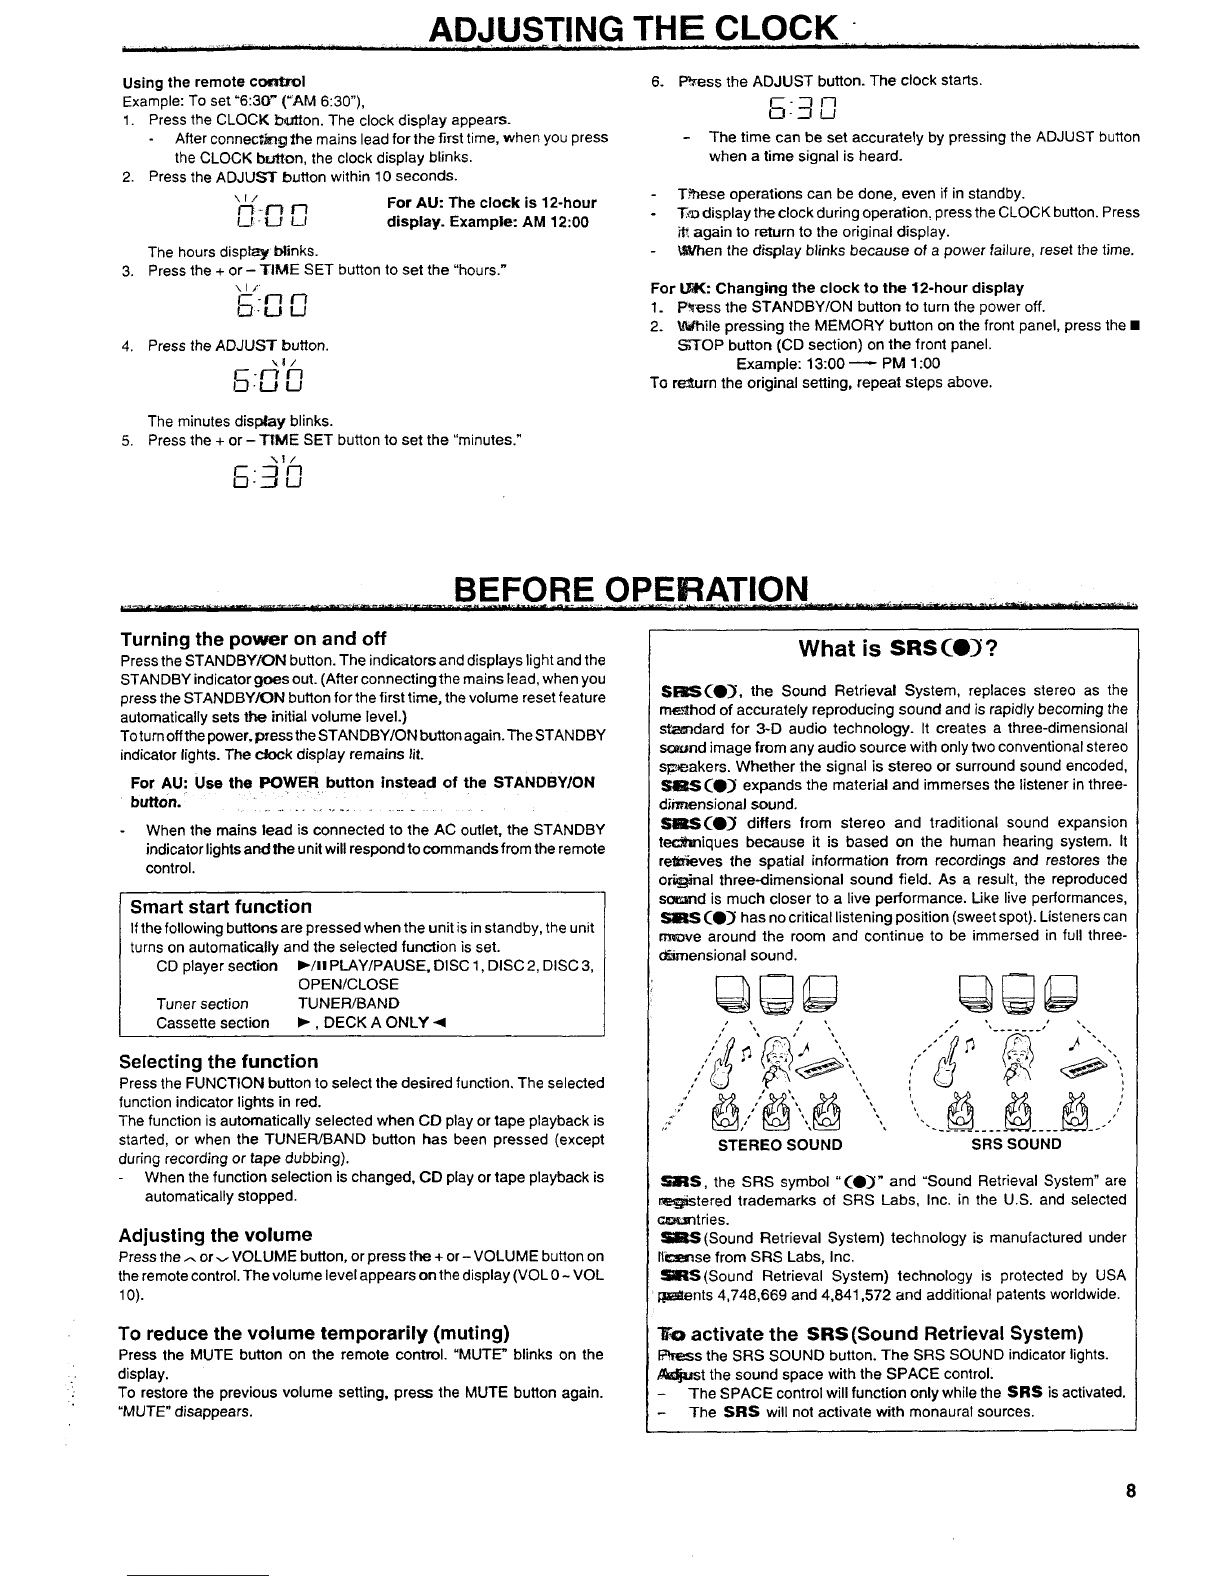
What is SRSCOJ?
S= (01, the Sound Retrieval System, replaces stereo as the
me.!lhod of accurately reproducing sound and is rapidly becoming the
stemdard for 3-D audio technology. It creates athree-dimensional
scwnd image from any audio source with only two conventional stereo
speakers. Whether the signal is stereo or surround sound encoded,
_(,> expands the materiaf and immerses the listener in three.
dimensional sound.
SW!lS C.3 differs from stereo and traditional sound expansion
te@sniques because it is based on the human hearing system. It
retrieves the spatial information from recordings and restores the
orig$nal three-dimensional sound field. As aresult, the reproduced
scmmrd is much closer to alive performance. Like live performances,
SEES C.] has no critical listening position (sweet spot). Listeners can
rmwe around the room and continue to be immersed in full three-
d%mensional sound.
L!LiMJ QHiJLJ
STEREO SOUND SRS SOUND
-S, the SRS symbol “CO>” and “Sound Retrieval System” are
rez@stered trademarks of SRS Labs, Inc. in the U.S. and selected
2zmsntries.
SSBS (Sound Retrieval System) technology is manufactured under
Ifasxrse from SRS Labs, Inc.
-S (Sound Retrieval System) technology is protected by USA
@ents 4,748,669 and 4,841,572 and additional patents worldwide.
-activate the SRS (Sound Retrieval System)
F?ress the SRS SOUND button. The SRS SOUND indicator lights.
%tjast the sound space with the SPACE control.
The SPACE control will function only while the SRS is activated.
The SI?S will not activate with monaural sources.
8