2
PREPARATION
J
(9/1
PRESET
CH(+,-)
RF converter output
(Video channel)
I
Area Factory IRange
setting
*The RFconverter ofthis VCR
has been factory set to
Australian UHF37.
The New Zealand and
Australian channels are not the
same. This means UHF37 Aus
is basically the same as UHF36
NZ.But not exactlythe same.
2
PREPARATION
R
0/1
CH(+,-)
CHANNEL(-, +)
7
~~~ VIDEO CHANNEL SETTING
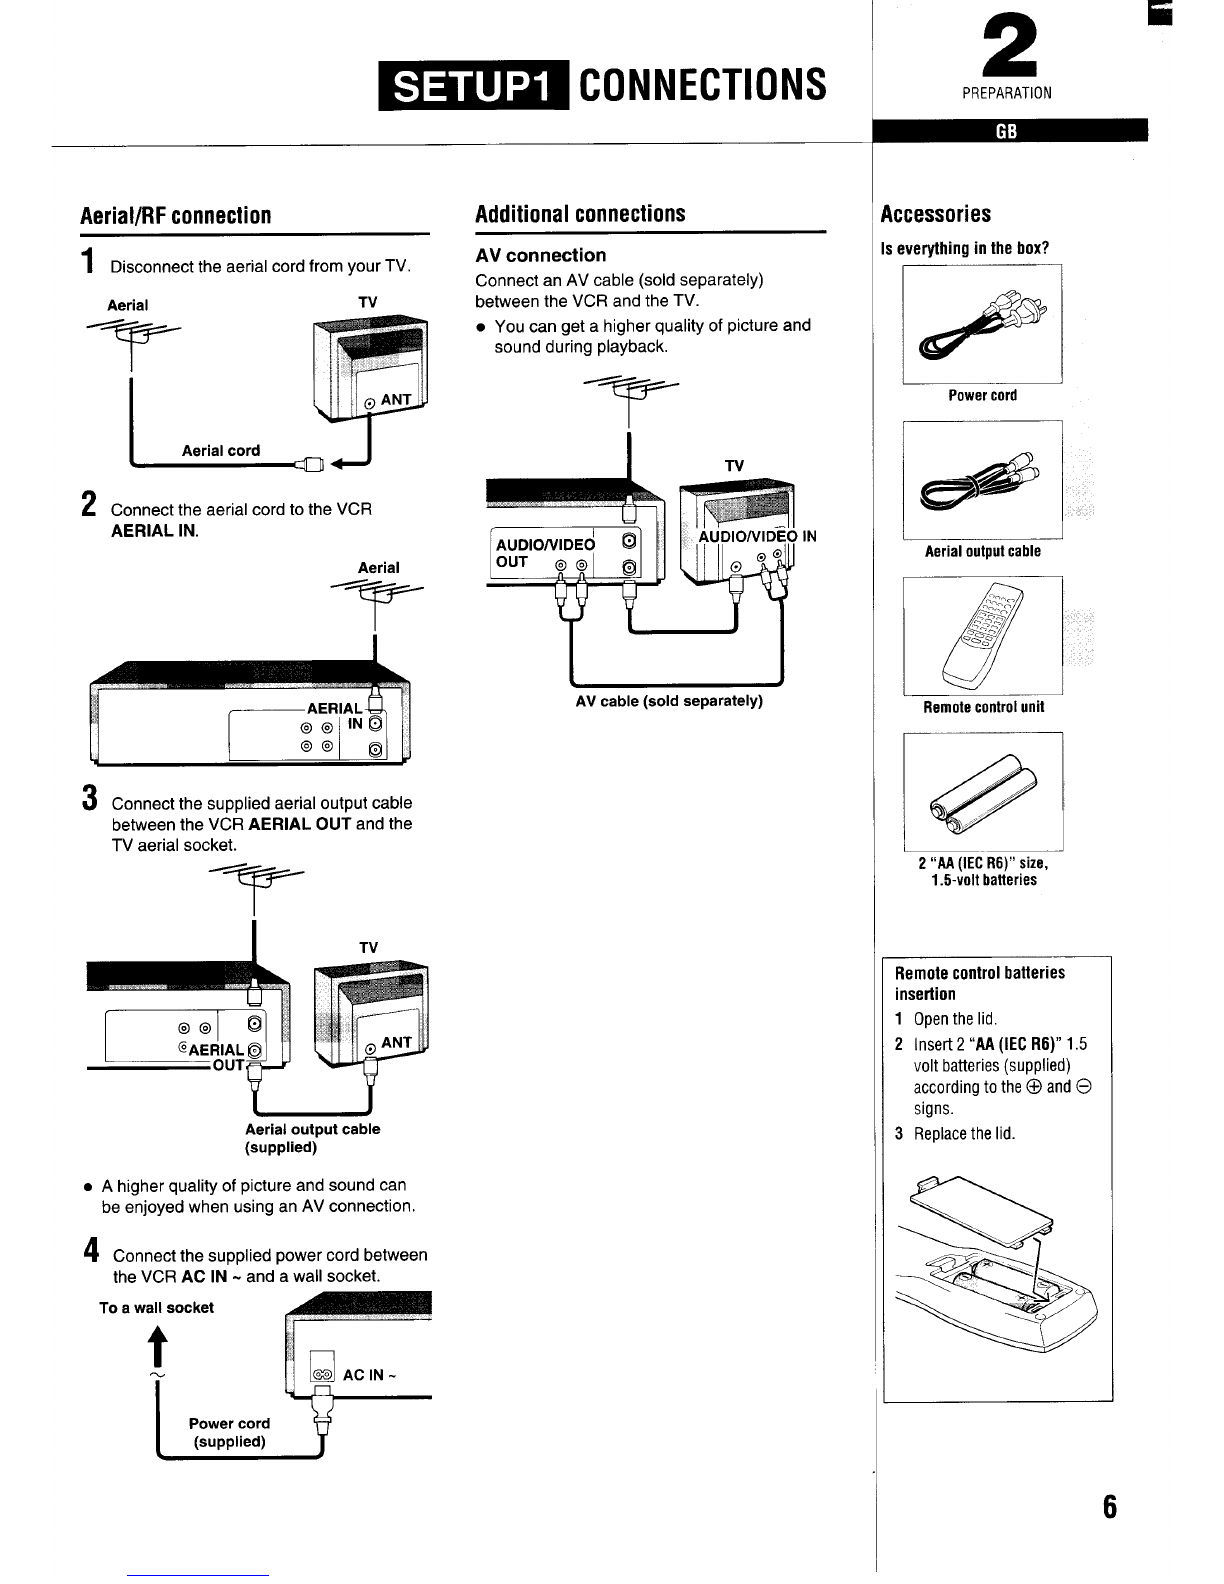
If the VCR has been connected to the TV using the “AV connection”, simply set your TV to
the “AV” mode. Go to ~~ VCR TUNING.
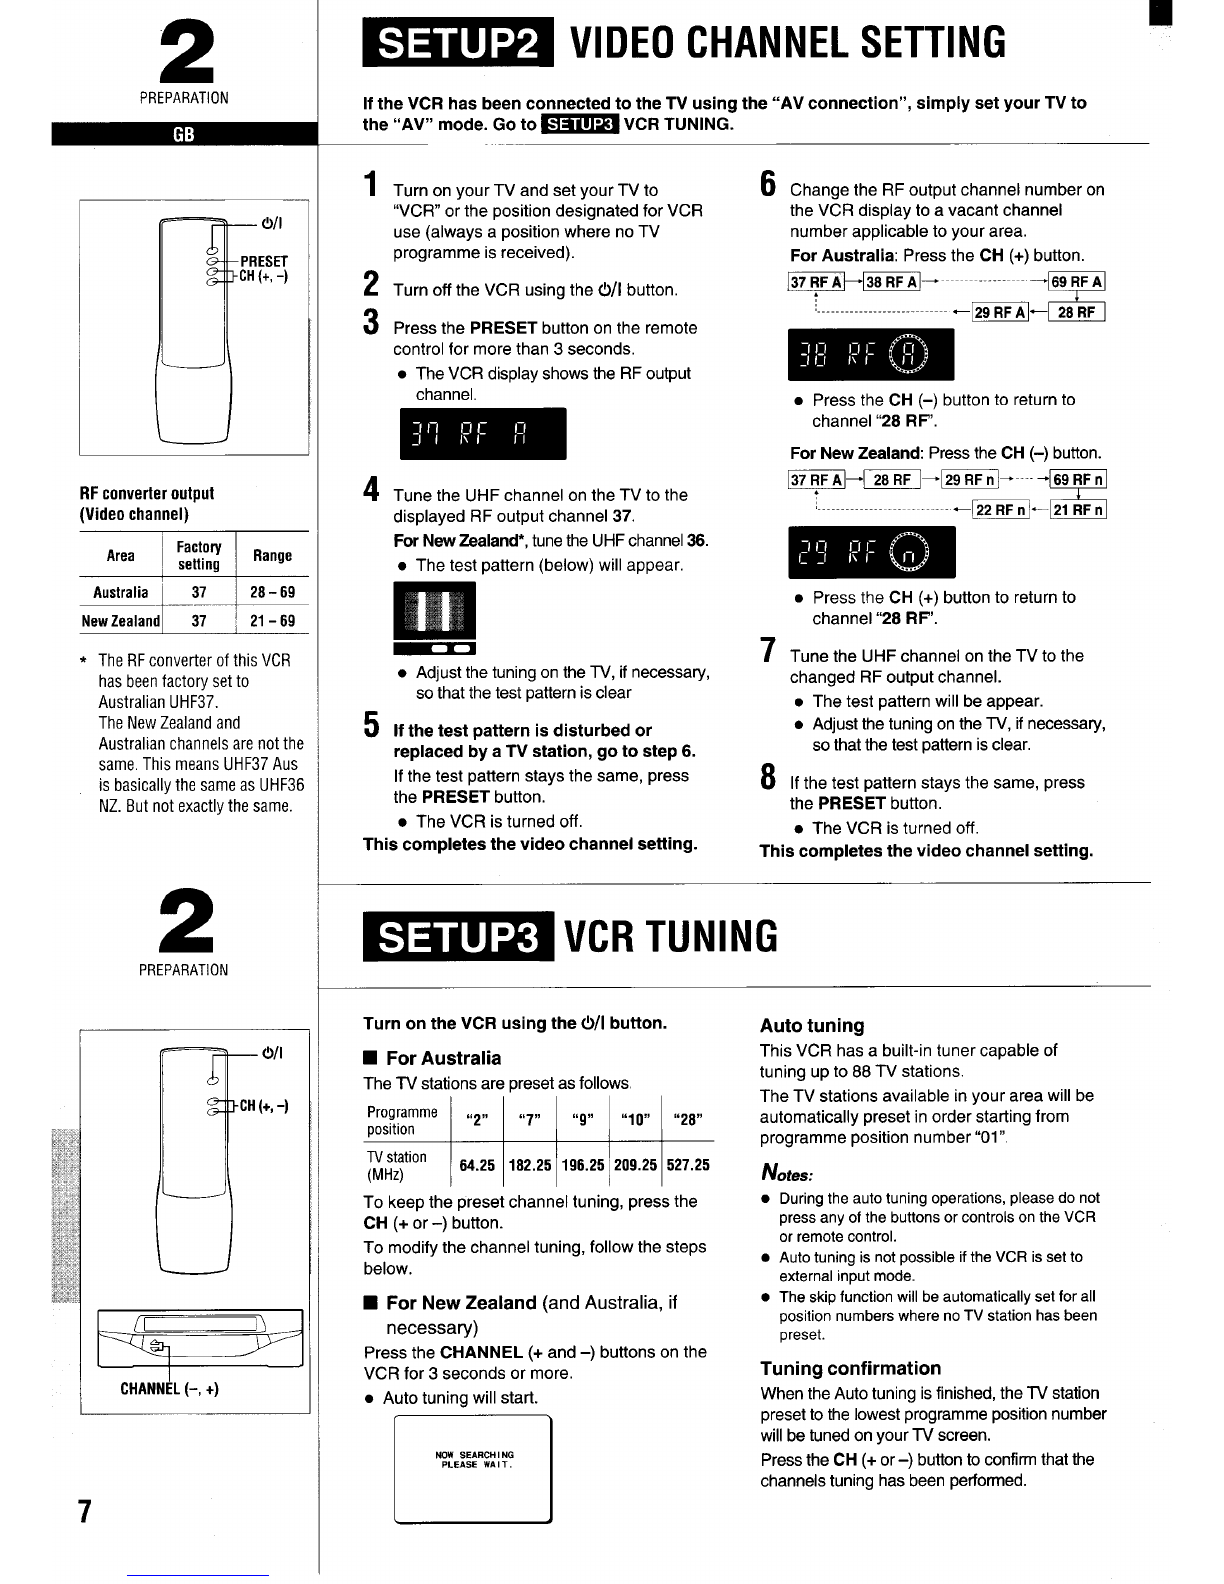
1
2
3
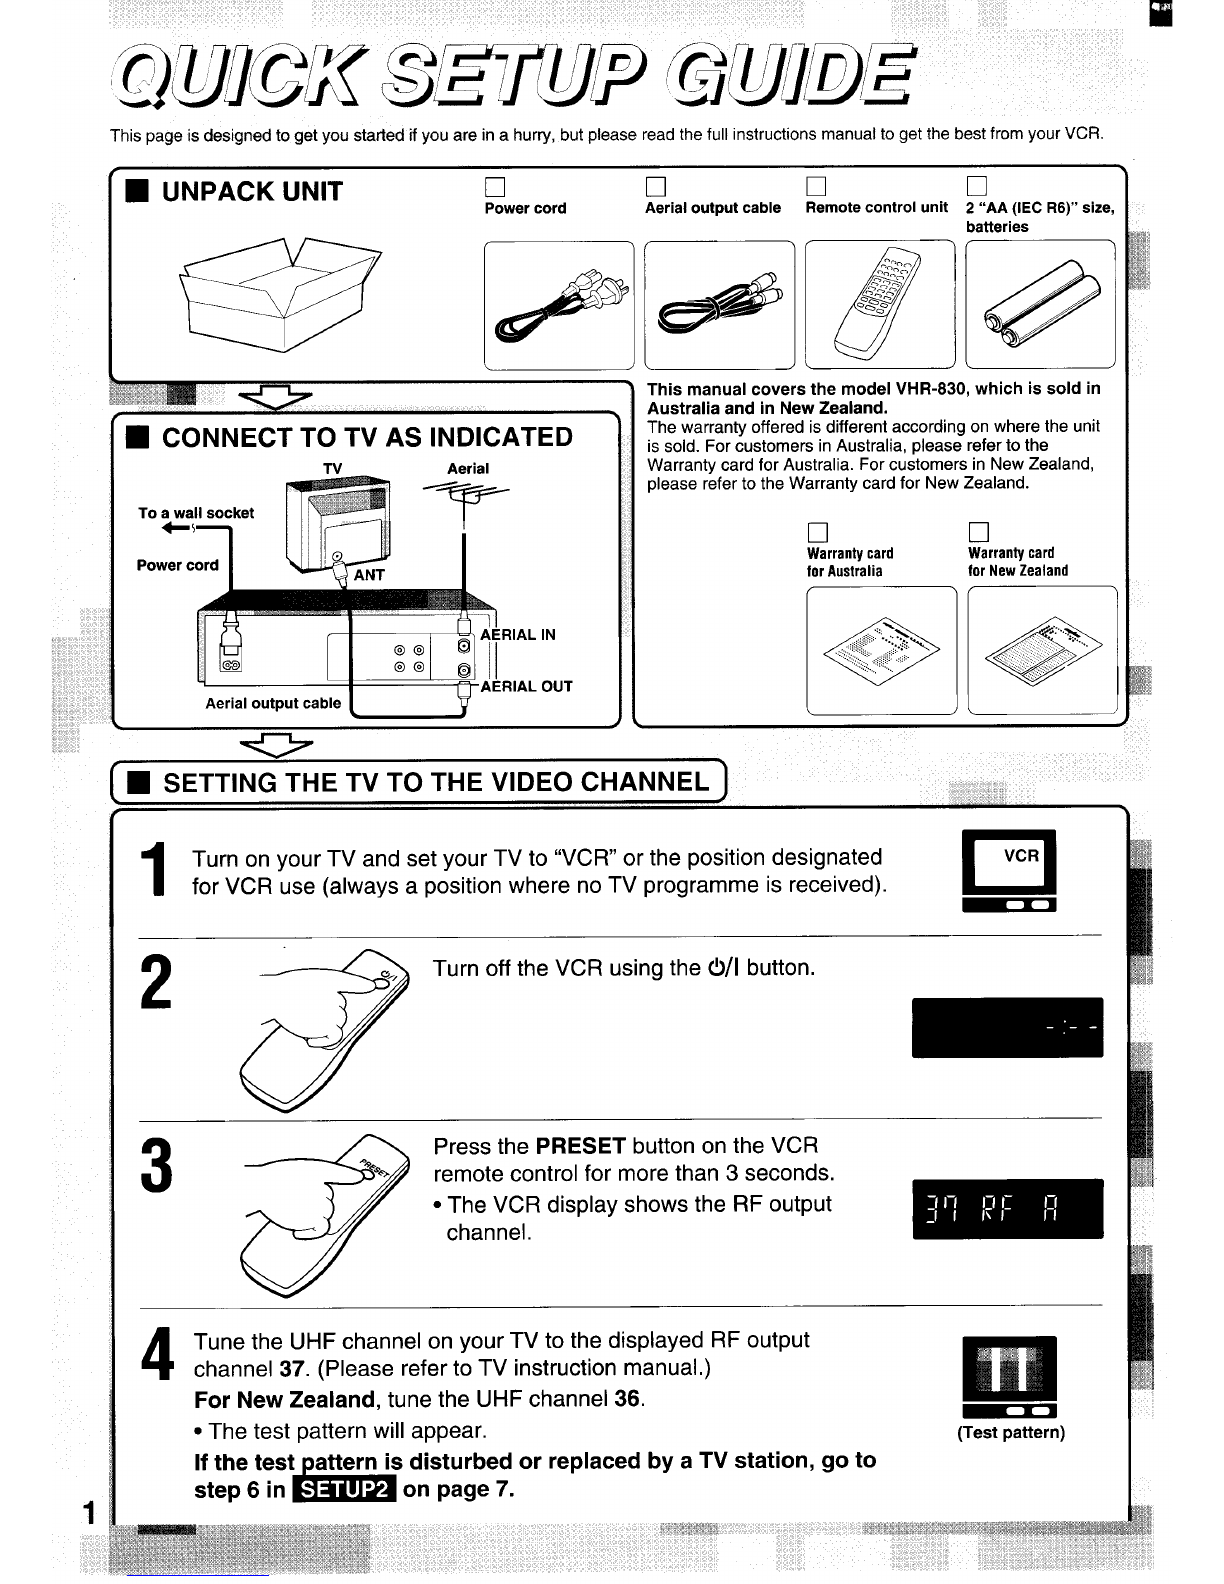
Turn on your TV and set your TV to
“VCR” or the position designated for VCR
use (always aposition where no TV
programme is received).
Turn off the VCR using the 0/1 button.
Press the PRESET button on the remote
control for more than 3seconds.
●The VCR display shows the RF output
channel,
4Tune the UHF channel on the TV to the
displayed RF output channel 37.
For New Zealand*, tune the UHF channel 36.
●The test pattern (below) will appear.
5
●Adjust the tuning on the TV, if necessary,
so that the test pattern is clear
If the test pattern is disturbed or
replaced by aTV station, go to step 6.
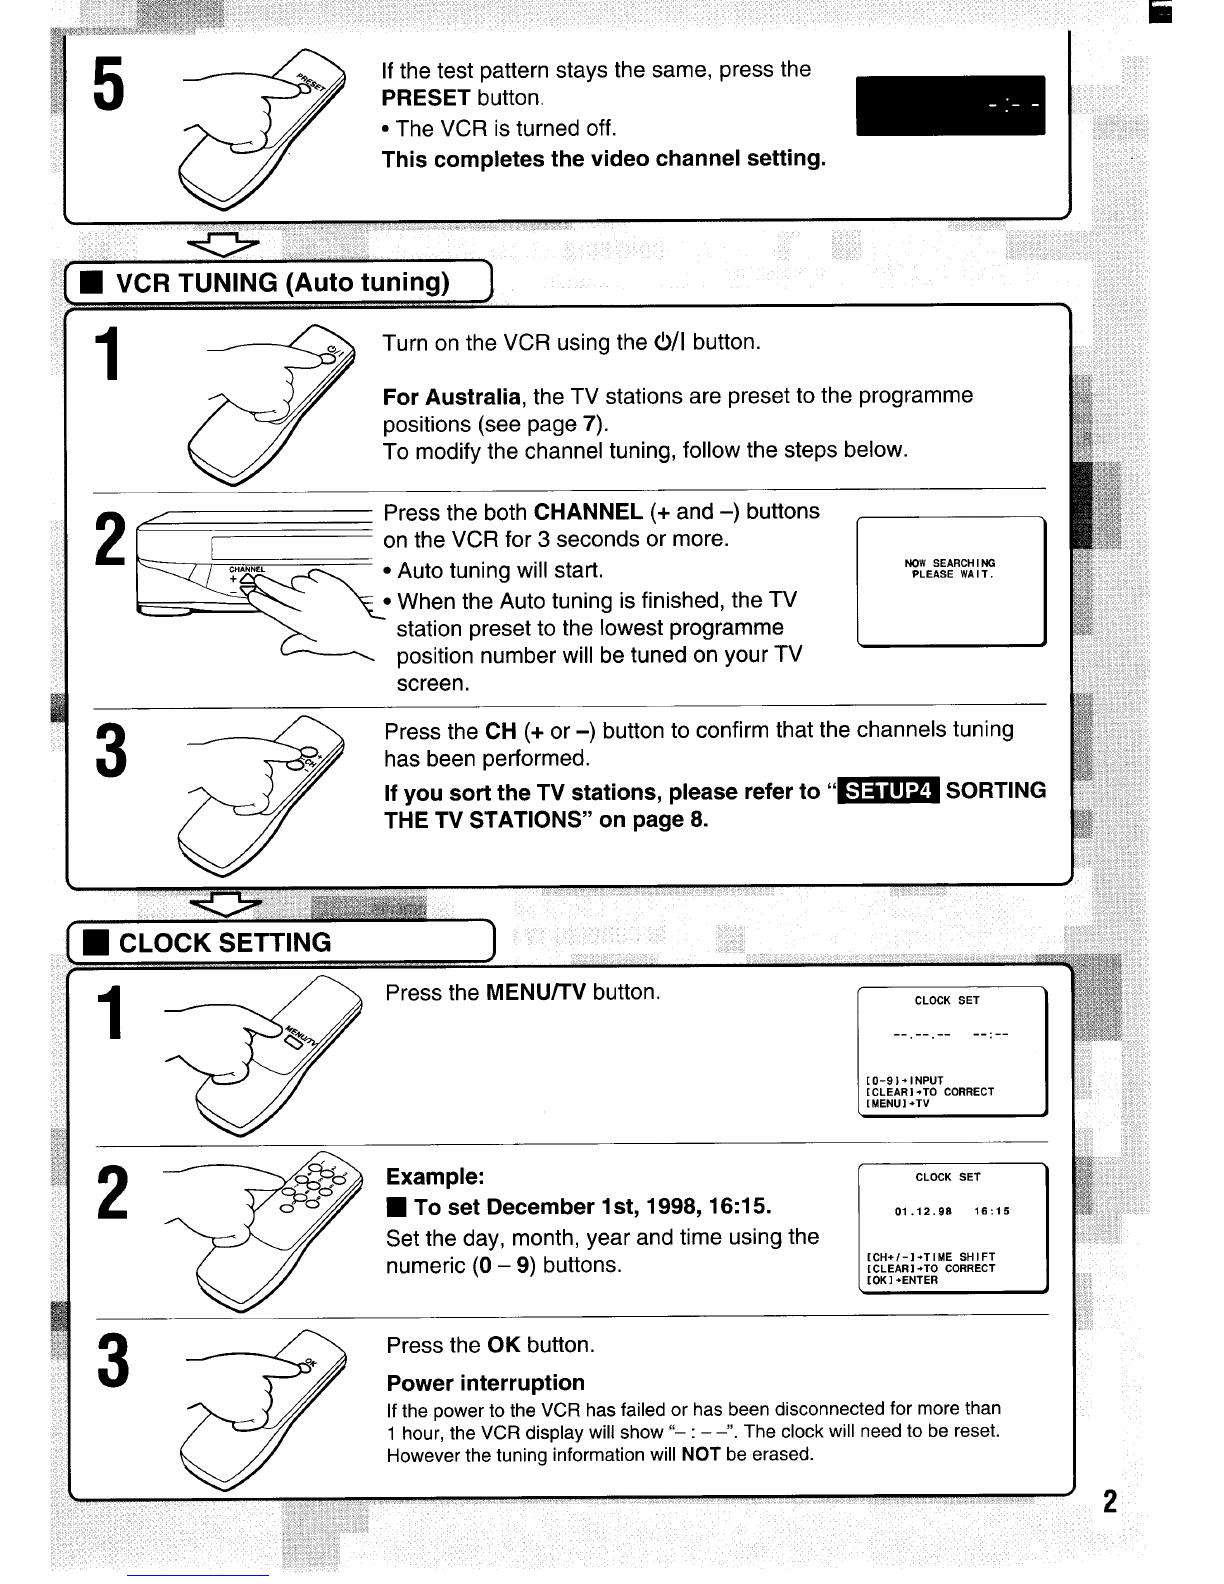
If the test pattern stays the same, press
the PRESET button.
●The VCR is turned off.
This completes the video channel setting.
6
7
8
Change the RF output channel number on
the VCR display to avacant channel
number applicable to your area.
For Australia: Press the CH (+) button.
-=+------------------ ’69 RFA
IS
‘-----------------------------29 RFA- 28RF
Ill%lm
●Press the CH (-) button to return to
channel “28 RF.
For New Zealand: Press the CH (-) button.
-“m”m”--”-”g mm
----------------------------- 22 RFn-21 RFn
n%m
●Press the CH (+) button to return to
channel “28 RF.
Tune the UHF channel on the TV to the
changed RF output channel.
●The test pattern will be appear.
●Adjust the tuning on the TV, if necessary,
so that the test pattern is clear.
If the test pattern stays the same, press
the PRESET button.
●The VCR is turned off.
This completes the video channel setting.
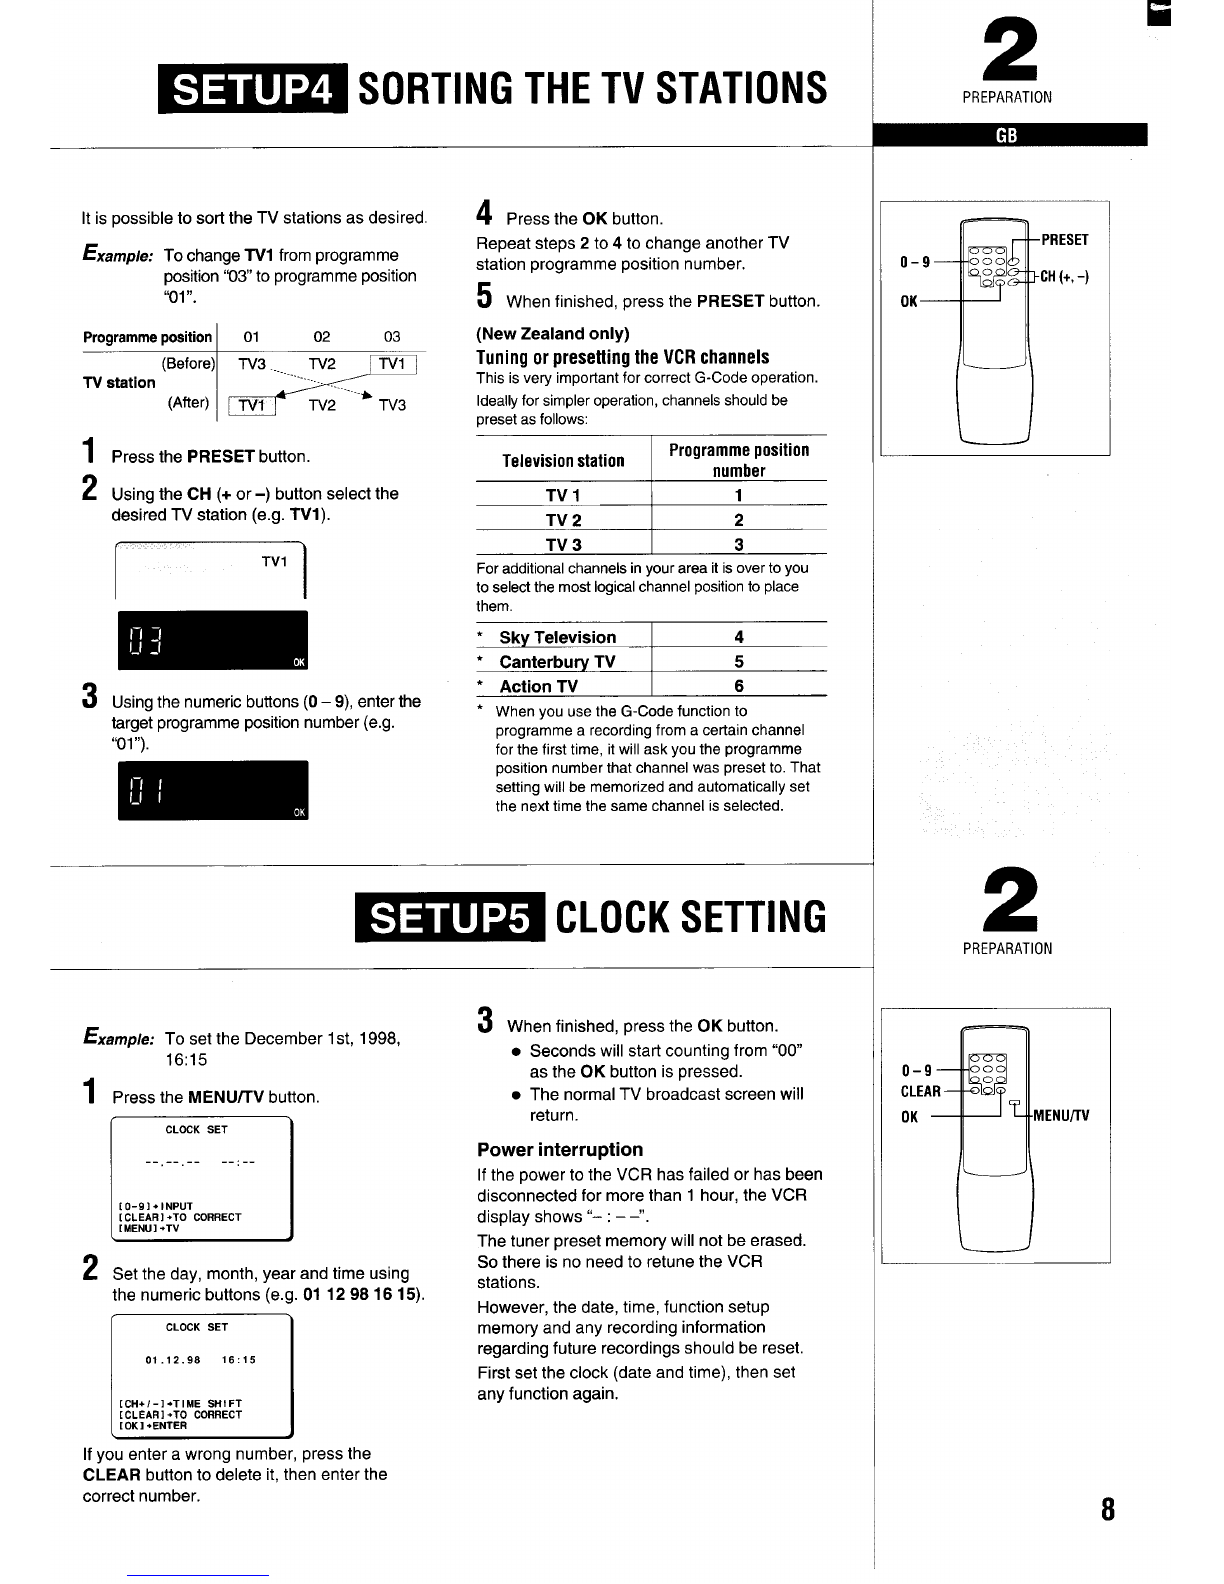
Turn on the VCR using the 0/1 button.
■For Australia
The TV stations are rxeset as follows
Programme
position 1“2” I“7”
I“9” I“10”
TVstation
(MHz) 64.25 182.25 196.25 209.25
“28”
527.25
To keep the preset channel tuning, press the
CH (+ or -) button.
To modify the channel tuning, follow the steps
below.
■For New Zealand (and Australia, if
necessary)
Press the CHANNEL (+ and –) buttons on the
VCR for 3seconds or more.
●Auto tuning will start.
NOW SEARCH 1NG
PLEASE WA 1T
Auto tuning
This VCR has abuilt-in tuner capable of
tuning up to 88 TV stations.
The TV stations available in your area will be
automatically preset in order starting from
programme position number “01”
Notes:
●
●
●
During the auto tuning operations, please do not
press any of the buttons or controls on the VCR
or remote control.
Auto tuning is not possible if the VCR is set to
external input mode.
The S!dD function will be automatically set for all
position numbers where no TV station has been
preset.
Tuning confirmation
When the Auto tuning is finished, the TV station
preset to the lowest programme position number
will be tuned on your TV screen.
Press the CH (+ or -) button to confirm that the
channels tuning has been performed.