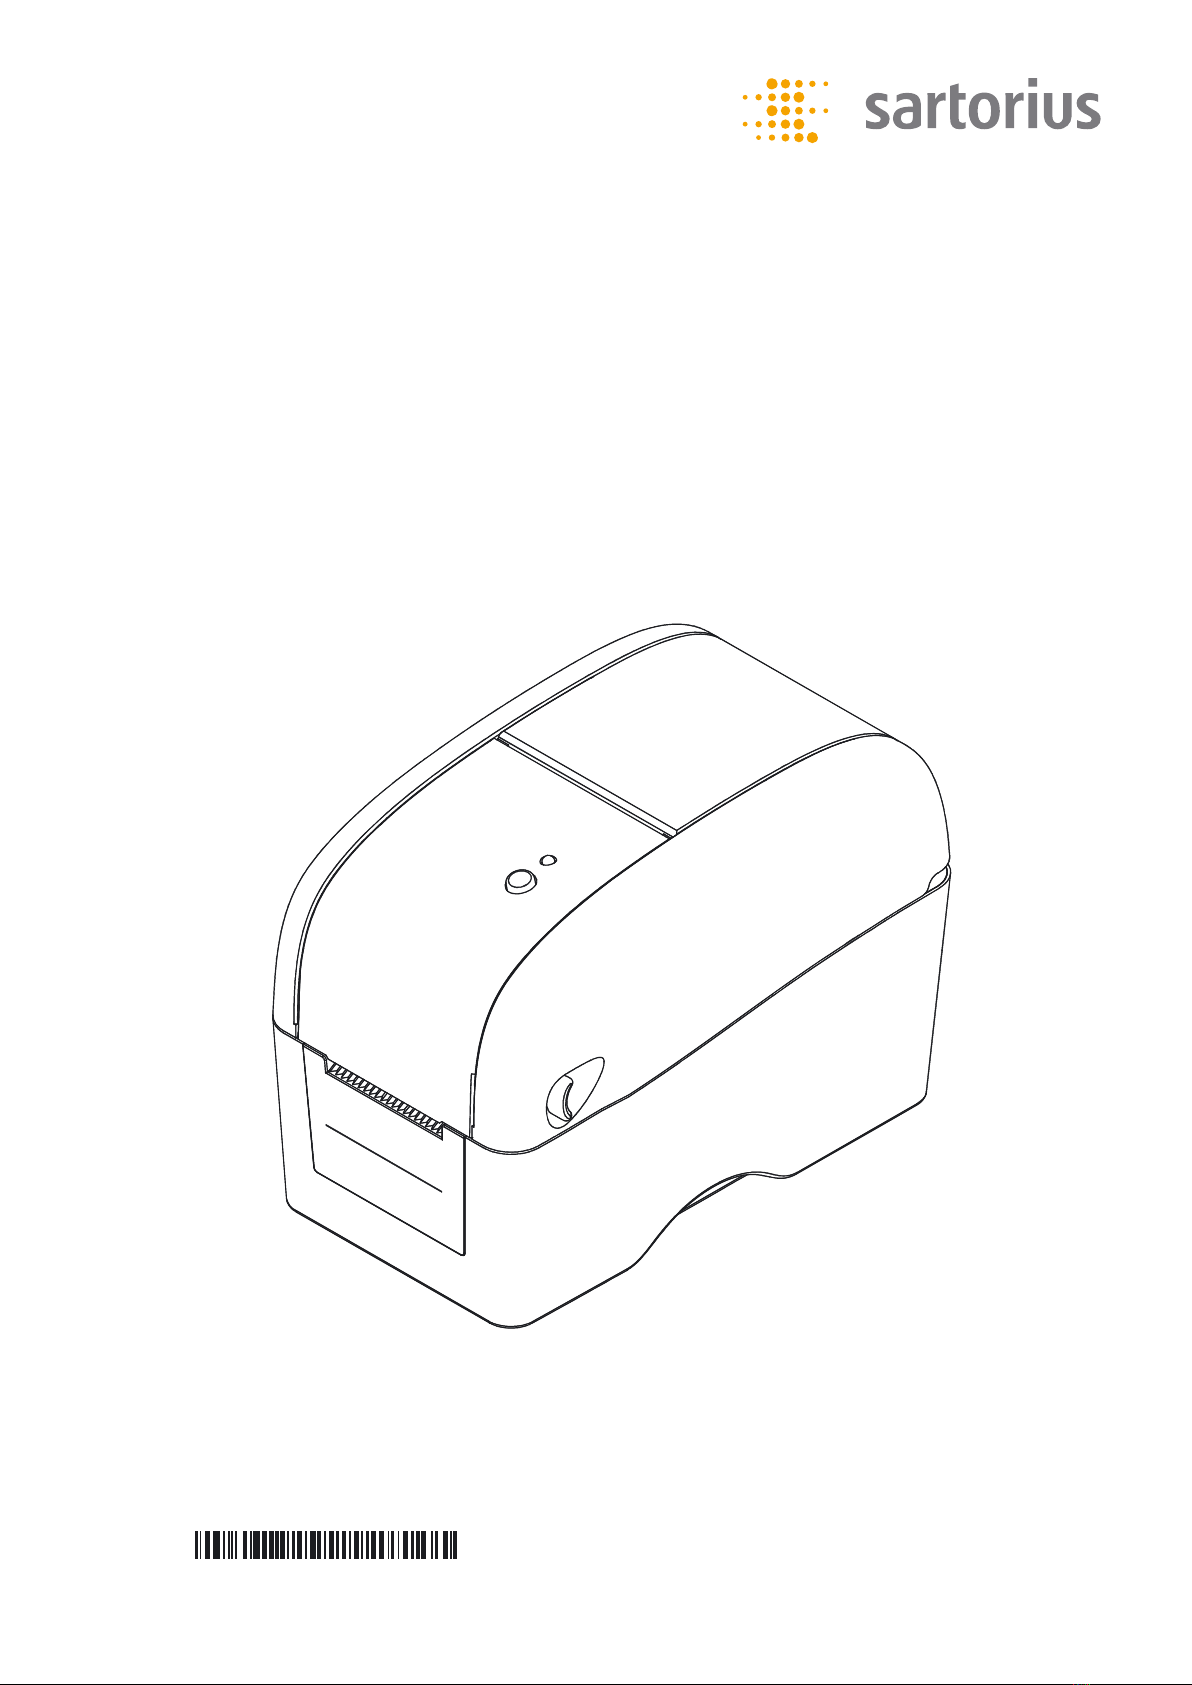
Sartorius YDP30 User manual
Operating Instructions | Betriebsanleitung | Mode d’emploi | Manuale di istruzioni |
Instrucciones de manejo | Инструкция по эксплуатации | 操作手册 | 取扱説明書
YDP30
Data Printer | Drucker | Imprimante | Stampante dati | Impresora de datos |
Принтер | 㗷⳯▘㱉⫒ | データプリンター
98647-004-91

2Operating Instructions YDP30
English page 3
Deutsch Seite 17
Français page 31
Italiano pagina 45
Español página 59
Русский страница 73
㺲㢶 ☾87㮝
日本語 101ページ

Operating Instructions YDP30 3
Contents
Contents
1. Safety Instructions ........................................... 4
2. Operations Overview ......................................... 5
2.1 Unpacking and Inspection .................................. 5
2.2 Printer Overview .......................................... 5
2.2.1 Front View .......................................... 5
2.2.2 Interior View ........................................ 6
2.2.3 Rear View .......................................... 6
3. Setup ..................................................... 7
3.1 Setting Up the Printer ...................................... 7
3.2 Loading the Media ........................................ 7
3.2.1 Loading the Media .................................... 7
3.2.2 Loading Media in Peel-off Mode ......................... 9
3.2.3 Loading the Thick Media (Thickness is 0.19 mm) ............. 10
3.3 Loading the Ribbon ....................................... 11
4. LED and Button Functions ..................................... 12
4.1 LED Indicator ............................................ 12
4.2 Feed Button Function ..................................... 12
4.3 Setting Up the RS232 Interface ............................... 13
5. Troubleshooting ............................................. 14
5.1 LED Status .............................................. 14
5.2 Print Problem ............................................ 14
6. Maintenance ............................................... 15
7. Specifications ............................................... 16
8. Accessories ................................................. 16
EC Declaration of Conformity .....................................115
4Operating Instructions YDP30
Safety Instructions
1. Safety Instructions
1. Please read this information carefully.
2. Keep these instructions in a safe place for future use.
3. Before cleaning the device, it should always be disconnected from the power
supply. Do not use any liquid or aerosol cleaning agents. A damp cloth is most
suitable for cleaning.
4. The power socket should be close to the device and easy to access.
5. The device must be protected against moisture.
6. Make sure that the device is securely positioned during set-up.
If it tips over or falls to the floor, it could be damaged.
7. When connecting to the power supply, it is important to note the connected
loads.
8. This device can be operated at ambient temperatures not exceeding 40°C.
A CR2032 lithium battery is installed in the main board.
Risk of explosion if battery is replaced by an incorrect type.
Dispose of used batteries according to the manufacturer's instructions.
Explanation of Symbols
The following symbols are used in these instructions:
tIndicates a required action
yDescribes what happens after you have performed a particular step
1. Perform steps in the specified order
2.
– Indicates an item in a list
Operating Instructions YDP30 5
Operations Overview
2. Operations Overview
2.1 Unpacking and Inspection
This printer has been specially packaged to withstand damage during shipping.
Please carefully inspect the packaging and printer upon receiving the bar code
printer. Please retain the packaging materials in case you need to reship the printer.
Unpacking the printer, the following items are included in the carton.
– Printer unit
– Operating instructions
– Power supply WDS060240 (Sartorius order no: 69Y03294)
– USB interface cable (Sartorius order no: 69Y03293)
– RS-232 interface cable (Sartorius order no: 69Y03295)
– Country-specific power cord
– Paper roll
If any parts are missing, please contact the Customer Service Department of your
local retailer or distributor.
2.2 Printer Overview
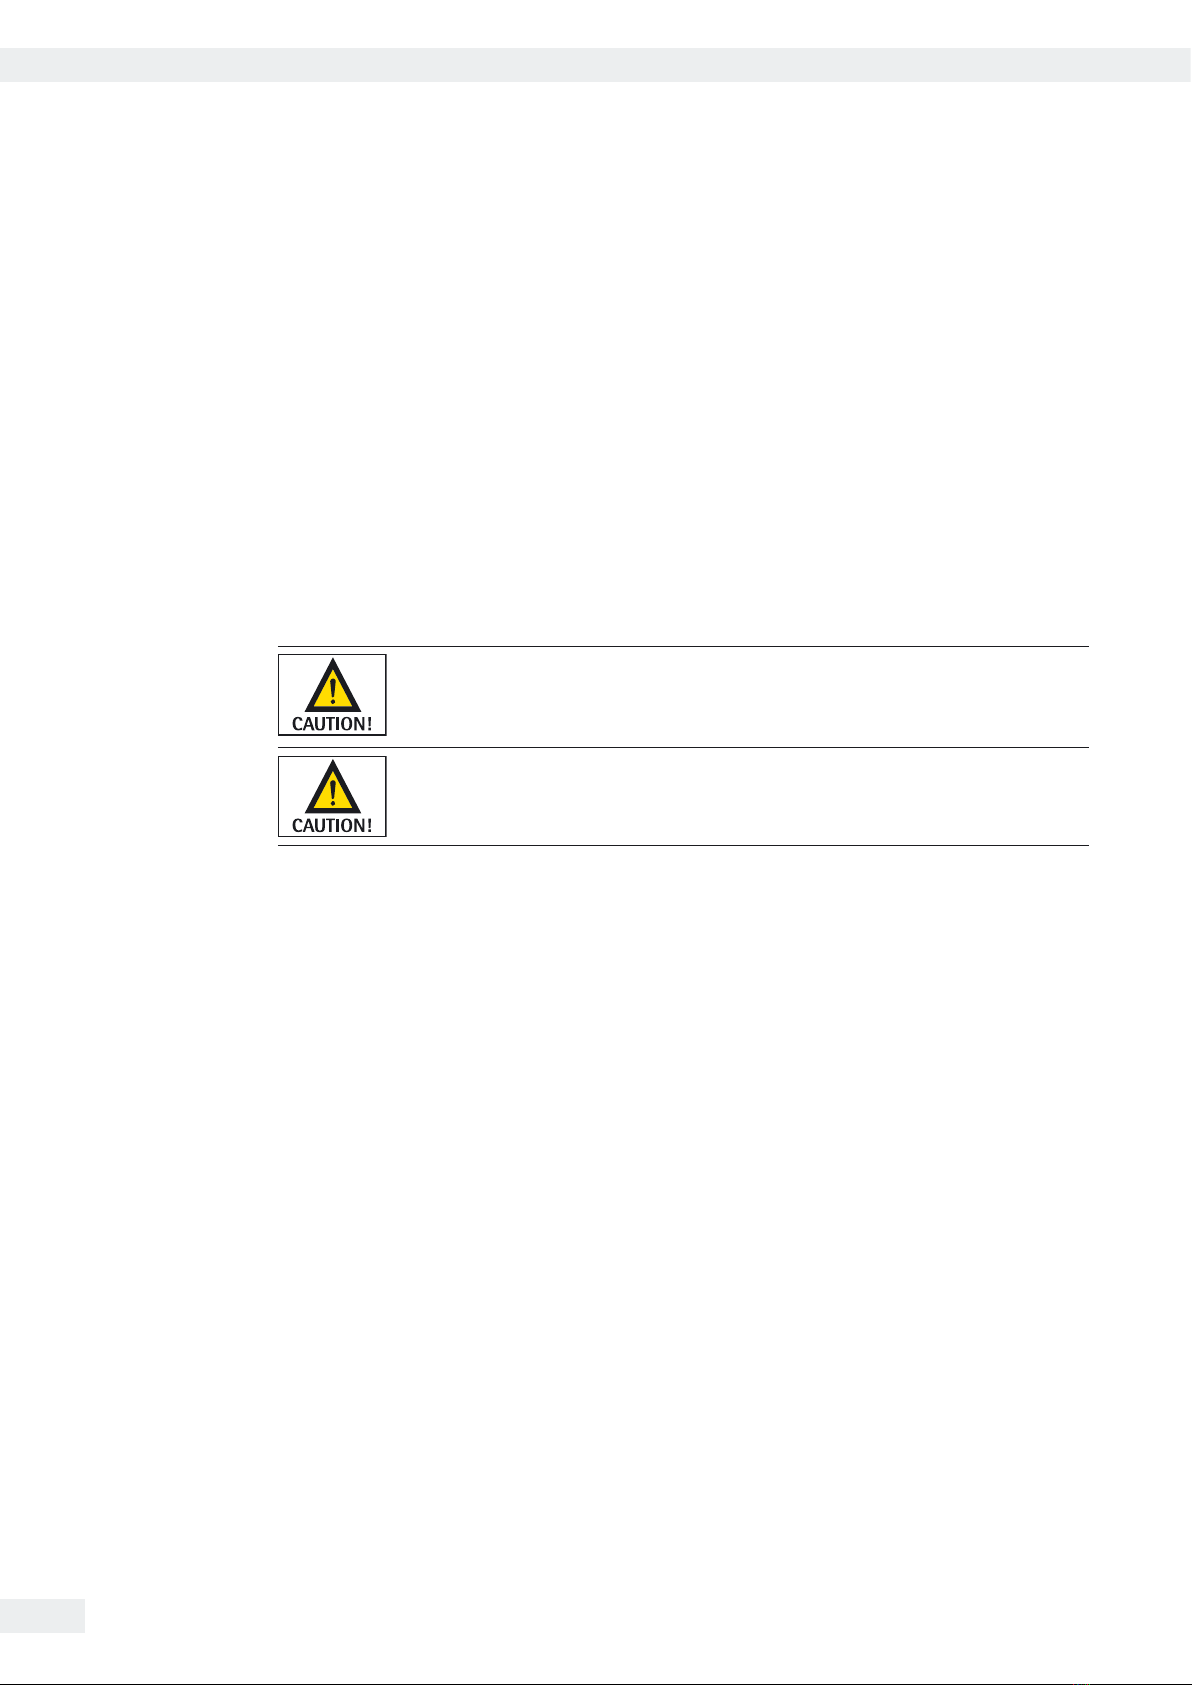
2.2.1 Front View
1
2
6
5
4
3
Item Description
1. Media view window
2. Top cover open lever
3. Peel-off panel
4. Paper exit chute
5. Feed button
6. LED indicator

6Operating Instructions YDP30
2.2.2 Interior View
1
2
10
93
4
5
6
7
11
12
13
14
8
Operations Overview
Item Description
1 Print head
2 Top cover
3 Top cover support
4 Gap sensor (transmitter)
5 Media guide adjuster knob
Ribbon supply hub
6 Platen roller
7 Black mark sensor
8 Media guide
9 Media holders
10 Gap sensor (receiver)
11 Ribbon supply hub
12 Ribbon rewind gear
13 Ribbon rewind hub
14 Ribbon access cover
2.2.3 Rear View
16 15
18
17
Item Description
15 RS-232C interface
16 USB interface
17 Power switch
18 Power jack socket

Operating Instructions YDP30 7
3. Setup
3.1 Setting Up the Printer
1. Place the printer on a flat, secure surface.
2. Make sure the power switch is set to “off.”
3. Connect the printer to the balance with the provided cable.
4. Plug the power cord into the AC power cord socket at the rear of the printer,
and then plug the power cord into a properly grounded power outlet.
Please switch OFF the printer power switch before plugging the power cord into
printer power jack.
When using the RS-232C interface and cable, refer to tSection 4.3 for setup
of the serial interface parameters.
3.2 Loading the Media
3.2.1 Loading the Media
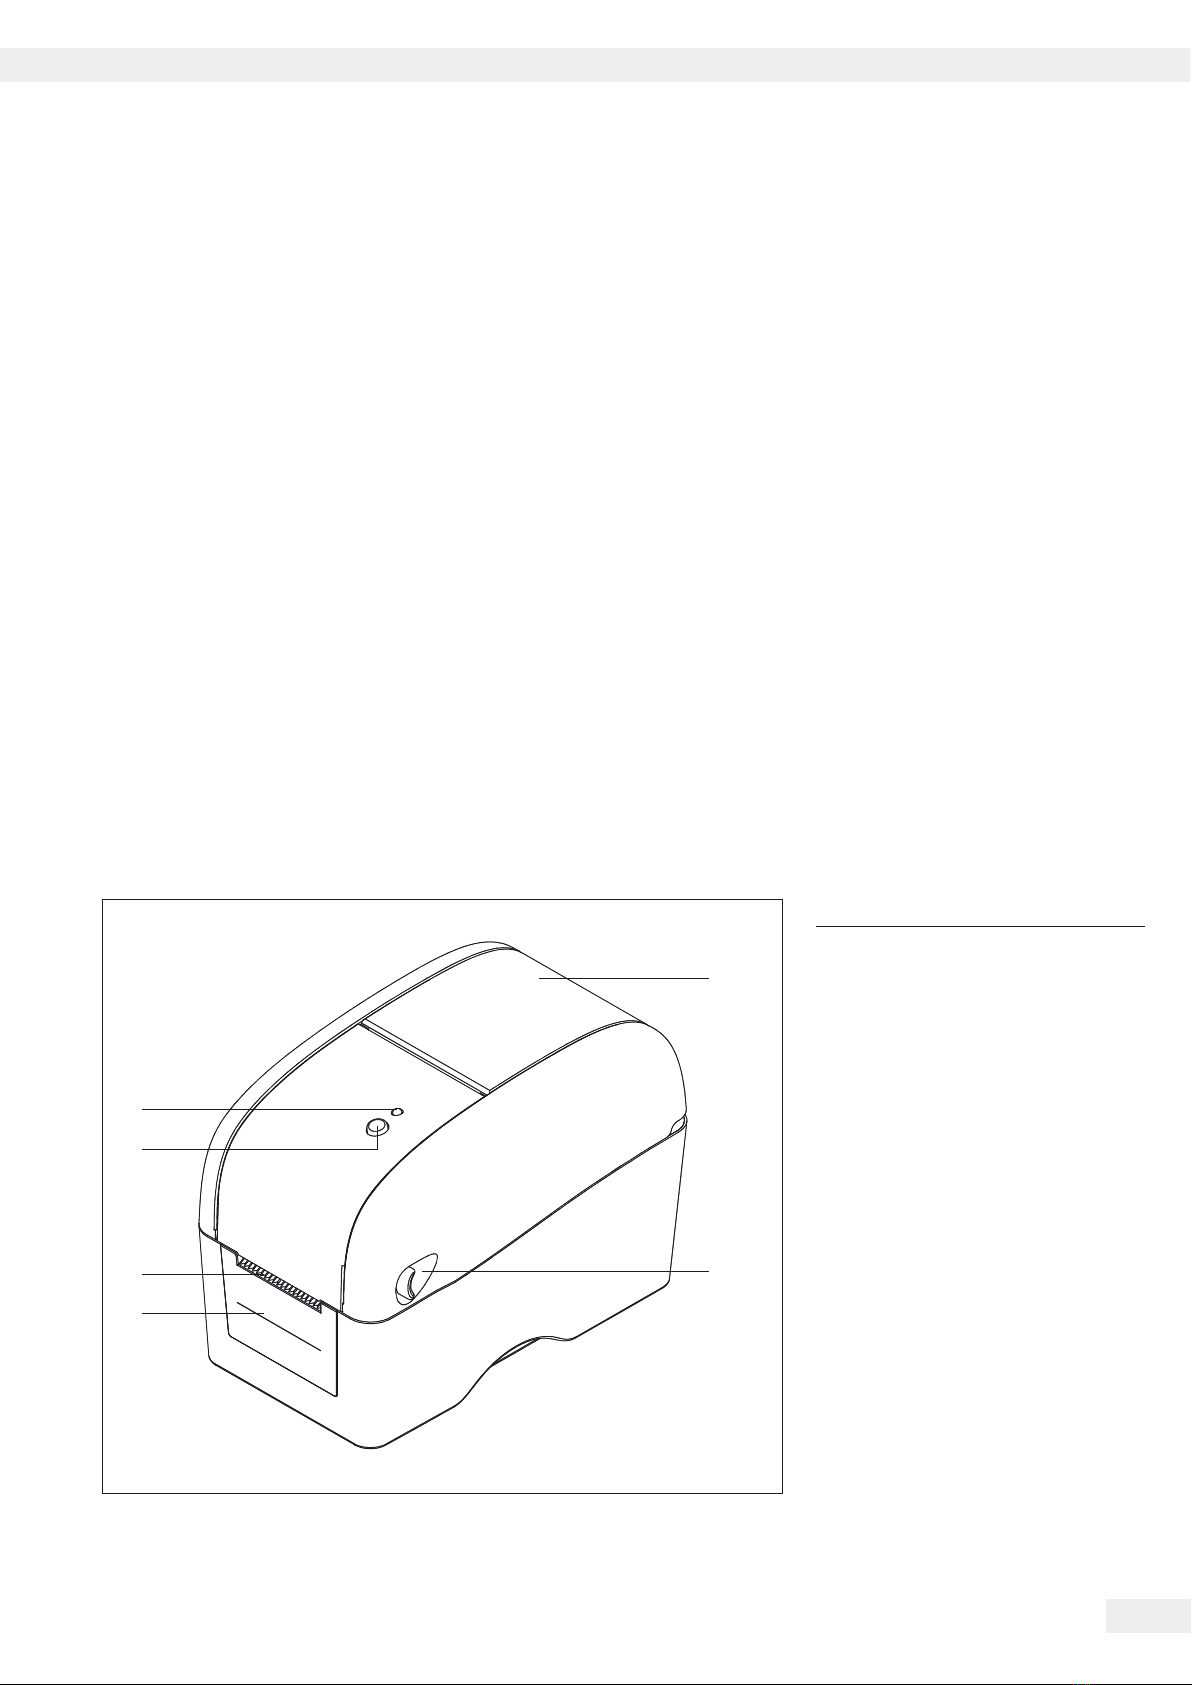
1. Open the printer top cover by pulling the tabs located on each side towards the
front of the printer, and then lift the top cover to the maximum open angle.
2. The media holder can be used for 1” and 1.5” media cores by rotating the upper
part of the label holder 180 degrees clockwise.
3. Adjust the media holders to the label roll width.
Place the roll between the holders and lock them onto the core.
Setup

8Operating Instructions YDP30
4. Put the paper, with the printing side facing up, through the media guides and
under the media sensor and place the label leading edge onto the platen roller.
5. Move the media guides to fit the label width by turning the guide adjuster knob.
6. Gently close the top cover. Make sure the cover is securely fastened.
7. Loading Path for Media
Setup

Operating Instructions YDP30 9
3.2.2 Loading Media in Peel-off Mode
1. Refer to Section 3.2.1 to load the media.
2. Open the top cover and peel-off panel after calibrating the sensor.
3. Release the paper from the support material. Guide the support material through
the “Backing paper opening."
4. Push the peel-off panel back to the printer.
5. Close the top cover gently.
6. Press the FEED button to do a test.
Peel-off
panel
Backing
paper open-
ing
Peel-off
roller
Backing
paper (liner)
Setup
10 Operating Instructions YDP30
3.2.3 Loading the Thick Media (Thickness is 0.19 mm)
1. Open the printer top cover by pulling the tabs located on each side towards the
front of the printer, and then lift the top cover to the maximum open angle.
2. Remove the lower front cover.
3. Disengage the platen holder tabs from the lower inner cover by pulling out the
right side and left side tabs. Move both side tabs into the 90 degree position for
a thick label.
1 = The tab here is for a regular label.
2 = The tab here is for a thick label (thickness is 0.19 mm).
4. Reassemble in the reverse procedure.
5. Refer to Section 3.2.1 to load the media.
Tab
2
1
Setup
Other manuals for YDP30
1
Table of contents
Languages:
Other Sartorius Printer manuals

Sartorius
Sartorius YDP30 User manual

Sartorius
Sartorius YPD20-OCE User manual

Sartorius
Sartorius YDP40 User manual

Sartorius
Sartorius YDP 04 User manual

Sartorius
Sartorius YDP40 User manual

Sartorius
Sartorius YDP20-0CE User manual

Sartorius
Sartorius YDP 03-0CE User manual

Sartorius
Sartorius YDP10BT-0CE User manual

Sartorius
Sartorius YDP10-0CE User manual


