Sartorius YDP 04 User manual

98647-002-51
Sartorius
YDP 04
Data Printer
Operating Instructions

Contents
Intended Use................................................... 3
Connection Options ......................................... 3
Safety Precautions............................................ 4
Installation...................................................... 5
Operation ...................................................... 7
Printing the Data of the
Connected Weighing Instrument.......................... 7
Troubleshooting Guide...................................... 8
Maintenance ...................................................9
Changing the Paper Roll .....................................9
Changing the Ink Ribbon Cassette ......................10
Charging/Changing the Batteries ......................11
Accessories ...................................................13
Specifications.................................................13
CMarking....................................................14
2

Intended Use
Model YDP 04 is a data printer designed to
receive weighing data from a connected weighing
instrument and to print it on plain paper (roll width:
57.5 mm). Text and data are printed with up to
24 characters per line.
Data is transferred either automatically or manually
by pressing a key.
Connection Options
The YDP 04 printer can be operated with the
following balances and scales:
– Basiclite and Gold Series: BL, BJ and GM models
– Economy Series: EA/EB models with serial number
90400000 or higher (available starting April1999)
3

Safety Precautions
The data printer complies with the EC Directives
and Standards for electrical equipment and
electromagnetic compatibility.
Use only rechargeable AA batteries of the following
type: nickel-cadmium UM-3, order no. 69Y03136.
Avoid draining the batteries excessively; otherwise,
this will reduce their recharging capacity.
Used batteries are hazardous waste and must be
properly disposed of according to your local
hazardous waste disposal regulations.
When cleaning the data printer, make sure that no
liquid enters the printer housing: use only a moist cloth
to wipe down the housing.
4

Installation
Equipment Supplied
The following components are supplied:
– Black ink ribbon cassette (is installed)
– 4 rechargeable batteries
– Paper roll
Installing the Rechargeable Batteries
• Remove the 4 batteries from the packaging
(they are discharged)
• Lift the cover of the paper roll compartment
• To open the battery compartment,
tilt back the cover
• Install the 4 rechargeable batteries in the battery
compartment. Make sure that the poles match the
+ and – signs!
• To close the battery compartment, press down
on the cover
• To close the paper roll compartment, lower
the cover
– You cannot thread the paper roll until the printer has
been turned on.
5

Connecting the Data Printer
to a Weighing Instrument
• Connect the interface cable to the weighing
instrument you are using. Secure the connection.
Turning On the Weighing Instrument
and the Printer
• Turn on the weighing instrument
> The printer will turn on automatically
Charging the Batteries during Initial Operation
• Charge the batteries by leaving the weighing
instrument turned on
> The batteries are charged in the standby mode
of the weighing instrument
> After 28 hours, the printer’s batteries are charged
Installing the Ink Ribbon Cassette
• To install the ink ribbon cassette, refer to
“Maintenance” on page10
Inserting the Paper Roll
• Insert the paper roll as described in
“Maintenance” on page 9
6

Operation
The data printer has 4 function keys for operation:
: Line Feed. Press the LF key to advance the
paper by one blank line.
: Numbering Function ON/OFF. The readout
shown on the left will be displayed once the
numbering function has been activated.
: Clear Number. This key resets the numbering
function to “001.”
: Prints the values:
Prints the data of the connected weighing
instrument.
Printing the Data of the Connected
Weighing Instrument
••If necessary, print several blank lines (line feed):
Press the key several times,
or keep it pressed for continuous line feed
• To print data, press the key
> The printout will be as shown on the left
••To reset the numbering function, if necessary,
press the key
••To turn off the numbering function,
press the key
7
123456789012345678901234
001: + 123.4 g

Troubleshooting Guide
Error Message Causes Solution
_ Underlining on the Transfer error in • Set the interface parameters
printout a data string of the connected weighing
instrument to1,200 baud,
odd parity and hardware
handshake.
8

Maintenance
Changing the Paper Roll
To operate your data printer, the paper rolls
must have the following specifications:
(see “Accessories”):
– Standard paper roll
– Wood-free paper, 60 g
– Width: 57.5 ± 0.5 mm
– Diameter: 65 mm max.
– Core diameter: 8 mm min.
• To open the paper roll compartment, lift the cover
• Pull out the roll holders from both sides
of the roll core as shown on the left
• Remove the old roll core
••Place a new paper roll on a flat surface
••The beginning of the paper must be on the bottom
and facing you
• Use your thumb and index finger of one hand to
hold the paper roll vertically above the paper roll
compartment
• Using your other hand, thread the paper through
the slot underneath the ink ribbon
• To transport the paper through the ink ribbon
cassette, press the key several times or hold
it down
> The paper will be threaded into,
then out of the ink ribbon cassette
9

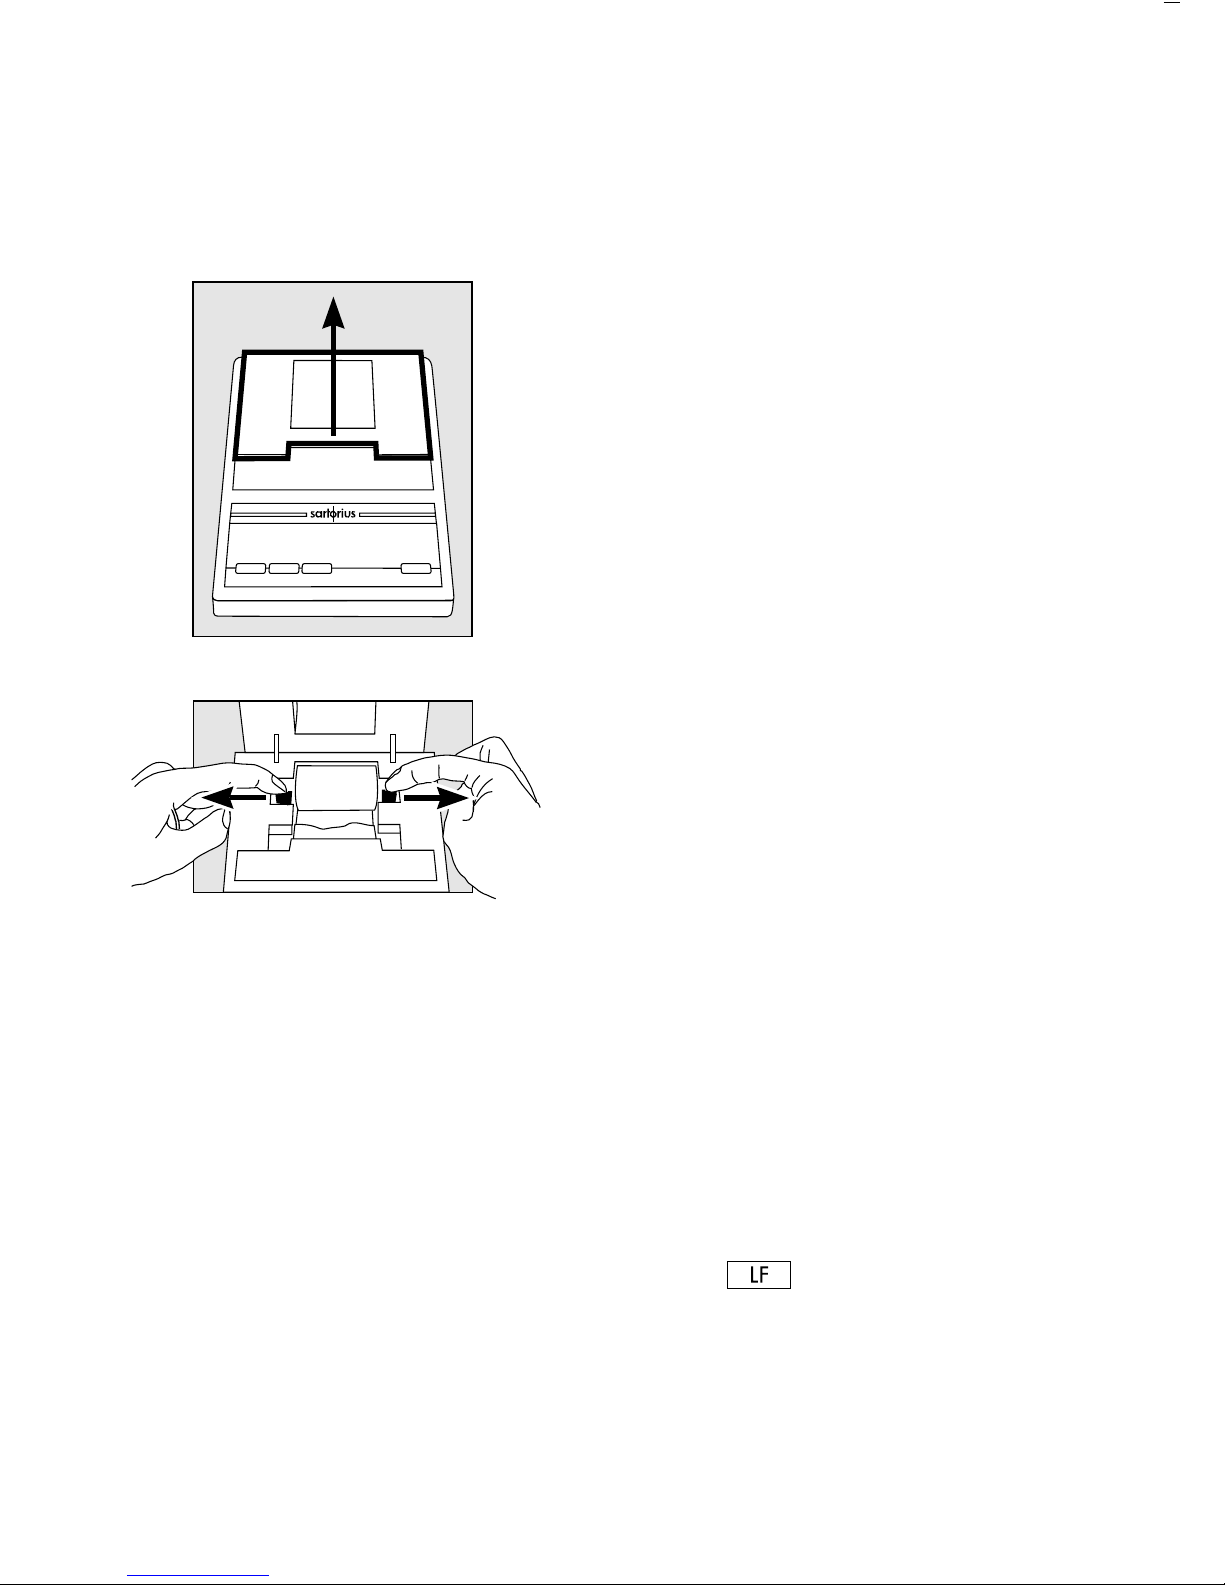
• To align the paper roll, hold it so that you can
push both roll holders into the core
• Release the roll holders on both sides
• To close the paper roll compartment,
lower the cover
Changing the Ink Ribbon Cassette
To operate your data printer, you must
use a black ink ribbon cassette, type ERC-22
(see “Accessories”).
• Lift the cover of the paper roll compartment
• To remove the paper from the ink ribbon cassette,
turn the paper roll opposite to the paper feed
direction
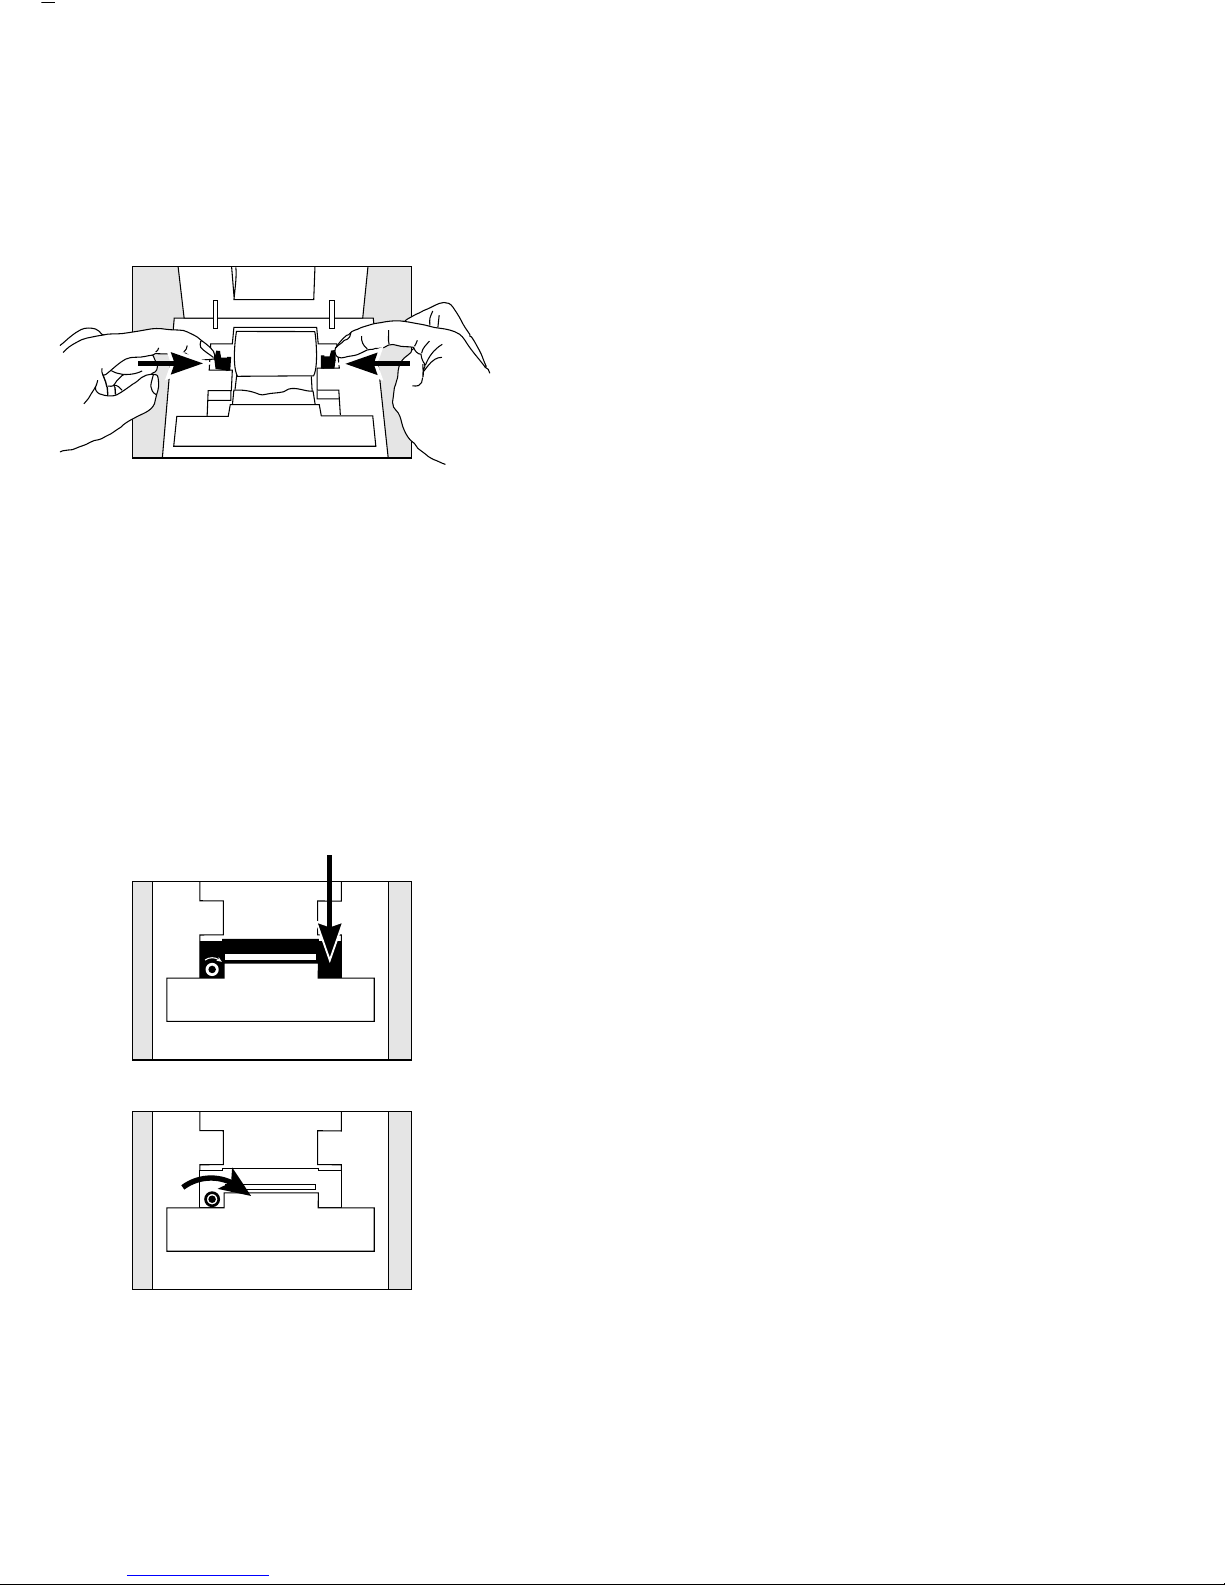
• Press down on the right side of the cassette
> The left side of the cassette will lift up
• Remove the cassette
• Insert a new ink ribbon cassette from the top
> The cassette will lock into place
••If necessary, turn the small tension wheel located
on the left in the direction of the arrow until the
ribbon is stretched taut in front of the paper
• To thread the paper,
refer to “Changing the Paper Roll”
• Lower the cover of the paper roll
compartment to close it
10

Charging the Batteries
••Charge the batteries by leaving the weighing
instrument turned on
> The batteries are charged in the standby
mode of the weighing instrument
> After 28 hours, the printer’s batteries are charged
Changing the Rechargeable Batteries
!Avoid draining the batteries excessively;
otherwise, this will reduce their recharging
capacity.
!Use only standard AA rechargeable batteries
of the following type: nickel-cadmium UM-3,
Sartorius order no. 69Y03136.
• Lift the cover of the paper roll compartment
• To open the battery compartment, tilt back
the cover
• Remove the 4 batteries
!Used batteries are hazardous waste and
must be properly disposed of according to your
local hazardous waste disposal regulations.
••If you have any questions, please contact
your local Sartorius Service Center
• Install the 4 rechargeable batteries in the
battery compartment. Make sure that the poles
match the + and – signs!!
• To close the battery compartment,
press down on the cover
• To close the paper roll compartment,
lower the cover
11

Cleaning the Data Printer
!When cleaning the data printer,
make sure that no liquid enters its housing
!Please do not use any aggressive cleaning
agents (solvents or similar agents)
• Disconnect the power supply by unplugging
the interface cable (connecting the weighing
instrument) from the rear panel of the printer
• Use cloth moistened with a mild detergent (soap)
only to wipe down the printer housing
• After cleaning, wipe down the printer with
a soft, dry piece of cloth
12

Accessories
Product Order No.
Spare paper rolls (box of 5) 6906937
Ink ribbon cassette 6906918
Set of rechargeable batteries
(4 nickel cadmium, UM-3, type AA) 69Y03136
Specifications
Designation Dimensions
Length 230 mm
Width 158 mm
Height 80 mm
Weight
(without batteries, paper roll) approx. 800 g
Operating temperature 0 to +40 °C
Storage temperature –40 to +70 °C
13

CMarking
The Cmarking affixed to the equipment indicates that the equipment meets the
requirements of the following Directive(s):
Council Directive 89/336/EEC “Electromagnetic compatibility (EMC)”
Applicable European Standards:
Limitation of emissions:
EN 50081-1 Residential, commercial and light industry
EN 50081-2 Industrial environment
Defined immunity to interference:
EN 50082-1 Residential, commercial and light industry
EN 50082-2 Industrial environment
Important Note:
The operator shall be responsible for any modifications to Sartorius equipment
and for any connections of cables or equipment not supplied by Sartorius
and must check and, if necessary, correct these modifications and connections.
On request, Sartorius will provide information on the minimum operating
specifications (in accordance with the Standards listed above for defined
immunity to interference).
Council Directive 73/23/EEC
“Electrical equipment designed for use within certain voltage limits”
Applicable European Standards:
EN 60950 Safety of information technology equipment including
electrical business equipment
EN 61010 Safety requirements for electrical equipment for measurement,
control and laboratory use
Part 1: General requirements
If you use electrical equipment in installations and under ambient conditions
requiring higher safety standards, you must comply with the provisions
as specified in the applicable regulations for installation in your country.
14

Information on Radio Frequency Interference
Warning!
This equipment generates, uses and can radiate
radio frequency energy and, if not installed and
used in accordance with the instruction manual, may
cause interference to radio communications. It has
been tested and found to comply with the limits for a
Class A computing device pursuant to Subpart J of
Part 15 of FCC Rules, which are designed to
provide reasonable protection against such
interference, when operated in a commercial
environment. Operation of this equipment in a
residential area is likely to cause interference, in
which case the user, at his own expense, will be
required to take whatever measures may be
required to correct the interference.
15
Table of contents
Other Sartorius Printer manuals

Sartorius
Sartorius YDP40 User manual

Sartorius
Sartorius YDP30 User manual

Sartorius
Sartorius YPD20-OCE User manual

Sartorius
Sartorius YDP20-0CE User manual

Sartorius
Sartorius YDP 03-0CE User manual

Sartorius
Sartorius YDP10BT-0CE User manual

Sartorius
Sartorius YDP30 User manual

Sartorius
Sartorius YDP10-0CE User manual

Sartorius
Sartorius YDP40 User manual