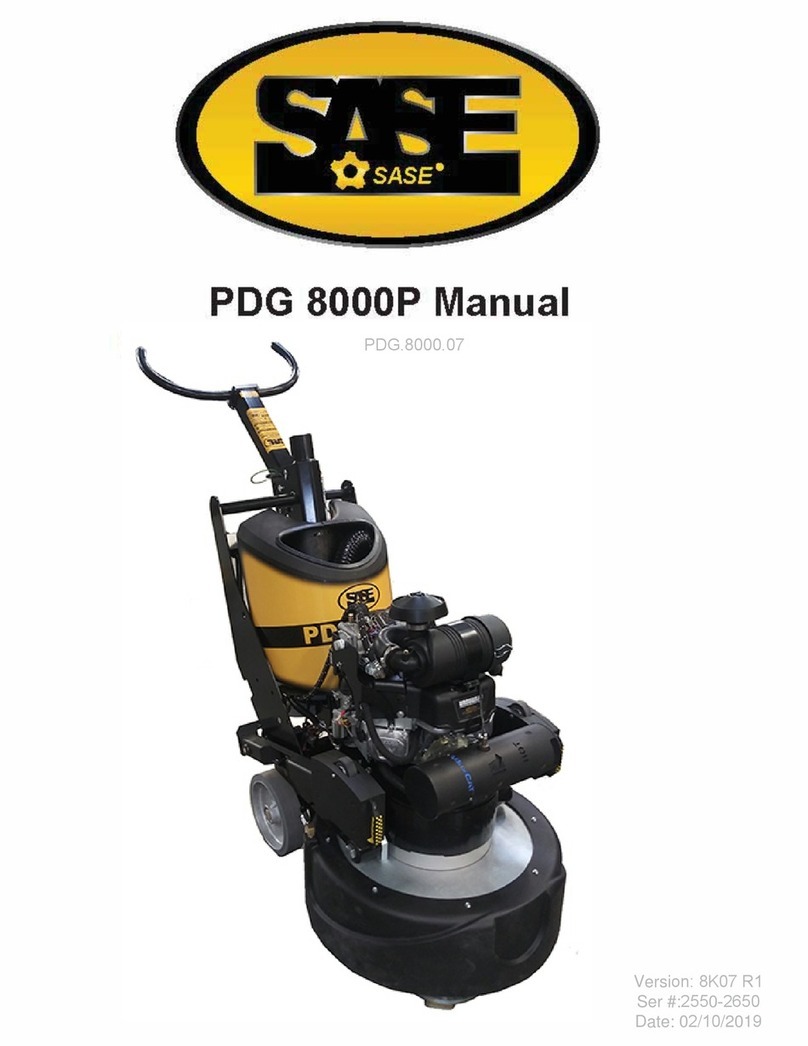
Sase PDG 6000 User manual

Version: 5.2
Machines: 1300-1500
5/10/2016


Table of Contents
Cover 1
Letter from Owner 3
Table of Contents 5
Introduction 6
Diamond Tooling 7
Changing Diamonds 8
Personal Safety 9
Diamond Tooling Quick Reference 10
Motor On Drum 12-13
Plastics & Water System 14-15
Inverter & Vac. System 16-17
Handle Assembly 18-19
Basic Frame 20-21
Step View 22-23
Complete Drum 24-25
Bottom Drum Assembly Level I 26-27
Bottom Drum Assembly Level II 28-29
Bottom Drum Assembly Level III 30-31
Top Plate Assembly 32-33
Drum Sheave Assembly 34-35
Intermediate Sheave Assembly 36-37
PTO Tensioner Assembly 38-39
Top Belt Idler Assembly 40-41
Top Tensioner Assembly 42-43
Belt Tightener 44-45
Main Belt Idler 46-47
Main Belt Spindle 48-49
Planetary Assembly 50-51
PTO Assembly 52-53
Flex Head 54-55
Tooling 56-57
Belt Paths 58
Technical Data 59-60
Troubleshooting 61-62
Warranty 63-64
CE Conformity 65

Introduction
The SASE PDG 6000 planetary diamond grinders are designed for wet or dry
grinding of marble, terrazzo, granite and concrete. Their applications range from
rough grinding through to a polished finish.
It is extremely important all users be familiar with the contents of this manual
before commencing operation of either machine. Failure to do so may result in
damage to machinery or expose operator to unnecessary dangers.
IMPORTANT
Only staff that has received the necessary training, both practically and
theoretically concerning their usage should operate the machinery.
Mechanical Action of Moving Machine Parts
Several parts of this machine are understood to be dangerous.
The Grind Head has a rotation and a counter rotation, keep body parts clear of
the moving grinder head.
The handle is heavy. Failure to lock the handle in place can result in operator
injury.
During operation, the machine has a twisting force. If you lose control of the
machine, it will walk away without you. The operator has to maintain control of
the machine. The machine moving freely can damage finished floor sections, or
wall sections. Not to mention anyone caught by the grind head could be
seriously injured.
Preventative Maintenance
Preventing the hazard is the best case scenario. Preventative Maintenance (PM)
is the responsibility of the operator.
Check and clean air filter regularly(200 operating hours)
Keep a Log Book for all service done.
Be sure that adequate vacuum system is in use.
Be aware of changes in operation, smell, noise, etc. while operating
Report to management ANY safety concerns.
Follow manufacturer recommendations for all motor maintenance.
Storage
The machine should always be stored in a cool, dry location. Moisture may upset
fragile electrical components.
Break-Down
The machine can be divided into two main parts.
1. Chassis/Frame section –This comprises the handle bars, body
panels, Propane tank, Steel frame and wheels.
2. Drum/Head –this comprises the motor, cover,
grinding/satellite/ planetary heads and internal components
The machine has been manufactured to allow movement between the chassis
and head via the connection point. This movement is important during the
grinding process as it creates a “floating” effect for the head. The floating gives
the head a self leveling effect, negating the need to adjust the height of the
head as the machine passes over floor areas with different slopes or
undulations.
Set-Up
Position the grinder in the working area. Make sure there are diamonds
underneath the machine, and that the head locks are tight.
IMPORTANT
Planetary head and grinding heads are set to turn in opposite directions of each
other.(as shown in this depiction)
When using the machine, each grinding head must always have the
same diamond type and number of diamonds as the other heads.
Each diamond must also be the same height as the next.
The Rubber skirt must be adjusted so that a good seal is established,
between the floor and the drum.
When setting the height of the handle, the operator is the guide. The comfort of
the operator during grinding is key. The handlebar should rest right at the
operator’s hip bone. When the machine is running, there will be a grinding force
to one side that can be felt through the handlebars. Use the hip to resist this
force instead of the arms.
Control Panel
The control panel consists of a number of buttons, giving 6 separate controls.
E- Stop - Brings the rotation to an abrupt halt, only in case of
emergency. Excessive use will increase motor wear. Also,
must be released(Gently twist clockwise)
Potentiometer - Controls the speed of rotation and counter rotation
simultaneously. Range: Low 1 to High 10
FWD - Starts the rotation of the drum in the 'forward' direction.
Will not work if inverter is in fault or if the E-Stop is
pressed down.
REV - Starts the rotation of the drum in the 'reverse' direction.
Will not work if inverter is in fault or if the E-Stop is
pressed down.
Stop - Brings the rotation to a gentle halt.
Reset - Reset the inverter, in case of fault. (takes a few seconds)

Determining Diamond Selection
Diamond Background
Diamond abrasives usually consist of 2 components:
Diamond powder (also known as diamond crystals or grit). By
changing the size of the diamond powder or grit, we can change how
coarse or fine the scratches will be that are left behind from the
grinding process.
A binding agent (metal or resin). Diamond powder is mixed and
suspended in either a metal or resin binding agent. When suspended
in a metal bond matrix, the finished product is referred to as a Metal
Bond or Sintered diamond segment. When suspended in a resin bond
matrix, the finished product is referred to as a Resin Bond diamond
segment or pad.
General Diamond Principles
Diamond Grit Size:
Changing the size of the diamond grit to a smaller particle/ grit size will affect the
performance of the diamond tool in the following ways:
Create a finer scratch pattern.
Increase the life of the diamond tool.
The opposite will occur when changing to a larger particle/grit size.
The Binding Agent/Metal Bond or Resin Bond:
Increasing hardness of bond will
Increase life of diamond tool.
Decrease production rate.
Cause diamond tool to leave finer scratches in dry –grinding
applications (when compared to a softer bond diamond tool with
the same diamond grit size).
A hard bond matrix should be used on a soft floor and a soft bond
matrix should be used on a hard floor.
Grinding disc set-up:
The set-up of diamond segments on the grinding heads of the machine will
influence the performance of the machine, the productivity levels and also
the finished floor quality.
There are basically two types of diamond configurations that can be used
when grinding:
1. Half set of diamonds –when there are diamonds placed at three
alternating positions on the diamond holder discs. ( See pictures on upper
right).
2. Full set of diamonds –when there are diamonds placed at each of the six
positions on the diamond holder discs. (See pictures on middle right).
Changing of Diamonds
Different applications often require different selections of diamond tooling.
There will be many occasions when the grinding discs need to be changed.
Following is a guide for this procedure.
Preparation
Press the Stop button and engage the Emergency Stop button. As an
extra precaution, you can unplug the power cord.
Change
1. Set handle in upright position.
2. Pull back on handle to lift grinding head off the ground (Above Top).
3. Lay machine back on the
ground
4. Put on gloves.
5. Remove grinding disc from
flex plate.
6. Check to ensure that all discs
are secure.
7. Once new diamonds have
been attached, reverse
procedure to lower machine
to ground.
As new diamonds may be a different height than the set being previously used,
re-adjust skirt to ensure good seal is established with the floor.
HALF-SET OF DIAMONDS
When the diamonds are set-up
as a half-set, they tend to follow
the surface of the floor. The
half-set diamond configuration
should only be used when an
extremely flat floor finish is not
required.
FULL-SET OF DIAMONDS
Diamonds that are set-up as a
full-set tend to not follow the
surface of the floor. If the
floor is wavy the machine will
grind the high areas yet miss
the low spots. The full-set
diamond configuration should
be used when a very flat floor
finish is desired.
..

Personal Safety
Please read the operator’s manual carefully and make sure you
understand the instructions before using the machine.
WARNING! Dust forms when grinding which can cause injuries if
inhaled. Use an approved breathing mask. Always provide for good
ventilation while machine is in use.
Always wear approved:
Protective helmet Hearing protection
Dust Mask Protective goggles
Non-slip boots with steel toe Protective gloves
WARNING
Under no circumstances may the machine be started without observing the
safety instructions.
At no time should lifting of machinery be attempted without
mechanical means such as a hoist or a forklift.
Should the user fail to comply with these, SASE Company Inc or its
representatives are free from all liability both directly and indirectly.
Read through these operating instructions and make sure that you understand
the contents before starting to use the machine.
Should you, after reading these safety instructions, still feel uncertain about the
safety risks involved you must not use the machine, please contact your SASE
representative for more information.
Reminder
Always check electrical source before starting.
Only qualified personnel should be allowed to operate machinery.
Never use a machine that is faulty. Carry out the checks, maintenance
and service instructions described in this manual. All repairs not
covered in this manual must be performed by a repairer nominated by
either the manufacturer or distributor.
Always wear personal safety equipment such as sturdy non-slip boots,
ear protection, dust mask and approved eye protection.
Machinery should only be started when grinding heads are resting on
the ground.
The machine should not be started without the rubber dust skirt
attached. It is essential a good seal between floor and machine be
established for safety, especially when operating in dry grinding
applications.
When changing the grinding discs ensure the unit is OFF. Press the
Stop button and when the machine is completely stopped, press the
emergency stop button. Disconnect the power cord, to add
protection.
The machine should not be lifted by handles, motor, chassis or other
parts. Transportation of the machine is best done on a pallet / skid to
which the machine must be firmly secured.
Extreme caution must be used when moving machinery by hand on an
inclined plane. Even the slightest slope can cause forces/ momentum
making the machinery impossible to brake manually.
Never use the machine if you are tired, if you have consumed any
alcohol, or if you are taking medication that could affect your vision,
your judgment or your coordination.
Never use a machine that has been modified in any way from its
original specification.
Be on your guard for electrical shocks. Avoid having body contact with
lightning conductors/metal in the ground.

Transportation
The machine comes equipped with an electronic system called a variable speed
drive or a frequency converter. The drive enables the variable speed and
direction component of the motor.
The drive is located in the steel cabinet mounted on the machine chassis. As with
all electronic equipment, the drives are sensitive to excessive vibration, rough
treatment and high levels of dust. Much care and attention has been given by
SASE to ensure maximum protection is given to the drive.
When transporting, it is important to ensure the machinery is properly secured at
all times to eliminate “bouncing”. Ensure the chassis or frame section of the
machine is secured down at all times when in transit.
The machine should always be transported under cover limiting the exposed to
natural elements –in particular rain and snow. The machine should not be lifted
by handle, motor, chassis or other parts.
Transportation of the machine is best done on a pallet/skid to which the machine
must be firmly secured. Do not attempt to slide the tines/forks from a fork lift
under grinding heads unless on a pallet/skid. Failure to do so can cause extreme
damage to grinding heads of machine and internal parts.
IMPORTANT
It is recommended that machinery be transported with a set of diamonds
attached at all times to ensure protection of locking mechanism for diamond
plates.
Speed
The grinding speed should start low and increase as the operator becomes more
comfortable with the application. Be sure that the RPM’s do not exceed 2000
when starting and stopping the drum rotation. The machine should be running
and the drum rotating before speed selection is fine tuned.
Safety Hazards
Before using the equipment, inspect electrical lines, and connections. Make sure
the machine is in good working order. Electrical shock from a split wire could be
fatal.
Check that the cord and extension cord are intact and in good
condition.
Never use the machine if the cord is damaged, hand it in to an
authorized service workshop for repair.
Do not use a rolled up extension cord.
Electrical cords must not exceed 200ft in length.
The machine should be connected to an earthed outlet socket.
Check that the mains voltage corresponds with that stated on the
rating plate on the machine.
Ensure the cord is behind you when you start to use the machine so
that the cord will not be damaged.
WARNING HIGH VOLTAGE!
Inspection and/or maintenance should be carried out with the motor switched
off and the plug disconnected.
This product is in accordance
with applicable EU directives.


1
23
45
6 7
8
11 10
12
9 13
14
15
Take Note:
The PDG6000 can not be built like this yet. The drum
and frame must be joined before the motor can be
lowered into place.
SHEET 2 OF 2
SCALE: 1:1
WEIGHT:
5
4
3
2
1
PDG 6000
Motor on Drum

Item No. Part No. Description Qty.
1 NB.12.266 SCREW, SOCKET HEAD CAP M14-2.0 X 40 ZINC 4
2 HOL.U11898 MOTOR, 535 230-460V 10KW 50-60HZ 1
3 NB.60.108 LUG, TERMINAL 8 AWG #10 STUD 4
4 NB.70.108 KEY, PARALLEL 1
5 PDG.60063.00 COUPLER, CJ28/38 LOVEJOY 1
6 PDG.60064.00 SPIDER, CJ28/38 GEAR 1
7 PDG.60077.01 SPACER, MOTOR 1
8 PDG.60048.25 GASKET, MOTOR, RUBBER 1
9 PDG.60210.00 DRUM, COMPLETE 1
10 PDG.60038.00 SHROUD, MOLDED VACUUM 1
11 NB.11.108 SCREW, FLANGED SOCKET HEAD CAP M6x16mm 8
12 PDG.60062.00 SHIELD, RUBBER DUST 1
13 PDG.6A010.00 FLEX HEAD, COMPLETE WITH BLUE SPRINGS 3
14 NB.30.212 WASHER, LOCK M8 ZINC 9
15 NB.10.218 SCREW, SOCKET HEAD CAP M8-1.25 X 25 12.9 ZINC 9
Motor on Drum

D
3isusedtofasten
4&5to1&2
hereoneachside.
1
2
6
7
8
6isinsertedinthetwoholes
ineachhalfshell(1&2).7is
thenfastenedto1&2with8.
21
F
12
13
14
3
4
5
G
2020
H
9
15
16
15
17
18
19
22
L
10
11
TheTankHookAssembly
(3/4/5/10/11)
fastens9to1&2
SHEET 1 OF 1
SCALE: 1:25
WEIGHT: 90.38kg
5
4
3
2
1
PDG 6000
Plastics & Water System

Item No. Part No. Description Qty.
1 PDG.60042.00 SHELL, RIGHT HAND 1
2 PDG.60043.00 SHELL, LEFT HAND 1
3 NB.40.116 RING, EXTERNAL RETAINING 5/8' 18-8 SS SPIRAL 2
4 NB.91.101 SPRING, EXTENTION 0.375 X 0.0475 X 2.25 2
5 PDG.20282.00 HOOK, SPRING 2
6 NB.20.140 NUT, SLOT BODIED RIVET M6 4
7 PDG.60078.50 COVER, HALF SHELL 1
8 NB.11.112 SCREW, FLANGED HEX HEAD CAP M6-1.0 X 30 NON-SERRATED ZINC 4
9 PDG.60041.00 TANK, WATER 1
10 PDG.20283.00 HOOK, RING 2
11 NB.47.120 RIVET, BLIND 1/8 DIA 0.313 L 4
12 NB.11.904 SCREW, FLANGED HEX HEAD CAP M8-1.25 X 40 10.9 ZINC 2
13 PDG.60079.00 SPACER, PLASTIC FIT 2
14 NB.11.121 SCREW, FLANGED HEX HEAD CAP M8-1.25 X 16 NON-SERRATED ZINC 2
15 PDG.20246.00 FITTING, PUSH TO CONNECT 3/8 X 1/4 4
16 PDG.20262.00 TUBING, WATER 3/8 INCH OD 4.5 ft
17 PDG.20247.00 VALVE, 1/4 BALL 2
18 PDG.20268.00 ELBOW, BRASS FEMALE 1/4 NPT X 1/4 NPT 2
19 PDG.20267.00 NIPPLE, 1/4" X CLOSE GALV /PDG5K PDG6K PDG8K 2
20 PDG.60075.00 DECAL, SET 1
21 PDG.20395.00 ADAPTER, USB CHARGER (NOT DISPLAYED) (SEE ARROW FOR #2) 1
Plastics & Water System
USB PORT added 5/15/2015 with serial number 05150992

3 4 5 6
5
1
22
8 97
10
11
12
13
14
15
16
17
SHEET 1 OF 1
SCALE1:8
WEIGHT: 69.28kg
5
4
3
2
1
PDG 6000
Inverter & Vac System

Item No. Part No. Description Qty.
1 PDG.60201.00 DRIVE, WITH ENCLOSURE 10HP 460V COMPLETE 1
2 NB.13.116 SCREW, FLAT HEAD SOCKET CAP M6 -1.0 X 20 4
3 WVAC.10.113 COUPLER, PLASTIC FEMALE FOR 3" VAC HOSE PART C 1
4 VAC.10.111 COUPLER, PLASTIC MALE FOR 3" VAC HOSE PART E 1
5 VAC.10.095 CLAMP, 3" BLACK PDG VACUUM HOSE 2
6 WVAC.HS3.00060 HOSE, 3" CLEAR WITH YELLOW STRIPE 6ft
7 PDG.80080.00 WHIP, MOTOR KIT 4 WIRE 8 AWG COMPLETE 0
8 795.00.06 3/4" W/R BLACK SLRN21(Used on Inverter to Motor Wiring) 1
9 NB.20.145 NUT, 3/4" NYLON CONDUIT LOCK(Not shown) 1
10 WSAS.CS.8165C TWISTLOCK 50A 480V 3P MALE(Not shown) 1
11 PDG.20242.00 CORD, GRIP (Not shown) 1
12 AIW.10X4.CRD CORD, POWER 10/4 60ft
13 WSAS.CS.8164C TWISTLOCK 50A 480V 3P FEMALE(Not shown) 1
14 PDG.60045.00 WEIGHT, BALLAST 2
15 PDG.20244.00 EYE, LIFTING 2
16 PDG.20239.00 FILTER, INLET FINE ELECTRICAL BOX (Right) 1
17 PDG.20239.01 FILTER, OUTLET COARSE ELECTRICAL BOX (Left) 1
1 PDG.60200.00 DRIVE, WITH ENCLOSURE 10HP 230V COMPLETE 1
10 WSAS.CS.8365C TWISTLOCK 50A 230V 3P MALE(Not shown) 1
13 WSAS.CS.8364C TWISTLOCK 50A 230V 3P FEMALE(Not shown) 1
Inverter & Vacuum System
Inverter Box, Fan Filters: Need to be washed or replaced every 100 operation hours.
Low Voltage

16
17
1
7
10
8
9
1212
11
14
15
13
6
5
4
3
25 21
22
24
2
18
19 20
23
Handle Assembly
SHEET 1 OF 1
SCALE: 1:6
WEIGHT: 18.6kg
TITLE:
5
4
3
2
1

Item No. Part No. Description Qty.
1 PDG.20225.00 STEM, HANDLE 1
2 NB.30.129 WASHER, WAVEY 1
3 PDG.20229.00 ACTUATOR, STEM LOCK 1
4 PDG.20228.00 LOCK, HANDLE STEM 1
5 PDG.20230.00 COVER, HANDLE STEM 1
6NB.12.219 SCREW, SOCKET HEAD CAP M8-1.25 X 25 12.9 ZINC 3
7 NB.30.111 WASHER, FLAT M8 ZINC 1
8 NB.70.110 KEY, PARALLEL M5 X 20 1
9 PDG.20227.00 HANDLE, STEM LOCK LEVER 1
10 NB.16.119 SCREW, BUTTON HEAD SOCKET CAP M8-1.25 X 12 1
11 PDG.20226.00 CAP, HANDLE STEM 1
12 NB.12.235 SCREW, SOCKET HEAD CAP M10-1.5 X 20 12.9 ZINC 6
13 PDG.20026.00 PANEL, COMPLETE INTERFACE NO DISPLAY V2 1
14 NB.11.107 SCREW, FLANGED SOCKET HEAD CAP M4-0.70 X 8 ZINC 4
15 PDG.20271.00 WRAP, 1/2" SPIRAL CORD (Not Shown) 2ft
16 PDG.20232.00 BAR, HANDLE 1
17 NB.20.135 NUT, SHAFT KM8 M40-1.5 ZINC 1
18 PDG.20238.00 WRENCH, HANDLE BAR SPANNER 1
19 NB.16.117 SCREW, BUTTON HEAD SOCKET M6 X 8 1
20 NB.51.201 Zip Tie Mount 1
21 PDG.20110.00 Vacuum Hose Hanger 1
22 NB.12.108 M6x12 Socket Head Bolt 4
23 795.00.12 Zip Tie (mounts to #20, fastens #13 wires) 1
24 PDG.20296.00 SPRING, COMPRESSION (located behind #4 inside handle) 1
25 NB.30.121 WASHER, BELLEVILLE (located between #1 and #9 cone pointed to #9) 1
SETTING HANDLE POSITION:
Handle Assembly
Using the provided spanner wrench, turn the nut counter-clockwise to remove completely. Place nut on opposite of handle stem, draw the
handle taper out by turning the nut clockwise against the handle stem.
To tighten the handle, put the nut on the original side of the handle and draw the taper back into the stem by turning the nut clockwise
against the handle stem.

6
8
4 5
7
8
3
2
9
11
10
1
ITEM NO.
PART NUMBER
DESCRIPTION
Frame Display/QTY.
1
B18.3.1M - 12 x 1.75
x 35 Hex SHCS --
35NHX
4
2
100-60040-00
Carriage
1
3
HBOLT 1.0000-
8x7x2.5-N
2
4
HNUT 1.0000-8-D-N
2
5
Metaxentric 13-
1270-50
Metaxentric
2
6
100-80059-00
Tilt Step Stop
1
7
92981A402
M12x16 Socket Head Shoulder
Bolt
2
7
B18.3.1M - 12 x 1.75
x 25 Hex SHCS --
25NHX
2
1
200-80047-00
1
7
B18.2.4.6M - Heavy
hex nut, M12 x 1.75
--W-N
2
11
PDG.20236.00
Gas Spring
1
12
PDG.20236.00
Gas Spring
1
16
95263A346
2
9
100-00111-00
Axle Bushing
4
15
300-60044-00
Vertical Frame Member
1
16
10inch Blickle
Wheel Wheel
2
17
300-60048-00
Tilt Assist Step 6k
2
18
4138T516
Gas Spring Pin
2
19
NB.10.118
5/8-11x3.5"
2
SHEET 1 OF 1
SCALE: 1:8
WEIGHT: 69.28kg
5
4
3
2
1
PDG 6000
Basic Frame
Other manuals for PDG 6000
1
Table of contents
Other Sase Grinder manuals