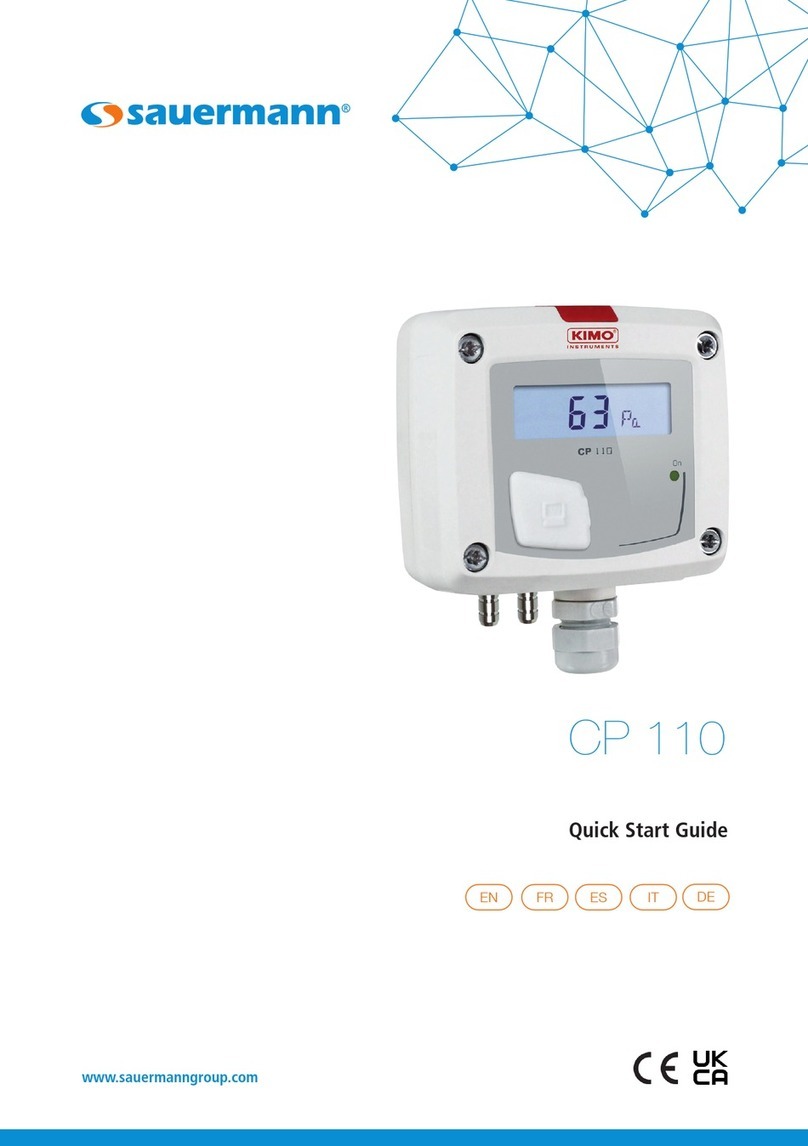
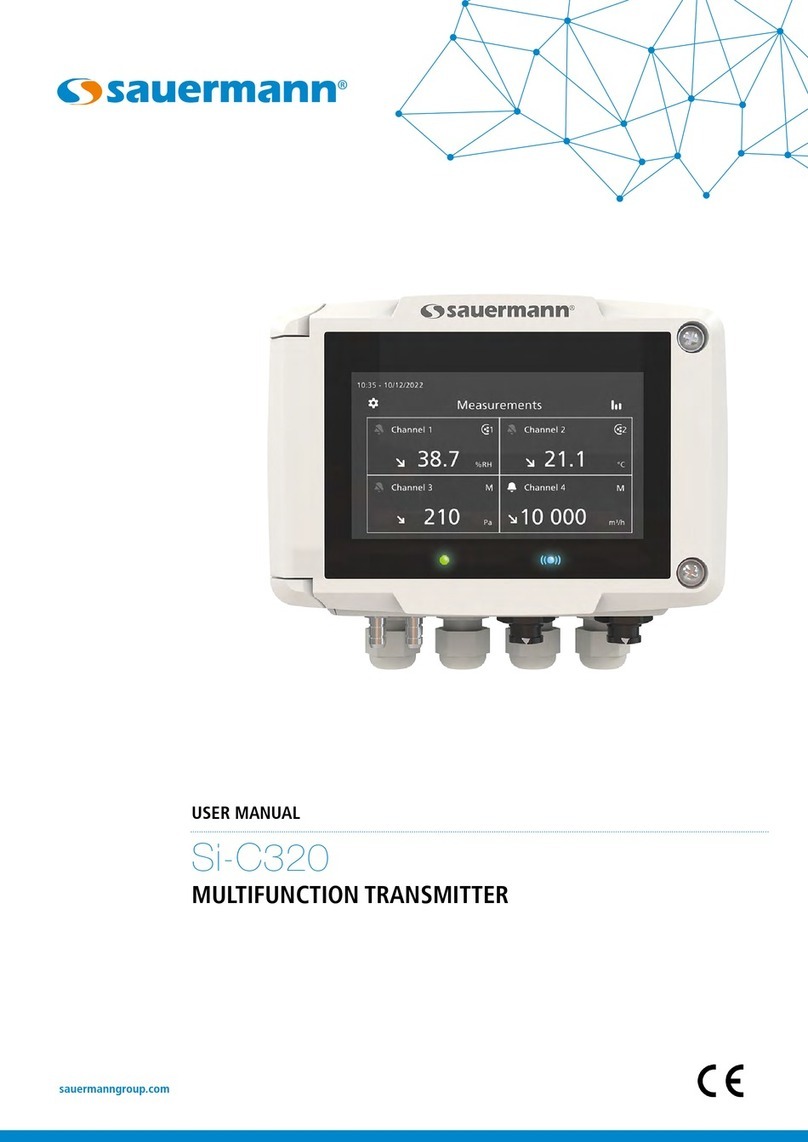
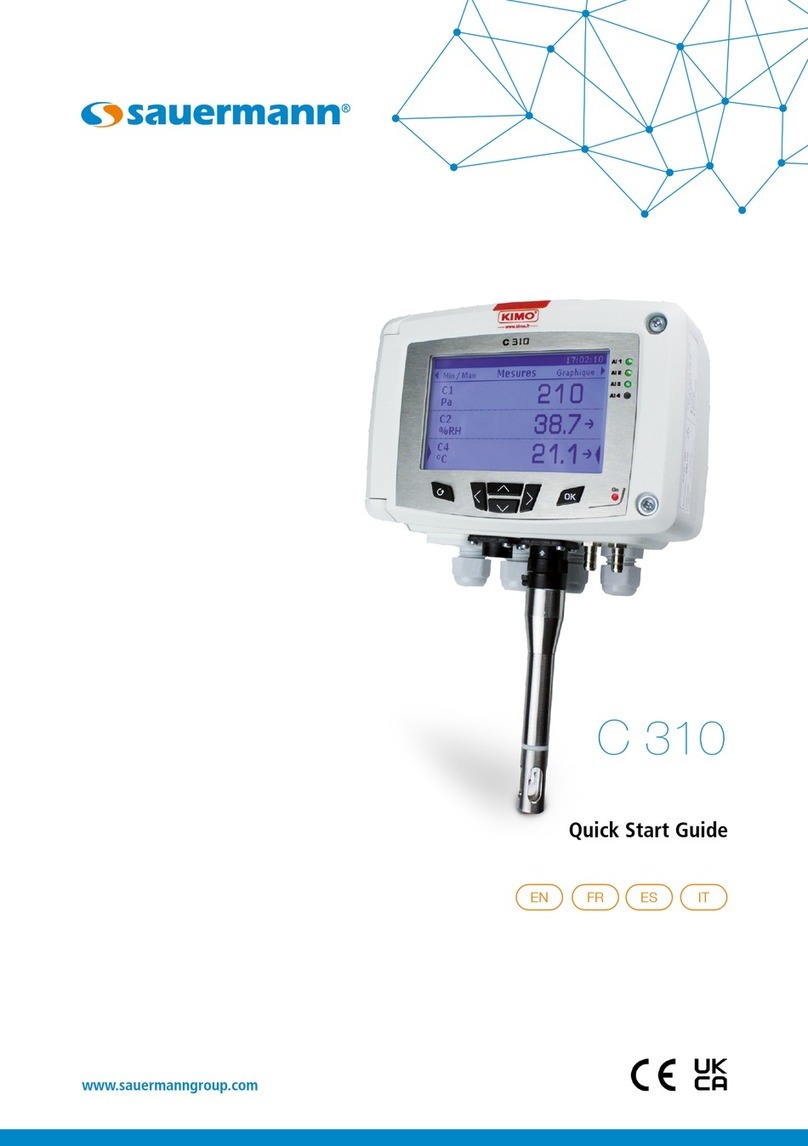
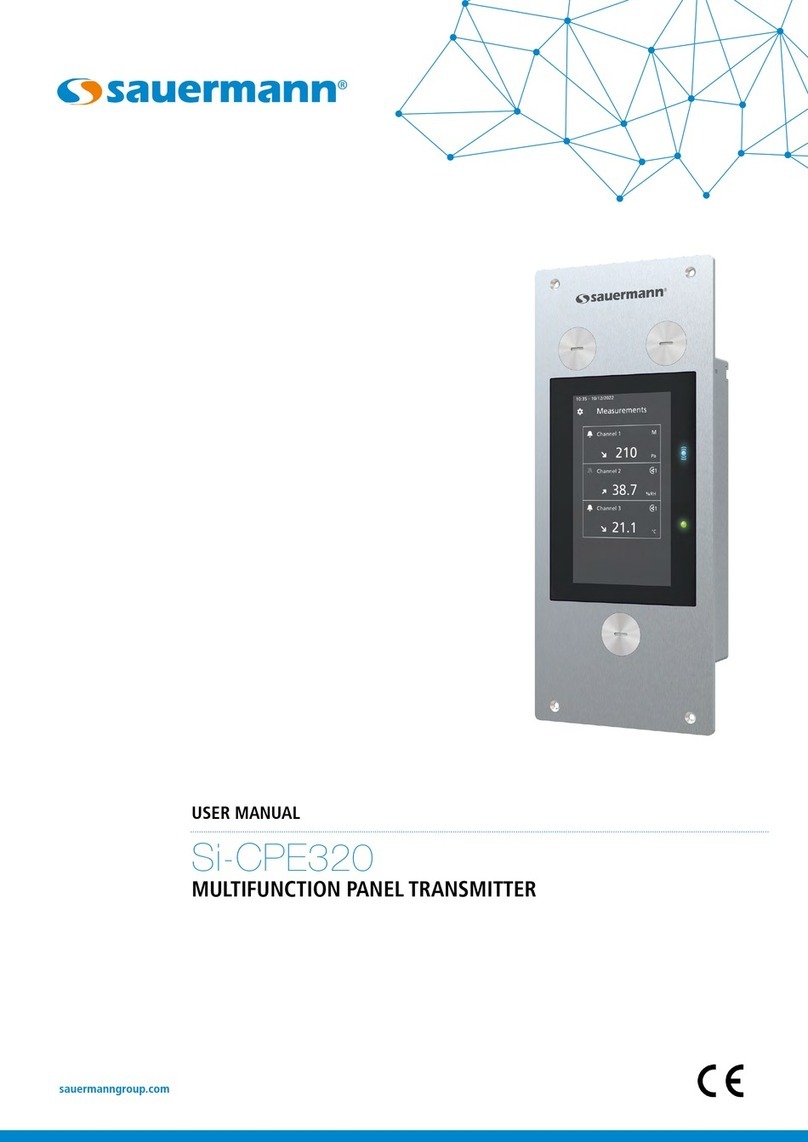
sauermann TM 110 User manual

English Quick Start Guide
Temperature transmitter
Operating temperature, protection of the instruments and information about storage
Conditions of use (°C/%RH/m): from 0 to +50 °C; in non-condensing conditions. From 0 to 2000 m.
Protection: IP65(2) or IP20(1)
Storage temperature: from -10 to +70 °C.
Dimensions
Electrical connections as per NFC15-100 standard
Symbols used
For your safety and in order to avoid any damage of the device, please follow the procedure described in
this document and read carefully the notes preceded by the following symbol:
The following symbol will also be used in this document, please read carefully the information notes
indicated after this symbol:
Connections
(1) Ambient model / (2) Duct and air tight models, model with terminal block and piping contact model / (3) Several probes available in option
112 mm
90 mm
41 mm
80 mm
46 mm 90 mm
109 mm
46 mm
Ø6 mm
90 mm
90 mm
46 mm 90 mm
109 mm
46 mm
109 mm
109 mm
112 mm
90 mm
41 mm
80 mm
46 mm 90 mm
109 mm
46 mm
Ø6 mm
90 mm
90 mm
46 mm 90 mm
109 mm
46 mm
109 mm
109 mm
112 mm
90 mm
41 mm
80 mm
46 mm 90 mm
109 mm
46 mm
Ø13 mm
150 mm
150 mm
Ø6 mm
90 mm
90 mm
46 mm 90 mm
109 mm
46 mm
109 mm
109 mm
Ambient model
Model with terminal block(3) Air tight model
112 mm
90 mm
41 mm
80 mm
46 mm 90 mm
109 mm
46 mm
Ø6 mm
90 mm
90 mm
46 mm 90 mm
109 mm
46 mm
109 mm
109 mm
Duct model, stainless steel probe(2)
Stainless steel probe technical
specications (duct model): Ø6 mm
contact tip; available lengths: 100 mm,
150mm, 200 mm, 250 mm or 300 mm.
Inside the front housing
1. Terminal block (only for model with
terminal block)
2. Switch
3. LCC-S software connection
4. Output terminal block
5. Power supply terminal block
6. Cable gland
1
2
Removable front face Fixed back housing
3
6
5
4
+
-
12 3 4 5 6 7
- +- +
Alimentation 24 Vdc
+
-
V
automate type passif ou
GND VT GND VT
Vdc
IT
1 23 45 6 7
1 2 2’
N L
6 7
N L
ou
ou
- +- +
+
-
Vdc
IT
+
-
+
+
-
... 5 6 7
Alimentation
24 Vdc
Alimentation 24 Vac
Classe II
+-
Alimentation 16-30 Vdc
autonome de type passif
A
+
-
... 5 6 7
autonome de type actif
A16-30 Vdc
automate type passif
+-
V
N L
4 5 6 7
N
L
Alimentation 24 Vac
Classe II
GND VT
- +
+
-
12 3 4 5 6 7
- +- +
Alimentación 24 Vdc
+
-
V
o
GND VT GND VT
Vdc
IT
1 23 45 6 7
1 2 2’
N L
6 7
N L
o
o
- +- +
+
-
Vdc
IT
+
-
+
+
-
... 5 6 7
Alimentación
24 Vdc
Alimentación 24 Vac
Clase II
+-
Alimentación 16-30 Vdc
A
+
-
... 5 6 7
A16-30 Vdc
+-
V
N L
4 5 6 7
N
L
Alimentación 24 Vac
Clase II
GND VT
- +
4 hilos
Regulador/PLC/BMS
TIPO PASIVO
4 hilos
Regulador/PLC/BMS
TIPO PASIVO
3 hilos
3 hilos
2 hilos
2 hilos
Regulador/PLC/BMS
TIPO PASIVO
Regulador/PLC/BMS
TIPO PASIVO
2 hilos
-
+
-
3 wires
1 2 3 4 5 6 7
- +- +
Power supply 24 Vdc
+
-
V
Display/regulator/PLC
passive type or
GND VT GND VT
Vdc
IT
1 2 3 4 5 6 7
1 2 2’
4 wires
N L
6 7
N L
or
or
- +- +
+
-
Vdc
IT
+
-
+
+
-
... 5 6 7
Power supply
24 Vdc
Power supply 24 Vac
Classe II
+-
4 wires 3 wires
2 wires
Power supply 16-30 Vdc
Display / regulator /
PLC passive type
A
+
-
... 5 6 7
Display/regulator/PLC
active type
A
2 wires 2 wires
16-30 Vdc
Display/regulator/PLC
passive type
+-
V
N L
4 5 6 7
N L
Power supply 24 Vac
Classe II
GND VT
- +
For TM110 – PO and TM110 – PN models
with 4-20 mA output – passive:
This connection must be made by a qualied and trained technician. To make the connection, the
transmitter MUST NOT BE ENERGIZED.
For TM110 – AO and TM110 – AN models with
0-10 V output – active, 4 wires:
To make a 3-wire connection, BEFORE POWERING
UP THE TRANSMITTER please connect the output
ground to the input ground. See drawing below.
+
-
3 wires
1 2 3 4 5 6 7
- +- +
Power supply 24 Vdc
+
-
V
Display/regulator/PLC
passive type or
GND VT
GND VT
Vdc
IT
1 2 3 4 5 6 7
1 2 2’
4 wires
N L
6 7
N L
or
or
- +- +
+
-
Vdc
IT
+
-
+
+
-
... 5 6 7
Power supply
24 Vdc
Power supply 24 Vac
Classe II
+-
4 wires
3 wires
2 wires
Power supply 16-30 Vdc
Display / regulator /
PLC passive type
A
+
-
... 5 6 7
Display/regulator/PLC
active type
A
2 ls 2 wires
16-30 Vdc
Display/regulator/PLC
passive type
+-
V
N L
4 5 6 7
N L
Power supply 24 Vac
Classe II
GND VT
- +
+
-
3 wires
1 2 3 4 5 6 7
- +- +
Power supply 24 Vdc
+
-
V
Display/regulator/PLC
passive type or
GND VT
GND VT
Vdc
IT
1 2 3 4 5 6 7
1 2 2’
4 wires
N L
6 7
N L
or
or
- +- +
+
-
Vdc
IT
+
-
+
+
-
... 5 6 7
Power supply
24 Vdc
Power supply 24 Vac
Classe II
+-
4 wires
3 wires
2 wires
Power supply 16-30 Vdc
Display / regulator /
PLC passive type
A
+
-
... 5 6 7
Display/regulator/PLC
active type
A
2 ls 2 wires
16-30 Vdc
Display/regulator/PLC
passive type
+-
V
N L
4 5 6 7
N
L
Power supply 24 Vac
Classe II
GND VT
- +
Settings and use of the transmitter
Conguration
CAUTION: the transmitter MUST NOT BE ENERGIZED
before a conguration. Then, proceed to the
required settings, with the DIP switches (as shown
on the drawings hereafter). Once the transmitter
congured, it can be powered up.
To congure the transmitter, unscrew the 4 screws of the casing
then open it.
The switches allowing the different settings are accessible.
1
2
3
4
Off On
Measuring range
setting
Unit of measurement
setting
On-off switch
Connection of a Pt100 probe
on terminal block Warning: if a 2-wire Pt100 probe is used,
carry out a shunt between 2 and 2’.
+
-
12 3 4 5 6 7
- +- +
Alimentation 24 Vdc
+
-
V
automate type passif ou
GND VT GND VT
Vdc
IT
1 23 45 6 7
1 2 2’
N L
6 7
N L
ou
ou
- +- +
+
-
Vdc
IT
+
-
+
+
-
... 5 6 7
Alimentation
24 Vdc
Alimentation 24 Vac
Classe II
+-
Alimentation 16-30 Vdc
autonome de type passif
A
+
-
... 5 6 7
autonome de type actif
A16-30 Vdc
automate type passif
+-
V
N L
4 5 6 7
N
L
Alimentation 24 Vac
Classe II
GND VT
- +
+
-
12 3 4 5 6 7
- +- +
Alimentación 24 Vdc
+
-
V
o
GND VT GND VT
Vdc
IT
1 23 45 6 7
1 2 2’
N L
6 7
N L
o
o
- +- +
+
-
Vdc
IT
+
-
+
+
-
... 5 6 7
Alimentación
24 Vdc
Alimentación 24 Vac
Clase II
+-
Alimentación 16-30 Vdc
A
+
-
... 5 6 7
A16-30 Vdc
+-
V
N L
4 5 6 7
N
L
Alimentación 24 Vac
Clase II
GND VT
- +
4 hilos
Regulador/PLC/BMS
TIPO PASIVO
4 hilos
Regulador/PLC/BMS
TIPO PASIVO
3 hilos
3 hilos
2 hilos
2 hilos
Regulador/PLC/BMS
TIPO PASIVO
Regulador/PLC/BMS
TIPO PASIVO
2 hilos
-
+
-
3 wires
1 2 3 4 5 6 7
- +- +
Power supply 24 Vdc
+
-
V
Display/regulator/PLC
passive type or
GND VT GND VT
Vdc
IT
1 2 3 4 5 6 7
1 2 2’
4 wires
N L
6 7
N L
or
or
- +- +
+
-
Vdc
IT
+
-
+
+
-
... 5 6 7
Power supply
24 Vdc
Power supply 24 Vac
Classe II
+-
4 wires 3 wires
2 wires
Power supply 16-30 Vdc
Display / regulator /
PLC passive type
A
+
-
... 5 6 7
Display/regulator/PLC
active type
A
2 wires 2 wires
16-30 Vdc
Display/regulator/PLC
passive type
+-
V
N L
4 5 6 7
N L
Power supply 24 Vac
Classe II
GND VT
- +
Measuring probe

Maintenance: please avoid any aggressive
solvent. Please protect the transmitter
and its probes from any cleaning product
containing formalin, that may be used for
cleaning rooms or ducts.
Precautions for use: please always use the device
in accordance with its intended use and within
parameters described in the technical features in order
not to compromise the protection ensured by the
device.
Français Guide rapide
Congurations From 0 to +50 °C From -20 to +80 °C From -50 to +50 °C From 0 to +100 °C From 0 to +200 °C From 0 to +400 °C
Combinations
1
2
3
4
1
2
3
4
1
2
3
4
1
2
3
4
1
2
3
4
1
2
3
4
Measuring range setting
Unit of measurement setting
To set a measuring range, put the switches 1, 2 and 3 of the measuring
ranges as shown in the following table.
Congurations °C °F
Combinations
To set the unit of measurement, put the on-off switch
4 as shown in the following table.
1
2
3
4
1
2
3
4
PC conguration
1
2
3
4
1
2
3
4
Conguration via LCC-S software (option)
An easy and friendly conguration with the software!
It is possible to congure intermediate ranges.
The minimum difference between the high range and the
low range is 20.
Example: for a 0-100 °C transmitter, the minimum delta of the range is
20 °C. It is then possible to congure the transmitter from 0 to +100 °C,
or from 0 to +20 °C, etc.
To access the conguration via software:
Set the DIP switches as shown beside.
Connect the cable of the LCC-S to the connection of the transmitter.
The conguration of the parameters can be done either with the
DIP switch or via software (you can not combine both solutions).
Left switch Right switch
Please refer to the
optional LCC-S
software to make the
conguration.
Mounting
To install the transmitter, mount the ABS plate
on the wall (drilling: Ø6 mm, screws and pins are
supplied).
Insert the transmitter on the xing plate (see A
on the drawing beside). Rotate the housing in
clockwise direction until you hear a “click” which
conrms that the transmitter is correctly installed.
The mounting plate is not available
for ambient models. 4 xing holes inside
the back housing can be used to install the
transmitter on the required location. 7.5 mm
8 mm
4.5 mm
40 mm
50 mm
68 mm
75 mm
37.5 mm
23.75 mm
14 mm
A
A
Capteur / transmetteur de
température
Température d'utilisation, protection des instruments et information sur le stockage
Conditions d'utilisation (°C/%HR/m) : de 0 à +50 °C; en conditions de non condensation. De 0 à 2000 m.
Indice de protection : IP65(2) ou IP20(1)
Storage temperature: from -10 to +70 °C.
Dimensions
Symboles utilisés
Pour votre sécurité et an d’éviter tout endommagement de l’appareil, veuillez suivre la procédure décrite
dans ce document et lire attentivement les notes précédées du symbole suivant :
Le symbole suivant sera également utilisé dans ce document. Veuillez lire attentivement les notes
d’informations indiquées après ce symbole.
Connectiques
(1) Modèle ambiant / (2) Modèles arrière, étanche avec bornier et contact tuyauterie / (3) Différentes sondes disponibles en option
112 mm
90 mm
41 mm
80 mm
46 mm 90 mm
109 mm
46 mm
Ø6 mm
90 mm
90 mm
46 mm 90 mm
109 mm
46 mm
109 mm
109 mm
112 mm
90 mm
41 mm
80 mm
46 mm 90 mm
109 mm
46 mm
Ø6 mm
90 mm
90 mm
46 mm 90 mm
109 mm
46 mm
109 mm
109 mm
112 mm
90 mm
41 mm
80 mm
46 mm 90 mm
109 mm
46 mm
Ø13 mm
150 mm
150 mm
Ø6 mm
90 mm
90 mm
46 mm 90 mm
109 mm
46 mm
109 mm
109 mm
Modèle ambiant
Modèle avec bornier(3) Modèle étanche
112 mm
90 mm
41 mm
80 mm
46 mm 90 mm
109 mm
46 mm
Ø6 mm
90 mm
90 mm
46 mm 90 mm
109 mm
46 mm
109 mm
109 mm
Modèle arrière inox(2)
Spécications de la sonde (modèle
arrière inox) : plongeur Ø6 mm ;
longueurs disponibles : 100 mm, 150 mm,
200 mm, 250 mm ou 300 mm.
Intérieur de la coque avant
1. Bornier (uniquement modèle avec
bornier)
2. Switch
3. Connexion Logiciel LCC-S
4. Bornier de sortie
5. Bornier d’alimentation
6. Presse-étoupe
1
2
Face avant mobile Boîter arrière xe
3
6
5
4
Raccordement d’une sonde
Pt100 sur bornier ATTENTION : en cas de sondes 2 ls,
effectuer un shunt entre 2 et 2’.
+
-
12 3 4 5 6 7
- +- +
Alimentation 24 Vdc
+
-
V
automate type passif ou
GND VT GND VT
Vdc
IT
1 23 45 6 7
1 2 2’
N L
6 7
N L
ou
ou
- +- +
+
-
Vdc
IT
+
-
+
+
-
... 5 6 7
Alimentation
24 Vdc
Alimentation 24 Vac
Classe II
+-
Alimentation 16-30 Vdc
autonome de type passif
A
+
-
... 5 6 7
autonome de type actif
A16-30 Vdc
automate type passif
+-
V
N L
4 5 6 7
N
L
Alimentation 24 Vac
Classe II
GND VT
- +
+
-
12 3 4 5 6 7
- +- +
Alimentación 24 Vdc
+
-
V
o
GND VT GND VT
Vdc
IT
1 23 45 6 7
1 2 2’
N L
6 7
N L
o
o
- +- +
+
-
Vdc
IT
+
-
+
+
-
... 5 6 7
Alimentación
24 Vdc
Alimentación 24 Vac
Clase II
+-
Alimentación 16-30 Vdc
A
+
-
... 5 6 7
A16-30 Vdc
+-
V
N L
4 5 6 7
N
L
Alimentación 24 Vac
Clase II
GND VT
- +
4 hilos
Regulador/PLC/BMS
TIPO PASIVO
4 hilos
Regulador/PLC/BMS
TIPO PASIVO
3 hilos
3 hilos
2 hilos
2 hilos
Regulador/PLC/BMS
TIPO PASIVO
Regulador/PLC/BMS
TIPO PASIVO
2 hilos
-
+
-
3 wires
1 2 3 4 5 6 7
- +- +
Power supply 24 Vdc
+
-
V
Display/regulator/PLC
passive type or
GND VT GND VT
Vdc
IT
1 2 3 4 5 6 7
1 2 2’
4 wires
N L
6 7
N L
or
or
- +- +
+
-
Vdc
IT
+
-
+
+
-
... 5 6 7
Power supply
24 Vdc
Power supply 24 Vac
Classe II
+-
4 wires 3 wires
2 wires
Power supply 16-30 Vdc
Display / regulator /
PLC passive type
A
+
-
... 5 6 7
Display/regulator/PLC
active type
A
2 wires 2 wires
16-30 Vdc
Display/regulator/PLC
passive type
+-
V
N L
4 5 6 7
N L
Power supply 24 Vac
Classe II
GND VT
- +
Sonde de mesure

Raccordements électriques suivant normes NFC15-100
+
-
12 3 4 5 6 7
- +- +
Alimentation 24 Vdc
+
-
V
automate type passif ou
GND VT GND VT
Vdc
IT
1 23 45 6 7
1 2 2’
N L
6 7
N L
ou
ou
- +- +
+
-
Vdc
IT
+
-
+
+
-
... 5 6 7
Alimentation
24 Vdc
Alimentation 24 Vac
Classe II
+-
Alimentation 16-30 Vdc
autonome de type passif
A
+
-
... 5 6 7
autonome de type actif
A16-30 Vdc
automate type passif
+-
V
N L
4 5 6 7
N
L
Alimentation 24 Vac
Classe II
GND VT
- +
+
-
12 3 4 5 6 7
- +- +
Alimentación 24 Vdc
+
-
V
o
GND VT GND VT
Vdc
IT
1 23 45 6 7
1 2 2’
N L
6 7
N L
o
o
- +- +
+
-
Vdc
IT
+
-
+
+
-
... 5 6 7
Alimentación
24 Vdc
Alimentación 24 Vac
Clase II
+-
Alimentación 16-30 Vdc
A
+
-
... 5 6 7
A16-30 Vdc
+-
V
N L
4 5 6 7
N
L
Alimentación 24 Vac
Clase II
GND VT
- +
4 hilos
Regulador/PLC/BMS
TIPO PASIVO
4 hilos
Regulador/PLC/BMS
TIPO PASIVO
3 hilos
3 hilos
2 hilos
2 hilos
Regulador/PLC/BMS
TIPO PASIVO
Regulador/PLC/BMS
TIPO PASIVO
2 hilos
-
+
-
3 wires
1 2 3 4 5 6 7
- +- +
Power supply 24 Vdc
+
-
V
Display/regulator/PLC
passive type or
GND VT GND VT
Vdc
IT
1 2 3 4 5 6 7
1 2 2’
4 wires
N L
6 7
N L
or
or
- +- +
+
-
Vdc
IT
+
-
+
+
-
... 5 6 7
Power supply
24 Vdc
Power supply 24 Vac
Classe II
+-
4 wires 3 wires
2 wires
Power supply 16-30 Vdc
Display / regulator /
PLC passive type
A
+
-
... 5 6 7
Display/regulator/PLC
active type
A
2 wires 2 wires
16-30 Vdc
Display/regulator/PLC
passive type
+-
V
N L
4 5 6 7
N L
Power supply 24 Vac
Classe II
GND VT
- +
Pour les modèles TM110 – PO et TM110 – PN
avec sortie 4-20 mA – passif :
Seul un technicien formé et qualié peut réaliser cette opération. Pour réaliser le raccordement,
l’appareil doit être HORS TENSION.
Pour les modèles TM110 – AO et TM110 – AN avec
sortie 0-10 V – actif, 4 ls :
Pour un raccordement 3 ls, la masse de la sortie et la
masse d’entrée doivent être reliées AVANT TOUTE
MISE SOUS TENSION. Voir schéma ci-dessous.
+
-
12 3 4 5 6 7
- +- +
Alimentation 24 Vdc
+
-
V
automate type passif ou
GND VT
GND VT
Vdc
IT
1 23 45 6 7
1 2 2’
N L
6 7
N L
ou
ou
- +- +
+
-
Vdc
IT
+
-
+
+
-
... 5 6 7
Alimentation
24 Vdc
Alimentation 24 Vac
Classe II
+-
Alimentation 16-30 Vdc
autonome de type passif
A
+
-
... 5 6 7
autonome de type actif
A16-30 Vdc
automate type passif
+-
V
N L
4 5 6 7
N
L
Alimentation 24 Vac
Classe II
GND VT
- +
+
-
12 3 4 5 6 7
- +- +
Alimentación 24 Vdc
+
-
V
o
GND VT GND VT
Vdc
IT
1 23 45 6 7
1 2 2’
N L
6 7
N L
o
o
- +- +
+
-
Vdc
IT
+
-
+
+
-
... 5 6 7
Alimentación
24 Vdc
Alimentación 24 Vac
Clase II
+-
Alimentación 16-30 Vdc
A
+
-
... 5 6 7
A16-30 Vdc
+-
V
N L
4 5 6 7
N
L
Alimentación 24 Vac
Clase II
GND VT
- +
4 hilos
Regulador/PLC/BMS
TIPO PASIVO
4 hilos
Regulador/PLC/BMS
TIPO PASIVO
3 hilos
3 hilos
2 hilos
2 hilos
Regulador/PLC/BMS
TIPO PASIVO
Regulador/PLC/BMS
TIPO PASIVO
2 hilos
-
+
-
3 wires
1 2 3 4 5 6 7
- +- +
Power supply 24 Vdc
+
-
V
Display/regulator/PLC
passive type or
GND VT GND VT
Vdc
IT
1 2 3 4 5 6 7
1 2 2’
4 wires
N L
6 7
N L
or
or
- +- +
+
-
Vdc
IT
+
-
+
+
-
... 5 6 7
Power supply
24 Vdc
Power supply 24 Vac
Classe II
+-
4 wires 3 wires
2 wires
Power supply 16-30 Vdc
Display / regulator /
PLC passive type
A
+
-
... 5 6 7
Display/regulator/PLC
active type
A
2 wires 2 wires
16-30 Vdc
Display/regulator/PLC
passive type
+-
V
N L
4 5 6 7
N L
Power supply 24 Vac
Classe II
GND VT
- +
+
-
12 3 4 5 6 7
- +- +
Alimentation 24 Vdc
+
-
V
automate type passif ou
GND VT
GND VT
Vdc
IT
1 23 45 6 7
1 2 2’
N L
6 7
N L
ou
ou
- +- +
+
-
Vdc
IT
+
-
+
+
-
... 5 6 7
Alimentation
24 Vdc
Alimentation 24 Vac
Classe II
+-
Alimentation 16-30 Vdc
autonome de type passif
A
+
-
... 5 6 7
autonome de type actif
A16-30 Vdc
automate type passif
+-
V
N L
4 5 6 7
N
L
Alimentation 24 Vac
Classe II
GND VT
- +
+
-
12 3 4 5 6 7
- +- +
Alimentación 24 Vdc
+
-
V
o
GND VT GND VT
Vdc
IT
1 23 45 6 7
1 2 2’
N L
6 7
N L
o
o
- +- +
+
-
Vdc
IT
+
-
+
+
-
... 5 6 7
Alimentación
24 Vdc
Alimentación 24 Vac
Clase II
+-
Alimentación 16-30 Vdc
A
+
-
... 5 6 7
A16-30 Vdc
+-
V
N L
4 5 6 7
N
L
Alimentación 24 Vac
Clase II
GND VT
- +
4 hilos
Regulador/PLC/BMS
TIPO PASIVO
4 hilos
Regulador/PLC/BMS
TIPO PASIVO
3 hilos
3 hilos
2 hilos
2 hilos
Regulador/PLC/BMS
TIPO PASIVO
Regulador/PLC/BMS
TIPO PASIVO
2 hilos
-
+
-
3 wires
1 2 3 4 5 6 7
- +- +
Power supply 24 Vdc
+
-
V
Display/regulator/PLC
passive type or
GND VT GND VT
Vdc
IT
1 2 3 4 5 6 7
1 2 2’
4 wires
N L
6 7
N L
or
or
- +- +
+
-
Vdc
IT
+
-
+
+
-
... 5 6 7
Power supply
24 Vdc
Power supply 24 Vac
Classe II
+-
4 wires 3 wires
2 wires
Power supply 16-30 Vdc
Display / regulator /
PLC passive type
A
+
-
... 5 6 7
Display/regulator/PLC
active type
A
2 wires 2 wires
16-30 Vdc
Display/regulator/PLC
passive type
+-
V
N L
4 5 6 7
N L
Power supply 24 Vac
Classe II
GND VT
- +
Réglages et utilisation du capteur
Conguration
ATTENTION : mettre le capteur HORS TENSION
avant de le congurer puis procéder aux réglages
souhaités en disposant les interrupteurs comme
décrit ci-après. Remettre le capteur sous tension
une fois les réglages effectués.
Pour congurer le capteur, dévisser les 4 vis du boîtier puis l’ouvrir.
Les switchs permettant les différents réglages sont accessibles.
1
2
3
4
Off On
Réglages de
la gamme de mesure
Réglages de l’unité de
mesure
Interrupteur
Entretien : éviter tous les solvants
agressifs. Lors du nettoyage à base de
produits formolés (pièces ou conduits),
protéger l’appareil.
Précautions d'utilisation : veillez à toujours utiliser
l’appareil conformément à l’usage prévu et dans les
limites des paramètres décrits dans les caractéristiques
techniques an de ne pas compromettre la protection
assurée par l’appareil.
Congurations De 0 à +50 °C De -20 à +80 °C De -50 à +50 °C De 0 à +100 °C De 0 à +200 °C De 0 à +400 °C
Combinaisons
1
2
3
4
1
2
3
4
1
2
3
4
1
2
3
4
1
2
3
4
1
2
3
4
Réglage des étendues de mesure
Réglage de l’unité de mesure
Pour régler une étendue de mesure, positionner les interrupteurs 1, 2 et
3 des étendues de mesure comme indiqué dans le tableau ci-dessous.
Congurations °C °F
Combinaisons
Pour régler une unité de mesure, positionner
l’interrupteur 4 des unités comme indiqué ci-contre.
1
2
3
4
1
2
3
4
Conguration par PC
1
2
3
4
1
2
3
4
Conguration logiciel LCC-S (option)
Le logiciel permet une conguration plus souple. Il est possible de
congurer des échelles intermédiaires.
La différence minimum entre l’échelle haute et l’échelle
basse est de 20.
Exemple : pour un capteur de 0-100 °C, le delta minimum de l’échelle
est de 20 °C. Vous pourrez par exemple congurer votre appareil de 0
à +100°C, ou de 0 à +20 °C, etc.
Pour accéder à la conguration par logiciel :
Régler les switchs comme indiqué ci-dessous.
Raccorder le câble du LCC-S à la connexion du capteur.
La conguration des paramètres s’effectue soit par switch soit
par logiciel. Les deux ne sont pas compatibles.
Switch de gauche Switch de droite
Pour procéder à la
conguration de votre
appareil par PC, voir la
notice du LCC-S.
Montage
Pour réaliser le montage mural, xer la plaqueABS au
mur (perçage Ø6 mm, vis et chevilles fournies). Insérer
le capteur dans la plaque de xation (aux points A
sur le schéma) en l’inclinant à 30°. Faire pivoter le
boîtier dans le sens des aiguilles d’une montre jusqu’à
l’obtention d’un clipage ferme.
Le modèle ambiant ne dispose pas de
platine de xation. 4 trous de xation sont
présents à l’intérieur du boîtier arrière. Les
utiliser pour installer le capteur à l’endroit
voulu. 7.5 mm
8 mm
4.5 mm
40 mm
50 mm
68 mm
75 mm
37.5 mm
23.75 mm
14 mm
A
A

Español Guía rápida
(1) Modelo ambiental / (2) Modelos posterior, a distancia y estándar.
Transmisor de temperatura
Temperatura de funcionamiento, índice de protección e información sobre el almacenamiento
Condiciones de uso (°C/%HR/m) : de 0 a 50 °C sin condensación. De 0 a 2000 m.
Índice de protección : IP65(2) o IP20(1)
Temperatura de almacenamiento : de -10 a +70 °C.
Dimensiones
Símbolos utilizados
Por su seguridad y para evitar daños en el dispositivo, siga el procedimiento descrito en el presente
documento y lea atentamente las notas precedidas del siguiente símbolo:
El siguiente símbolo también se utiliza en el presente documento. Lea atentamente las notas informativas
indicadas tras este símbolo.
Conexiones
(1) Modelo con sonda ambiente / (2) Modelos con sonda externa, sonda para conductos (posterior y de contacto) y estanca / (3) Diferentes sondas disponibles opcionalmente
112 mm
90 mm
41 mm
80 mm
46 mm 90 mm
109 mm
46 mm
Ø6 mm
90 mm
90 mm
46 mm 90 mm
109 mm
46 mm
109 mm
109 mm
112 mm
90 mm
41 mm
80 mm
46 mm 90 mm
109 mm
46 mm
Ø6 mm
90 mm
90 mm
46 mm 90 mm
109 mm
46 mm
109 mm
109 mm
112 mm
90 mm
41 mm
80 mm
46 mm 90 mm
109 mm
46 mm
Ø13 mm
150 mm
150 mm
Ø6 mm
90 mm
90 mm
46 mm 90 mm
109 mm
46 mm
109 mm
109 mm
Modelo con sonda ambiental interna
Modelo con sonda remota(3) Modelo con sonda ambiental estanca
112 mm
90 mm
41 mm
80 mm
46 mm 90 mm
109 mm
46 mm
Ø6 mm
90 mm
90 mm
46 mm 90 mm
109 mm
46 mm
109 mm
109 mm
Modelo con sonda posterior de acero inox(2)
Especicaciones de la sonda (modelo
con sonda posterior de acero inox.):
Ø6 mm ; longitudes disponibles: 100 mm,
150 mm, 200 mm, 250 mm o
300 mm.
Interior de la parte frontal
1. Bloque de terminales (sólo en
modelos para sonda remota)
2. Bloque de microinterruptores
3. Conexión LCC-S
4. Salida de señal
5. Bornes de alimentación
6. Prensaestopa
1
2
Parte frontal extraible Parte trasera ja
3
6
5
4
Conexiones eléctricas – según la norma NFC15-100
+
-
12 3 4 5 6 7
- +- +
Alimentation 24 Vdc
+
-
V
automate type passif ou
GND VT GND VT
Vdc
IT
1 23 45 6 7
1 2 2’
N L
6 7
N L
ou
ou
- +- +
+
-
Vdc
IT
+
-
+
+
-
... 5 6 7
Alimentation
24 Vdc
Alimentation 24 Vac
Classe II
+-
Alimentation 16-30 Vdc
autonome de type passif
A
+
-
... 5 6 7
autonome de type actif
A16-30 Vdc
automate type passif
+-
V
N L
4 5 6 7
N
L
Alimentation 24 Vac
Classe II
GND VT
- +
+
-
12 3 4 5 6 7
- +- +
Alimentación 24 Vdc
+
-
V
o
GND VT GND VT
Vdc
IT
1 23 45 6 7
1 2 2’
N L
6 7
N L
o
o
- +- +
+
-
Vdc
IT
+
-
+
+
-
... 5 6 7
Alimentación
24 Vdc
Alimentación 24 Vac
Clase II
+-
Alimentación 16-30 Vdc
A
+
-
... 5 6 7
A16-30 Vdc
+-
V
N L
4 5 6 7
N
L
Alimentación 24 Vac
Clase II
GND VT
- +
4 hilos
Regulador/PLC/BMS
TIPO PASIVO
4 hilos
Regulador/PLC/BMS
TIPO PASIVO
3 hilos
3 hilos
2 hilos
2 hilos
Regulador/PLC/BMS
TIPO PASIVO
Regulador/PLC/BMS
TIPO PASIVO
2 hilos
-
+
-
3 wires
1 2 3 4 5 6 7
- +- +
Power supply 24 Vdc
+
-
V
Display/regulator/PLC
passive type or
GND VT GND VT
Vdc
IT
1 2 3 4 5 6 7
1 2 2’
4 wires
N L
6 7
N L
or
or
- +- +
+
-
Vdc
IT
+
-
+
+
-
... 5 6 7
Power supply
24 Vdc
Power supply 24 Vac
Classe II
+-
4 wires 3 wires
2 wires
Power supply 16-30 Vdc
Display / regulator /
PLC passive type
A
+
-
... 5 6 7
Display/regulator/PLC
active type
A
2 wires 2 wires
16-30 Vdc
Display/regulator/PLC
passive type
+-
V
N L
4 5 6 7
N L
Power supply 24 Vac
Classe II
GND VT
- +
Para modelos TM110 – PO y TM110 – PN
con salida 4-20 mA – lazo pasivo:
Sólo un técnico cualicado puede efectuar estas conexiones. Debe llevar a cabo esta instalación
cuando el instrumento no tenga tensión.
Para modelos TM110 – AO y TM110 – AN con salida
0-10 V – activo, 4 hilos:
EN LA CONEXIÓN A 3 HILOS, la
interconexión entre las tomas a tierra (GND)
de salida de señal y de alimentación debe
realizarse antes de alimentar el equipo.
+
-
12 3 4 5 6 7
- +- +
Alimentation 24 Vdc
+
-
V
automate type passif ou
GND VT GND VT
Vdc
IT
1 23 45 6 7
1 2 2’
N L
6 7
N L
ou
ou
- +- +
+
-
Vdc
IT
+
-
+
+
-
... 5 6 7
Alimentation
24 Vdc
Alimentation 24 Vac
Classe II
+-
Alimentation 16-30 Vdc
autonome de type passif
A
+
-
... 5 6 7
autonome de type actif
A16-30 Vdc
automate type passif
+-
V
N L
4 5 6 7
N
L
Alimentation 24 Vac
Classe II
GND VT
- +
+
-
12 3 4 5 6 7
- +- +
Alimentación 24 Vdc
+
-
V
o
GND VT
GND VT
Vdc
IT
1 23 45 6 7
1 2 2’
N L
6 7
N L
o
o
- +- +
+
-
Vdc
IT
+
-
+
+
-
... 5 6 7
Alimentación
24 Vdc
Alimentación 24 Vac
Clase II
+-
Alimentación 16-30 Vdc
A
+
-
... 5 6 7
A16-30 Vdc
+-
V
N L
4 5 6 7
N
L
Alimentación 24 Vac
Clase II
GND VT
- +
4 hilos
Regulador/PLC/BMS
TIPO PASIVO
4 hilos
Regulador/PLC/BMS
TIPO PASIVO
3 hilos
3 hilos
2 hilos
2 hilos
Regulador/PLC/BMS
TIPO PASIVO
Regulador/PLC/BMS
TIPO PASIVO
2 hilos
-
+
-
3 wires
1 2 3 4 5 6 7
- +- +
Power supply 24 Vdc
+
-
V
Display/regulator/PLC
passive type or
GND VT GND VT
Vdc
IT
1 2 3 4 5 6 7
1 2 2’
4 wires
N L
6 7
N L
or
or
- +- +
+
-
Vdc
IT
+
-
+
+
-
... 5 6 7
Power supply
24 Vdc
Power supply 24 Vac
Classe II
+-
4 wires 3 wires
2 wires
Power supply 16-30 Vdc
Display / regulator /
PLC passive type
A
+
-
... 5 6 7
Display/regulator/PLC
active type
A
2 wires 2 wires
16-30 Vdc
Display/regulator/PLC
passive type
+-
V
N L
4 5 6 7
N L
Power supply 24 Vac
Classe II
GND VT
- +
+
-
12 3 4 5 6 7
- +- +
Alimentation 24 Vdc
+
-
V
automate type passif ou
GND VT GND VT
Vdc
IT
1 23 45 6 7
1 2 2’
N L
6 7
N L
ou
ou
- +- +
+
-
Vdc
IT
+
-
+
+
-
... 5 6 7
Alimentation
24 Vdc
Alimentation 24 Vac
Classe II
+-
Alimentation 16-30 Vdc
autonome de type passif
A
+
-
... 5 6 7
autonome de type actif
A16-30 Vdc
automate type passif
+-
V
N L
4 5 6 7
N
L
Alimentation 24 Vac
Classe II
GND VT
- +
+
-
12 3 4 5 6 7
- +- +
Alimentación 24 Vdc
+
-
V
o
GND VT
GND VT
Vdc
IT
1 23 45 6 7
1 2 2’
N L
6 7
N L
o
o
- +- +
+
-
Vdc
IT
+
-
+
+
-
... 5 6 7
Alimentación
24 Vdc
Alimentación 24 Vac
Clase II
+-
Alimentación 16-30 Vdc
A
+
-
... 5 6 7
A16-30 Vdc
+-
V
N L
4 5 6 7
N
L
Alimentación 24 Vac
Clase II
GND VT
- +
4 hilos
Regulador/PLC/BMS
TIPO PASIVO
4 hilos
Regulador/PLC/BMS
TIPO PASIVO
3 hilos
3 hilos
2 hilos
2 hilos
Regulador/PLC/BMS
TIPO PASIVO
Regulador/PLC/BMS
TIPO PASIVO
2 hilos
-
+
-
3 wires
1 2 3 4 5 6 7
- +- +
Power supply 24 Vdc
+
-
V
Display/regulator/PLC
passive type or
GND VT GND VT
Vdc
IT
1 2 3 4 5 6 7
1 2 2’
4 wires
N L
6 7
N L
or
or
- +- +
+
-
Vdc
IT
+
-
+
+
-
... 5 6 7
Power supply
24 Vdc
Power supply 24 Vac
Classe II
+-
4 wires 3 wires
2 wires
Power supply 16-30 Vdc
Display / regulator /
PLC passive type
A
+
-
... 5 6 7
Display/regulator/PLC
active type
A
2 wires 2 wires
16-30 Vdc
Display/regulator/PLC
passive type
+-
V
N L
4 5 6 7
N L
Power supply 24 Vac
Classe II
GND VT
- +
Conguración y uso del transmisor
Conguración
Para congurar el transmisor, debe proceder
a colocar los interruptores según se describe
a continuación cuando el equipo esté sin
alimentación. Reestablezca la alimentación una vez
haya completado la conguración.
Para congurar el transmisor, desenrosque los 4 tornillos de la
carcasa y ábrala.
Los interruptores que permiten los diferentes ajustes son accesibles.
1
2
3
4
Off On
Ajuste del rango de
medición
Ajuste de las unidades
de medición
Interruptor
Conexión de una sonda Pt100
al bloque de terminales En caso de usar una sonda de 2 hilos,
conecte un shunt entre 2 y 2’.
+
-
12 3 4 5 6 7
- +- +
Alimentation 24 Vdc
+
-
V
automate type passif ou
GND VT GND VT
Vdc
IT
1 23 45 6 7
1 2 2’
N L
6 7
N L
ou
ou
- +- +
+
-
Vdc
IT
+
-
+
+
-
... 5 6 7
Alimentation
24 Vdc
Alimentation 24 Vac
Classe II
+-
Alimentation 16-30 Vdc
autonome de type passif
A
+
-
... 5 6 7
autonome de type actif
A16-30 Vdc
automate type passif
+-
V
N L
4 5 6 7
N
L
Alimentation 24 Vac
Classe II
GND VT
- +
+
-
12 3 4 5 6 7
- +- +
Alimentación 24 Vdc
+
-
V
o
GND VT GND VT
Vdc
IT
1 23 45 6 7
1 2 2’
N L
6 7
N L
o
o
- +- +
+
-
Vdc
IT
+
-
+
+
-
... 5 6 7
Alimentación
24 Vdc
Alimentación 24 Vac
Clase II
+-
Alimentación 16-30 Vdc
A
+
-
... 5 6 7
A16-30 Vdc
+-
V
N L
4 5 6 7
N
L
Alimentación 24 Vac
Clase II
GND VT
- +
4 hilos
Regulador/PLC/BMS
TIPO PASIVO
4 hilos
Regulador/PLC/BMS
TIPO PASIVO
3 hilos
3 hilos
2 hilos
2 hilos
Regulador/PLC/BMS
TIPO PASIVO
Regulador/PLC/BMS
TIPO PASIVO
2 hilos
-
+
-
3 wires
1 2 3 4 5 6 7
- +- +
Power supply 24 Vdc
+
-
V
Display/regulator/PLC
passive type or
GND VT GND VT
Vdc
IT
1 2 3 4 5 6 7
1 2 2’
4 wires
N L
6 7
N L
or
or
- +- +
+
-
Vdc
IT
+
-
+
+
-
... 5 6 7
Power supply
24 Vdc
Power supply 24 Vac
Classe II
+-
4 wires 3 wires
2 wires
Power supply 16-30 Vdc
Display / regulator /
PLC passive type
A
+
-
... 5 6 7
Display/regulator/PLC
active type
A
2 wires 2 wires
16-30 Vdc
Display/regulator/PLC
passive type
+-
V
N L
4 5 6 7
N L
Power supply 24 Vac
Classe II
GND VT
- +
Sonda de medición

Mantenimiento: evitar disolventes
agresivos. Proteger el transmisor cuando se
limpie con formol la supercie donde esté
instalado (salas limpias, conductos...).
Precauciones de uso: utilice siempre el instrumento
conforme al uso previsto y dentro de los límites de los
parámetros descritos en las características técnicas con
tal de no comprometer la protección garantizada por
el dispositivo.
Conguración De 0 a +50 °C De -20 a +80 °C De -50 a +50 °C De 0 a +100 °C De 0 a +200 °C De 0 a +400 °C
Combinaciones
1
2
3
4
1
2
3
4
1
2
3
4
1
2
3
4
1
2
3
4
1
2
3
4
Conguración del rango
de temperatura
Conguración de la unidad de medición
Para configurar el rango de medición de temperatura, coloque los
interruptores 1, 2 y 3 como se indica a continuación.
Conguración °C °F
Combinaciones
Para configurar la unidad de medición de
temperatura, coloque el
interruptor 4 como se indica a continuación.
1
2
3
4
1
2
3
4
Conguración vía PC
1
2
3
4
1
2
3
4
Conguración con el programa LCC-S
Una conguración exible gracias al programa LCC-S. Podrá
congurar usted mismo sus propias escalas intermedias, un
offset...
La diferencia mínima entre los valores mínimo y máximo
de temperatura debe ser de 20.
Para acceder a la conguración por software, es necesario ajustar
los interruptores previamente como se indica en el gráco y
conectar el cable al conector especíco en la electrónica (ver en el
apartado CONEXIONES)
La conguración debe realizarse a través de los interruptores DIP
o mediante programa (no pueden combinarse ambos métodos).
Bloque izquierdo Bloque derecho
Para proceder a la
conguración del
equipo, consulte el
manual del programa
LCC-S.
Montaje
Para realizar el montaje mural, jar la placa
de ABS en la pared (suministrada con el
equipo). Tornillería : Ø 6 mm (tornillos y tacos
suministrados). Colocar el equipo a la placa
de jación y rotar 30°. Hacer pivotar la caja en
sentido de las agujas del reloj hasta obtener una
jación segura.
El modelo con sonda interna no dispone
de placa de jación. En el interior de la caja se
hallan 4 oricios para la jación directa sobre
la pared. 7.5 mm
8 mm
4.5 mm
40 mm
50 mm
68 mm
75 mm
37.5 mm
23.75 mm
14 mm
A
A

QSG – TM 110 – 07/01/2022 – Non-contractual document – We reserve the right to modify the characteristics of our products without prior notice
www.sauermanngroup.com
Download the TM 110 data sheet
Télécharger la che technique du TM 110
Descargue la cha técnica del TM 110
Scarica la scheda tecnica del TM 110
Download the LCC-S software user manual
Télécharger la notice d'utilisation du logiciel LCC-S
Descargue el manual de usuario del software LCC-S
Scarica il manuale d'uso del software LCC-S
https://sauermann-en.custhelp.com
Customer service portal / Portail service clients
Portal de servicio al cliente / Portale servizio clienti
Use our Customer service portal to contact us
Utilisez notre Portail service clients pour nous contacter
Contacte con nosotros a través del Portal de servicio al cliente
Utilizzate il nostro Portale servizio clienti per contattarci
Table of contents
Languages:
Other sauermann Transmitter manuals
Popular Transmitter manuals by other brands

Ericsson GE
Ericsson GE LBI-4622B Maintenance manual

Wave Central
Wave Central AXIS TX PICO Menu guide

Siemens
Siemens miniTek user guide

RKI Instruments
RKI Instruments 65-2330RKSS Operator's manual

ok2bwn
ok2bwn MICROFOX HF instruction manual

Hallicrafters
Hallicrafters HT-32A Operating and service instructions

WIKA
WIKA T12 Series operating instructions

EnOcean
EnOcean PTM 230 user manual

Lectrosonics
Lectrosonics UT instruction manual

Emerson
Emerson Rosemount MultiVariable 3051SMV Reference manual

Axcera
Axcera Innovator CU10BT/CU0T-1 instruction manual

Endress+Hauser
Endress+Hauser Cerabar S PMC71 operating instructions