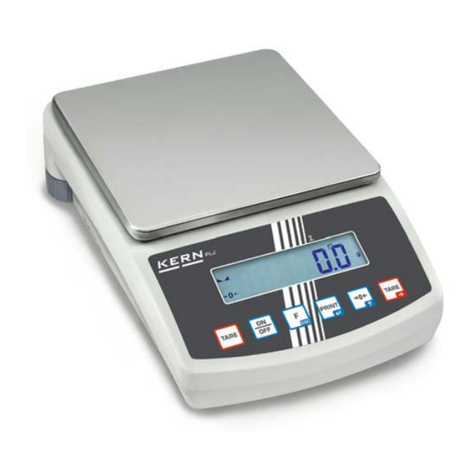
Scale House MB1 User manual

ELETTRONIC SCALES
KOMPAKTWAAGEN
BALANCE COMPACTE
BILANCE ELETTRONICHE
MB
OPERATING MANUAL
BENUTZERHANDBUCH
MODE D’EMPLOI OPERATEUR
MANUALE OPERATIVO
MB_1.6_14.02_EN_DE_FR_IT

2
LANGUAGES
SPRACHEN
LANGUES
LINGUE
ENGLISH ...........................................................................................................................................3
DEUTSCH .........................................................................................................................................3
FRANÇAIS.........................................................................................................................................3
ITALIANO ........................................................................................................................................13

3
ENGLISH
INDEX
1. INTRODUCTION..............................................................................................................................................4
2. MAIN TECHNICAL SPECIFICATIONS ...........................................................................................................5
3. INSTALLATION................................................................................................................................................6
3.1 POWER SUPPLY AND START-UP............................................................................................................6
3.2 BATTERY POWERED ...............................................................................................................................6
4. FRONT PANEL KEYS AND INDICATORS .....................................................................................................6
4.1 FUNCTION OF THE KEYS .......................................................................................................................7
4.2 FUNCTION OF THE SYMBOLS ON LCD DISPLAY .................................................................................7
5. OPERATIONS..................................................................................................................................................8
5.1 AUTOMATIC ZERO UPON START-UP .....................................................................................................8
5.2 SCALE ZERO FUNCTION.........................................................................................................................8
5.3 TARE FUNCTION ......................................................................................................................................9
5.4 CHANGE OF THE UNIT OF MEASURE ...................................................................................................9
6. CALIBRATION...............................................................................................................................................10
6.1 STANDARD CALIBRATION.....................................................................................................................10
6.2 LINEAR CALIBRATION ........................................................................................................................... 11
7. VISUALISATION OF A/D CONVERTER POINTS.........................................................................................12
8. ERROR MESSAGES.....................................................................................................................................13
RECYCLING INSTRUCTION.............................................................................................................................13
DECLARATION OF CONFORMITY ..................................................................................................................14
WARRANTY.......................................................................................................................................................14

4
1. INTRODUCTION
This manual was created to help you install and learn all about the functional possibilities of the MB
scale.
WARNINGS
The scales should be sited in a location that will not degrade the accuracy.
Avoid extremes of temperature. Do not place in direct sunlight or near air conditioning vents.
Avoid unsuitable tables. The tables or floor must be rigid and not vibrate. Do not place near
vibrating machinery.
Avoid high humidity that might cause condensation. Avoid direct contact with water. Do not spray or
immerse the scales in water.
Avoid air movement such as from fans or opening doors. Do not place near open windows.
Keep the scales clean.
Do not stack material on the scales when they are not in use.

5
2. MAIN TECHNICAL SPECIFICATIONS
Model
Plate
(dimensions in mm)
Capacity kg
Division g
MB1
Ø 120
1
0,1
MB5
Ø 120
5
0,5
Operative Temperature:
0°C - 40°C / 32°F - 104°F.
Power supply:
2pcs 1,5V AA battery.
Display :
LCD backlit with 5 digits 15 mm high.
Case:
ABS Plastic.
Zero range:
+/- 2% of max load capacity.
Auto zero at start-up:
+/- 50% of max load capacity.

6
3. INSTALLATION
3.1 POWER SUPPLY AND START-UP
The indicator can be powered 2 pcs 1,5V AA batteries.
TO TURN ON/TURN OFF the instrument press the ON/OFF key.
3.2 BATTERY POWERED
When the batteries needs replacing or charging the symbol on the display will turn on.
4. FRONT PANEL KEYS AND INDICATORS

7
4.1 FUNCTION OF THE KEYS
- It turns on or turns off the scale.
- Clears the displayed gross weight if it’s within +/- 2% of the total capacity.
- A secondary function of parameter confirmation when in setting mode.
- If pressed for an instant it executes the semiautomatic tare;
- A secondary function of parameter selection when in setting mode.
- Pressed together in the weighing mode change the unit of measure between
g/OZ.
- Pressed together in the setup environment, they permit to return in weighing
mode
4.2 FUNCTION OF SYMBOLS ON LCD DISPLAY
INDICATOR
FUNCTION
g/OZ
Indicates the unit of measure in use (gram or OZ).
Indicates that the weight is stable.
Indicates that the battery is low (see section 3.2)
NET
Indicates that the displayed weight is a net weight.
Indicates that the weight detected on the weighing system is near zero.

8
5. OPERATIONS
5.1 AUTOMATIC ZERO UPON START-UP
The indicator has an “auto zero at start-up” function: in other words it means that if at start-up a
weight within +/- 50% of the capacity is detected, it will be zeroed; if the weight is not within this
tolerance, the display shows “Err 4” and the present weight after a few instants.
5.2 SCALE ZERO FUNCTION
You can press the ZERO key at any time to set the zero point from which all other weighing and
counting is measured, within +/- 2% of power up zero. This will usually only be necessary when the
platform is empty. When the zero point is obtained the display will show the indicator for zero.
The scale has an automatic rezeroing function to account for minor drifting or accumulation of
material on the platform. However you may need to press the ZERO key to rezero the scale if small
amounts of weight are shown when the platform is empty.

9
5.3 TARE FUNCTION
Zero the scale by pressing the ZERO key if necessary. The zero symbol will be on.
Place a container on the platform, a value for its weight will be displayed. Press the TARE key to
tare the scale when the “stable” is light. The weight that was displayed is stored as the tare value
and that value is subtracted from the display, leaving zero on the display. The "NET" indicator will
be on. As product is added only the weight of the product will be shown.
The scale could be tared a second time if another type of product was to be added to the first one.
Again only the weight that is added after taring will be displayed.
When the container is removed a negative value will be shown.
To remove the tare, unload the scale and press again TARE.
5.4 CHANGE OF THE UNIT OF MEASURE
By pressing together TARE and ZERO keys the conversion between g and OZ units of measure
takes place; the relative symbol will turn on in the display (see section 4).

10
6. CALIBRATION
6.1 STANDARD CALIBRATION
- Turn off the power, empty the pan, hold the ON/OFF key and the TARE key together until, display
will show “88888”, now release the ON/OFF key;
- When the display will shows “F1 CAL”, release also the TARE key;
- Press ZERO key to enter setting, display will show “UNLD” and after the instrument will acquired
automatically the zero value, after that it will show “LD”;
-Put the same weight of the maximum capacity on the scale and wait the stability, the display will
show “PASS”
- Press ZERO key to return in the setup environment.

11
6.2 LINEAR CALIBRATION
- Turn off the power, empty the pan, hold the ON/OFF key and the TARE key together until, display
will show “88888”, now release the ON/OFF key;
- When the display will shows “F1 CAL”, release also the TARE key;
- Press TARE key until the display will show “F6 l-c”, at this point press the ZERO key to enter;
- The display will show “UNLD” and after the instrument will acquired automatically the zero value,
after that it will show “h-CAP”; put, on the scale, half of the capacity and press the ZERO key;
- The display will show “F-CAP”;
- Put the same weight of the maximum capacity on the scale and press the ZERO key, the display
shows “PASS”;
- Press ZERO key to return in the setup environment.

12
7. VISUALISATION OF A/D CONVERTER POINTS
- Turn off the power, empty the pan, hold the OFF/ON key and the TARE key together until, display
will show “88888”at this point will be necessary to release the OFF/ON key;
- When the display will show “F1 CAL”, release also the TARE key;
- Press TARE key, display will show “F2 INP”;
- Press ZERO key to confirm;
- The instrument shows the A/D converter points relative to the weight on the scale.
- Press ZERO to exit the step.
- Press ON/OFF to exit setup.

13
8. ERROR MESSAGES
ERROR
MESSAGES
DESCRIPTION
SOLUTION
0-ERR
Over range
Remove weight from the scale.
b-ERR
Low battery
Change the batteries.
Err 4
Zero Setting
Error
Upon start-up or when the ZERO key is pressed, the weight
on the scale exceeds the percentage programmed on the
max. capacity. Remove the excess weight and retry.
Err 6
Input signal
greater than
3mV/V
Indicates that the A/D converter value is greater than the
maximum value:
- Remove the weight from the scale if it’s exceeding.
- The load cell or the electronics could be damaged.
RECYCLING INSTRUCTION
The crossed-out wheeled bin on the product means that at the product end of life, it
must be taken to separate collection or to the reseller when a new equivalent type of
equipment is purchased. The adequate differentiated refuse collection in having the
product recycled, helps to avoid possible negative effects on the environment and
health and supports the recycling of the materials of which the equipment is made.
The unlawful disposal of the product by the user will entail fines foreseen by the current regulations.

14
DECLARATION OF CONFORMITY
This device conforms to the essential standards and norms relative to the applicable European regulations. The Declaration
of conformity is available in the web site www.scalehouse.it.
WARRANTY
Scale House products are guaranteed for a period of twelve months from delivery, excluding the parts classified as
expendable materials such as mechanical printing heads, batteries, electric motors and wheels. The warranty for these
expendable materials is three months. The warranty refers to breakdowns resulting from any construction defect or material
defect of the product supplied and covers the cost of labor and spare parts. The product must be returned to the Seller
address in its original packaging with shipping paid by the sender. The warranty does not apply to breakdowns due to
improper use or non-observance of the operating instructions, electrical phenomenon, unauthorized repair attempt,
connection to other equipment or removal of any product identification elements (serial number, label, etc.). This warranty
does not provide for any compensation for damages, direct or indirect, incurred by the user due to complete or partial failure
of instruments, even during the warranty period. The warranty for the load cells excludes the damages caused by knocks
and overloads.
AUTHORISED SERVICE CENTRE STAMP

15
DEUTSCH
INHALT
1. EINLEITUNG..................................................................................................................................................16
2. TECHNISCHE SPEZIFIKATIONEN...............................................................................................................17
3. INSTALLATION..............................................................................................................................................18
3.1 SPANNUNGSVERSORGUNG UND INBETRIEBNAHME ......................................................................18
3.2 BATTERIEBETRIEB ................................................................................................................................18
4. FRONTPANEL TASTER UND ANZEIGEN....................................................................................................18
4.1 TASTENFUNKTIONEN............................................................................................................................19
4.2 SYMBOLE DES LCD DISPLAYS.............................................................................................................19
5. FUNKTIONEN................................................................................................................................................20
5.1 AUTOMATISCHE NULLUNG BEIM START ............................................................................................20
5.2 WAAGE NULLEN.....................................................................................................................................20
5.3 TARAFUNKTION .....................................................................................................................................21
5.4 WECHSELN DER MAßEINHEIT .............................................................................................................21
6. KALIBRIERUNG............................................................................................................................................22
7. VISUALISIERUNG DER A/D KONVERTERPUNKTE...................................................................................22
8. FEHLERMELDUNGEN..................................................................................................................................23
RECYCLINGHINWEIS.......................................................................................................................................23
KONFORMITÄTSERKLÄRUNG .......................................................................................................................24
GARANTIE.........................................................................................................................................................24

16
1. EINLEITUNG
Diese Beschreibung erklärt Ihnen den Einsatz und die Funktionen der MB Waage.
HINWEISE
Die Waage sollte an einem Ort eingesetzt werden, welcher die Genauigkeit nicht beeinträchtigt.
Extreme Temperaturen vermeiden. Nicht in direktem Sonnenlicht oder bei Ventilatoren betreiben.
Achten Sie auf eine stabile Auflage. Tisch oder Boden muss eben und frei von Vibrationen sein.
Nicht in der Nähe von vibrierenden Maschinen betreiben.
Achten Sie auf ein sauberes Netz. Nicht an der gleichen Steckdose mit großen Geräten oder
Motoren anschließen.
Nicht bei hoher Luftfeuchtigkeit betreiben und direkten Kontakt mit Wasser vermeiden. Nicht in
Wasser eintauchen oder ansprühen.
Vermeiden Sie Zugluft von offenen Fenstern oder Ventilatoren. Nicht in der Nähe von Türen
platzieren.
Halten Sie die Waage sauber.
Stapeln Sie keine Waren auf die unbenutzte Waage.

17
2. TECHNISCHE HAUPTEIGENSCHAFTEN
Version
Schale
(Abmessungen mm)
Wägebereich
kg
Ziffernschritt [g]
MB1
Ø 120
1
0,1
MB5
Ø 120
5
0,5
Umgebungstemperatur:
0°C - 40°C / 32°F - 104°F.
Stromversorgung:
2 austauschbare Batterien Typ AA mit 1,5V (inbegriffen).
Display:
Hintergrundbeleuchtetes LCD-Display mit 5 Ziffern mit 15
mm Höhe.
Gehäuse:
ABS Plastic.
Nullstellbereich:
+/- 2 % des Max. Wägebereich.
Nullstellung beim Start:
+/- 50% des Max. Wägebereich.

18
3. INSTALLATION
3.1 SPANNUNGSVERSORGUNG UND INBETRIEBNAHME
Der Indikator kann mit 2 austauschbaren Batterien Typ AA mit 1,5V betrieben werden.
Zum Ein-/ Ausschalten des Gerätes die Taste ON/OFF drücken.
3.2 BATTERIEBETRIEB
Muss die Batterie geladen werden, so erscheint das Symbol im Display.
4. TASTEN UND ANZEIGEN AUF DEM FRONTPANEEL

19
4.1 FUNKTIONEN DER TASTER
- Netztaste.
- Löschen des Brutto-Gewichts, bis +/-2% des max. Wägebereichs.
- Als zweite Funktion als “ENTER”-Taste beim Setzen der Parameter oder anderen
Funktionen.
- Kurz gedrückt zum halbautomatischen Tarieren;;
- Als zweite Funktion zum Erhöhen der aktiven Einheit beim Setzen der Parameter
oder anderen Funktionen.
- Zum Wechseln zwischen g und OZ.
4.2 SYMBOLE DES LCD DISPLAYS
SYMBOLE
FUNKTION
g/OZ
Zeigt an, dass die Anzeige in Gramm oder Unzen ist.
Zeigt an, dass die Waage stabil ist..
Zeigt an, dass der Akku geladen werden soll (siehe Kap.3.2)
NET
Zeigt an, dass das Netto-Gewicht angezeigt wird.
Zeigt an, dass das ermittelte Gewicht in der Nähe des Nullpunktes liegt.

20
5. FUNKTIONEN
5.1 AUTOMATISCHE NULLEINSTELLUNG BEIM EINSCHALTEN
Der Indikator hat eine “Auto-NULL beim Start” Funktion: Das bedeutet, sollte beim Start ein Gewicht
bis +/-10% des max. Wägebereichs ermittelt werden, so wird dieses GENULLT; sollte dieses
Gewicht NICHT innerhalb der Grenzen sein, wird im Display “Err 4” angezeigt und nach einem
Augenblick, der Gewichtswert angezeigt.
5.2 NULLEINSTELLUNG DER WAAGE
Falls die Waage im entleerten Zustand NICHT NULL anzeigt, drücken Sie die ZERO Taste (das
“ZERO” Symbol erscheint). Fals der Anzeigewert größer als +/-2% des max. Wägebereichs ist, so
hat dies keine Wirkung.
Die Waage hat eine automatische Nulleinstellungsfunktion, um ein minimales Wegdriften oder
Materialansammlung auf der Plattform auszugleichen. Jedoch müssen Sie die ZERO Taste
drücken, falls bei leerer Waage ein kleiner Wert angezeigt wird.
This manual suits for next models
1
Table of contents
Languages:
Other Scale House Scale manuals

Scale House
Scale House PSL Series User manual
Scale House
Scale House ATM Series User manual

Scale House
Scale House FPW Series User manual
Scale House
Scale House NCS3K User manual
Scale House
Scale House ASB6 User manual
Scale House
Scale House OCSF-50 User manual
Scale House
Scale House DHS Series User manual
Scale House
Scale House GAI420 User manual
Scale House
Scale House KS Series User manual
