manuals.online logo
Brands
  1. Home
  2. •
  3. Brands
  4. •
  5. Scanomat
  6. •
  7. Coffee Maker
  8. •
  9. Scanomat TopBrewer User manual

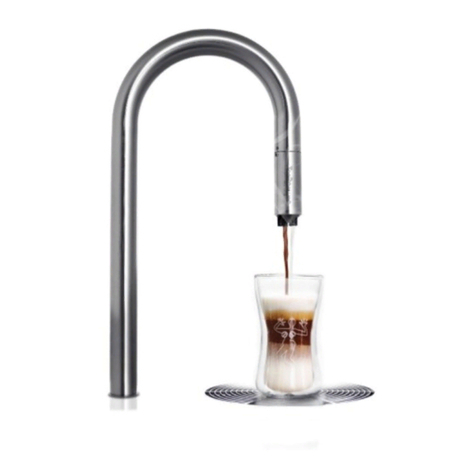
Scanomat TopBrewer User manual

Cleaning Manual
TopBrewer Pro & Compact
1. Brewer Cleaning (daily)
2. Milk Cleaning (3 times weekly)
3. Choco Cleaning (2 times weekly)
10/2021
Milk Cleaner - Blue
Alkaline
SKU 4302830
Milk Cleaner - Blue
Alkaline
SKU 4302830
Choco Cleaning Can
2,5 l
SKU 4302786
In general
Cleaning Cloth and
Paper Towel
Cleaning Brush
SKU 4302319
Jug 1000 ml (x2)
SKU 4302657
Jug 1000 ml
SKU 4302657
Suggested weekly cleaning schedule
Monday
Brewer BrewerBrewer Brewer Brewer
Milk Milk Milk
Tuesday
Choco Choco
Wednesday Thursday Friday
Tip Brushes
SKU 4302349
TopBrewer Waste bags
Bio-degradable
SKU 017
Milk Cleaner - Green
Acidic
SKU 4302831
Yellow Tabs, 25 pcs
Brew Group Cleaner
SKU 4302339
In our webshop you have the opportunity to purchase the used cleaning
products in this guide and a wide array of other assecories for your TopBrewer. buy at shop.scanomat.com
WHAT YOU NEED FOR CLEANING
Brewer Cleaning Milk Cleaning Choco Cleaning
Cleaning Head
SKU 2008371
3
BREWER
CLEANING
USING YELLOW TABS
PERFORM DAILY
4
1
The machine goes into neutral mode with the bottom piston raised,
ready for cleaning when the door is opened.
PRO: Open the hinged door by pushing the right side until it pops out
and pull it towards you.
COMPACT: Open the door by pivoting it outwards from the bottom and
sliding it into a horizontal hold position.
OPEN THE STAINLESS STEEL DOOR
PRO
COMPACT
5
B
BB
A
A
A
C
OPEN THE STAINLESS STEEL DOOR
2
Gently remove the outer
metal casing (A) of the
milk foamer by twisting
the metal head clock-
wise.
Slide down the black
casing (B) and clean the
outlet with a damp cloth.
Unscrew the milk foamer (A).
Seperate the two parts of the
foamer unscrewing it clock-
wise (B).
Clean the milk foamer in hot
water with the tip brushes.
Clean the two holes (bottum/
side) in milk foamer tip (C)
with the tip brushes.
Connect the two parts of the
milk foamer again and re-
attach it to the faucet.
REMOVE CASING
AND HOUSEING
REMOVE
MILK FOAMER
3 4
Fit the Cleaning Head (A)
onto the faucet by sliding it
onto the milk foamer.
Mount the outer metal
casing (B) by twisting it
anti-clockwise onto the
faucet.
PLACE
CLEANING HEAD
Take care that the O-rings (illustrated red) remain in position during and after cleaning.
! BE EXTRA AWARE !
*The Cleaning Head ensures proper backflush which
cleans the milk foamer as well as the milk lines that go
into the fridge. The hot water goes directly into the drain.
4200446
4200445
4302169
990480005000
4200444
2007109 /
2009623
2008259
2007424
2008371
O-rings
1
2
3
4
5
Heads/milkfoamer
1
2
3
4
5
1
2
34
5
3
4
2
2
1
SKUs for reorder
6
Danger hot Danger hot
4 5
The scraper can be moved freely to allow
access to all components.
Start by pulling out the scraper arm (black)
on the brewing unit.
Brush around the grey base plate in order to
remove any ground coffee deposits.
Brush the deposits into the dreg bin.
MOVE SCRAPER REMOVE GROUND COFFEE
7
Danger hot Danger hot
6 7
Having removed most of the coffee grounds,
wipe the top piston sieve (underside) as well
as around the top piston O-ring (white ring).
The stainless steel bottom piston must be
completely clean with no coffee remains.
Push the scraper back into the position as
shown. Place a TopBrewer Yellow cleaning
tablet inside the scraper.
CLEAN TOP AND BOTTOM PISTON ADD YELLOW TAB
8
B
A
9
Close the door on the machine and push the faucet all the way down the the dip-
tray.
Select ”CLEAN” from the left pane menu on the iPad. The process will take approx-
imately 2,5 minute and “Machine is ready” will appear in the status bar in the App
once completed.
If the cleaning process is accidentally stopped please start it again from the menu.
CLOSE DOOR AND START CLEANING PROCESS
8
Gently remove the outer
metal casing (A) of the
milk foamer by twisting the
metal head clockwise.
Remove the cleaning head
(B) from the faucet.
REMOVE
CLEANING HEAD
9
B
A
10
Prior to use, prime the TopBrewer by dispensing one espresso or coffee drink.
Discard the drink.
Now the brewer is clean and ready for use.
PRIME WITH ESPRESSO DRINK
11
Re-attach the milk foam-
er housing (A).
Then re-attach the outer
metal casing by twisting
the metal head
anti-clockwise (B).
RE-ATTACH
HOUSING/CASING
REMOVE
CLEANING HEAD
10
CLEAN
MILK
1
2
3
4
5
Blue
Blue
Green
Blue Blue
MILK
CLEANING
We recommend doing the milk clean 3 times a week. Use
the blue alkaline milk fat remover 4 times as offen as the
green descaler.
Some milk types might require more cleaning, depending
on how homogenic the milk is, the fat content, if it’s
organic etc.
USING LIQUID CLEANERS
PERFORM 3 TIMES A WEEK
Before the milk clean, please ensure that you have done the brewer cleaning. This is the optimal way to maintain your TopBrewer.
11
Fill a jug with clean cold
tap water, approx. 300 ml.
Push the faucet all the way down
to the diptray to away liquid splash
during the cleaning process.
CLEAN WATER PUSH FAUCET DOWN
Fill another jug with 600 ml of hot/
steaming water from the TopBrewer, or
hot tap water.
Add 30 ml of cleaning liquid to the water.
If the fridge has dual milk lines, mix double of
the cleaning liquid.
MIX CLEANING LIQUID
PREPARE MILK CLEAN
12
Replace the jug in the fridge with the hot water jug.
Insert the milk line(s) into the water.
Select “Cold Milk” or “Warm Milk” in the menu on the
iPad.
Place the jug inside the fridge and insert the milk
line(s) into the water.
Select “Cold Milk” or “Warm Milk” in the menu
on the iPad. Run 1 cup through to push out the
milk in the lines.
If there is dual milk lines, do this step for both milk choices.
1RINSE WITH CLEANING LIQUIDRINSE WITH COLD WATER 2
13
Replace the jug in the fridge with the cold water jug.
Insert the milk line(s) into the water.
Select “Cold Milk” or “Warm Milk” in the menu on the
iPad. Run 1 cup through to rinse the line(s).
If there is dual milk lines, do this step for both milk choices.
Slide the size and number of cups to maximum and
select “Start now”.
Repeat untill the jug is empty.
If there is dual milk lines, do this step for both milk choices.
3RINSE WITH COLD WATERCUSTOMISE SIZE AND CUPS
14
Remove the jug and wipe the fridge inside with a
damp cloth.
Place the milk can or container, add the milk lines
and close the fridge.
4WIPE FRIDGE AND ADD MILK
Prior to use, prime the TopBrewer milk system by
dispensing a small cup of milk.
Discard the drink.
Now the milk system is clean and ready for use.
PRIME WITH MILK DRINK
5
15
CHOCO
CLEANING
USING CHOCO CLEANING SYSTEM
PERFORM TWICE A WEEK
16
Mix 400 ml of hot tap water with 20 ml of milk fat
cleaning liquid (blue) in a jug and add it to the choco
cleaning can (make sure the lever is closed on the tube).
On the choco rack close the tube from the choco box
and disconnect it from the rack. Wipe away any left over
chocolate from the connector.
Place the cleaning can on the table, with the black stud
facing down (avoid spilling the liquid) and connect the
tube to the choco rack.
Turn the lever vertically to open.
Push the faucet all the way down to the diptray.
1PREPARE CHOCO CLEANING 2CONNECT CLEANING CAN
OPEN
17
Select the hot chocolate drink
from the menu on the iPad.
Maximise the size and cup
numbers, select “Start now”.
Repeat untill the can is empty.
Add 400 ml clean cold water to
the cleaning can. Select the hot
chocolate drink, maximise the size
and cup numbers, select “Start
n o w ”.
Repeat untill the can is empty.
Disconnect the cleaning can tube.
Wipe off the connector on the rack.
Reconnect the choco box tube.
Open the valve and run chocolate
drink(s) from the iPad menu until
the chocolate is back in the system.
3 4 5
START CLEANING CLEANSE WITH WATER RECONNECT & PRIME
OPEN
11
2
2
Remove lid from bean hopper and wipe with a
damp cloth prior to filling it with beans.
Fresh Amokka® Coffee beans have a great flavour,
therefore do not overfill the hoppers to allow beans
to always stay their best - store unused beans in a
sealed bag somewhere cold.
In the status bar of the app, the machine will
notify you when the coffee dreg bin is full. When
removing the bin (keep switched on) the unit will
reset its counting system and will assume that
you have emptied it. Therefore empty the dregs
bin every time it is removed and follow above
illustration for either Pro or Compact.
TIP TIP
IMPROVING TASTE EXPERIENCE REMOVING COFFEE WASTE
COMPACTPRO

Other manuals for TopBrewer

3

Other Scanomat Coffee Maker manuals

Scanomat TopBrewer Pro User manual

Scanomat

Scanomat TopBrewer Pro User manual

Scanomat PRO6 EU Troubleshooting guide
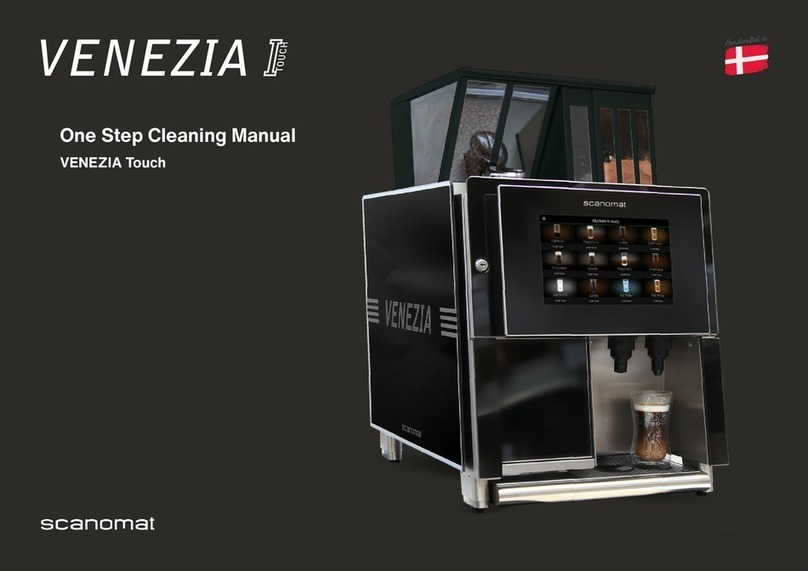
Scanomat

Scanomat PRO6 EU Troubleshooting guide

Scanomat San Remo Classico III User manual

Scanomat

Scanomat San Remo Classico III User manual

Scanomat TopBrewer Pro Troubleshooting guide

Scanomat

Scanomat TopBrewer Pro Troubleshooting guide

Scanomat VENEZIA Touch User manual

Scanomat

Scanomat VENEZIA Touch User manual

Scanomat MiniCafe Troubleshooting guide

Scanomat

Scanomat MiniCafe Troubleshooting guide

Scanomat TopBrewer User manual

Scanomat

Scanomat TopBrewer User manual

Scanomat Classic Brew User manual

Scanomat

Scanomat Classic Brew User manual

Scanomat TopBrewer Pro User manual

Scanomat

Scanomat TopBrewer Pro User manual
Popular Coffee Maker manuals by other brands

AEG KF 2060 operating instructions

AEG

AEG KF 2060 operating instructions

Premium PEM615P Use & care manual

Premium

Premium PEM615P Use & care manual

Philips HD7751/00 user manual

Philips

Philips HD7751/00 user manual

Vitek VT-8701 Manual Instrucitons

Vitek

Vitek VT-8701 Manual Instrucitons

JDE Sprso Giro quick start guide

JDE

JDE Sprso Giro quick start guide

Bialetti Mini Express quick start guide

Bialetti

Bialetti Mini Express quick start guide

Miele CVA 4062 installation instructions

Miele

Miele CVA 4062 installation instructions

Toastess TFC25T Instruction booklet

Toastess

Toastess TFC25T Instruction booklet

Nespresso Essenza Automatic D100 instruction manual

Nespresso

Nespresso Essenza Automatic D100 instruction manual

Saeco Exprelia EVO user manual

Saeco

Saeco Exprelia EVO user manual

Siemens TI355 Series instruction manual

Siemens

Siemens TI355 Series instruction manual

kitchen Selectives CM-302BL Product instruction manual

kitchen Selectives

kitchen Selectives CM-302BL Product instruction manual

Keurig Platinum B70 Use and care guide

Keurig

Keurig Platinum B70 Use and care guide

Salton ME5B Use & care guide

Salton

Salton ME5B Use & care guide

Jura GIGA X3C Instructions for use

Jura

Jura GIGA X3C Instructions for use

Ide Line CM0801 user guide

Ide Line

Ide Line CM0801 user guide

DeLonghi EAM4000 Series instruction manual

DeLonghi

DeLonghi EAM4000 Series instruction manual

DeLonghi EC201CD.B manual

DeLonghi

DeLonghi EC201CD.B manual

manuals.online logo
manuals.online logoBrands
  • About & Mission
  • Contact us
  • Privacy Policy
  • Terms and Conditions

Copyright 2025 Manuals.Online. All Rights Reserved.