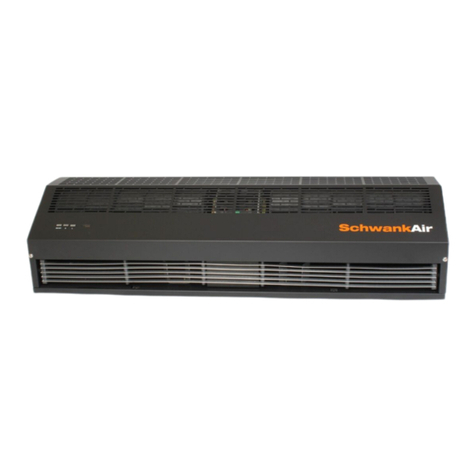
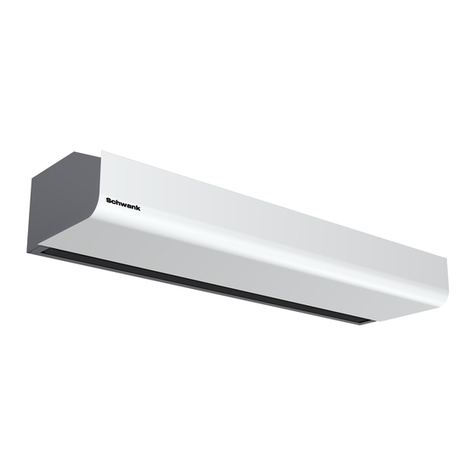
SchwankAir 524EH User manual

6HULHV'ULYH7KUX:LQGRZ$LU&XUWDLQ
9a+]$
,QVWDOODWLRQ2SHUDWLRQDQG0DLQWHQDQFH,QVWUXFWLRQV
Schwan
k
A
ir
,03257$17,16758&7,216«
5HDGDOOLQVWUXFWLRQVEHIRUHLQVWDOOLQJRUXVLQJ
WKLVKHDWHU
«6$9(7+(6(,16758&7,216
IMPORTANT INSTRUCTIONS
:KHQXVLQJHOHFWULFDODSSOLDQFHVEDVLFSUHFDXWLRQV
VKRXOGDOZD\VEHIROORZHGWRUHGXFHWKHULVNRIILUH
HOHFWULFVKRFNDQGLQMXU\WRSHUVRQVLQFOXGLQJWKH
IROORZLQJ
5HDGDOOLQVWUXFWLRQVEHIRUHLQVWDOOLQJRUXVLQJWKLV
DSSOLDQFH
7KLVDSSOLDQFHLVKRWZKHQLQXVHWRDYRLGEXUQVGR
QRWOHWEDUHVNLQWRXFKKRWVXUIDFHVNHHS
FRPEXVWLEOHPDWHULDOVVXFKDVSDSHUFORWKHV
EHGGLQJFXUWDLQVHWFDWOHDVWLQFKHV>P@IURP
WKHKHDWHU
([WUHPHFDXWLRQLVQHFHVVDU\ZKHQWKHXQLWLVXVHG
E\RUQHDUFKLOGUHQRULQYDOLGVDQGZKHQHYHULWLVOHIW
RSHUDWLQJDQGXQDWWHQGHG
'RQRWXVHRXWGRRUV
'RQRWRSHUDWHDQ\KHDWHUDIWHULWPDOIXQFWLRQV
GLVFRQQHFWDWVHUYLFHSDQHO&DOODFRPSHWHQW
HOHFWULFDOWHFKQLFLDQWRLQYHVWLJDWHDQGVHUYLFH
'RQRWLQVHUWRUDOORZIRUHLJQREMHFWVWRHQWHUWKH
UHWXUQRUGLVFKDUJHJULOOHVDVWKLVPD\FDXVHDQ
HOHFWULFDOVKRFNILUHRUGDPDJHWRWKHDSSOLDQFH
7RSUHYHQWSRVVLEOHILUHGRQRWEORFNUHWXUQDQG
GLVFKDUJHDLUJULOOHVLQDQ\PDQQHU
'RQRWXVHZKHUHIODPPDEOHYDSRUVRUOLTXLGVDUH
VWRUH
8VHWKLVDSSOLDQFHRQO\DVGHVFULEHGLQWKLVPDQXDO
$Q\RWKHUXVHQRWUHFRPPHQGHGE\WKH
PDQXIDFWXUHUPD\FDXVHILUHHOHFWULFVKRFNRULQMXU\
WRSHUVRQVDQGSURSHUW\
)LJXUH6HULHV*HQHUDO$VVHPEO\'UDZLQJ
&DUWRQ&RQWHQWV
5HPRYHIURPFDUWRQDQGFKHFNFRQWHQWVLQFOXGH
x 'ULYH7KUX:LQGRZ$LU&XUWDLQ
x 0RXQWLQJEUDFNHW>0%@FZIL[LQJKDUGZDUH
x $QJOHGPRXQWLQJEDVH>$0%@FZIL[LQJKDUGZDUH
x 3ODVWLFHOHFWULFDOER[FRQQHFWRU
)RUZDUUDQW\SXUSRVHVSOHDVHUHWDLQ\RXUUHFHLSWDVSURRI
RISXUFKDVH
,QVWDOODWLRQ
7KHDLUFXUWDLQLVGHVLJQHGIRULQGRRUXVHVXUIDFH
PRXQWHGKRUL]RQWDOO\DWDGLVFKDUJHKHLJKWDWWKHWRSRI
WKHVOLGLQJZLQGRZ0XOWLSOHXQLWVPRXQWHGVLGHE\VLGH
PD\EHXVHGIRUZLGHURSHQLQJV7KHDLUFXUWDLQPXVWEH
PRXQWHGGLUHFWO\WRWKH0RXQWLQJ%UDFNHW>0%@ZLWKWKH
RSWLRQWRXVHWKH$QJOHG0RXQWLQJ%DVH>$0%@LQ
FRPELQDWLRQZLWKWKH0RXQWLQJ%UDFNHW7KHXQLWPXVW
QRWEHORFDWHGLPPHGLDWHO\EHORZDQHOHFWULFDORXWOHW
'2127,167$//%277202)+($7(5/(667+$1
LQFKHV>PP@$%29($&2817(5
)LJXUH:LQGRZ+HDGHU0RXQWLQJ2SWLRQV
/RFDWHPRXQWLQJKDUGZDUHDVQHFHVVDU\FRQVLGHULQJWKH
GHVLJQRIWKHZLQGRZKHDGHUDQGXQLWZHLJKWVHH7DEOH
8VLQJWKH$0%DVDWHPSODWHGHWHUPLQHDQRSWLPXP
ORFDWLRQIRUWKHXQLW3ODFHWKH$0%RQWKHWDUJHW
ORFDWLRQPDUNSRVLWLRQRIWKHIL[LQJKROHVWREHGULOOHG
8VLQJVXLWDEOHIL[LQJKDUGZDUHLQVWDOOWKH$0%DQG0%
LQWRSRVLWLRQDVUHTXLUHG6RPHLQWHUQDOKHDGHU
FRPSRQHQWVPD\KDYHWREHPRYHGEHIRUHDQ\GULOOLQJLV
FRQGXFWHGLWPD\EHQHFHVVDU\WRGULOOXSIURPWKH
KHDGHUGXHWRGHVLJQFRQILJXUDWLRQRIWKHZLQGRZ
FOHDUDQFH
:$51,1*«5LVNRIILUH'RQRWXVHDVD
KRXVHKROGRUUHVLGHQWLDOKHDWHU
0RGHO
$
,QFKHV
>PP@
%
,QFKHV
>PP@
208V
Electrical
Input (W)
Weight
lb [kg]
208V Heat
Output
(kW)
(+ >@ >@ >@
(+ >@ >@ >@
7DEOH
8VH$0%DVDWHPSODWHWR
PDUNGULOOPRXQWLQJKROHV
$WWDFK0%WR$0%
$WWDFK$0%0%WR
KHDGHU
$WWDFKXQLWWR0%
&RQQHFWHOHFWULFDO
Conforms to:
CAN CSA-C22.2 no.46-13
& UL 2021(Ed.3): 2013
,0
6HULHV'ULYH7KUX:LQGRZ$LU&XUWDLQ0DQXDO
$SULO
5/$

Figure 3: Mounting Bracket Alignment
Align and position mounting bracket into the two slots on the
rear plate of the unit (refer to Figure 3). Ensure the serrated
lock washer, at each end of the air curtain, is positioned
between the mounting bracket and the internal bracket (see
Figure 4). Tilt and point the aircurtain to the preferred
direction and firmly tighten both fixing screws using a Philips
No. 2 screwdriver via access hole in each end cap.
Figure 4: Cross Section of Mounting Bracket
(OHFWULFDO&RQQHFWLRQ
$OOHOHFWULFDOZLULQJDQGFRQQHFWLRQVPXVWEHFDUULHGRXW
E\DFRPSHWHQWTXDOLILHGHOHFWULFLDQLQDFFRUGDQFHZLWK
WKHODWHVWORFDODQGRUQDWLRQDOHOHFWULFDOFRGHVDQG
UHJXODWLRQV
(QVXUHWKDWVXSSO\ZLUHVFLUFXLWEUHDNHUVDQGRWKHU
HOHFWULFDOLQVWDOODWLRQHTXLSPHQWDUHFRUUHFWO\VL]HGIRUWKH
PRGHOEHLQJLQVWDOOHGVHH7DEOH)RUHDFKXQLWD
VLQJOHSKDVHORFDOLVRODWRUVZLWFKZLWKDFRQWDFW
VHSDUDWLRQRQERWKSROHVRIDWOHDVW´>PP@PXVWEH
ILWWHGWRWKHVXSSO\ZLULQJWKHLVRODWRUPXVWEHORFDWHG
ZLWKLQHDV\DFFHVV7KHXQLWVKRXOGEHFRQQHFWHGWRD
9$&SK+]HOHFWULFDOVXSSO\DQGPXVWEH
JURXQGHG5HPRYHWKHWZRRXWHUSDQKHDG3KLOLSV
VFUHZVRQWRSRIWKHXQLWDQGUHOHDVHWKHSRZHU
FRQQHFWRUSODWH)LWWKHER[FRQQHFWRUWRWKHSRZHU
FRQQHFWRUSODWH,QVHUWHOHFWULFDOVXSSO\FDEOHVHH)LJXUH
DQGWLJKWHQER[FRQQHFWRUWRWKHFDEOH
&RQQHFWHDFKRIWKHZLUHVDVIROORZV
x /LYHZLUHWRWHUPLQDOPDUNHG/RU/
x /LYHZLUHWRWHUPLQDOPDUNHG1RU/
x *URXQGZLUHWRWHUPLQDOPDUNHG(RU
3RVLWLRQWKHHOHFWULFDOVXSSO\FDEOHVDVWKH\FRPHRXWRI
WKHWHUPLQDOEORFNDVVKRZQLQ)LJXUH(QVXUHRQO\
VXIILFLHQWZLUHLVSXOOHGWKURXJKWRHQDEOHFRQQHFWLRQWR
WKHWHUPLQDOEORFNDQGDYRLGH[FHVVFDEOHFRPLQJLQWR
FRQWDFWZLWKDQ\PRYLQJSDUWV&DUHIXOO\LQVHUWDOOFDEOHV
WKURXJKWKHUHFWDQJXODUKROHLQWKHWRSRIWKHXQLWDQG
UHLQVWDOOWKHSRZHUFRQQHFWRUSODWH(QVXUHWKHHOHFWULFDO
VXSSO\FDEOHLVFRUUHFWO\DQGVXIILFLHQWO\VHFXUHGE\WKH
SODVWLFER[FRQQHFWRU
Figure 6: 500 Series Wiring Diagram
5HPRYH3URWHFWLYH)LOP
7KHDLUFXUWDLQSDQHOVDUHFRDWHGLQDQHDV\WRSHHO
SURWHFWLYHILOP3OHDVHHQVXUHDOOWKHSURWHFWLYHILOPLV
UHPRYHGEHIRUHWKHXQLWLVSXWLQWRVHUYLFH
7UDLQ+DQG2II
%HIRUHOHDYLQJVLWHLWLVLPSRUWDQWWKDWWKHVHLQVWUXFWLRQV
DUHSUHVHQWHGWRWKHHQGXVHURUWKHLUUHSUHVHQWDWLYHDQG
WKHRSHUDWLRQDQGPDLQWHQDQFHRIWKHDLUFXUWDLQLVIXOO\
H[SODLQHGDQGXQGHUVWRRG(1'86(5.((37+(6(
,16758&7,216,1$6$)(3/$&(
2SHUDWLRQ
Control of the aircurtain is achieved by using the three integral
switches mounted adjacent to the discharge grille.
Switch Action
IFan On
I+ Middle Fan + Half Heat
I+ Middle + End Fan + Full Heat
ORFNZDVKHU
IL[LQJVFUHZ
LQWHUQDOEUDFNHW
PRXQWLQJ
EUDFNHW
VFUHZGULYHU
DFFHVVKROH
WKURXJKHQGFDS
Figure 5: Electrical Connection

7KHUPDO6DIHW\&XWRXWV
,IWKHDLUFXUWDLQH[FHHGVQRUPDORSHUDWLQJWHPSHUDWXUHWKHWKHUPDOVDIHW\FXWRXWVZLOORSHUDWHDQGLVRODWHHOHFWULFDO
VXSSO\WRWKHKHDWLQJHOHPHQWV,WLVUHFRPPHQGHGWKDWRQO\FRPSHWHQWTXDOLILHGSHUVRQVVHUYLFHWKHDLUFXUWDLQ
7RUHVHWWKHWKHUPDOVDIHW\FXWRXWVGLVFRQQHFWHOHFWULFDOVXSSO\WRWKHDLUFXUWDLQGHWHUPLQHDQGUHVROYHWKHFDXVHRI
WKHIDXOW$OORZWKHDLUFXUWDLQVXIILFLHQWWLPHWRFRROEHIRUHUHVWRULQJVXSSO\,IWKHIDXOWSHUVLVWVDUUDQJHIRUD
FRPSHWHQWWHFKQLFLDQWRLQYHVWLJDWHDQGVHUYLFH7RDYRLGDKD]DUGGXHWRLQDGYHUWHQWUHVHWWLQJRIWKHWKHUPDOFXWRXW
WKLVDSSOLDQFHPXVWQRWEHVXSSOLHGWKURXJKDQH[WHUQDOVZLWFKLQJGHYLFHVXFKDVDWLPHURUFRQQHFWHGWRDFLUFXLW
WKDWLVUHJXODUO\VZLWFKHGRQDQGRIIE\WKHXWLOLW\
6HUYLFH0DLQWHQDQFH
Always disconnect and isolate the main electrical supply before installing, maintaining or repairing this equipment. All
maintenance/repairs should only be carried out by a competent electrician or Schwank/Infrasave appointed technician.
To ensure the air curtain operates efficiently, the air inlet and outlet grilles, fan impellers, housings and motors must be kept free
of dust and debris. Weekly vacuum and clean any build-up of dirt and debris within the air curtain (please note that the motor is
permanently lubricated and require no additional lubrication). Once the air curtain has been cleaned check all electrical
connections to the unit ensuring they are tight and have notbecome loose. If the outer casing requires cleaning this should be
carefully done using a damp soft cloth. Do not use solvents or abrasive materials. Reinstate the electrical supply and fully
function test the air curtain to ensure correct operation.
:DUUDQW\
The Manufacturer warrants that this product is free from defects in materialor workmanship under normal use and service subject
to the terms of this document.
ONE YEAR WARRANTY
Subject to the conditions and limitations stated herein, during the term of this limited warranty, we will supply any component part
(at our option a new or repaired component part) of the heater as defined below,which the Manufacturer’s examination
determines to be defective in workmanship or material for a period of one (1) year from the date of installation, unless otherwise
specified below. This warranty applies to the heater’s original owner, and subsequent transferees and only if the unit is installed,
operated, and maintained in accordance with the printed instructions accompanying the unit and in compliance with all applicable
installation codes and good trade practices.
WHAT IS NOT COVERED
The Manufacturer shall not be responsible for any expenses, including service, labor, diagnosis, analysis, material or
transportation charges incurred during removal or reinstallation of this product, or any of its components or parts. All labor or
service charges shall be paid by the owner. This warranty does not cover products improperly installed, misused, exposed to or
damaged by negligence, accident, corrosive or contaminating atmosphere, water,excessive thermal shock, impact, abrasion,
normal wear due to use, alteration or operation contrary to the owner’s manual or if the serial number has been altered, defaced or
removed. This warranty shall not apply if the electrical input to the product varies by more than ±10% of the rated input on the
rating plate. The Manufacturer shall not be liable for any default or delay in performance by its warranty caused by any
contingency beyond its control, including war, government restrictions, or restraints,strikes, fire, flood, acts of God, or short or
reduced supply of raw materials or products.
Care has been taken in compiling these instructions to ensure they are correct, although Schwank/Infrasave disclaims all liability
for damage resulting from any inaccuracies and/or deficiencies in this documentation. Schwank/Infrasave retains the right to
change the specifications stated in these instructions.
LIMITATIONS AND EXCLUSIONS
This document contains all warranties made by the Manufacturer and may not be varied, altered or extended by any person.
There are no promises, or agreements extending from the Manufacture other than the statements contained herein. THIS
WARRANTY IS IN LIEU OF ALL WARRANTIESEXPRESSED OR IMPLIED, TO THEEXTENT AUTHORIZED BY THELAWS OF THE
JURISDICTION, INCLUDINGSPECIFICALLY THE WARRANTIESOR MERCHANTIBILITY OF FITNESSFOR A PARTICULAR PURPOSE.
It is understood and agreed that the Manufacturer’s obligation hereunder is limited torepairing or replacing parts determined to be
defective as stated above. In no event shall the Manufacturer be responsible for any alleged personal injuries or other special,
incidental or consequential damages. As to property damages, contract, tort or otherclaim the Manufacturer’s responsibility shall
not exceed the purchase price paid for the product.
All replacement parts will be warranted for the unused portion of the warranty coverage period remaining on the applicable unit.
6FKZDQNDQG,QIUDVDYH
86$ &DQDGD
6FKZDQN:D\ %UDGFR%OYG
:D\QHVERUR*$ 0LVVLVVDXJD21/:$
7HO
)D[
ZZZVFKZDQNJURXSFRP
FVU#VFKZDQNJURXSFRP
FVU#LQIUDVDYHFRP

,QVWDOODWLRQ3LFWRULDO
&RQWHQWV
± 3RVLWLRQ$0%DWFHQWHURIKHDGHU
'ULOO
$
0%PRXQWLQJKROHV
$
WWDFK0%WR
$
0% +DQJXQLWRQ0%
6HFXUHXQLWWR0%
(OHFWULFDOFRQQHFWLRQ
,QVWDOOHGXQLW
This manual suits for next models
1
Other SchwankAir Heater manuals
Popular Heater manuals by other brands

Qlima
Qlima PEW 3020 operating manual

Creda
Creda CAR 033 Operating instructions manual

Detroit Radiant Products
Detroit Radiant Products AVS Series installation manual

Valley Comfort Systems
Valley Comfort Systems VC95C Installation and operation manual

BEHA
BEHA EDP Mounting instructions

Smith's Heating First
Smith's Heating First ECOVECTOR LL 1200 Installation & user guide