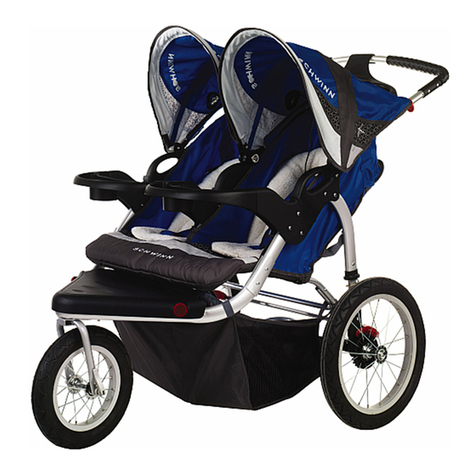
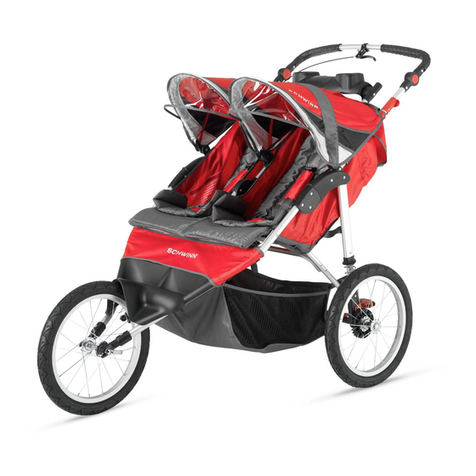
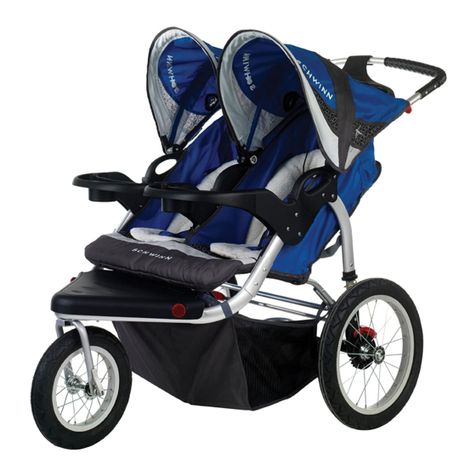
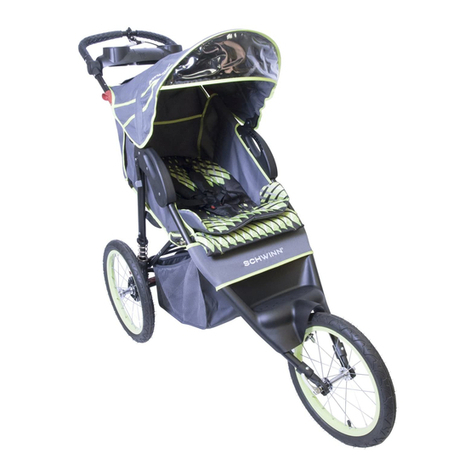
Schwinn CV309 User manual

Interval Jogger
This manual contains safety, assembly, use and maintenance
instrucons. Read these instrucons carefully before use and keep
them for future reference. Your child’s safety may be aected if you do
not follow these instrucons. The Interval Jogger must be assembled
by an adult who has read and understands the instrucons in this
manual.
Keep the packaging away from children and dispose of all
packaging before use. Do not return this product to the place of
purchase. If any parts are missing, call Consumer Care at
(800) 544-1108. Or visit our web site at www.safety1st.com. Have the
model number and date code (manufacture date) located on the
back of stroller available.
CV309
OWNER’S MANUAL

Thank You
ii
For purchasing the Schwinn® Interval Jogger. You will be sure to enjoy
hours of pleasurable exercise and family me. If you have any quesons
or comments, our Consumer Care team is available:
Monday through Thursday: 8:00 AM – 6:00 PM EST
Friday: 8:00 AM – 4:30 PM EST
You may also reach us through the following:
Phone:
(800) 544-1108
Online: www.safety1st.com

Contents
iii
1 SAFETY . . . . . . . . . . . . . . . . . . . . . . . . . . . . . . . . . . . . . . . . . . . . . . . . . . . . . 1
Warnings . . . . . . . . . . . . . . . . . . . . . . . . . . . . . . . . . . . . . . . . . . . . . . 1
2 PARTS AND FEATURES . . . . . . . . . . . . . . . . . . . . . . . . . . . . . . . . . . . . . . . . 3
3 ASSEMBLY ..................................................4
Unfold the Stroller....................................... 4
Aach the Rear Wheels . . . . . . . . . . . . . . . . . . . . . . . . . . . . . . . . . . 5
Aach the Front Wheel................................... 6
Aach the Parent Tray . . . . . . . . . . . . . . . . . . . . . . . . . . . . . . . . . . . 7
Aach the Child Tray..................................... 7
4 USING THE STROLLER.........................................8
Adjust the Canopy....................................... 8
Adjust the Handlebar . . . . . . . . . . . . . . . . . . . . . . . . . . . . . . . . . . . . 8
Using the Safety Wrist Strap. . . . . . . . . . . . . . . . . . . . . . . . . . . . . . . 9
To Store the Wrist Strap . . . . . . . . . . . . . . . . . . . . . . . . . . . . . . . . . . 9
Using the 5-Point Safety Restraint System . . . . . . . . . . . . . . . . . . 10
Adjusng the Seat...................................... 11
Adjusng the Shoulder Strap Height . . . . . . . . . . . . . . . . . . . . . . . 11
Using the Front Wheel and Swivel Lock . . . . . . . . . . . . . . . . . . . . 12
Using the Parking Brake . . . . . . . . . . . . . . . . . . . . . . . . . . . . . . . . . 12
. . . . . . . . . . . . . .13
6 TO FOLD STROLLER ..........................................15
7 REPLACEABLE PARTS . . . . . . . . . . . . . . . . . . . . . . . . . . . . . . . . . . . . . . . . 16
8 MAINTENANCE .............................................16
9 WARRANTY . . . . . . . . . . . . . . . . . . . . . . . . . . . . . . . . . . . . . . . . . . . . . . . . 16

1
FOR THE SAFETY OF YOUR CHILD, PLEASE READ THE
FOLLOWING WARNINGS AND ASSEMBLY INSTRUCTIONS
AND KEEP FOR FUTURE REFERENCE.
• Adult assembly required. CAUTION: Keep small parts away
from children during assembly.
• NEVER LEAVE CHILD UNATTENDED. ALWAYS keep child
in view when in stroller.
• AVOID SERIOUS INJURY from falling or sliding out. ALWAYS
use seat belt. Check frequently to make sure it is secure.
• ALWAYS keep fingers away from moving parts, when folding,
unfolding or adjusting stroller to prevent finger entrapment.
• ALWAYS make sure stroller is FULLY OPEN AND LOCKED
before using.
• ALWAYS use the brakes when stroller is stopped.
• ALWAYS remove protective material and poly bags and
dispose before assembly.
• NEVER put hot liquids in the cup holder.
• NEVER use stroller on stairs or escalators.
• NEVER rollerblade with stroller.
• NEVER allow children to play with or hang onto the stroller.
• NEVER allow children to climb into the stroller unassisted.
Stroller may tip over and injure child.
• NEVER place or hang parcels, bags or accessories on the
handle or canopy. The stroller may tip over or the canopy may
collapse.
• This product will become unstable if a parcel bag or rack is
used when there is no provision for one.
• This product may become unstable if a parcel bag, other than
the one recommended by the manufacturer is used.
• This product will become unstable if the manufacturer’s
recommended load is exceeded.
• DO NOT carry additional children, goods or accessories in or
on this product except as recommended in the manufacturer’s
instructions.
• NEVER place more than 2 lbs. (1 kg) in parent tray to prevent
tipping.
• NEVER place more than 10 lbs. (4.5 kg) in the storage basket. If
weight is exceeded, hazardous unstable conditions may exist.
• STROLLER is only for use with children up to 50-lbs. (22.7
kg), and WHEN SEATED, the midpoint of the child’s head is at
or below the top of the stroller seat.
• ONLY use this stroller with ONE child at a time.
• STROLLER is for use with children who can sit up unassisted,
and is NOT recommended for newborns.
• FALL HAZARD: Wheel can detach and cause tipover. Pull on
wheel to assure it is securely attached.
• FALL HAZARD from tip over. Before running, jogging, or
walking fast, LOCK the front wheel from swiveling.
1Safety
WARNING:
2
• Check frequently to be sure that child is properly secured in
restraint system
• Always maintain a safe speed. Avoid quick, sharp changes in
direction, as tip-over may occur. The stroller is not intended
for use at high speeds.
• Allow extra clearance for the stroller when near curbs,
parked cars, and other obstacles. The stroller requires a
wide turning radius. Do not turn sharply.
• Use caution when turning on loose or uneven surfaces and
when going downhill.
• Always engage the parking brakes when stopping, releasing
the handle or loading / unloading children.
• Keep the safety wrist strap on until you are sure the stroller
is completely stopped.
• Do not travel over curbs, bumps or holes.
• Do not pull or push the stroller with a vehicle.
• Do not lift stroller by child and/or parent tray or canopy.
Before each use check:
• The stroller for damage. Do not use if damaged.
• The tire pressure. If necessary inflate the tires to within the
range shown on the tire sidewall. Always use a foot or hand
pump to inflate the tires.
• The fasteners are tight. Tighten if necessary.
• Front wheel is locked from swiveling before running or
jogging.
• All loose items are removed from the passenger compartment.
• Maximum weight that can be carried in the under seat basket
is 10 lb (4.5 kg). The parent/child tray is 2 lb (1 kg) each.
During use be sure to:
• Take proper steps (clothing, ventilation, hydration) to
protect the child from exposure hazards such as wind chill
and heat exhaustion. These hazards will have a greater
impact on the less active passenger.
• Only an adult who can physically control the vehicle should
use the stroller. Never allow the stroller to be used by
children as a toy.
• Always lock the front wheel before jogging with the stroller.
• Failure to lock the front wheel when jogging with the stroller
may cause the stroller to become unbalanced, tip over or
lose control.

3
2Parts and Features
child tray
parent tray
front wheel
fold release
rear wheels (2)
frame lock
wheel release lever
wrist strap

3Assembly
4
UNFOLD THE STROLLER
ALWAYS keep ngers away from moving parts, when
folding, unfolding or adjusng stroller to prevent
nger entrapment.
• Ensure that all locking devices are engaged before use.
Unlatch side frame lock. .
Connue holding lock open while pulling up on handle
unl frame “clicks” into place.
WARNING:
2

5
ATTACH THE REAR WHEELS
Push rear wheel into hole unl it clicks into place. Pull on wheel to
make sure it is secure. Repeat on other wheel.
To remove rear wheels:
Li release lever while pulling on wheel. Repeat on other wheel.
.
1
2

6
ATTACH THE FRONT WHEEL
Loosen the locking nut by hand.
Align wheel axle with front wheel forks and insert wheel. Figure
Finger ghten the locking nut located on one side of the axle.
Lock axle in place by pressing the quick release lever toward the
wheel , unl it is secured against the frame.
NOTE: It may be dicult to press the quick release lever against
the frame. If so, release the lever, loosen locking nut one or two
turns and try again.
Pull quick release lever away from wheel.
Quick
Release
Lever
Quick
Release
Lever
Locking
Nut
2
1
3
Fork Fork

Align posts with holes on parent tray. Snap parent tray onto
handlebar tubes.
ATTACH THE PARENT TRAY
Levers
7
ATTACH THE CHILD TRAY
Guide tray tabs into slots on stroller frame.
Push unl tray clicks into place.
To Remove: Squeeze release levers on both sides and li tray up
and o.
1

Rotate the canopy into any posion.
ADJUST THE CANOPY
4Using the Stroller
8
ADJUST THE HANDLEBAR
Press buons on both sides of the handlebar and rotate up or
down as desired.

9
TO STORE WRIST STRAP
Two ways to store wrist strap when not in use: hang wrist strap
on handlebar , or place strap in basket.
WARNING:
USING THE WRIST STRAP
Using the stroller without the safety wrist strap may result in
the user becoming separated from the stroller and serious
injury or death to the passenger. Always use the safety wrist
strap when using the stroller. Always engage the rear parking
brakes before removing the strap from your wrist.
Place your hand through the large loop in a posion so the strap is
comfortable and secure.

WARNING:
•NEVER LEAVE CHILD UNATTENDED. ALWAYS keep child in
view when in stroller.
• AVOID SERIOUS INJURY from falling or sliding out. ALWAYS
use seat belt. Check frequently to make sure it is secure.
• Belts must be threaded exactly as shown (Figure 4.8).
• Failure to follow these instructions could result in the serious
injury or death of your child.
NOTE: Shoulder and
waist straps must be
threaded in direcon of
arrows shown.
C
A
B
10
Place your child in the stroller, with the crotch strap between the
child’s legs. Fasten both buckles. Tighten waist and
shoulder straps snugly around your child.
Shoulder straps:
loosen strap at (A) and slide buckle up.
loosen strap at (A) and slide buckle down.
Waist straps:
pull end (C).
loosen strap at (B). .
NOTE: If the straps should come out of the buckle, rethread as
shown.

11
ADJUSTING THE SHOULDER STRAP HEIGHT
Use these seat height slots to properly
adjust the height of the shoulder straps to
your child’s height. To adjust the shoulder
strap height:
Starng from the back of the seat,
pull the shoulder strap anchor away
from the seat.
Insert the anchor through the slot in
the seat, pushing it towards the front.
Re-insert the anchor through the slit
in the front of the seat at the desired
height.
Pull the strap and anchor all the way
through to the back. Make sure the
strap is properly anchored on the seat
back. Repeat these steps for the
opposite strap.
WARNING:
For proper installation of the restraint system, make sure both
anchors lay flat against the back board.
Improper adjustment of the 5-point safety harness when
the seat is in the reclined position may result in the child
slipping into the leg openings and strangulation. Always
re-adjust the 5-point safety harness to the new position.
To lower seat back completely: Li the clamp lever and
lower seat back. Push clamp lever closed.
To raise seat back: Li clamp lever. Hold end of strap, slide clamp
lever up, pushing seat forward and push clamp lever closed.
NOTE: DO NOT adjust the seat when your child is in the stroller.
ADJUSTING THE SEAT
WARNING:

WARNING:
Slide up to swivel Slide down to lock
12
USING THE PARKING BRAKE
1 2
Lock Brakes: Step down onto brake bar between rear wheels to
lock both rear wheels. To park stroller, BRAKES MUST
Unlock Brakes: Lift up on brake bar to unlock brakes.
• FALL HAZARD from tip over. Before running, jogging, or
walking fast, LOCK the front wheel from swiveling.
• FALL HAZARD: Wheel can detach and cause tip over.
Pull on wheel to assure it is securely attached.
Push tab up unl it “clicks” allowing wheel to swivel around.
Engage Front Swivel Lock: With the wheel straight, push tab down
unl it “clicks” to keep front wheel from swiveling.
NOTE: Locked posion is ideal for travel over rocky or uneven
surfaces. Locked posion is required for jogging.

5
13
4A
B
WARNING: Recline seat back to lowest posion.
Close canopy.
To avoid serious injury:
• Use ONLY IC178, IC181, IC201, IC203, IC205, IC206,
IC207, IC208, IC210, IC211, IC212, IC217, IC218, IC219,
IC220, IC224, IC226, IC228, IC229, IC230, IC231, IC233,
IC234, IC240, IC244, IC250, IC251, IC252, IC258, IC259,
IC261, IC263, IC267, IC279, IC280, IC305, 22036, 22056,
22326 infant car seats with this stroller.
• Please refer to the manufacturer’s instructions for the use
of your infant car seat.
• ALWAYS use child’s tray when car seat is installed.
• NEVER
use child tray cup holder when car seat is attached to
stroller.
Stroller may tip over and injure infant.
• ALWAYS install car seat facing to the rear of the stroller.
• ALWAYS use the restraint system in the car seat.
Car seat must be positioned so child faces the stroller
Posion car seat over the stroller. Touch rear at vercal
surface of car seat A against rear vercal surface of the child tray
B. Lower straight down into stroller and push down on handle. Car
seat will click into place when fully nested.

14
When properly installed, car
seat will come to rest on child
tray and stroller frame. Figure
Pull up on car seat to make sure
it is securely installed.
To remove the car seat, pull the release lever
as shown. Li car seat.

15
Fold release
buttons
6To Fold Stroller
Lock rear brakes. Remove your baby. Close canopy. Unlock front
wheel.
Pull up on BOTH fold release buttons found on both sides of the
stroller underneath the parent tray.
Push the handlebar down until the side frame lock clicks into place.
Stroller can stand alone.

8Care and Maintenance
9
16
• To clean stroller fabric and seat pad, use a sponge or damp cloth
with cold water and mild soap. Drip dry only. Do not use harsh
household cleaners or bleach to clean stroller.
• Restraint and crotch straps should be surface washed and air dried
only. Do not place in washing machine or dryer.
• Periodically, check for loose screws, worn parts, torn material or
loose stching. Tighten or replace parts as needed.
Dorel Juvenile Group, Inc. warrants to the original purchaser that this
product (Interval Jogger), is free from material and workmanship defects
when used under normal condions for a period of one (1) year from the
date of purchase. Should the product contain defects in material or
workmanship Dorel Juvenile Group, Inc., will repair or replace the
product, at our opon, free of charge. Purchaser will be responsible for
all costs associated with packaging and shipping the product to Dorel
Juvenile Group Consumer Care Department at the address noted on
front page and all other freight or insurance costs associated with the
return. Dorel Juvenile Group will bear the cost of shipping the repaired or
replaced product to the purchaser. Product should be returned in its
original package accompanied by a proof of purchase, either a sales
receipt or other proof that the product is within the warranty period.
This warranty is void if the owner repairs or modies the product or the
product has been damaged as a result of misuse.
This warranty excludes any liability other than that expressly stated
previously, including but not limited to, any incidental or inconsequenal
damages.
SOME STATES DO NOT ALLOW THE EXCLUSION OR LIMITATION OF
INCIDENTAL OR CONSEQUENTIAL DAMAGES, SO THE ABOVE LIMITATION
OR EXCLUSION MAY NOT APPLY TO YOU.
THIS WARRANTY GIVES YOU SPECIFIC LEGAL RIGHTS, AND YOU MAY
ALSO HAVE OTHER RIGHTS THAT MAY VARY FROM STATE TO STATE.
7Replaceable Parts
• Single front wheel
• Single rear wheels
• Child tray
• Parent tray
• To order parts call (800) 544-1108.
• Include the model number and manufacture date (found on the
stroller) and a brief descripon of the part.

©2017 PACIFIC CYCLE INC.
SCHWINN® AND SCHWINN QUALITY® ARE
REGISTERED TRADEMARKS AND ARE USED
UNDER LICENSE FROM PACIFIC CYCLE INC.,
A DIVISION OF DOREL INDUSTRIES.
©2017 Dorel Juvenile. (800) 544-1108
Styles and colors may vary. Los estilos y los colores pueden variar.
Made in CHINA. Hecho en CHINA.
Distributed by (distribuido por) Dorel Juvenile Group, Inc., 2525 State St., Columbus, IN 47201-7494.
Dorel Juvenile Canada, 2855 Argentia Road, Unit 4, Mississauga, ON, L5N 8G6
Importado y Distribuido en Chile por: Comercial e Industrial Silfa S.A. - San Ignacio 0201 / Parque Industrial
Portezuelo Quilicura, Santiago Chile. Fono (562) 2339 9000. En Perú por: Comexa S.A. - Los Libertadores 455 – San
Isidro, Lima – Perú. Fono (511) 4469014. En Centro América, Caribe y Ecuador por: Best Brands Group S.A. – Av.
Balboa, Bay Mall Plaza, Planta Baja, local 9, Panamá. - Fono: (507) 300 2884. En Colombia por: Baby Universe S.A.S. -
Vía 40 No. 77-29, Barranquilla, Colombia - Fono: (575) 353 1110
Importador: DJGM, S.A. DE C.V. Gabriel Mancera No. 1041 Col. Del Valle Delegación Benito Juárez C.P. 03100 México,
D.F. R.F.C. DJG140305GN9 Tel. (55) 67199202 03/20/17 4358-7087C
Table of contents
Languages:
Other Schwinn Stroller manuals

Schwinn
Schwinn Safari User manual

Schwinn
Schwinn 01569C User manual

Schwinn
Schwinn Double Seat Fixed WheelJogging Stroller User manual

Schwinn
Schwinn Jogging Stroller User manual

Schwinn
Schwinn Turismo 13-SC113 User manual

Schwinn
Schwinn Turismo User manual

Schwinn
Schwinn Arrow 13-SC212 User manual

Schwinn
Schwinn Double Seat Swivel Wheel Jogging Stroller User manual

Schwinn
Schwinn Arrow 13-SC112 User manual

Schwinn
Schwinn Single Seat Fixed Wheel Jogging Stroller User manual