Sciener M503 User manual

Scan for Wechat
Account
Scan to
download APP
www.kejixia.cn
171219 - VER3.0
Address: 4th floor, Building 17, Innovation Park, Wenyixi Road 998#, Yuhang District,
Hangzhou, Zhejiang Province, PRC
Web: www.kejixia.cn Email: contact@sciener.cn Hotline: 400-0658-851
Copyright: Sciener 2017
Manual
M503
Sciener

Lock bodyFront panel Back panel Rubber pad
Parameters
Parts list
Model:
Dimensions:
Material:
Gross weight:
Communication method:
Supporting systems:
Stand-by current:
Operating current:
Power supply:
Unlock time:
M503
Front W70mm x H155mm x T12mm
Back W71mm x H162mm x T30mm
Front panel: Zinc alloy
Back panel: Industrial plastic
Lock body: Zinc alloy
1.2KG
Bluetooth 4.1ble
Android 5.0/IOS7.0
≈35μA
≈200 mA
4 AA
≈1.5 s
Door lock frame must be greater than 110mm, and door thickness must
be between 35-45 mm
●
Package list:
Precautions before installing and adjusting the door lock
Before installing the lock, please check that all the accessories are present.
If your door needs to drill holes across, please seek professional help in order to avoid unnecessary
property damage.
Before installing the lock, please connect the front panel of the lock to the back panel, and pair the
lock with the APP.
●
●
/02
Screw Strike plate
Key x2
/01
Please read the manual before installation carefully and keep
this manual at a secure place.
Please refer to sales agents and professionals for information not included in this manual.
For more support, please call 0571-81902879 /86 15381172306.
We reserve the right of upgrading the product without prior notice.
●
●

/03
Pair the lock with APP
Install latch/deadbolt and cylinder
Please install under the guidance of a professional
In case of special circumstances, Please handle with care to avoid damage!
●
●
Screw
Screw
Direction
Unlock key
Reset button
Delete/exit key
Adjust the lock before installation
Pull out the cables from the front and back panel,
and connect them as shown in the figure
Installation notes
If your door lock hole, panel mounting holes and the lock do not match, please refer the illustration
(drilling hole) and adjust the hole. Non-professionals shall not drill holes to avoid causing damage!
Warning
/04
After power is on, while the front panel touchscreen
backlight is off:
1. Tap the touch screen to activate
2. Open the app after voice prompt "please add
bluetooth administrator"
3. Tap profile picture on the top left corner, select "add
lock"-"door lock"
4. Select the lock device name that is found. After adding
successfully, the page will jump to the lock list. If not
successful, repeat the above steps or long press the reset
button in the back panel until you hear the voice prompt
Important Pair with App using bluetooth
Front panel
Back panel

Installation steps:
Lock body: Fix the lock body (figure 1) with two screws
(figure 2)
Front panel: Fix the rubber pad on front panel and press it
on the door (figure 3). Pull the power cable through the
holes in the door (figure 4) , the iron plae (figure 5) and fix
the iron plate with screws.
Back panel: Connect the back panel with the power cable
(figure 6), adjust the position of back panel and press it on
the iron plate, make sure the spindle goes across the circular
hole in the iron plate and into the lock body (figure 7). Fix
the back panel with screws (figure 8 and figure 9).
Install front/back panel
Bolt switch test
Turn the bolt switch, if
the bolt come out and
retract properly, fix the
back panel with a
screw.
Screw
/06/05
1
3
5
8
9
4
2
Back panel
6
7
Front panel

left/right switch
Install batteries and cover Adjust door opening direction
Judge the opening direction of the door
Front panel and features
Pull up the slide cover of the back panel, install
4 AA batteries and push the cover back to its
original position.
When install the lock, please adjust
the left-right switch in the back
panel to match the actual opening
direction of the door.
*At times of low battery power, please use Micro USB
power source to recharge.
Micro USB emergency power supply port
Mechanical key/cylinder
Digital touch screen
/07 /08
1 Left in 3 Left out 4 Right out
2 Right in
Left open
Right open
Ourdoor
Indoor
Ourdoor
Indoor Indoor
Ourdoor
Ourdoor
Indoor

Care and Maintenance
1. Please keep the lock from direct contact with corrosive liquids.
2. Please do not hang anything on the door handle.
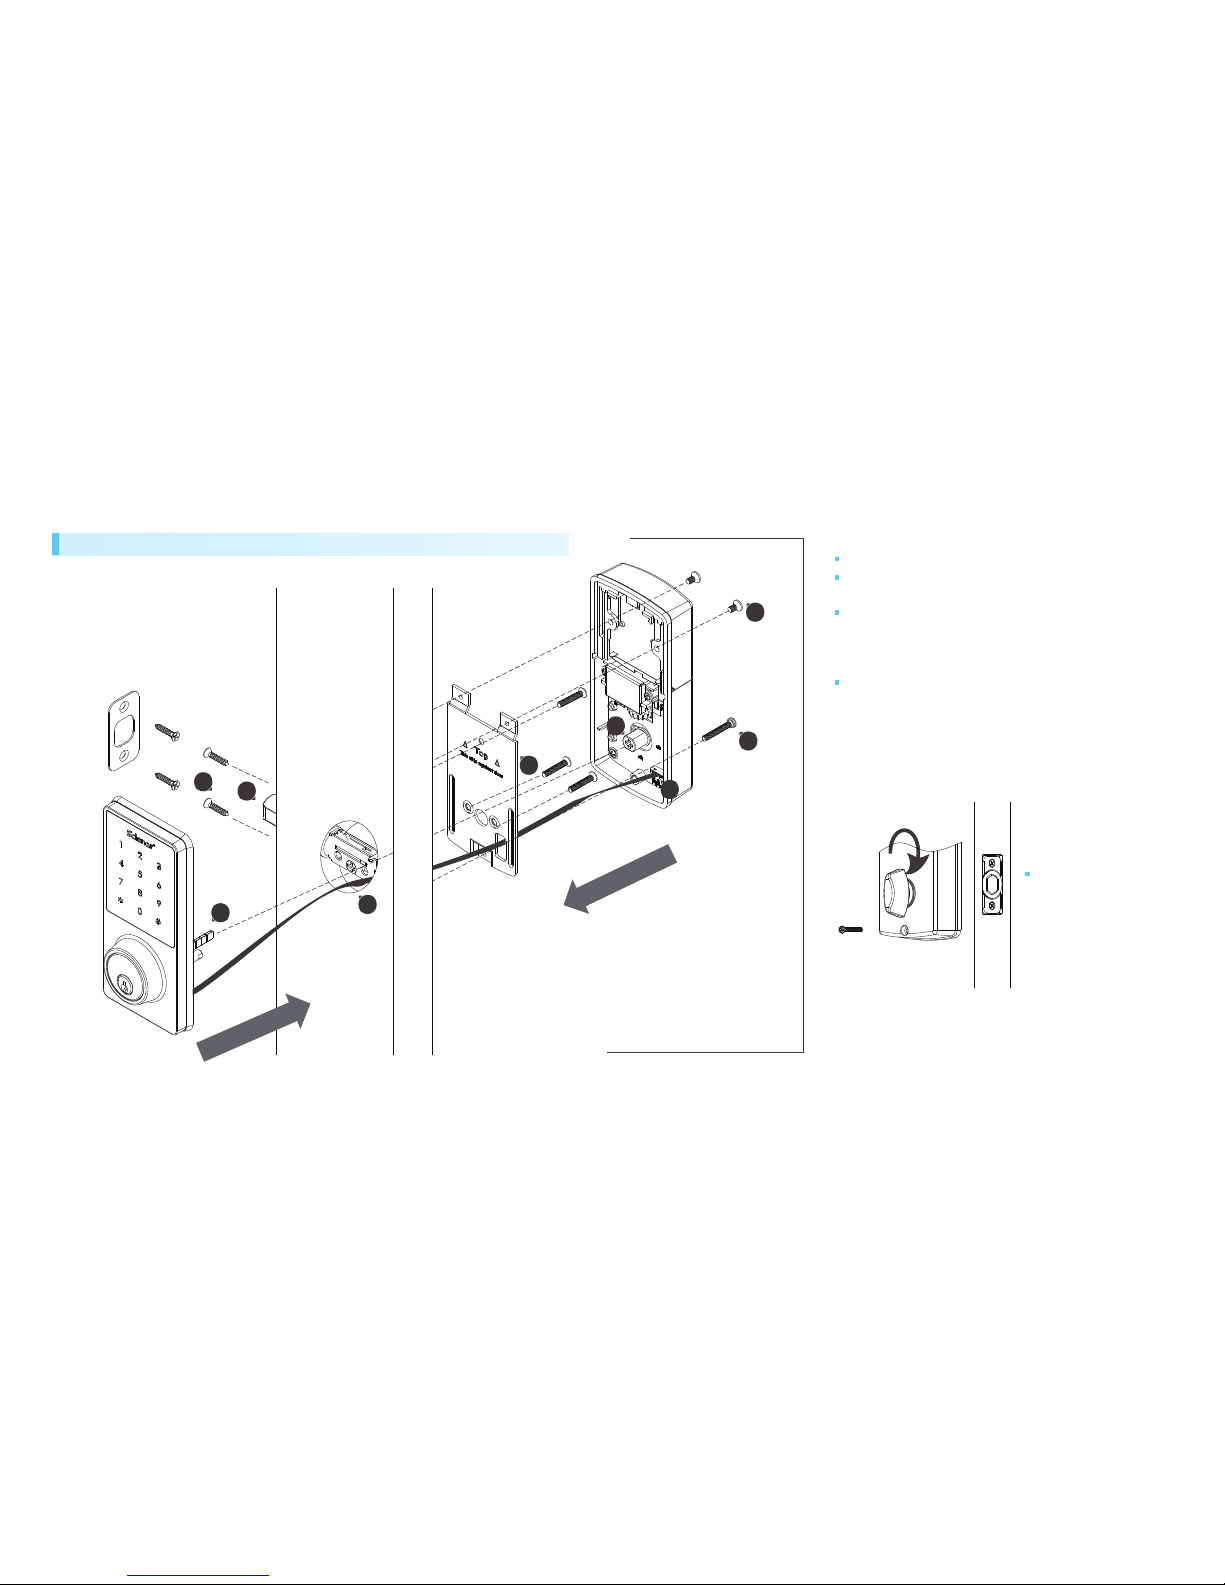
3. If the door deforms, please adjust the strike plate accordingly, so that the bolt can stretch
fully into the strike plate.
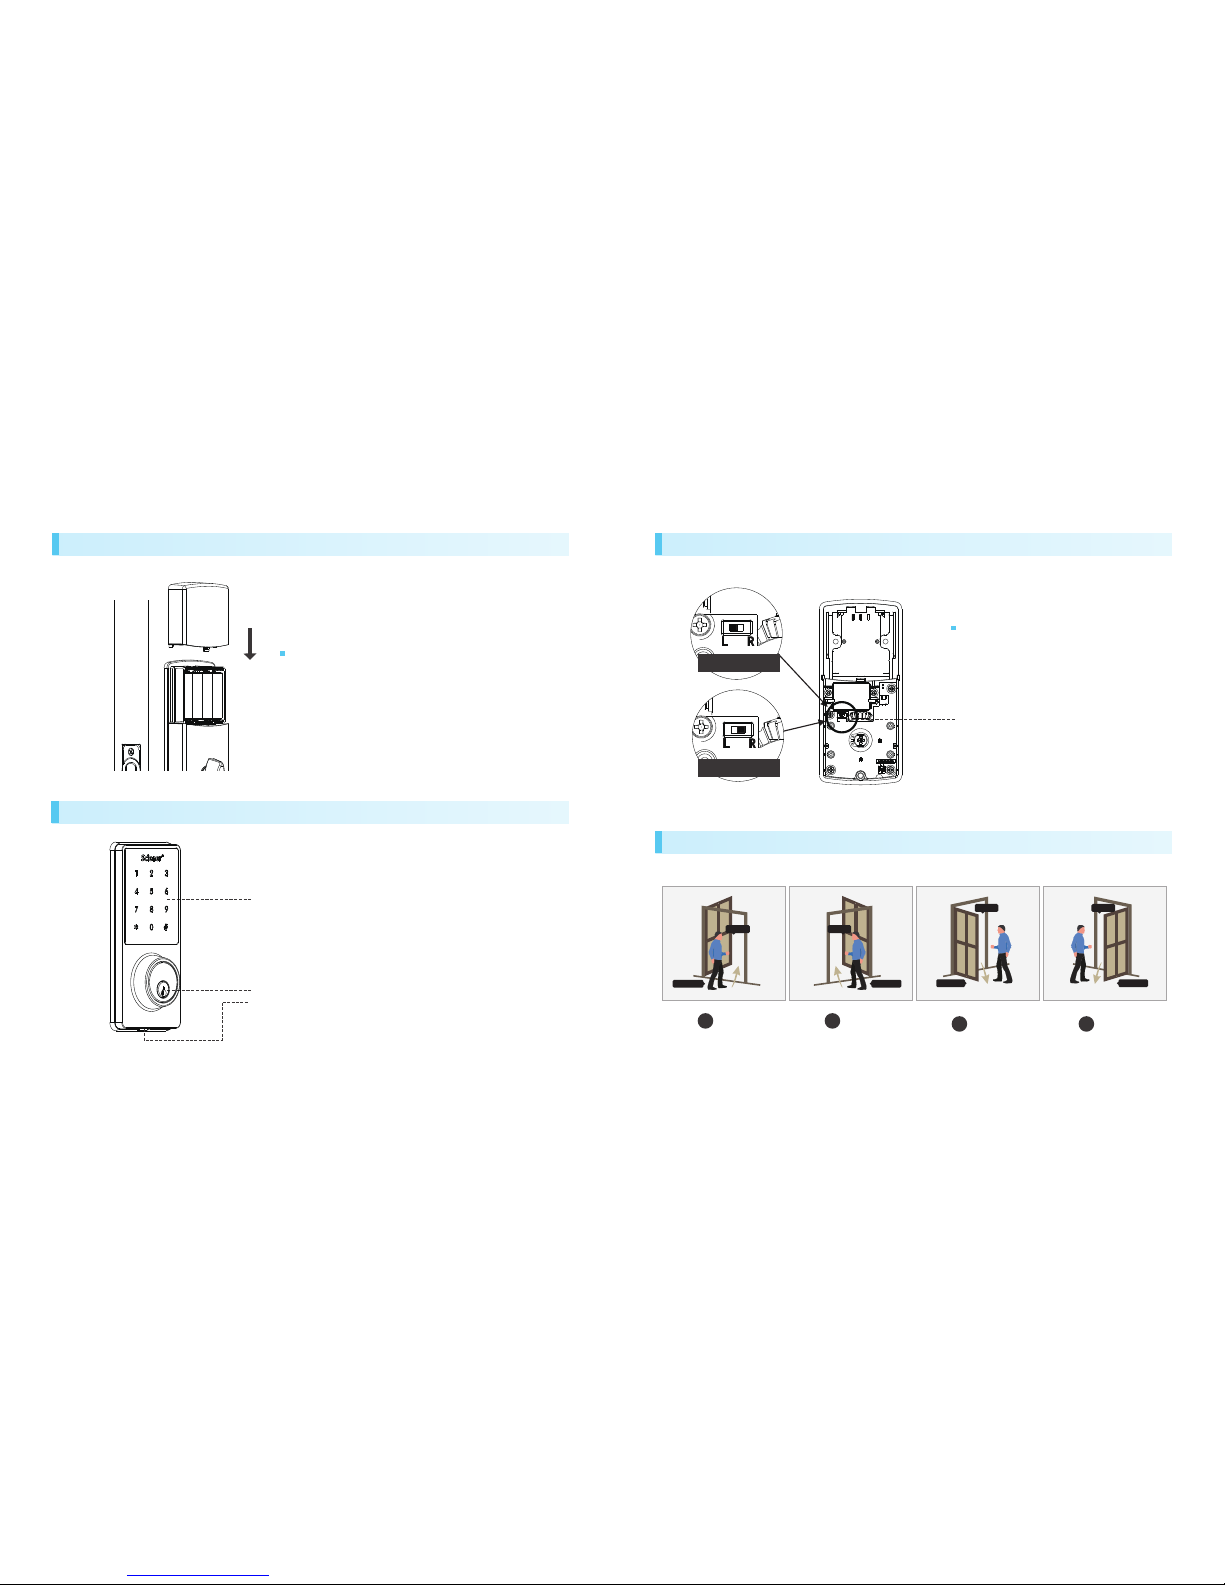
4. Please replace with new batteries when the low battery warning is prompted.
5. Please keep the mechanical keys at a secure place.
●
●
●
●
●
FCCWarningStatement
Changesormodificationsnotexpresslyapprovedbythepartyresponsibleforcompliancecouldvoidtheuser’sauthoritytooperatethe
equipment.ThisequipmenthasbeentestedandfoundtocomplywiththelimitsforaClassBdigitaldevice,pursuanttoPart15ofthe
FCCRules.Theselimitsaredesignedtoprovidereasonableprotectionagainstharmfulinterferenceinaresidentialinstallation.This
equipmentgeneratesusesandcanradiateradiofrequencyenergyand,ifnotinstalledandusedinaccordancewiththeinstructions,may
causeharmfulinterferencetoradiocommunications.However,thereisnoguaranteethatinterferencewillnotoccurinaparticular
installation.Ifthisequipmentdoescauseharmfulinterferencetoradioortelevisionreception,whichcanbedeterminedbyturningthe
equipmentoffandon,theuserisencouragedtotrytocorrecttheinterferencebyoneormoreofthefollowingmeasures:
‐‐ Reorientorrelocatethereceivingantenna.
‐‐ Increasetheseparationbetweentheequipmentandreceiver.
‐‐
Connecttheequipmentintoanoutletonacircuitdifferentfromthattowhichthereceiverisconnected.
‐‐ Consultthedealeroranexperiencedradio/TVtechnicianforhelp.
This device complies with part 15 of the FCC Rules. Operation is subject to the following
two conditions: (1) This device may not cause harmful interference, and
(2) this device must accept any interference received, including interference that may cause undesired operation.
Table of contents
Other Sciener Door Lock manuals