scigiene N323R User manual

TEMPERATURE CONTROLLER
N323R
OPERATING MANUAL V1.7x
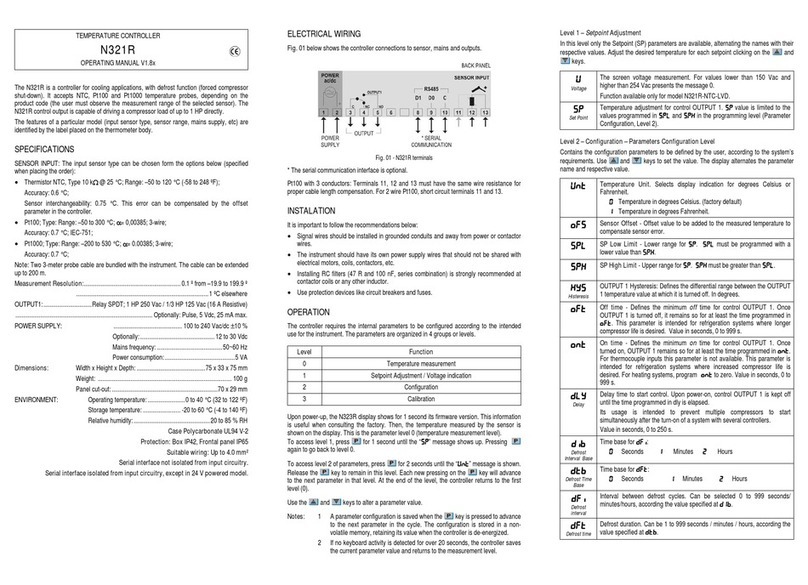
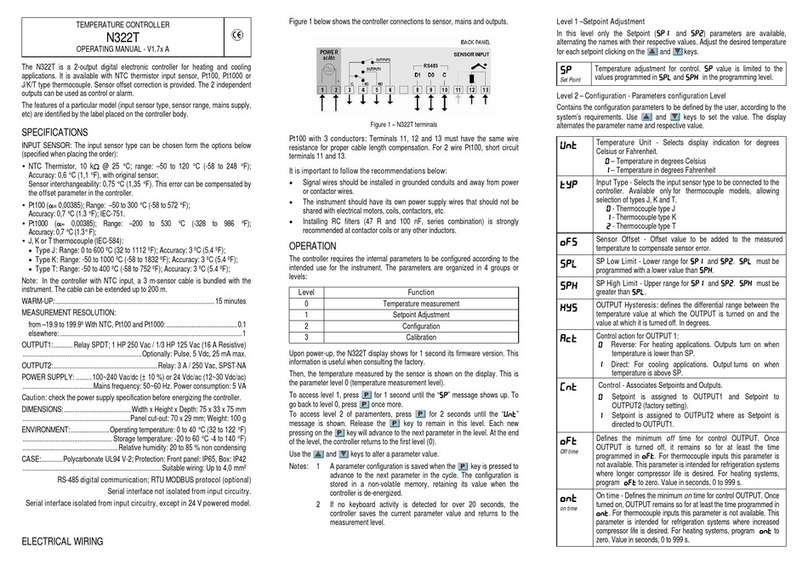
The N323R is a Refrigeration controller designed to control the temperature of
refrigeration cases and coldrooms, embedding several specialized functions for best
system performance. The N323R can read two temperature probes (controller and
defrost probes) and has three relay outputs for controlling the compressor, the defrost
and the fan.
The controller can be ordered with optional features such as to comply with the
application’s requirements. The label on the instrument housing shows the complete
instrument configuration.
SPECIFICATIONS
PROBE INPUT:....................................................................................2 Thermistor NTC
........................................................................................................ Type 10 kΩ@ 25 °C
.................................................................................Range: –50 to 120 °C (-58 to 248°F)
...............................................................................................................Accuracy: 0,6 °C
Two 3-meter probe cable are bundled with the instrument. The cable can be
extended up to 200 m. Sensor interchangeability: 0,75 °C. This error can be
compensated by the offset parameter in the controller.
Measurement Resolution: ...................................................0,1 °C from –19.9º to 199.9º
..................................................................................................................1 °C elsewhere
OUTPUT1: ......................Relay SPDT; 1 HP 250 Vac / 1/3 HP 125 Vac (16 A Resistive)
...............................................Optionally: Pulse, 5 Vdc, 25 mA max.
OUTPUT2:........Relay SPST-NA, 3 A / 250 Vac (General use) ; 5A / 250Vac (Resistive)
OUTPUT3:..................SPST-NA, 3 A / 250 Vac (General use) ; 5A / 250Vac (Resistive)
POWER SUPPLY: ...............................100 to 240 Vca/dc ±10 %
Optionally:....................................12 to 30 Vdc
Mains frequency: ..............................50~60 Hz
Power consumption:................................ 5 VA
Dimensions: Width x Height x Depth:...................................75 x 33 x75 mm
Weight: ...........................................................................100 g
Panel cut-out:.........................................................70 x 29 mm
ENVIRONMENT:.................................. Operating temperature: 0 to 40 ºC (32to 122 ºF)
...............................................................Storage temperature: -20 to 60 ºC (-4to 140 ºF)
..................................................................Relative humidity: 20 to 85% non-condensing
CASE:........................Polycarbonate UL94 V-2; Protection: Front panel: IP65, Box: IP42
...........................................................................................Suitable wiring: Up to 4,0 mm²
DIGITAL COMMUNICATION: .......................RS-485, RTU MODBUS protocol (optional)
Serial interface not isolated from input circuitry.
Serial interface isolated from input circuitry, except in 24 V powered model.
INSTALLATION
It is important to follow the recommendationsbelow:
•Signal wires should be installed in grounded conduits and away from power or
contactor wires.
•The instrument should have its own power supply wires that should not be shared
with electrical motors, coils, contactors, etc.
•Installing RC filters (47 R and 100 nF, series combination) is strongly
recommended at contactor coils or any other inductor.
•Use protection devices like circuit breakers and fuses.
ELECTRICAL WIRING
Figure 1 below shows the controller connections to sensor, mains and outputs.
Figure 1 – N323R terminals
OPERATION
The controller requires the internal parameters to be configured according to the
intended use for the instrument. The parameters are organized in 4 groups or levels:
Level Function
0 Temperature measurement
1 Setpoint Adjustment
2 Configuration
3 Calibration
Upon power-up, the N323R display shows for 1 second its firmware version. This
information is useful when consulting the factory.
Then, the temperature measured by the sensor is shown on the display. This is the
parameter level 0(temperature measurement level).
To access level 1, press for 1 second until the “SP” message shows up. Pressing
again to go back to level 0.
To access level 2 of paramenters, press for 2 seconds until the “uNT” message is
shown. Release the key to remain in this level. Each new pressing on the key
will advance to the next parameter in that level. At the end of the level, the controller
returns to the first level (0). Use the and keys to alter a parameter value.
Notes: 1 A parameter configuration is saved when the key is pressed to
advance to the next parameter in the cycle. The configuration is stored
in a non-volatile memory, retaining its value when the controller is de-
energized.
2 If no keyboard activity is detected for over 20 seconds, the controller
saves the current parameter value and returns to the measurement
level.
3. While in the temperature measurement level, a momentary pressing on
the key will show the Probe 2 temperature (evaporator temperature)
Level 1 – Setpoint Adjustment
In this level only the Setpoint (SP) parameters are available, alternating the names with
their respective values. Adjust the desired temperature for each setpoint clicking on the
and keys.
SP
Set Point
Case of coldroom temperate adjustment. SP value is limited to the
values programmed in SPL and SPk in the programming level
(Parameter configuration, level 2).
Level 2 – Configuration –Parameters configuration Level
Contains the configuration parameters to be defined by the user, according to the
system’s requirements. Use and keys to set the value. The display alternates
the parameter name and respective value.
Unt
Unit Temperature Unit. Selects display indication for degrees Celsius or
Fahrenheit
0Temperature Celsius. (factorydefault)
1Temperature in degrees Fahrenheit.
Of1
Offset
Probe 1
Probe 1 Offset - Offset value to be added to the sensor 1 measured
temperature such as to perform fine adjustments to the value showed on
the display (after sensor replacement, for instance, if required).
Range: ± 0.1 to 10.0 degrees.
Of2
Offset
sensor 2
Probe 2 Offset - Offset value to be added to the sensor 2 measured
temperature to perform fine adjustments to the value showed on the
display (after sensor replacement, for instance, if required).
Range: ± 0.1 to 10.0 degrees.
Spl
SP Low Limit
SP Low Limit - Lower range for SP. SPL must be programmed with a
lower value than spK.
spK
SP High Limit
SP High Limit - Upper range forSP. SPx must be greater than spl.
Kys
Histeresis OUTPUT 1 Hysteresis: defines the differential range between the
temperature value at which the OUTPUT is turned on and the value at
which it is turned off. In degrees.
(nt
Control Defines the output position for the refrigeration relay.
0Refrigeration at OUTPUT1/ Defrost at OUTPUT2. (factory default)
1Refrigeration at OUTPUT2/ Defrost at OUTPUT1.
Dly
Delay Delay time to start control. Upon power-on, control OUTPUT 1 is kept off
until the time programmed in dly is elapsed. Its usage is intended to
prevent multiple compressors to start simultaneously after the turn-on of
a system with several controllers. Value in seconds, 0 to 250 s.
0nt
on time
On time - Defines the minimum on time for refrigeration output. Once
turned on, OUTPUT 1 remains so for at least the time programmed in
ont. This parameter is intended for refrigeration systems where
increased compressor life is desired. Value in seconds, 0 to 999 s.
0ft
Off time
Off time - Defines the minimum off time for control OUTPUT 1. Once
OUTPUT 1 is turned off, it remains so for at least the time programmed
in oft. This parameter is intended for refrigeration systems where
longer compressor life is desired. Value in seconds, 0 to 999 s.
df1
Defrost
Interval
Interval time between defrost cycles. Adjustable from 0 to 999s.
During this time, the defrost output remains off.
df1= 0 disables this function (no defrost cycles)
Dft
Defrost time Defrost duration. Interval time during which the defrost output remains
on.
Value in minutes, 1 to 999.

df(
defrost
Compressor
Compressor output behavior during the defrost cycle:
0Always off;
1Always on ;
2Compressor output works normally, turning on and off to maintain
the temperature.
Dfs
Temperature for finalizing the defrost clycle – evaporator
temperature value as measured by sensor 2 which terminates the
defrost cycle, regardless of the time configured in Dft.
Range:–50 to +120 degrees (-58 to 248°F).
NOTE: the defrost cycle will not initiate if the evaporator temperature is
the value defined in this parameter.
ddt
Drain down time – This parameter sets the time interval for keeping the
outputs off to allow optimum drying of the evaporator.
Value in minutes, 0 to 999.
frs
Evaporator temperature for liberating the fan – after defrost and
water draining, the refrigeration is turned on. To keep warm air from
circulating in the system, demanding more energy to lower the
temperature, the N323R can be configured to maintain the fan output
off until the temperature cools below the value defined in frs.
Range: : –50 to 120 °C (-58 to 248°F)
fdl
Fan maximum delay after draining – to assure product integrity, the
fan output will be unconditionally turned on after the time programmed
in fdl, regardless of the fact that the evaporator temperature may not
have reached the temperature value defined in frs
Value in minutes, 0 to 999.
foc
Fan behavior during refrigeration .
0Fan is active only whenthe compressor is on..
1Fan is active during the complete refrigeration cycle, even when the
compressor is turned off.
fod
Fan behavior during defrost.
0Fan is off during the defrost cycle.
1Fan is active during the defrost cycle.
fss
Fan deactivation due to evaporator heating – evaporator temperature
that turns the Fan off when the evaporator heats up (above temperature
defined in fss), improving system efficiency and protecting the
compressor. The fan is allowed to turn on again when the temperature
drops 2 degrees below the value defined in this parameter.
Coe
Compressor function during a probe failure: This parameter fixes the
compressor operating mode in the event of the main probe failure.
0Compressor is deactivated when probe 1 is in error.
1Compressor is activated when probe 1 is in error
Dfh
defrost hold
Defrost hold time (temperature indication hold): This is the time
interval following the end of the defrost cycle for the controller to display
actual control temperature. During the defrost cycle and the time defined
by dfh, the display will be showing the last measured temperature prior
to the start of the defrost cycle.
0 : function disabled (shows actual temperature during the
defrost cycle);
1 to 250 : Time interval (sec., min. or hours) after the end of defrost for
the display to show the actual control temperature.
Level 3 – Calibration level
The controller is factory calibrated. The following parameters should be accessed only
by experienced personnel. To enter this cycle, the key must be kept pressed for 4
seconds.
Don’t press the and keys if you are not sure of the calibration
procedures. Just press the key a few times until the temperature
measurement level is reached again.
Pas Password - Enter the correct password to unlock write operations for
the parameters in the following levels.
[l1 Calibration low input 1 – Zero value of the input 1. It adjusts the
lower measurement range of Probe 1.
[k1 Calibration High input 1 – Gain calibration. It adjusts the full scale
measurement range of the Probe 1.
[l2 Calibration low input 2 – Zero value of the input 2. It adjusts the
lower measurement range of of Probe 2.
[k2 Calibration High input 2 – Gain calibration. It adjusts the full scale
measurement range of the Probe 2.
FA( Factory Calibration – Restores factory calibration parameters.The
value 1restores the calibration parameters to the factory values.
Prt Protection – Defines the levels of parameters that will be password
protected. See “Configuration Protection Usage” for details.
Pa( Password Change - Allows changing the current password to a new
one. Values from 1 to 999.
Sn2 Serial number - First part of the instrument serial number.
sn1 Serial number - Second part of the instrument serial number.
sn0 Serial number - Third part of the instrument serial number.
CONTROLLER OPERATION
The controller turns on and off the compressor output such as to maintain the
temperature at the selected Setpoint. The front panel display shows the symbol
whenever the compressor is active.
Defrost
Function to eliminate the ice accumulated on the evaporator, for improving system
efficiency. The duration and interval of the defrost cycles are user configurable.
However, it may be unconditionally terminated depending on the evaporator
temperature as measured by Probe 2 (refer to the dfs parameter)
The defrost can be achieved by: 1) compressor deactivation; 2) electrical heater or
3) heat pump inversion.
In the first case, the refrigeration is turned off and the defrost happens naturally. In the
second case the defrost output drives an electrical resistance to generate heat and so
melt the ice. In this mode, the compressor output is also deactivated. In the third case,
heat pump inversion, the compressor is kept active and the defrost output commands
the valve that inverts the heat cycle.
During defrost, the case of coldroom temperature may be forced to reflect the last
temperature measured prior to entering the defrost cycle (refer to the dfh parameter).
The df1 and dft parameters define, respectively, the time interval between defrosts
and the duration of the defrost cycle. The controller display shows the symbol to
indicate that a defrost cycle is in progress.
Manual defrost: The key allows that a defrost cycle be initiated of terminated
immediately. Pressing this key for 3 seconds will toggle the current defrost status.
Definition of the evaporator temperature that terminates the defrost. (dfs
parameter)
- Wait for ice building on the evaporator;
- Start a defrost cycle manually;
- Visually monitor the evaporator until there is no more ice onit.
- Check the Probe 2 temperature (momentary press on the key). This is the
correct temperature setting for the dfs.parameter.
CONFIGURATION PROTECTION
A protection system to avoid unwanted changes to the controller parameters
is implemented. The level of protection can be selected from partial to full. The following
parameters are part of the protection system:
Pas When this parameter is presented, the correct password must be entered to
allow changes of parameters in the following levels.
Prt Defines the level of parameters that will be password protected:
1 - Only calibration level is protected (factory configuration);
2 - Calibration and Configuration levels areprotected;
3 - All levels are protected - calibration, Configurationand setpoints.
PA( Parameter for definition of a new password. Since it is located in the
calibration level, can only be changed by a user that knows the current
password. Valid passwords are in the range 1 to 999.
CONFIGURATION PROTECTION USAGE
The PAS parameter is displayed before entering a protected level. If the correct
password is entered, parameters in all following levels can be changed. Ifwrong or no
password is entered, parameters in the following levels will be read only.
Important notes:
1- After five consecutive attempts to enter a wrong password, new tentative will be
blocked for the next 10 minutes. If the current valid password is unknown, the master
password can be used only to define a new password for the controller.
2 - The password for a brand new device is 111.
MASTER PASSWORD
The master password allows user to define a new password forthe controller, even if
the current password is unknown. The master password is based in the serial number
of the controller, and calculated as following:
[ 1 ] + [ higher digit of SN2 ] + [ higher digit of SN1 ] + [ higher digit of SN0 ]
for example the master password for the device with serial number 987123 465 is: 1 9 3 6
as follows: 1 + sn2= 987; sn1= 123; sn0= 465 = 1 9 3 6
How to use the master password:
1- Enter the master password value at PaS prompt.
2- Go to PA( parameter and enter the new password, which must not be zero (0).
3- Now you can use this new password to access all controller parameters with modify
rights.
ERROR MESSAGES
Probe measurement errors force the controller outputs to be turned off. The cause for
these errors may have origin in a bad connection, sensor defect (cable or element) or
system temperature outside the sensor working range. The display signs related to
measurement errors are shown below
Measured temperature exceeded maximum allowed range for the
sensor. Broken Pt100, Pt1000 or T/C. Short circuited NTC sensor.
Measured temperature is below minimum measurement range of the
sensor.Short circuited Pt100, Pt1000 or T/C. Broken NTC.
PRODUCT IDENTIFICATION
The label attached to the controller case identifies the model and the optional present in
the product, as described below:

MODEL: N323R - A - B - C, where:
A: Input Sensor: NTC
B: Digital communication: blank or 485 (RS485, Modbus protocol)
C. Voltage rating: blank (100-240 Vac/dc) or 24V (10-30 Vac/dc);
Table of contents
Other scigiene Temperature Controllers manuals
Popular Temperature Controllers manuals by other brands

Omron
Omron E5ZN Series instruction manual

Spartan
Spartan WT912G installation guide

ColdfusionX
ColdfusionX JLD-612 instruction manual

SWASTIK
SWASTIK DTC-9621-1 quick start guide

28 GORILLA
28 GORILLA 28-0010038 user manual

Love Controls
Love Controls TSS2 series Specifications - installation and operation instructions

Johnson Controls
Johnson Controls W43A quick guide

KIOUR
KIOUR TOUCH LINE RSD manual

oventrop
oventrop Unibox TQ vario operating instructions

Engineered Comfort
Engineered Comfort Fan Coil Controller EZstat Installation and operation manual

Viessmann
Viessmann VITOTROL 100 operating instructions

oventrop
oventrop Unibox E BV operating instructions