Ribbon Tension
Adjustment
(VX2/VXL)
Document Owner:
Service Department
Effective Date:
AUG-22-2022
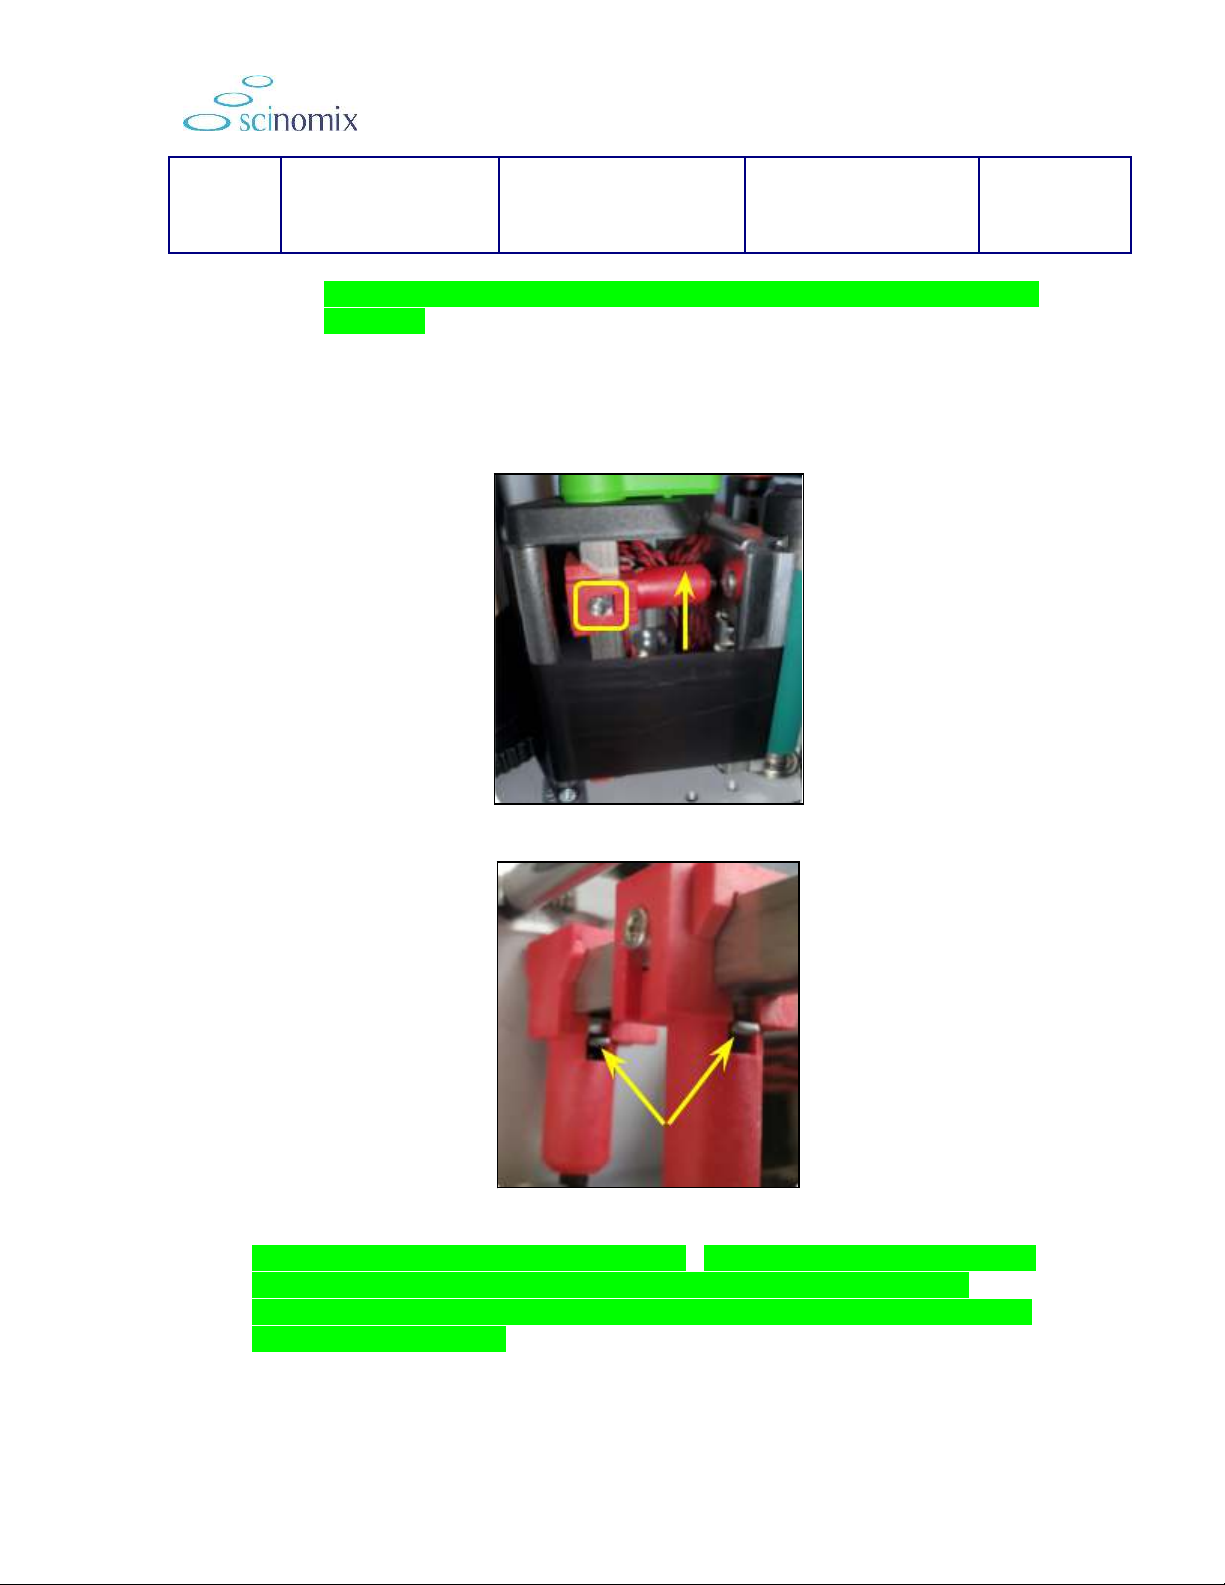
Figure 4.
4. Check the location and pressure of the red tension fingers: The red tension
fingers that press the printhead against the print roller should be set as shown in
Figure 5 below.
a. Open the printhead, and locate a hole in the rail at the top and the bottom
that line up with the tension fingers.
b. Slide a 2.5mm Allen (you can use the one on the printer) into each of the
two holes and loosen until it stops.
c. Turn the screw back clockwise 1.5 turns to tighten to the setting found to
work the best.
d. Slide the top tension finger down so the pressure point is in line with the
top of the ink ribbon as shown below.
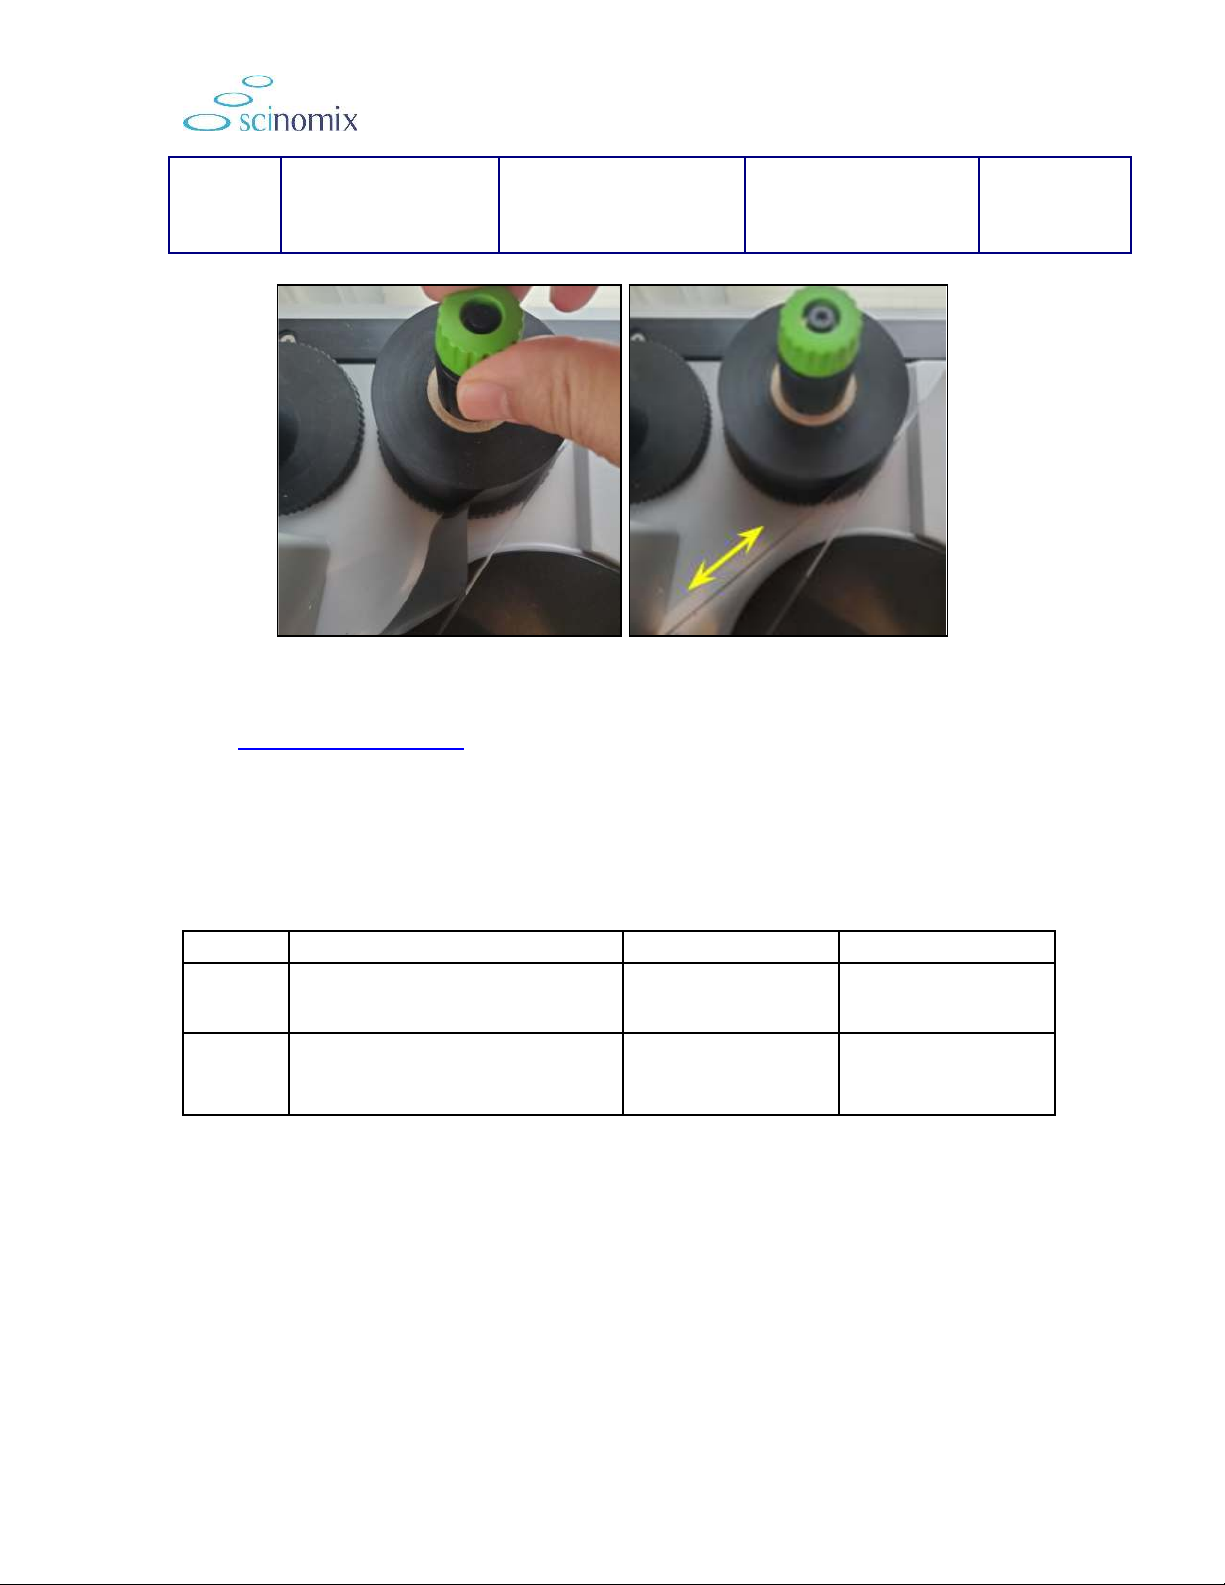
5. Check the adjustment of the wrinkle bar:
a. With the ribbon run through the printhead, the ink ribbon heads to the
waste spool. The wrinkle bar (roller) has a set screw and an index line
showing a positive/negative position.
b. Make sure that the scribed line on the wrinkle bar is slightly to the positive
side of the centerline. Picture is below.
6. Check/Adjust Top and Bottom Guide Pin Tension. The core of the guide pins
is adjustable and affects how much tension each pin puts on the print head.
a. Use a 2.5mm Allen wrench to loosen the set screw in the face of the top
guide pin, then slide the pin up to the top.
b. Insert the 2.5mm Allen wrench into the hole on the back side of the pin.
c. Loosen the pin by turning counterclockwise until completely loose, then
clockwise 1.5 turns to tighten to the setting we have found works the best.
d. When complete, slide the top tension finger down so the pressure point is
in line with the top of the ink ribbon. Having the top finger in line with the
top edge of the ribbon reduces wear on the print roller.
e. Once run through the printhead, the ink ribbon heads to the waste spool.
There is a roller that we call the wrinkle bar that has a set screw and an
index line that shows a positive/negative position. You want to make sure
File Location: Google Drive Revision: B Approved Date: AUG-22-2022 Approved by: Service