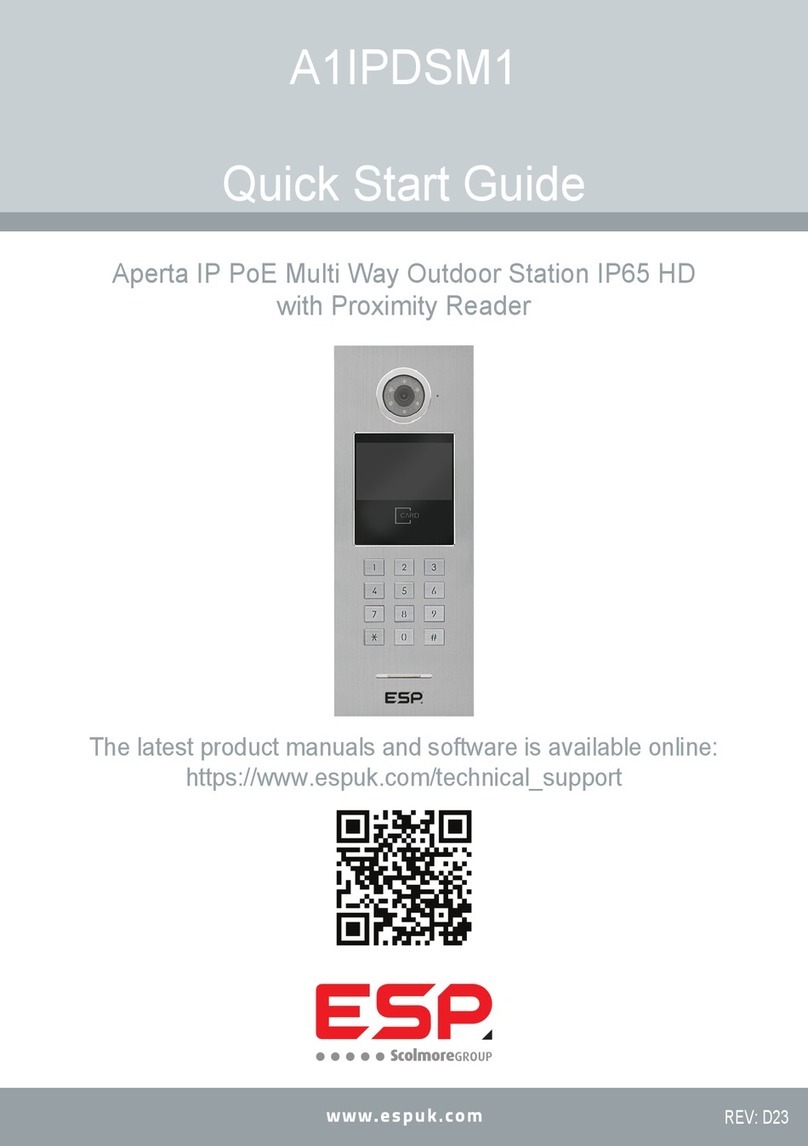
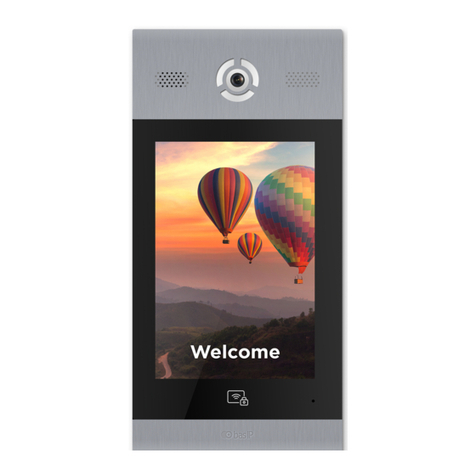
Scolmore ESP Aperta A1IPDSM1 Installation instructions

A1IPDSM1
Full Manual
The latest product manuals and software is available online:
https://www.espuk.com/technical_support
Aperta IP PoE Multi Way Outdoor Station IP65 HD
with Proximity Reader

Contents
1. Installation
2. Main Interface
3. Video Intercom
4. Unlock Functions
A. Public Password Unlock
B. User Password Unlock
C. Proximity Card/Fob Unlock
5. System Settings
1. Setting the Address
2. Setting the Administrator Password
3. Setting the Public Password
4. Password Authority
5. Volume Setting
6. Unlock Type
7. Sensor Setting
8. Language Setting
9. Date Setting
10.System Information
11.Card Management
12.Restore Default Settings
13.Trade Hours
6. Installation of Outdoor Units
Page 1
Page 2
Page 2
Page 3
Page 3
Page 3
Page 3
Page 4
Page 4
Page 4
Page 5
Page 5
Page 5
Page 6
Page 6
Page 6
Page 7
Page 7
Page 7 - 9
Page 9
Page 9
Page 10

Page: 1
1. Installation
Connect the Door Station to a switch/network or alternatively directly to a Monitor using the RJ45 port [1].
If the connected network does not support PoE, then DC12V1A needs to be applied to the 12V & GND terminals [2].
*All system cabling has been tested with Cat5E UTP PVC Cable.
**Maximum distance of 100m to PoE switch is supported.
Reed Switch
Note:
When using number 2 or 3 connection types, the purple line is not needed.
Note:
EVBPSBB (with optional battery backup feature) sold separately
Camera
LEDs
Microphone
Screen
Card Zone
Keys
Speaker
485A
485B
GND
12V
NO12V+
NC
COM
NO
CTL
DET
GND
IP/PoE connection
Fail Secure Lock (+)
Video Door Station
Lock Connections
Exit button
Sensor
Ground
2. The Main Interface
On standby, the display will show Date & Time, Network Status, Visitor’s Calling, Password Unlocking, and User
Instructions.
3. Video Intercom
1. In the main interface, visitors input the Room Number, eg: input 101 or 0101, the three digit room no. call after 3
seconds, the four digits Room Number call immediately.
2. When entering a Room Number, press * to delete any errors; During calling or talking, press “ ” to end the call.
During the conversation, press “4” key low down volume, “6” key rise up volume, press “0” to extend the
conversation time to be 60 seconds.
3. When entering the Room Number, press “ ” to delete any errors;
During a call or when calling, press “ ” to end the call.
During the conversation, pressing “4” will lower the volume, pressing “6” will raise the volume
4. The Indications of the Status Bar are:
1. Calling - Outdoor Station Calling Indoor Monitor
2. Busy - Indoor Monitor Busy
3. Connected- Intercom
5. If a monitor when connected to a call, and the monitor’s unlock feature is used, the Outdoor Station will show “Door
Unlock”.
4. Unlock Functions
A. Public Password Unlock
Public unlock passwords by default are disabled. It will need to be set by the responsible person to set the password.
To use the Public Password; Press “#” + “Public Password” + “#”.
B. User Password Unlock
Public unlock passwords by default are disabled. It will need to be set by the responsible person to set the
password.
To use the User Password; Press “ ” + Room Number + “#” + “User Password” + “#”
C. Proximity Card/Fob Unlock
Simply Present the Programmed Card to the “Card Zone”.
5. System Settings
Enter administration mode:
Press (when in standby) #to enter the password entry screen, then type in the Administation Passcode, and then press
#.
Once into Administration mode, pressing “#” will confirm or enter a submenu, “4” will navigate left, “6” will navigate right,
and “ ” will go back a menu or exit the Administration Menu.
Note: Default Admin Passcode is 666666.
1. Setting the Address:
When Address is selected press #to enter. If address is not selected, use the 4and 6keys to navigate the menu.
Once in the “Address” menu, press “#” to edit the address of the Outdoor Station.
1. When editing the address the field will be highlighted, use “ ” to delete a number, once all 4 digits are entered
press #.
1. If it is the first Outdoor Station set to address to “0101”.
2. If there are more than 1 Outdoor Station(s) the address can be any value between 0102 ~ 0104.
3. If there is more than one building to be part of the same system, the first 2 digits (the building) can be any
value between 01 ~ 04.
2. Setting the Administrator Password
When Admin Pwd is selected press #to enter. If Admin Pwd is not selected, use the 4and 6keys to navigate the
menu.
Once in the “Admin Pwd” menu, press “#” to enter in the current password (6 digits), and the new password (6
digits) twice, and finally press “#” to confirm
3. Setting Public Password
When Unlock Pwd is selected press #to enter. If Unlock Pwd is not selected, use the 4and 6keys to navigate the
menu.
You will then need to enter the Administation Passcode, and then the new public unlock passcode twice.
And then press # to confirm and exit the menu.
4. Password Authority
When Authority is selected press #to enter. If Authority is not selected, use the 4and 6keys to navigate the
menu.
By default, the unlock methods are disabled.
Press “0” to select disable, press “1” to enable the Public Password, and press “2” to enable the User Password.
And then press # to confirm and exit the menu.
Note: User Passwords must be set on indoor monitor(s). See A1IPMW/B Full Manuals for further information
5. Volume Setting
When Volume is selected press #to enter. If Volume is not selected, use the 4and 6keys to navigate the menu.
You will see Ad Vol which is the global volume & Ring Vol which is the ringing volume.
Press “0” to set the Ad Volume, and press “1” to set the Ring Volume.
Once adjusting volumes, press “4” and “6” to adjust volumes up and down.
And then press # to confirm and exit the menu.
6. Unlock Type
When Unlock is selected press #to enter. If Unlock is not selected, use the 4and 6keys to navigate the menu.
By default, the unlock method is “NO” (Normally Open), and a 10 second delay.
Press “0” to choose “NC” (Normally Closed), press “1” to select Power On Lock, then choose your unlock time
(Unlock Delay) you can select a time between 1 ~ 150.
And then press # to confirm and exit the menu.
7. Sensor Setting
When Sensor Set is selected press #to enter. If Sensor Set is not selected, use the 4and 6keys to navigate the
menu.
By default, the unlock method is disabled.
Press “0” to select Disable, and press “1” to Enable, and then “ ” to delete the Open Sensor Delay time.
And then press # to confirm and exit the menu.
8. Language Setting
When Language is selected press # to enter. If Language is not selected, use the 4 and 6 keys to navigate the
menu. By default the language is English.
10.System Information
When Language is selected press # to enter. If Language is not selected, use the 4 and 6 keys to navigate the
menu.
The System Information page will show Door No., Local IP Address, Subnet Mask, Gateway Address, Software
Version, Producer and NetCfg.
9. Date Setting
When Date Set is selected press # to enter. If Date Set is not selected, use the 4 and 6 keys to navigate the menu.
If the Date setting is incorrectly set it will indicate setting failed.
The format should be YYYY-MM-DD HH:MM.
Press “ * ” to delete incorrect inputs, press # to confirm and save the inputs.
11.Card Management
When Card Manage is selected press # to enter. If Card Manage is not selected, use the 4 and 6 keys to navigate
the menu.
A. To add user cards/fobs
Press 0 to choose the Add Cards function
II. After the correct room number has been inputted, press # to confirm and then once on the below screen,
present your card/fob to the card reader, and finally press # to complete adding the card/fob.
I. To add an IC card, you will need to assign it to a room number.
On the Add Cards screen you will need to enter the room number, and press #.
For example for room 159, enter 0159.
B. To delete users cards/fobs
Press 1, to choose the Delete Cards functions, followed by #.
To delete a card you will need to select either by Card Number, by Room Number or to Delete all local cards,
which is 0 , 1 or 2 respectively.
After pressing either 0, 1 or 2, press # to continue the deleting process.
I. If the delete by Card Number was entered, then enter in the card/fob’s ID number and press #.
It will then indicate it has been successfully deleted, or the card number does not exist.
II. If the delete by Room Number was entered, then enter the room number followed by #.
For example for room 112, enter 0112.
It will then indicate it has been successfully deleted, or the room does not have any cards/fobs.
III. Finally, if Delete all local cards, was entered, then press # to confirm to delete all local cards.
12.Restore default settings
When Restore is selected press # to enter. If Restore is not selected, use the 4 & 6 keys to navigate the menu.
Once on the restore page, if you want to the restore all settings back to factory default press #, the Outdoor Station
will then restart.
13.Trades Hours
When Restore is selected press # to enter. If Restore is not selected, use the 4 & 6 keys to navigate the menu.
Once on the Trade Facility menu, pressing 4 or 6 will enable or disable the function.
Pressing # will start the editing sequence to set to time that the trade facility should be active for each day.
Using “ ” to delete numbers, # to continue to the next field, and the number pad to set the time.
Times for each segment need completing before you can save.
To use the Trades Facility, if you press & hold # when on the A1IPDSM1’s standby screen within the configured
Trade Hours, will trigger the lock output. This will use the time function as defined in this menu, and as such a 3rd
party timer is not needed.
6. Installation of Outdoor Units

1. Installation
Connect the Door Station to a switch/network or alternatively directly to a Monitor using the RJ45 port [1].
If the connected network does not support PoE, then DC12V1A needs to be applied to the 12V & GND terminals [2].
*All system cabling has been tested with Cat5E UTP PVC Cable.
**Maximum distance of 100m to PoE switch is supported.
Page: 2
2. The Main Interface
On standby, the display will show Date & Time, Network Status, Visitor’s Calling, Password Unlocking, and User
Instructions.
3. Video Intercom
1. In the main interface, visitors input the Room Number, eg: input 101 or 0101, the three digit room no. call after 3
seconds, the four digits Room Number call immediately.
2. When entering a Room Number, press * to delete any errors; During calling or talking, press “ ” to end the call.
During the conversation, press “4” key low down volume, “6” key rise up volume, press “0” to extend the
conversation time to be 60 seconds.
3. When entering the Room Number, press “ ” to delete any errors;
During a call or when calling, press “ ” to end the call.
During the conversation, pressing “4” will lower the volume, pressing “6” will raise the volume
4. The Indications of the Status Bar are:
1. Calling - Outdoor Station Calling Indoor Monitor
2. Busy - Indoor Monitor Busy
3. Connected- Intercom
5. If a monitor when connected to a call, and the monitor’s unlock feature is used, the Outdoor Station will show “Door
Unlock”.
4. Unlock Functions
A. Public Password Unlock
Public unlock passwords by default are disabled. It will need to be set by the responsible person to set the password.
To use the Public Password; Press “#” + “Public Password” + “#”.
B. User Password Unlock
Public unlock passwords by default are disabled. It will need to be set by the responsible person to set the
password.
To use the User Password; Press “ ” + Room Number + “#” + “User Password” + “#”
C. Proximity Card/Fob Unlock
Simply Present the Programmed Card to the “Card Zone”.
5. System Settings
Enter administration mode:
Press (when in standby) #to enter the password entry screen, then type in the Administation Passcode, and then press
#.
Once into Administration mode, pressing “#” will confirm or enter a submenu, “4” will navigate left, “6” will navigate right,
and “ ” will go back a menu or exit the Administration Menu.
Note: Default Admin Passcode is 666666.
1. Setting the Address:
When Address is selected press #to enter. If address is not selected, use the 4and 6keys to navigate the menu.
Once in the “Address” menu, press “#” to edit the address of the Outdoor Station.
1. When editing the address the field will be highlighted, use “ ” to delete a number, once all 4 digits are entered
press #.
1. If it is the first Outdoor Station set to address to “0101”.
2. If there are more than 1 Outdoor Station(s) the address can be any value between 0102 ~ 0104.
3. If there is more than one building to be part of the same system, the first 2 digits (the building) can be any
value between 01 ~ 04.
2. Setting the Administrator Password
When Admin Pwd is selected press #to enter. If Admin Pwd is not selected, use the 4and 6keys to navigate the
menu.
Once in the “Admin Pwd” menu, press “#” to enter in the current password (6 digits), and the new password (6
digits) twice, and finally press “#” to confirm
3. Setting Public Password
When Unlock Pwd is selected press #to enter. If Unlock Pwd is not selected, use the 4and 6keys to navigate the
menu.
You will then need to enter the Administation Passcode, and then the new public unlock passcode twice.
And then press # to confirm and exit the menu.
4. Password Authority
When Authority is selected press #to enter. If Authority is not selected, use the 4and 6keys to navigate the
menu.
By default, the unlock methods are disabled.
Press “0” to select disable, press “1” to enable the Public Password, and press “2” to enable the User Password.
And then press # to confirm and exit the menu.
Note: User Passwords must be set on indoor monitor(s). See A1IPMW/B Full Manuals for further information
5. Volume Setting
When Volume is selected press #to enter. If Volume is not selected, use the 4and 6keys to navigate the menu.
You will see Ad Vol which is the global volume & Ring Vol which is the ringing volume.
Press “0” to set the Ad Volume, and press “1” to set the Ring Volume.
Once adjusting volumes, press “4” and “6” to adjust volumes up and down.
And then press # to confirm and exit the menu.
6. Unlock Type
When Unlock is selected press #to enter. If Unlock is not selected, use the 4and 6keys to navigate the menu.
By default, the unlock method is “NO” (Normally Open), and a 10 second delay.
Press “0” to choose “NC” (Normally Closed), press “1” to select Power On Lock, then choose your unlock time
(Unlock Delay) you can select a time between 1 ~ 150.
And then press # to confirm and exit the menu.
7. Sensor Setting
When Sensor Set is selected press #to enter. If Sensor Set is not selected, use the 4and 6keys to navigate the
menu.
By default, the unlock method is disabled.
Press “0” to select Disable, and press “1” to Enable, and then “ ” to delete the Open Sensor Delay time.
And then press # to confirm and exit the menu.
8. Language Setting
When Language is selected press # to enter. If Language is not selected, use the 4 and 6 keys to navigate the
menu. By default the language is English.
10.System Information
When Language is selected press # to enter. If Language is not selected, use the 4 and 6 keys to navigate the
menu.
The System Information page will show Door No., Local IP Address, Subnet Mask, Gateway Address, Software
Version, Producer and NetCfg.
9. Date Setting
When Date Set is selected press # to enter. If Date Set is not selected, use the 4 and 6 keys to navigate the menu.
If the Date setting is incorrectly set it will indicate setting failed.
The format should be YYYY-MM-DD HH:MM.
Press “ * ” to delete incorrect inputs, press # to confirm and save the inputs.
11.Card Management
When Card Manage is selected press # to enter. If Card Manage is not selected, use the 4 and 6 keys to navigate
the menu.
A. To add user cards/fobs
Press 0 to choose the Add Cards function
II. After the correct room number has been inputted, press # to confirm and then once on the below screen,
present your card/fob to the card reader, and finally press # to complete adding the card/fob.
I. To add an IC card, you will need to assign it to a room number.
On the Add Cards screen you will need to enter the room number, and press #.
For example for room 159, enter 0159.
B. To delete users cards/fobs
Press 1, to choose the Delete Cards functions, followed by #.
To delete a card you will need to select either by Card Number, by Room Number or to Delete all local cards,
which is 0 , 1 or 2 respectively.
After pressing either 0, 1 or 2, press # to continue the deleting process.
I. If the delete by Card Number was entered, then enter in the card/fob’s ID number and press #.
It will then indicate it has been successfully deleted, or the card number does not exist.
II. If the delete by Room Number was entered, then enter the room number followed by #.
For example for room 112, enter 0112.
It will then indicate it has been successfully deleted, or the room does not have any cards/fobs.
III. Finally, if Delete all local cards, was entered, then press # to confirm to delete all local cards.
12.Restore default settings
When Restore is selected press # to enter. If Restore is not selected, use the 4 & 6 keys to navigate the menu.
Once on the restore page, if you want to the restore all settings back to factory default press #, the Outdoor Station
will then restart.
13.Trades Hours
When Restore is selected press # to enter. If Restore is not selected, use the 4 & 6 keys to navigate the menu.
Once on the Trade Facility menu, pressing 4 or 6 will enable or disable the function.
Pressing # will start the editing sequence to set to time that the trade facility should be active for each day.
Using “ ” to delete numbers, # to continue to the next field, and the number pad to set the time.
Times for each segment need completing before you can save.
To use the Trades Facility, if you press & hold # when on the A1IPDSM1’s standby screen within the configured
Trade Hours, will trigger the lock output. This will use the time function as defined in this menu, and as such a 3rd
party timer is not needed.
6. Installation of Outdoor Units

1. Installation
Connect the Door Station to a switch/network or alternatively directly to a Monitor using the RJ45 port [1].
If the connected network does not support PoE, then DC12V1A needs to be applied to the 12V & GND terminals [2].
*All system cabling has been tested with Cat5E UTP PVC Cable.
**Maximum distance of 100m to PoE switch is supported.
2. The Main Interface
On standby, the display will show Date & Time, Network Status, Visitor’s Calling, Password Unlocking, and User
Instructions.
3. Video Intercom
1. In the main interface, visitors input the Room Number, eg: input 101 or 0101, the three digit room no. call after 3
seconds, the four digits Room Number call immediately.
2. When entering a Room Number, press * to delete any errors; During calling or talking, press “ ” to end the call.
During the conversation, press “4” key low down volume, “6” key rise up volume, press “0” to extend the
conversation time to be 60 seconds.
3. When entering the Room Number, press “ ” to delete any errors;
During a call or when calling, press “ ” to end the call.
During the conversation, pressing “4” will lower the volume, pressing “6” will raise the volume
4. The Indications of the Status Bar are:
1. Calling - Outdoor Station Calling Indoor Monitor
2. Busy - Indoor Monitor Busy
3. Connected- Intercom
5. If a monitor when connected to a call, and the monitor’s unlock feature is used, the Outdoor Station will show “Door
Unlock”.
Page: 3
4. Unlock Functions
A. Public Password Unlock
Public unlock passwords by default are disabled. It will need to be set by the responsible person to set the password.
To use the Public Password; Press “#” + “Public Password” + “#”.
B. User Password Unlock
Public unlock passwords by default are disabled. It will need to be set by the responsible person to set the
password.
To use the User Password; Press “ ” + Room Number + “#” + “User Password” + “#”
C. Proximity Card/Fob Unlock
Simply Present the Programmed Card to the “Card Zone”.
5. System Settings
Enter administration mode:
Press (when in standby) #to enter the password entry screen, then type in the Administation Passcode, and then press
#.
Once into Administration mode, pressing “#” will confirm or enter a submenu, “4” will navigate left, “6” will navigate right,
and “ ” will go back a menu or exit the Administration Menu.
Note: Default Admin Passcode is 666666.
1. Setting the Address:
When Address is selected press #to enter. If address is not selected, use the 4and 6keys to navigate the menu.
Once in the “Address” menu, press “#” to edit the address of the Outdoor Station.
1. When editing the address the field will be highlighted, use “ ” to delete a number, once all 4 digits are entered
press #.
1. If it is the first Outdoor Station set to address to “0101”.
2. If there are more than 1 Outdoor Station(s) the address can be any value between 0102 ~ 0104.
3. If there is more than one building to be part of the same system, the first 2 digits (the building) can be any
value between 01 ~ 04.
2. Setting the Administrator Password
When Admin Pwd is selected press #to enter. If Admin Pwd is not selected, use the 4and 6keys to navigate the
menu.
Once in the “Admin Pwd” menu, press “#” to enter in the current password (6 digits), and the new password (6
digits) twice, and finally press “#” to confirm
3. Setting Public Password
When Unlock Pwd is selected press #to enter. If Unlock Pwd is not selected, use the 4and 6keys to navigate the
menu.
You will then need to enter the Administation Passcode, and then the new public unlock passcode twice.
And then press # to confirm and exit the menu.
4. Password Authority
When Authority is selected press #to enter. If Authority is not selected, use the 4and 6keys to navigate the
menu.
By default, the unlock methods are disabled.
Press “0” to select disable, press “1” to enable the Public Password, and press “2” to enable the User Password.
And then press # to confirm and exit the menu.
Note: User Passwords must be set on indoor monitor(s). See A1IPMW/B Full Manuals for further information
5. Volume Setting
When Volume is selected press #to enter. If Volume is not selected, use the 4and 6keys to navigate the menu.
You will see Ad Vol which is the global volume & Ring Vol which is the ringing volume.
Press “0” to set the Ad Volume, and press “1” to set the Ring Volume.
Once adjusting volumes, press “4” and “6” to adjust volumes up and down.
And then press # to confirm and exit the menu.
6. Unlock Type
When Unlock is selected press #to enter. If Unlock is not selected, use the 4and 6keys to navigate the menu.
By default, the unlock method is “NO” (Normally Open), and a 10 second delay.
Press “0” to choose “NC” (Normally Closed), press “1” to select Power On Lock, then choose your unlock time
(Unlock Delay) you can select a time between 1 ~ 150.
And then press # to confirm and exit the menu.
7. Sensor Setting
When Sensor Set is selected press #to enter. If Sensor Set is not selected, use the 4and 6keys to navigate the
menu.
By default, the unlock method is disabled.
Press “0” to select Disable, and press “1” to Enable, and then “ ” to delete the Open Sensor Delay time.
And then press # to confirm and exit the menu.
8. Language Setting
When Language is selected press # to enter. If Language is not selected, use the 4 and 6 keys to navigate the
menu. By default the language is English.
10.System Information
When Language is selected press # to enter. If Language is not selected, use the 4 and 6 keys to navigate the
menu.
The System Information page will show Door No., Local IP Address, Subnet Mask, Gateway Address, Software
Version, Producer and NetCfg.
9. Date Setting
When Date Set is selected press # to enter. If Date Set is not selected, use the 4 and 6 keys to navigate the menu.
If the Date setting is incorrectly set it will indicate setting failed.
The format should be YYYY-MM-DD HH:MM.
Press “ * ” to delete incorrect inputs, press # to confirm and save the inputs.
11.Card Management
When Card Manage is selected press # to enter. If Card Manage is not selected, use the 4 and 6 keys to navigate
the menu.
A. To add user cards/fobs
Press 0 to choose the Add Cards function
II. After the correct room number has been inputted, press # to confirm and then once on the below screen,
present your card/fob to the card reader, and finally press # to complete adding the card/fob.
I. To add an IC card, you will need to assign it to a room number.
On the Add Cards screen you will need to enter the room number, and press #.
For example for room 159, enter 0159.
B. To delete users cards/fobs
Press 1, to choose the Delete Cards functions, followed by #.
To delete a card you will need to select either by Card Number, by Room Number or to Delete all local cards,
which is 0 , 1 or 2 respectively.
After pressing either 0, 1 or 2, press # to continue the deleting process.
I. If the delete by Card Number was entered, then enter in the card/fob’s ID number and press #.
It will then indicate it has been successfully deleted, or the card number does not exist.
II. If the delete by Room Number was entered, then enter the room number followed by #.
For example for room 112, enter 0112.
It will then indicate it has been successfully deleted, or the room does not have any cards/fobs.
III. Finally, if Delete all local cards, was entered, then press # to confirm to delete all local cards.
12.Restore default settings
When Restore is selected press # to enter. If Restore is not selected, use the 4 & 6 keys to navigate the menu.
Once on the restore page, if you want to the restore all settings back to factory default press #, the Outdoor Station
will then restart.
13.Trades Hours
When Restore is selected press # to enter. If Restore is not selected, use the 4 & 6 keys to navigate the menu.
Once on the Trade Facility menu, pressing 4 or 6 will enable or disable the function.
Pressing # will start the editing sequence to set to time that the trade facility should be active for each day.
Using “ ” to delete numbers, # to continue to the next field, and the number pad to set the time.
Times for each segment need completing before you can save.
To use the Trades Facility, if you press & hold # when on the A1IPDSM1’s standby screen within the configured
Trade Hours, will trigger the lock output. This will use the time function as defined in this menu, and as such a 3rd
party timer is not needed.
6. Installation of Outdoor Units

1. Installation
Connect the Door Station to a switch/network or alternatively directly to a Monitor using the RJ45 port [1].
If the connected network does not support PoE, then DC12V1A needs to be applied to the 12V & GND terminals [2].
*All system cabling has been tested with Cat5E UTP PVC Cable.
**Maximum distance of 100m to PoE switch is supported.
2. The Main Interface
On standby, the display will show Date & Time, Network Status, Visitor’s Calling, Password Unlocking, and User
Instructions.
3. Video Intercom
1. In the main interface, visitors input the Room Number, eg: input 101 or 0101, the three digit room no. call after 3
seconds, the four digits Room Number call immediately.
2. When entering a Room Number, press * to delete any errors; During calling or talking, press “ ” to end the call.
During the conversation, press “4” key low down volume, “6” key rise up volume, press “0” to extend the
conversation time to be 60 seconds.
3. When entering the Room Number, press “ ” to delete any errors;
During a call or when calling, press “ ” to end the call.
During the conversation, pressing “4” will lower the volume, pressing “6” will raise the volume
4. The Indications of the Status Bar are:
1. Calling - Outdoor Station Calling Indoor Monitor
2. Busy - Indoor Monitor Busy
3. Connected- Intercom
5. If a monitor when connected to a call, and the monitor’s unlock feature is used, the Outdoor Station will show “Door
Unlock”.
4. Unlock Functions
A. Public Password Unlock
Public unlock passwords by default are disabled. It will need to be set by the responsible person to set the password.
To use the Public Password; Press “#” + “Public Password” + “#”.
B. User Password Unlock
Public unlock passwords by default are disabled. It will need to be set by the responsible person to set the
password.
To use the User Password; Press “ ” + Room Number + “#” + “User Password” + “#”
C. Proximity Card/Fob Unlock
Simply Present the Programmed Card to the “Card Zone”.
Page: 4
5. System Settings
Enter administration mode:
Press (when in standby) #to enter the password entry screen, then type in the Administation Passcode, and then press
#.
Once into Administration mode, pressing “#” will confirm or enter a submenu, “4” will navigate left, “6” will navigate right,
and “ ” will go back a menu or exit the Administration Menu.
Note: Default Admin Passcode is 666666.
1. Setting the Address:
When Address is selected press #to enter. If address is not selected, use the 4and 6keys to navigate the menu.
Once in the “Address” menu, press “#” to edit the address of the Outdoor Station.
1. When editing the address the field will be highlighted, use “ ” to delete a number, once all 4 digits are entered
press #.
1. If it is the first Outdoor Station set to address to “0101”.
2. If there are more than 1 Outdoor Station(s) the address can be any value between 0102 ~ 0104.
3. If there is more than one building to be part of the same system, the first 2 digits (the building) can be any
value between 01 ~ 04.
2. Setting the Administrator Password
When Admin Pwd is selected press #to enter. If Admin Pwd is not selected, use the 4and 6keys to navigate the
menu.
Once in the “Admin Pwd” menu, press “#” to enter in the current password (6 digits), and the new password (6
digits) twice, and finally press “#” to confirm
3. Setting Public Password
When Unlock Pwd is selected press #to enter. If Unlock Pwd is not selected, use the 4and 6keys to navigate the
menu.
You will then need to enter the Administation Passcode, and then the new public unlock passcode twice.
And then press # to confirm and exit the menu.
4. Password Authority
When Authority is selected press #to enter. If Authority is not selected, use the 4and 6keys to navigate the
menu.
By default, the unlock methods are disabled.
Press “0” to select disable, press “1” to enable the Public Password, and press “2” to enable the User Password.
And then press # to confirm and exit the menu.
Note: User Passwords must be set on indoor monitor(s). See A1IPMW/B Full Manuals for further information
5. Volume Setting
When Volume is selected press #to enter. If Volume is not selected, use the 4and 6keys to navigate the menu.
You will see Ad Vol which is the global volume & Ring Vol which is the ringing volume.
Press “0” to set the Ad Volume, and press “1” to set the Ring Volume.
Once adjusting volumes, press “4” and “6” to adjust volumes up and down.
And then press # to confirm and exit the menu.
6. Unlock Type
When Unlock is selected press #to enter. If Unlock is not selected, use the 4and 6keys to navigate the menu.
By default, the unlock method is “NO” (Normally Open), and a 10 second delay.
Press “0” to choose “NC” (Normally Closed), press “1” to select Power On Lock, then choose your unlock time
(Unlock Delay) you can select a time between 1 ~ 150.
And then press # to confirm and exit the menu.
7. Sensor Setting
When Sensor Set is selected press #to enter. If Sensor Set is not selected, use the 4and 6keys to navigate the
menu.
By default, the unlock method is disabled.
Press “0” to select Disable, and press “1” to Enable, and then “ ” to delete the Open Sensor Delay time.
And then press # to confirm and exit the menu.
8. Language Setting
When Language is selected press # to enter. If Language is not selected, use the 4 and 6 keys to navigate the
menu. By default the language is English.
10.System Information
When Language is selected press # to enter. If Language is not selected, use the 4 and 6 keys to navigate the
menu.
The System Information page will show Door No., Local IP Address, Subnet Mask, Gateway Address, Software
Version, Producer and NetCfg.
9. Date Setting
When Date Set is selected press # to enter. If Date Set is not selected, use the 4 and 6 keys to navigate the menu.
If the Date setting is incorrectly set it will indicate setting failed.
The format should be YYYY-MM-DD HH:MM.
Press “ * ” to delete incorrect inputs, press # to confirm and save the inputs.
11.Card Management
When Card Manage is selected press # to enter. If Card Manage is not selected, use the 4 and 6 keys to navigate
the menu.
A. To add user cards/fobs
Press 0 to choose the Add Cards function
II. After the correct room number has been inputted, press # to confirm and then once on the below screen,
present your card/fob to the card reader, and finally press # to complete adding the card/fob.
I. To add an IC card, you will need to assign it to a room number.
On the Add Cards screen you will need to enter the room number, and press #.
For example for room 159, enter 0159.
B. To delete users cards/fobs
Press 1, to choose the Delete Cards functions, followed by #.
To delete a card you will need to select either by Card Number, by Room Number or to Delete all local cards,
which is 0 , 1 or 2 respectively.
After pressing either 0, 1 or 2, press # to continue the deleting process.
I. If the delete by Card Number was entered, then enter in the card/fob’s ID number and press #.
It will then indicate it has been successfully deleted, or the card number does not exist.
II. If the delete by Room Number was entered, then enter the room number followed by #.
For example for room 112, enter 0112.
It will then indicate it has been successfully deleted, or the room does not have any cards/fobs.
III. Finally, if Delete all local cards, was entered, then press # to confirm to delete all local cards.
12.Restore default settings
When Restore is selected press # to enter. If Restore is not selected, use the 4 & 6 keys to navigate the menu.
Once on the restore page, if you want to the restore all settings back to factory default press #, the Outdoor Station
will then restart.
13.Trades Hours
When Restore is selected press # to enter. If Restore is not selected, use the 4 & 6 keys to navigate the menu.
Once on the Trade Facility menu, pressing 4 or 6 will enable or disable the function.
Pressing # will start the editing sequence to set to time that the trade facility should be active for each day.
Using “ ” to delete numbers, # to continue to the next field, and the number pad to set the time.
Times for each segment need completing before you can save.
To use the Trades Facility, if you press & hold # when on the A1IPDSM1’s standby screen within the configured
Trade Hours, will trigger the lock output. This will use the time function as defined in this menu, and as such a 3rd
party timer is not needed.
6. Installation of Outdoor Units

1. Installation
Connect the Door Station to a switch/network or alternatively directly to a Monitor using the RJ45 port [1].
If the connected network does not support PoE, then DC12V1A needs to be applied to the 12V & GND terminals [2].
*All system cabling has been tested with Cat5E UTP PVC Cable.
**Maximum distance of 100m to PoE switch is supported.
2. The Main Interface
On standby, the display will show Date & Time, Network Status, Visitor’s Calling, Password Unlocking, and User
Instructions.
3. Video Intercom
1. In the main interface, visitors input the Room Number, eg: input 101 or 0101, the three digit room no. call after 3
seconds, the four digits Room Number call immediately.
2. When entering a Room Number, press * to delete any errors; During calling or talking, press “ ” to end the call.
During the conversation, press “4” key low down volume, “6” key rise up volume, press “0” to extend the
conversation time to be 60 seconds.
3. When entering the Room Number, press “ ” to delete any errors;
During a call or when calling, press “ ” to end the call.
During the conversation, pressing “4” will lower the volume, pressing “6” will raise the volume
4. The Indications of the Status Bar are:
1. Calling - Outdoor Station Calling Indoor Monitor
2. Busy - Indoor Monitor Busy
3. Connected- Intercom
5. If a monitor when connected to a call, and the monitor’s unlock feature is used, the Outdoor Station will show “Door
Unlock”.
4. Unlock Functions
A. Public Password Unlock
Public unlock passwords by default are disabled. It will need to be set by the responsible person to set the password.
To use the Public Password; Press “#” + “Public Password” + “#”.
B. User Password Unlock
Public unlock passwords by default are disabled. It will need to be set by the responsible person to set the
password.
To use the User Password; Press “ ” + Room Number + “#” + “User Password” + “#”
C. Proximity Card/Fob Unlock
Simply Present the Programmed Card to the “Card Zone”.
5. System Settings
Enter administration mode:
Press (when in standby) #to enter the password entry screen, then type in the Administation Passcode, and then press
#.
Once into Administration mode, pressing “#” will confirm or enter a submenu, “4” will navigate left, “6” will navigate right,
and “ ” will go back a menu or exit the Administration Menu.
Note: Default Admin Passcode is 666666.
1. Setting the Address:
When Address is selected press #to enter. If address is not selected, use the 4and 6keys to navigate the menu.
Once in the “Address” menu, press “#” to edit the address of the Outdoor Station.
1. When editing the address the field will be highlighted, use “ ” to delete a number, once all 4 digits are entered
press #.
1. If it is the first Outdoor Station set to address to “0101”.
2. If there are more than 1 Outdoor Station(s) the address can be any value between 0102 ~ 0104.
3. If there is more than one building to be part of the same system, the first 2 digits (the building) can be any
value between 01 ~ 04.
2. Setting the Administrator Password
When Admin Pwd is selected press #to enter. If Admin Pwd is not selected, use the 4and 6keys to navigate the
menu.
Once in the “Admin Pwd” menu, press “#” to enter in the current password (6 digits), and the new password (6
digits) twice, and finally press “#” to confirm
Page: 5
3. Setting Public Password
When Unlock Pwd is selected press #to enter. If Unlock Pwd is not selected, use the 4and 6keys to navigate the
menu.
You will then need to enter the Administation Passcode, and then the new public unlock passcode twice.
And then press # to confirm and exit the menu.
4. Password Authority
When Authority is selected press #to enter. If Authority is not selected, use the 4and 6keys to navigate the
menu.
By default, the unlock methods are disabled.
Press “0” to select disable, press “1” to enable the Public Password, and press “2” to enable the User Password.
And then press # to confirm and exit the menu.
Note: User Passwords must be set on indoor monitor(s). See A1IPMW/B Full Manuals for further information
5. Volume Setting
When Volume is selected press #to enter. If Volume is not selected, use the 4and 6keys to navigate the menu.
You will see Ad Vol which is the global volume & Ring Vol which is the ringing volume.
Press “0” to set the Ad Volume, and press “1” to set the Ring Volume.
Once adjusting volumes, press “4” and “6” to adjust volumes up and down.
And then press # to confirm and exit the menu.
6. Unlock Type
When Unlock is selected press #to enter. If Unlock is not selected, use the 4and 6keys to navigate the menu.
By default, the unlock method is “NO” (Normally Open), and a 10 second delay.
Press “0” to choose “NC” (Normally Closed), press “1” to select Power On Lock, then choose your unlock time
(Unlock Delay) you can select a time between 1 ~ 150.
And then press # to confirm and exit the menu.
7. Sensor Setting
When Sensor Set is selected press #to enter. If Sensor Set is not selected, use the 4and 6keys to navigate the
menu.
By default, the unlock method is disabled.
Press “0” to select Disable, and press “1” to Enable, and then “ ” to delete the Open Sensor Delay time.
And then press # to confirm and exit the menu.
8. Language Setting
When Language is selected press # to enter. If Language is not selected, use the 4 and 6 keys to navigate the
menu. By default the language is English.
10.System Information
When Language is selected press # to enter. If Language is not selected, use the 4 and 6 keys to navigate the
menu.
The System Information page will show Door No., Local IP Address, Subnet Mask, Gateway Address, Software
Version, Producer and NetCfg.
9. Date Setting
When Date Set is selected press # to enter. If Date Set is not selected, use the 4 and 6 keys to navigate the menu.
If the Date setting is incorrectly set it will indicate setting failed.
The format should be YYYY-MM-DD HH:MM.
Press “ * ” to delete incorrect inputs, press # to confirm and save the inputs.
11.Card Management
When Card Manage is selected press # to enter. If Card Manage is not selected, use the 4 and 6 keys to navigate
the menu.
A. To add user cards/fobs
Press 0 to choose the Add Cards function
II. After the correct room number has been inputted, press # to confirm and then once on the below screen,
present your card/fob to the card reader, and finally press # to complete adding the card/fob.
I. To add an IC card, you will need to assign it to a room number.
On the Add Cards screen you will need to enter the room number, and press #.
For example for room 159, enter 0159.
B. To delete users cards/fobs
Press 1, to choose the Delete Cards functions, followed by #.
To delete a card you will need to select either by Card Number, by Room Number or to Delete all local cards,
which is 0 , 1 or 2 respectively.
After pressing either 0, 1 or 2, press # to continue the deleting process.
I. If the delete by Card Number was entered, then enter in the card/fob’s ID number and press #.
It will then indicate it has been successfully deleted, or the card number does not exist.
II. If the delete by Room Number was entered, then enter the room number followed by #.
For example for room 112, enter 0112.
It will then indicate it has been successfully deleted, or the room does not have any cards/fobs.
III. Finally, if Delete all local cards, was entered, then press # to confirm to delete all local cards.
12.Restore default settings
When Restore is selected press # to enter. If Restore is not selected, use the 4 & 6 keys to navigate the menu.
Once on the restore page, if you want to the restore all settings back to factory default press #, the Outdoor Station
will then restart.
13.Trades Hours
When Restore is selected press # to enter. If Restore is not selected, use the 4 & 6 keys to navigate the menu.
Once on the Trade Facility menu, pressing 4 or 6 will enable or disable the function.
Pressing # will start the editing sequence to set to time that the trade facility should be active for each day.
Using “ ” to delete numbers, # to continue to the next field, and the number pad to set the time.
Times for each segment need completing before you can save.
To use the Trades Facility, if you press & hold # when on the A1IPDSM1’s standby screen within the configured
Trade Hours, will trigger the lock output. This will use the time function as defined in this menu, and as such a 3rd
party timer is not needed.
6. Installation of Outdoor Units

1. Installation
Connect the Door Station to a switch/network or alternatively directly to a Monitor using the RJ45 port [1].
If the connected network does not support PoE, then DC12V1A needs to be applied to the 12V & GND terminals [2].
*All system cabling has been tested with Cat5E UTP PVC Cable.
**Maximum distance of 100m to PoE switch is supported.
2. The Main Interface
On standby, the display will show Date & Time, Network Status, Visitor’s Calling, Password Unlocking, and User
Instructions.
3. Video Intercom
1. In the main interface, visitors input the Room Number, eg: input 101 or 0101, the three digit room no. call after 3
seconds, the four digits Room Number call immediately.
2. When entering a Room Number, press * to delete any errors; During calling or talking, press “ ” to end the call.
During the conversation, press “4” key low down volume, “6” key rise up volume, press “0” to extend the
conversation time to be 60 seconds.
3. When entering the Room Number, press “ ” to delete any errors;
During a call or when calling, press “ ” to end the call.
During the conversation, pressing “4” will lower the volume, pressing “6” will raise the volume
4. The Indications of the Status Bar are:
1. Calling - Outdoor Station Calling Indoor Monitor
2. Busy - Indoor Monitor Busy
3. Connected- Intercom
5. If a monitor when connected to a call, and the monitor’s unlock feature is used, the Outdoor Station will show “Door
Unlock”.
4. Unlock Functions
A. Public Password Unlock
Public unlock passwords by default are disabled. It will need to be set by the responsible person to set the password.
To use the Public Password; Press “#” + “Public Password” + “#”.
B. User Password Unlock
Public unlock passwords by default are disabled. It will need to be set by the responsible person to set the
password.
To use the User Password; Press “ ” + Room Number + “#” + “User Password” + “#”
C. Proximity Card/Fob Unlock
Simply Present the Programmed Card to the “Card Zone”.
5. System Settings
Enter administration mode:
Press (when in standby) #to enter the password entry screen, then type in the Administation Passcode, and then press
#.
Once into Administration mode, pressing “#” will confirm or enter a submenu, “4” will navigate left, “6” will navigate right,
and “ ” will go back a menu or exit the Administration Menu.
Note: Default Admin Passcode is 666666.
1. Setting the Address:
When Address is selected press #to enter. If address is not selected, use the 4and 6keys to navigate the menu.
Once in the “Address” menu, press “#” to edit the address of the Outdoor Station.
1. When editing the address the field will be highlighted, use “ ” to delete a number, once all 4 digits are entered
press #.
1. If it is the first Outdoor Station set to address to “0101”.
2. If there are more than 1 Outdoor Station(s) the address can be any value between 0102 ~ 0104.
3. If there is more than one building to be part of the same system, the first 2 digits (the building) can be any
value between 01 ~ 04.
2. Setting the Administrator Password
When Admin Pwd is selected press #to enter. If Admin Pwd is not selected, use the 4and 6keys to navigate the
menu.
Once in the “Admin Pwd” menu, press “#” to enter in the current password (6 digits), and the new password (6
digits) twice, and finally press “#” to confirm
3. Setting Public Password
When Unlock Pwd is selected press #to enter. If Unlock Pwd is not selected, use the 4and 6keys to navigate the
menu.
You will then need to enter the Administation Passcode, and then the new public unlock passcode twice.
And then press # to confirm and exit the menu.
4. Password Authority
When Authority is selected press #to enter. If Authority is not selected, use the 4and 6keys to navigate the
menu.
By default, the unlock methods are disabled.
Press “0” to select disable, press “1” to enable the Public Password, and press “2” to enable the User Password.
And then press # to confirm and exit the menu.
Note: User Passwords must be set on indoor monitor(s). See A1IPMW/B Full Manuals for further information
5. Volume Setting
When Volume is selected press #to enter. If Volume is not selected, use the 4and 6keys to navigate the menu.
You will see Ad Vol which is the global volume & Ring Vol which is the ringing volume.
Press “0” to set the Ad Volume, and press “1” to set the Ring Volume.
Once adjusting volumes, press “4” and “6” to adjust volumes up and down.
And then press # to confirm and exit the menu.
Page: 6
6. Unlock Type
When Unlock is selected press #to enter. If Unlock is not selected, use the 4and 6keys to navigate the menu.
By default, the unlock method is “NO” (Normally Open), and a 10 second delay.
Press “0” to choose “NC” (Normally Closed), press “1” to select Power On Lock, then choose your unlock time
(Unlock Delay) you can select a time between 1 ~ 150.
And then press # to confirm and exit the menu.
7. Sensor Setting
When Sensor Set is selected press #to enter. If Sensor Set is not selected, use the 4and 6keys to navigate the
menu.
By default, the unlock method is disabled.
Press “0” to select Disable, and press “1” to Enable, and then “ ” to delete the Open Sensor Delay time.
And then press # to confirm and exit the menu.
8. Language Setting
When Language is selected press # to enter. If Language is not selected, use the 4 and 6 keys to navigate the
menu. By default the language is English.
10.System Information
When Language is selected press # to enter. If Language is not selected, use the 4 and 6 keys to navigate the
menu.
The System Information page will show Door No., Local IP Address, Subnet Mask, Gateway Address, Software
Version, Producer and NetCfg.
9. Date Setting
When Date Set is selected press # to enter. If Date Set is not selected, use the 4 and 6 keys to navigate the menu.
If the Date setting is incorrectly set it will indicate setting failed.
The format should be YYYY-MM-DD HH:MM.
Press “ * ” to delete incorrect inputs, press # to confirm and save the inputs.
11.Card Management
When Card Manage is selected press # to enter. If Card Manage is not selected, use the 4 and 6 keys to navigate
the menu.
A. To add user cards/fobs
Press 0 to choose the Add Cards function
II. After the correct room number has been inputted, press # to confirm and then once on the below screen,
present your card/fob to the card reader, and finally press # to complete adding the card/fob.
I. To add an IC card, you will need to assign it to a room number.
On the Add Cards screen you will need to enter the room number, and press #.
For example for room 159, enter 0159.
B. To delete users cards/fobs
Press 1, to choose the Delete Cards functions, followed by #.
To delete a card you will need to select either by Card Number, by Room Number or to Delete all local cards,
which is 0 , 1 or 2 respectively.
After pressing either 0, 1 or 2, press # to continue the deleting process.
I. If the delete by Card Number was entered, then enter in the card/fob’s ID number and press #.
It will then indicate it has been successfully deleted, or the card number does not exist.
II. If the delete by Room Number was entered, then enter the room number followed by #.
For example for room 112, enter 0112.
It will then indicate it has been successfully deleted, or the room does not have any cards/fobs.
III. Finally, if Delete all local cards, was entered, then press # to confirm to delete all local cards.
12.Restore default settings
When Restore is selected press # to enter. If Restore is not selected, use the 4 & 6 keys to navigate the menu.
Once on the restore page, if you want to the restore all settings back to factory default press #, the Outdoor Station
will then restart.
13.Trades Hours
When Restore is selected press # to enter. If Restore is not selected, use the 4 & 6 keys to navigate the menu.
Once on the Trade Facility menu, pressing 4 or 6 will enable or disable the function.
Pressing # will start the editing sequence to set to time that the trade facility should be active for each day.
Using “ ” to delete numbers, # to continue to the next field, and the number pad to set the time.
Times for each segment need completing before you can save.
To use the Trades Facility, if you press & hold # when on the A1IPDSM1’s standby screen within the configured
Trade Hours, will trigger the lock output. This will use the time function as defined in this menu, and as such a 3rd
party timer is not needed.
6. Installation of Outdoor Units

1. Installation
Connect the Door Station to a switch/network or alternatively directly to a Monitor using the RJ45 port [1].
If the connected network does not support PoE, then DC12V1A needs to be applied to the 12V & GND terminals [2].
*All system cabling has been tested with Cat5E UTP PVC Cable.
**Maximum distance of 100m to PoE switch is supported.
2. The Main Interface
On standby, the display will show Date & Time, Network Status, Visitor’s Calling, Password Unlocking, and User
Instructions.
3. Video Intercom
1. In the main interface, visitors input the Room Number, eg: input 101 or 0101, the three digit room no. call after 3
seconds, the four digits Room Number call immediately.
2. When entering a Room Number, press * to delete any errors; During calling or talking, press “ ” to end the call.
During the conversation, press “4” key low down volume, “6” key rise up volume, press “0” to extend the
conversation time to be 60 seconds.
3. When entering the Room Number, press “ ” to delete any errors;
During a call or when calling, press “ ” to end the call.
During the conversation, pressing “4” will lower the volume, pressing “6” will raise the volume
4. The Indications of the Status Bar are:
1. Calling - Outdoor Station Calling Indoor Monitor
2. Busy - Indoor Monitor Busy
3. Connected- Intercom
5. If a monitor when connected to a call, and the monitor’s unlock feature is used, the Outdoor Station will show “Door
Unlock”.
4. Unlock Functions
A. Public Password Unlock
Public unlock passwords by default are disabled. It will need to be set by the responsible person to set the password.
To use the Public Password; Press “#” + “Public Password” + “#”.
B. User Password Unlock
Public unlock passwords by default are disabled. It will need to be set by the responsible person to set the
password.
To use the User Password; Press “ ” + Room Number + “#” + “User Password” + “#”
C. Proximity Card/Fob Unlock
Simply Present the Programmed Card to the “Card Zone”.
5. System Settings
Enter administration mode:
Press (when in standby) #to enter the password entry screen, then type in the Administation Passcode, and then press
#.
Once into Administration mode, pressing “#” will confirm or enter a submenu, “4” will navigate left, “6” will navigate right,
and “ ” will go back a menu or exit the Administration Menu.
Note: Default Admin Passcode is 666666.
1. Setting the Address:
When Address is selected press #to enter. If address is not selected, use the 4and 6keys to navigate the menu.
Once in the “Address” menu, press “#” to edit the address of the Outdoor Station.
1. When editing the address the field will be highlighted, use “ ” to delete a number, once all 4 digits are entered
press #.
1. If it is the first Outdoor Station set to address to “0101”.
2. If there are more than 1 Outdoor Station(s) the address can be any value between 0102 ~ 0104.
3. If there is more than one building to be part of the same system, the first 2 digits (the building) can be any
value between 01 ~ 04.
2. Setting the Administrator Password
When Admin Pwd is selected press #to enter. If Admin Pwd is not selected, use the 4and 6keys to navigate the
menu.
Once in the “Admin Pwd” menu, press “#” to enter in the current password (6 digits), and the new password (6
digits) twice, and finally press “#” to confirm
3. Setting Public Password
When Unlock Pwd is selected press #to enter. If Unlock Pwd is not selected, use the 4and 6keys to navigate the
menu.
You will then need to enter the Administation Passcode, and then the new public unlock passcode twice.
And then press # to confirm and exit the menu.
4. Password Authority
When Authority is selected press #to enter. If Authority is not selected, use the 4and 6keys to navigate the
menu.
By default, the unlock methods are disabled.
Press “0” to select disable, press “1” to enable the Public Password, and press “2” to enable the User Password.
And then press # to confirm and exit the menu.
Note: User Passwords must be set on indoor monitor(s). See A1IPMW/B Full Manuals for further information
5. Volume Setting
When Volume is selected press #to enter. If Volume is not selected, use the 4and 6keys to navigate the menu.
You will see Ad Vol which is the global volume & Ring Vol which is the ringing volume.
Press “0” to set the Ad Volume, and press “1” to set the Ring Volume.
Once adjusting volumes, press “4” and “6” to adjust volumes up and down.
And then press # to confirm and exit the menu.
6. Unlock Type
When Unlock is selected press #to enter. If Unlock is not selected, use the 4and 6keys to navigate the menu.
By default, the unlock method is “NO” (Normally Open), and a 10 second delay.
Press “0” to choose “NC” (Normally Closed), press “1” to select Power On Lock, then choose your unlock time
(Unlock Delay) you can select a time between 1 ~ 150.
And then press # to confirm and exit the menu.
7. Sensor Setting
When Sensor Set is selected press #to enter. If Sensor Set is not selected, use the 4and 6keys to navigate the
menu.
By default, the unlock method is disabled.
Press “0” to select Disable, and press “1” to Enable, and then “ ” to delete the Open Sensor Delay time.
And then press # to confirm and exit the menu.
8. Language Setting
When Language is selected press # to enter. If Language is not selected, use the 4 and 6 keys to navigate the
menu. By default the language is English.
Page: 7
10.System Information
When Language is selected press # to enter. If Language is not selected, use the 4 and 6 keys to navigate the
menu.
The System Information page will show Door No., Local IP Address, Subnet Mask, Gateway Address, Software
Version, Producer and NetCfg.
9. Date Setting
When Date Set is selected press # to enter. If Date Set is not selected, use the 4 and 6 keys to navigate the menu.
If the Date setting is incorrectly set it will indicate setting failed.
The format should be YYYY-MM-DD HH:MM.
Press “ * ” to delete incorrect inputs, press # to confirm and save the inputs.
11.Card Management
When Card Manage is selected press # to enter. If Card Manage is not selected, use the 4 and 6 keys to navigate
the menu.
A. To add user cards/fobs
Press 0 to choose the Add Cards function
II. After the correct room number has been inputted, press # to confirm and then once on the below screen,
present your card/fob to the card reader, and finally press # to complete adding the card/fob.
I. To add an IC card, you will need to assign it to a room number.
On the Add Cards screen you will need to enter the room number, and press #.
For example for room 159, enter 0159.
B. To delete users cards/fobs
Press 1, to choose the Delete Cards functions, followed by #.
To delete a card you will need to select either by Card Number, by Room Number or to Delete all local cards,
which is 0 , 1 or 2 respectively.
After pressing either 0, 1 or 2, press # to continue the deleting process.
I. If the delete by Card Number was entered, then enter in the card/fob’s ID number and press #.
It will then indicate it has been successfully deleted, or the card number does not exist.
II. If the delete by Room Number was entered, then enter the room number followed by #.
For example for room 112, enter 0112.
It will then indicate it has been successfully deleted, or the room does not have any cards/fobs.
III. Finally, if Delete all local cards, was entered, then press # to confirm to delete all local cards.
12.Restore default settings
When Restore is selected press # to enter. If Restore is not selected, use the 4 & 6 keys to navigate the menu.
Once on the restore page, if you want to the restore all settings back to factory default press #, the Outdoor Station
will then restart.
13.Trades Hours
When Restore is selected press # to enter. If Restore is not selected, use the 4 & 6 keys to navigate the menu.
Once on the Trade Facility menu, pressing 4 or 6 will enable or disable the function.
Pressing # will start the editing sequence to set to time that the trade facility should be active for each day.
Using “ ” to delete numbers, # to continue to the next field, and the number pad to set the time.
Times for each segment need completing before you can save.
To use the Trades Facility, if you press & hold # when on the A1IPDSM1’s standby screen within the configured
Trade Hours, will trigger the lock output. This will use the time function as defined in this menu, and as such a 3rd
party timer is not needed.
6. Installation of Outdoor Units

1. Installation
Connect the Door Station to a switch/network or alternatively directly to a Monitor using the RJ45 port [1].
If the connected network does not support PoE, then DC12V1A needs to be applied to the 12V & GND terminals [2].
*All system cabling has been tested with Cat5E UTP PVC Cable.
**Maximum distance of 100m to PoE switch is supported.
2. The Main Interface
On standby, the display will show Date & Time, Network Status, Visitor’s Calling, Password Unlocking, and User
Instructions.
3. Video Intercom
1. In the main interface, visitors input the Room Number, eg: input 101 or 0101, the three digit room no. call after 3
seconds, the four digits Room Number call immediately.
2. When entering a Room Number, press * to delete any errors; During calling or talking, press “ ” to end the call.
During the conversation, press “4” key low down volume, “6” key rise up volume, press “0” to extend the
conversation time to be 60 seconds.
3. When entering the Room Number, press “ ” to delete any errors;
During a call or when calling, press “ ” to end the call.
During the conversation, pressing “4” will lower the volume, pressing “6” will raise the volume
4. The Indications of the Status Bar are:
1. Calling - Outdoor Station Calling Indoor Monitor
2. Busy - Indoor Monitor Busy
3. Connected- Intercom
5. If a monitor when connected to a call, and the monitor’s unlock feature is used, the Outdoor Station will show “Door
Unlock”.
4. Unlock Functions
A. Public Password Unlock
Public unlock passwords by default are disabled. It will need to be set by the responsible person to set the password.
To use the Public Password; Press “#” + “Public Password” + “#”.
B. User Password Unlock
Public unlock passwords by default are disabled. It will need to be set by the responsible person to set the
password.
To use the User Password; Press “ ” + Room Number + “#” + “User Password” + “#”
C. Proximity Card/Fob Unlock
Simply Present the Programmed Card to the “Card Zone”.
5. System Settings
Enter administration mode:
Press (when in standby) #to enter the password entry screen, then type in the Administation Passcode, and then press
#.
Once into Administration mode, pressing “#” will confirm or enter a submenu, “4” will navigate left, “6” will navigate right,
and “ ” will go back a menu or exit the Administration Menu.
Note: Default Admin Passcode is 666666.
1. Setting the Address:
When Address is selected press #to enter. If address is not selected, use the 4and 6keys to navigate the menu.
Once in the “Address” menu, press “#” to edit the address of the Outdoor Station.
1. When editing the address the field will be highlighted, use “ ” to delete a number, once all 4 digits are entered
press #.
1. If it is the first Outdoor Station set to address to “0101”.
2. If there are more than 1 Outdoor Station(s) the address can be any value between 0102 ~ 0104.
3. If there is more than one building to be part of the same system, the first 2 digits (the building) can be any
value between 01 ~ 04.
2. Setting the Administrator Password
When Admin Pwd is selected press #to enter. If Admin Pwd is not selected, use the 4and 6keys to navigate the
menu.
Once in the “Admin Pwd” menu, press “#” to enter in the current password (6 digits), and the new password (6
digits) twice, and finally press “#” to confirm
3. Setting Public Password
When Unlock Pwd is selected press #to enter. If Unlock Pwd is not selected, use the 4and 6keys to navigate the
menu.
You will then need to enter the Administation Passcode, and then the new public unlock passcode twice.
And then press # to confirm and exit the menu.
4. Password Authority
When Authority is selected press #to enter. If Authority is not selected, use the 4and 6keys to navigate the
menu.
By default, the unlock methods are disabled.
Press “0” to select disable, press “1” to enable the Public Password, and press “2” to enable the User Password.
And then press # to confirm and exit the menu.
Note: User Passwords must be set on indoor monitor(s). See A1IPMW/B Full Manuals for further information
5. Volume Setting
When Volume is selected press #to enter. If Volume is not selected, use the 4and 6keys to navigate the menu.
You will see Ad Vol which is the global volume & Ring Vol which is the ringing volume.
Press “0” to set the Ad Volume, and press “1” to set the Ring Volume.
Once adjusting volumes, press “4” and “6” to adjust volumes up and down.
And then press # to confirm and exit the menu.
6. Unlock Type
When Unlock is selected press #to enter. If Unlock is not selected, use the 4and 6keys to navigate the menu.
By default, the unlock method is “NO” (Normally Open), and a 10 second delay.
Press “0” to choose “NC” (Normally Closed), press “1” to select Power On Lock, then choose your unlock time
(Unlock Delay) you can select a time between 1 ~ 150.
And then press # to confirm and exit the menu.
7. Sensor Setting
When Sensor Set is selected press #to enter. If Sensor Set is not selected, use the 4and 6keys to navigate the
menu.
By default, the unlock method is disabled.
Press “0” to select Disable, and press “1” to Enable, and then “ ” to delete the Open Sensor Delay time.
And then press # to confirm and exit the menu.
8. Language Setting
When Language is selected press # to enter. If Language is not selected, use the 4 and 6 keys to navigate the
menu. By default the language is English.
10.System Information
When Language is selected press # to enter. If Language is not selected, use the 4 and 6 keys to navigate the
menu.
The System Information page will show Door No., Local IP Address, Subnet Mask, Gateway Address, Software
Version, Producer and NetCfg.
9. Date Setting
When Date Set is selected press # to enter. If Date Set is not selected, use the 4 and 6 keys to navigate the menu.
If the Date setting is incorrectly set it will indicate setting failed.
The format should be YYYY-MM-DD HH:MM.
Press “ * ” to delete incorrect inputs, press # to confirm and save the inputs.
11.Card Management
When Card Manage is selected press # to enter. If Card Manage is not selected, use the 4 and 6 keys to navigate
the menu.
A. To add user cards/fobs
Press 0 to choose the Add Cards function
Page: 8
II. After the correct room number has been inputted, press # to confirm and then once on the below screen,
present your card/fob to the card reader, and finally press # to complete adding the card/fob.
I. To add an IC card, you will need to assign it to a room number.
On the Add Cards screen you will need to enter the room number, and press #.
For example for room 159, enter 0159.
B. To delete users cards/fobs
Press 1, to choose the Delete Cards functions, followed by #.
To delete a card you will need to select either by Card Number, by Room Number or to Delete all local cards,
which is 0 , 1 or 2 respectively.
After pressing either 0, 1 or 2, press # to continue the deleting process.
I. If the delete by Card Number was entered, then enter in the card/fob’s ID number and press #.
It will then indicate it has been successfully deleted, or the card number does not exist.
II. If the delete by Room Number was entered, then enter the room number followed by #.
For example for room 112, enter 0112.
It will then indicate it has been successfully deleted, or the room does not have any cards/fobs.
III. Finally, if Delete all local cards, was entered, then press # to confirm to delete all local cards.
12.Restore default settings
When Restore is selected press # to enter. If Restore is not selected, use the 4 & 6 keys to navigate the menu.
Once on the restore page, if you want to the restore all settings back to factory default press #, the Outdoor Station
will then restart.
13.Trades Hours
When Restore is selected press # to enter. If Restore is not selected, use the 4 & 6 keys to navigate the menu.
Once on the Trade Facility menu, pressing 4 or 6 will enable or disable the function.
Pressing # will start the editing sequence to set to time that the trade facility should be active for each day.
Using “ ” to delete numbers, # to continue to the next field, and the number pad to set the time.
Times for each segment need completing before you can save.
To use the Trades Facility, if you press & hold # when on the A1IPDSM1’s standby screen within the configured
Trade Hours, will trigger the lock output. This will use the time function as defined in this menu, and as such a 3rd
party timer is not needed.
6. Installation of Outdoor Units

1. Installation
Connect the Door Station to a switch/network or alternatively directly to a Monitor using the RJ45 port [1].
If the connected network does not support PoE, then DC12V1A needs to be applied to the 12V & GND terminals [2].
*All system cabling has been tested with Cat5E UTP PVC Cable.
**Maximum distance of 100m to PoE switch is supported.
2. The Main Interface
On standby, the display will show Date & Time, Network Status, Visitor’s Calling, Password Unlocking, and User
Instructions.
3. Video Intercom
1. In the main interface, visitors input the Room Number, eg: input 101 or 0101, the three digit room no. call after 3
seconds, the four digits Room Number call immediately.
2. When entering a Room Number, press * to delete any errors; During calling or talking, press “ ” to end the call.
During the conversation, press “4” key low down volume, “6” key rise up volume, press “0” to extend the
conversation time to be 60 seconds.
3. When entering the Room Number, press “ ” to delete any errors;
During a call or when calling, press “ ” to end the call.
During the conversation, pressing “4” will lower the volume, pressing “6” will raise the volume
4. The Indications of the Status Bar are:
1. Calling - Outdoor Station Calling Indoor Monitor
2. Busy - Indoor Monitor Busy
3. Connected- Intercom
5. If a monitor when connected to a call, and the monitor’s unlock feature is used, the Outdoor Station will show “Door
Unlock”.
4. Unlock Functions
A. Public Password Unlock
Public unlock passwords by default are disabled. It will need to be set by the responsible person to set the password.
To use the Public Password; Press “#” + “Public Password” + “#”.
B. User Password Unlock
Public unlock passwords by default are disabled. It will need to be set by the responsible person to set the
password.
To use the User Password; Press “ ” + Room Number + “#” + “User Password” + “#”
C. Proximity Card/Fob Unlock
Simply Present the Programmed Card to the “Card Zone”.
5. System Settings
Enter administration mode:
Press (when in standby) #to enter the password entry screen, then type in the Administation Passcode, and then press
#.
Once into Administration mode, pressing “#” will confirm or enter a submenu, “4” will navigate left, “6” will navigate right,
and “ ” will go back a menu or exit the Administration Menu.
Note: Default Admin Passcode is 666666.
1. Setting the Address:
When Address is selected press #to enter. If address is not selected, use the 4and 6keys to navigate the menu.
Once in the “Address” menu, press “#” to edit the address of the Outdoor Station.
1. When editing the address the field will be highlighted, use “ ” to delete a number, once all 4 digits are entered
press #.
1. If it is the first Outdoor Station set to address to “0101”.
2. If there are more than 1 Outdoor Station(s) the address can be any value between 0102 ~ 0104.
3. If there is more than one building to be part of the same system, the first 2 digits (the building) can be any
value between 01 ~ 04.
2. Setting the Administrator Password
When Admin Pwd is selected press #to enter. If Admin Pwd is not selected, use the 4and 6keys to navigate the
menu.
Once in the “Admin Pwd” menu, press “#” to enter in the current password (6 digits), and the new password (6
digits) twice, and finally press “#” to confirm
3. Setting Public Password
When Unlock Pwd is selected press #to enter. If Unlock Pwd is not selected, use the 4and 6keys to navigate the
menu.
You will then need to enter the Administation Passcode, and then the new public unlock passcode twice.
And then press # to confirm and exit the menu.
4. Password Authority
When Authority is selected press #to enter. If Authority is not selected, use the 4and 6keys to navigate the
menu.
By default, the unlock methods are disabled.
Press “0” to select disable, press “1” to enable the Public Password, and press “2” to enable the User Password.
And then press # to confirm and exit the menu.
Note: User Passwords must be set on indoor monitor(s). See A1IPMW/B Full Manuals for further information
5. Volume Setting
When Volume is selected press #to enter. If Volume is not selected, use the 4and 6keys to navigate the menu.
You will see Ad Vol which is the global volume & Ring Vol which is the ringing volume.
Press “0” to set the Ad Volume, and press “1” to set the Ring Volume.
Once adjusting volumes, press “4” and “6” to adjust volumes up and down.
And then press # to confirm and exit the menu.
6. Unlock Type
When Unlock is selected press #to enter. If Unlock is not selected, use the 4and 6keys to navigate the menu.
By default, the unlock method is “NO” (Normally Open), and a 10 second delay.
Press “0” to choose “NC” (Normally Closed), press “1” to select Power On Lock, then choose your unlock time
(Unlock Delay) you can select a time between 1 ~ 150.
And then press # to confirm and exit the menu.
7. Sensor Setting
When Sensor Set is selected press #to enter. If Sensor Set is not selected, use the 4and 6keys to navigate the
menu.
By default, the unlock method is disabled.
Press “0” to select Disable, and press “1” to Enable, and then “ ” to delete the Open Sensor Delay time.
And then press # to confirm and exit the menu.
8. Language Setting
When Language is selected press # to enter. If Language is not selected, use the 4 and 6 keys to navigate the
menu. By default the language is English.
10.System Information
When Language is selected press # to enter. If Language is not selected, use the 4 and 6 keys to navigate the
menu.
The System Information page will show Door No., Local IP Address, Subnet Mask, Gateway Address, Software
Version, Producer and NetCfg.
9. Date Setting
When Date Set is selected press # to enter. If Date Set is not selected, use the 4 and 6 keys to navigate the menu.
If the Date setting is incorrectly set it will indicate setting failed.
The format should be YYYY-MM-DD HH:MM.
Press “ * ” to delete incorrect inputs, press # to confirm and save the inputs.
11.Card Management
When Card Manage is selected press # to enter. If Card Manage is not selected, use the 4 and 6 keys to navigate
the menu.
A. To add user cards/fobs
Press 0 to choose the Add Cards function
II. After the correct room number has been inputted, press # to confirm and then once on the below screen,
present your card/fob to the card reader, and finally press # to complete adding the card/fob.
I. To add an IC card, you will need to assign it to a room number.
On the Add Cards screen you will need to enter the room number, and press #.
For example for room 159, enter 0159.
B. To delete users cards/fobs
Press 1, to choose the Delete Cards functions, followed by #.
To delete a card you will need to select either by Card Number, by Room Number or to Delete all local cards,
which is 0 , 1 or 2 respectively.
After pressing either 0, 1 or 2, press # to continue the deleting process.
I. If the delete by Card Number was entered, then enter in the card/fob’s ID number and press #.
It will then indicate it has been successfully deleted, or the card number does not exist.
II. If the delete by Room Number was entered, then enter the room number followed by #.
For example for room 112, enter 0112.
It will then indicate it has been successfully deleted, or the room does not have any cards/fobs.
Page: 9
III. Finally, if Delete all local cards, was entered, then press # to confirm to delete all local cards.
12.Restore default settings
When Restore is selected press # to enter. If Restore is not selected, use the 4 & 6 keys to navigate the menu.
Once on the restore page, if you want to the restore all settings back to factory default press #, the Outdoor Station
will then restart.
13.Trades Hours
When Restore is selected press # to enter. If Restore is not selected, use the 4 & 6 keys to navigate the menu.
Once on the Trade Facility menu, pressing 4 or 6 will enable or disable the function.
Pressing # will start the editing sequence to set to time that the trade facility should be active for each day.
Using “ ” to delete numbers, # to continue to the next field, and the number pad to set the time.
Times for each segment need completing before you can save.
To use the Trades Facility, if you press & hold # when on the A1IPDSM1’s standby screen within the configured
Trade Hours, will trigger the lock output. This will use the time function as defined in this menu, and as such a 3rd
party timer is not needed.
6. Installation of Outdoor Units

1. Installation
Connect the Door Station to a switch/network or alternatively directly to a Monitor using the RJ45 port [1].
If the connected network does not support PoE, then DC12V1A needs to be applied to the 12V & GND terminals [2].
*All system cabling has been tested with Cat5E UTP PVC Cable.
**Maximum distance of 100m to PoE switch is supported.
2. The Main Interface
On standby, the display will show Date & Time, Network Status, Visitor’s Calling, Password Unlocking, and User
Instructions.
3. Video Intercom
1. In the main interface, visitors input the Room Number, eg: input 101 or 0101, the three digit room no. call after 3
seconds, the four digits Room Number call immediately.
2. When entering a Room Number, press * to delete any errors; During calling or talking, press “ ” to end the call.
During the conversation, press “4” key low down volume, “6” key rise up volume, press “0” to extend the
conversation time to be 60 seconds.
3. When entering the Room Number, press “ ” to delete any errors;
During a call or when calling, press “ ” to end the call.
During the conversation, pressing “4” will lower the volume, pressing “6” will raise the volume
4. The Indications of the Status Bar are:
1. Calling - Outdoor Station Calling Indoor Monitor
2. Busy - Indoor Monitor Busy
3. Connected- Intercom
5. If a monitor when connected to a call, and the monitor’s unlock feature is used, the Outdoor Station will show “Door
Unlock”.
4. Unlock Functions
A. Public Password Unlock
Public unlock passwords by default are disabled. It will need to be set by the responsible person to set the password.
To use the Public Password; Press “#” + “Public Password” + “#”.
B. User Password Unlock
Public unlock passwords by default are disabled. It will need to be set by the responsible person to set the
password.
To use the User Password; Press “ ” + Room Number + “#” + “User Password” + “#”
C. Proximity Card/Fob Unlock
Simply Present the Programmed Card to the “Card Zone”.
5. System Settings
Enter administration mode:
Press (when in standby) #to enter the password entry screen, then type in the Administation Passcode, and then press
#.
Once into Administration mode, pressing “#” will confirm or enter a submenu, “4” will navigate left, “6” will navigate right,
and “ ” will go back a menu or exit the Administration Menu.
Note: Default Admin Passcode is 666666.
1. Setting the Address:
When Address is selected press #to enter. If address is not selected, use the 4and 6keys to navigate the menu.
Once in the “Address” menu, press “#” to edit the address of the Outdoor Station.
1. When editing the address the field will be highlighted, use “ ” to delete a number, once all 4 digits are entered
press #.
1. If it is the first Outdoor Station set to address to “0101”.
2. If there are more than 1 Outdoor Station(s) the address can be any value between 0102 ~ 0104.
3. If there is more than one building to be part of the same system, the first 2 digits (the building) can be any
value between 01 ~ 04.
2. Setting the Administrator Password
When Admin Pwd is selected press #to enter. If Admin Pwd is not selected, use the 4and 6keys to navigate the
menu.
Once in the “Admin Pwd” menu, press “#” to enter in the current password (6 digits), and the new password (6
digits) twice, and finally press “#” to confirm
3. Setting Public Password
When Unlock Pwd is selected press #to enter. If Unlock Pwd is not selected, use the 4and 6keys to navigate the
menu.
You will then need to enter the Administation Passcode, and then the new public unlock passcode twice.
And then press # to confirm and exit the menu.
4. Password Authority
When Authority is selected press #to enter. If Authority is not selected, use the 4and 6keys to navigate the
menu.
By default, the unlock methods are disabled.
Press “0” to select disable, press “1” to enable the Public Password, and press “2” to enable the User Password.
And then press # to confirm and exit the menu.
Note: User Passwords must be set on indoor monitor(s). See A1IPMW/B Full Manuals for further information
5. Volume Setting
When Volume is selected press #to enter. If Volume is not selected, use the 4and 6keys to navigate the menu.
You will see Ad Vol which is the global volume & Ring Vol which is the ringing volume.
Press “0” to set the Ad Volume, and press “1” to set the Ring Volume.
Once adjusting volumes, press “4” and “6” to adjust volumes up and down.
And then press # to confirm and exit the menu.
6. Unlock Type
When Unlock is selected press #to enter. If Unlock is not selected, use the 4and 6keys to navigate the menu.
By default, the unlock method is “NO” (Normally Open), and a 10 second delay.
Press “0” to choose “NC” (Normally Closed), press “1” to select Power On Lock, then choose your unlock time
(Unlock Delay) you can select a time between 1 ~ 150.
And then press # to confirm and exit the menu.
7. Sensor Setting
When Sensor Set is selected press #to enter. If Sensor Set is not selected, use the 4and 6keys to navigate the
menu.
By default, the unlock method is disabled.
Press “0” to select Disable, and press “1” to Enable, and then “ ” to delete the Open Sensor Delay time.
And then press # to confirm and exit the menu.
8. Language Setting
When Language is selected press # to enter. If Language is not selected, use the 4 and 6 keys to navigate the
menu. By default the language is English.
10.System Information
When Language is selected press # to enter. If Language is not selected, use the 4 and 6 keys to navigate the
menu.
The System Information page will show Door No., Local IP Address, Subnet Mask, Gateway Address, Software
Version, Producer and NetCfg.
9. Date Setting
When Date Set is selected press # to enter. If Date Set is not selected, use the 4 and 6 keys to navigate the menu.
If the Date setting is incorrectly set it will indicate setting failed.
The format should be YYYY-MM-DD HH:MM.
Press “ * ” to delete incorrect inputs, press # to confirm and save the inputs.
11.Card Management
When Card Manage is selected press # to enter. If Card Manage is not selected, use the 4 and 6 keys to navigate
the menu.
A. To add user cards/fobs
Press 0 to choose the Add Cards function
II. After the correct room number has been inputted, press # to confirm and then once on the below screen,
present your card/fob to the card reader, and finally press # to complete adding the card/fob.
I. To add an IC card, you will need to assign it to a room number.
On the Add Cards screen you will need to enter the room number, and press #.
For example for room 159, enter 0159.
B. To delete users cards/fobs
Press 1, to choose the Delete Cards functions, followed by #.
To delete a card you will need to select either by Card Number, by Room Number or to Delete all local cards,
which is 0 , 1 or 2 respectively.
After pressing either 0, 1 or 2, press # to continue the deleting process.
I. If the delete by Card Number was entered, then enter in the card/fob’s ID number and press #.
It will then indicate it has been successfully deleted, or the card number does not exist.
II. If the delete by Room Number was entered, then enter the room number followed by #.
For example for room 112, enter 0112.
It will then indicate it has been successfully deleted, or the room does not have any cards/fobs.
III. Finally, if Delete all local cards, was entered, then press # to confirm to delete all local cards.
12.Restore default settings
When Restore is selected press # to enter. If Restore is not selected, use the 4 & 6 keys to navigate the menu.
Once on the restore page, if you want to the restore all settings back to factory default press #, the Outdoor Station
will then restart.
13.Trades Hours
When Restore is selected press # to enter. If Restore is not selected, use the 4 & 6 keys to navigate the menu.
Once on the Trade Facility menu, pressing 4 or 6 will enable or disable the function.
Pressing # will start the editing sequence to set to time that the trade facility should be active for each day.
Using “ ” to delete numbers, # to continue to the next field, and the number pad to set the time.
Times for each segment need completing before you can save.
To use the Trades Facility, if you press & hold # when on the A1IPDSM1’s standby screen within the configured
Trade Hours, will trigger the lock output. This will use the time function as defined in this menu, and as such a 3rd
party timer is not needed.
Page: 10
6. Installation of Outdoor Units

Contact Details
Elite Security Products UK, Unit 7 Target Park, Shawbank Road, Lakeside, Redditch, Worcestershire, B98 8YN
Registered in England, Company Registration Number: 02769392, VAT Registration: GB614686525
For more product information please visit www.espuk.com
E&OE - Errors and Omissions Excepted. K23
Table of contents
Other Scolmore Intercom System manuals
Popular Intercom System manuals by other brands
Clear-Com
Clear-Com FreeSpeak II FSII-TCVR-24 user guide
Talkaphone
Talkaphone AOR-8 installation guide
HIK VISION
HIK VISION DS-KH6310-W quick start guide
Clear-Com
Clear-Com ECLIPSE ICS 92/52 instruction manual
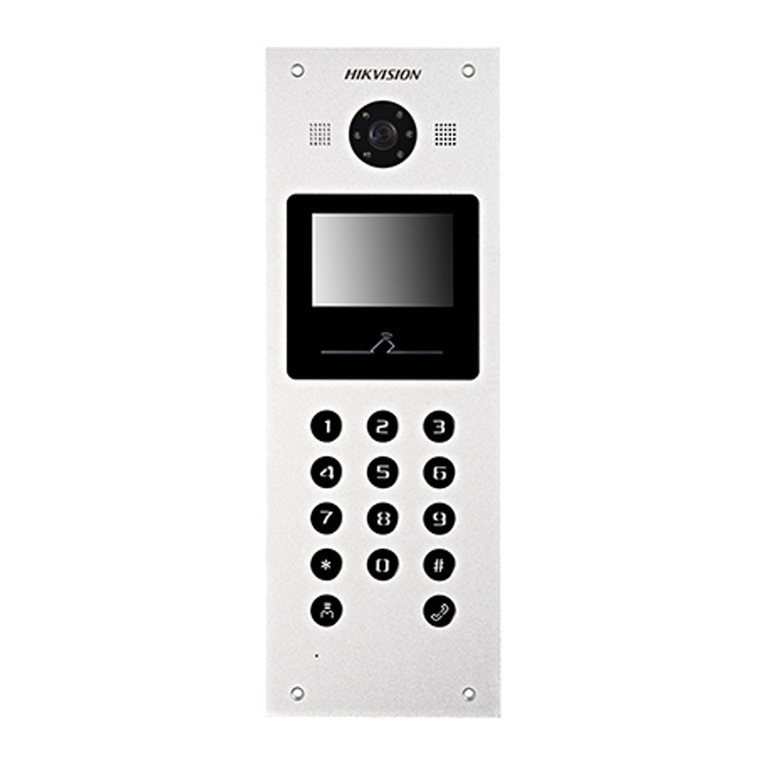
HIK VISION
HIK VISION DS-KD3002-VM user manual

Vistadoor
Vistadoor M-E VDV-610 COMPACT operating instructions

