Scotty HIGH PERFORMANCE ELECTRIC DOWNRIGGER Guide
I
INSTALLATION
I
USE AND SAFETY
I
MAINTENANCE
CAUTION! Read through this entire booklet
before operating your Scotty downrigger!
Improper use may damage your downrigger and
void warranty. You may also expose yourself to
unnecessary danger and physical injury.

INTRODUCTION
Thank you for choosing a Scotty Downrigger. In 1973 Scotty produced its first
downrigger. Our goal was to manufacture a superior downrigger, built to
withstand the demanding marine environment, and we now produce many manual
and electric models. This instruction book will give you basic instruction on
mounting and using your downrigger. Please read it carefully. It will improve
your results and also give you important tips on downrigger safety and care.
Good
Fishing!
FEATURES
Auto Brake
Releases automatically when winding up downrigger, and sets automatically
when the handle is released.
Clutch Brake
The Scotty clutch brake allows descent of the downrigger at any speed
you choose. Most of the time you will want a uniform slow speed to avoid tangles.
However, in instances where you want a lure deep very quickly, the Scotty will
respond, giving you complete control. In addition, the clutch brake can be set
so that it will slip if you hang up on the bottom. Many times you can then turn the
boat around and lift the weight free without losing anything.
Limited Lifetime Warranty
Through the use of non-corrosive materials and sound engineering, Scotty is proud to
warranty all its manual downriggers for the lifetime of the original owner.
We will also back our customers with fast, direct factory service and do our best
to get them back fishing as fast and inexpensively as possible. Please read the
warranty agreement carefully and retain the certificate section in a safe place.
Horizontal Spool Design
Low Profile Horizontal spool design for easy winding and compact storage.
Positive Drive Depth Counter
Spray protected, positive drive depth counter, reads in feet.
Extendable Handle Arm
Models
No.
1060, 1080, 1085, and 1090 have an extendable handle arm
for extra cranking leverage and a fast retrieve two foot per turn spool.
FISHING
WITH DOWNRIGGERS
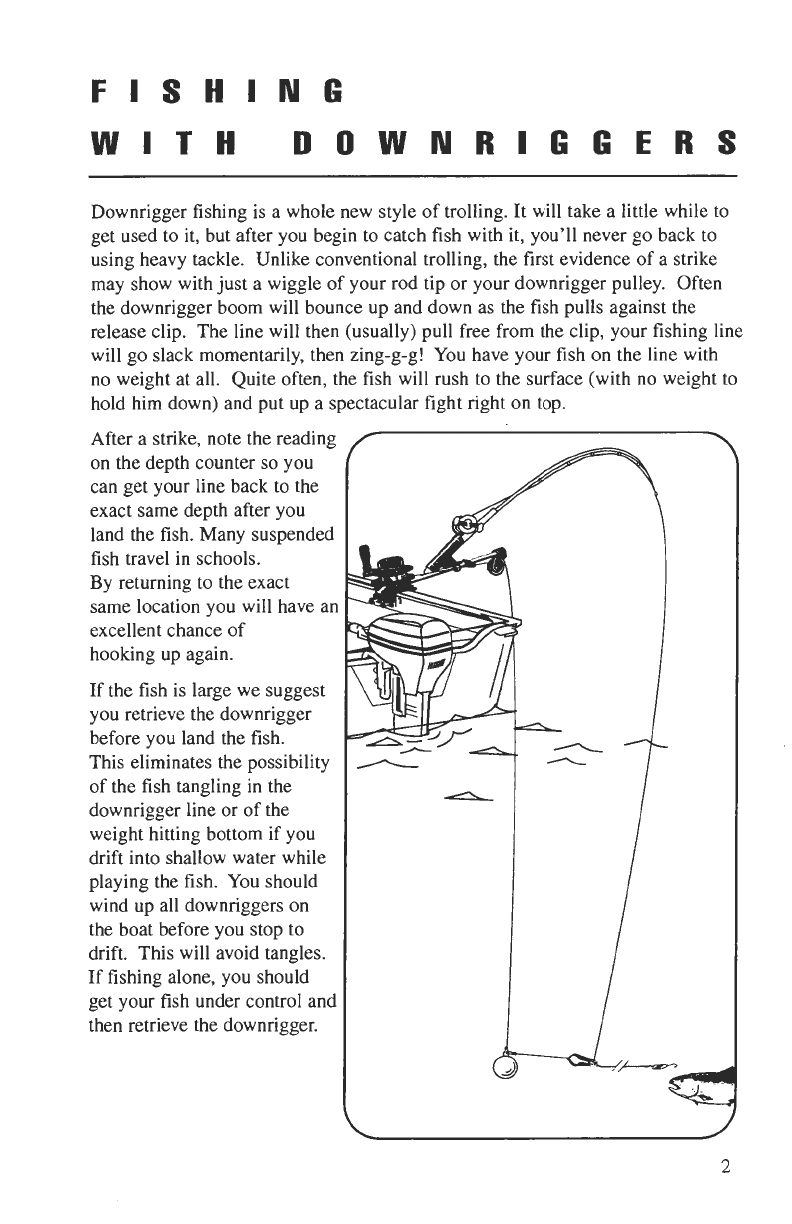
Downrigger fishing is a whole new style of trolling. It will take a little while to
get used to it, but after you begin to catch fish with
it,
you'll never go back to
using heavy tackle. Unlike conventional trolling, the first evidence of a strike
may show with just a wiggle of your rod tip or your downrigger pulley. Often
the downrigger boom will bounce up and down as the fish pulls against the
release clip. The line will then (usually) pull free from the clip, your fishing line
will go slack momentarily, then zing-g-g! You have your fish on the line with
no weight at all. Quite often, the fish will rush to the surface (with no weight to
hold him down) and put up a spectacular fight right on top.
After a strike, note the reading
on the depth counter so you
can get your line back to the
exact same depth after you
land the fish. Many suspended
fish travel in schools.
By returning to the exact
same location you will have an
excellent chance of
hooking up again.
If the fish is large we suggest
you retrieve the downrigger
before you land the fish.
This eliminates the possibility
of the fish tangling in the
downrigger line or of the
weight hitting bottom if you
drift into shallow water while
playing the fish. You should
wind up all downriggers on
the boat before you stop to
drift. This will avoid tangles.
If fishing alone, you should
get your fish under control and
then retrieve the downrigger.

The Scotty Models No. 1085 and No. 1090 are designed for use on wide beam
boats of 16 ft. long and up. Installation on smaller boats is not recommended.
All sports have some physical hazards connected with them and fishing with a
Downrigger calls for some common sense and precaution. There are natural
physical forces associated with long armed downriggers. The load or strain at
the mounting point of a downrigger is proportional to the length of the arm.
With a 30 inch arm and 150 lb. breaking strain trolling wire, this pulling force
and the arm leverage can exert a force of approximately
1
100 lbs. on the gunnel
of your boat. It is obvious that this force could overcome a weak mounting
point on the boat. In the case of a small boat, it could cause the boat to
submerge or overturn if the wire is caught on the
bottom in a strong tide or in a heavy wind.
HERE ARE SOME SAFETY TIPS THAT
SHOULD BE OBSERVED WHEN YOU ARE
DOWNRIGGER FISHING, PARTICULARLY
IN OCEAN OR TIDAL CONDITIONS.
Care must always be exercised to avoid tangling
your downrigger wire in your boat prop. The best
way to avoid this risk is to mount the downrigger
near the stern of the boat so that the wire never
gets under the boat in a turn. Sharp turns should
be avoided and you should never back up with the
downrigger wire out.
If your model has the tilt-up base and the
downrigger is tilted up, the boom must be tilted
back past vertical, and the red lock lever tucked
fully under the downrigger base.
Keep your
fingers away from the underside of the down-
rigger base and remove the lead weight when
the downrigger is tilted up or unattended.
Make sure the area where you are mounting your
Downrigger is strong and reinforced.
If
it
is weak, reinforce it with a backing plate of
wood or metal.
Don't attempt to retrieve a weighted or
snagged downrigger cable by hand. Wave or
boat motion could cause serious injury.
Red lock lever must
be tucked under base to lock
the downrigger upright

WHAT HAPPENS WHEN
YOU HIT BOTTOM?
When your weight touches bottom while trolling, you will see the downrigger
boom bounce in a manner similar to a fish strike. You should immediately
wind up to a safer depth. WARNING! Be very cautious when fishing
in
strong
tidal current or on windy days. If the weight or wire snags on the bottom, the
force of the tide or wind on the boat can put terrific strain on the downrigger.
KEEP
a sharp pair of
wire
cutters handy in case you have to cut the
wire
in an emergency.
Because of the built in tilt-up feature, the downrigger boom
may fly up quickly when the wire breaks, or is cut,
so be sure to stand clear,
not leaning over the boom.
We always recommend you have a large scale chart of your fishing area and try
to know your position at all times when deep trolling. With a relatively smooth
bottom, if the lead weight hangs up on a small ledge
it
can often be released by
turning around and pulling from the opposite direction, providing there is
relatively little tide or wind and your boat is easy and responsive in handling.
The wire line can be played out if necessary while you turn the boat to the
direction of the hang-up. After a hang-up the wire should be examined for any
broken strands. If strands are broken,
it
should be cut and rejoined.
As a temporary alternative, the free strands should be carefully tucked and
woven back into the remaining lays. The wire is now reduced in strength and
if there is further and continued breaking of the strands, replace the wire.
The built-in Scotty brake handle stop will allow the brake to slip if you hang up
on the bottom. This will allow you to stop your boat while
it
is slipping and
decide your best strategy. Most times you can turn the boat around, and while
pulling from the opposite direction, lift the weight free without losing anything.

MOUNTING
INSTRUCTIONS
Our recommendations with regard to mounting locations are:
Downriggers work best if they are mounted near the stern of the boat. They will work at
any location but the risk of tangling wire line in your prop during a turn is minimized the
further back the downrigger is mounted.
The downiigger should be mounted in a location where
it
is easy to reach and operate.
Remember you will be handling heavy weights on and off and you will be setting lines and
releases. The downrigger needs to be convenient for these activities.
Do not mount
it
where you have to reach or lean a long way to make the connections.
A rod holder should be mounted close to each downrigger, but be sure to allow
clearance for the rod in the holder. Otherwise the butt of the rod may interfere with the
downrigger reel. Allow enough clearance so the rod can easily be removed from the rod
holder when you get a strike. Scotty makes several models of rod holders that work well
with our downriggers. (Inquire at your supplier.)
FOR MODELS NO. 1050 AND 1060
These models mount on the No. 1010 slide-in mounting bracket supplied with the
downrigger. This bracket should be securely mounted to the boat as shown below.
Slide downrigger into the mounting bracket and secure with lock bar.
We recommend that a wood or metal backing always be installed on the underside of the
mounting surface. This spreads the load and avoids damage to the boat, in the event of a
bottom hang up.

INSTRUCTIONS
FOR
MODELS
No. 1080,1085 and 1090
These models mount on the Scotty #I023 tilt-up mounting bracket supplied with the
downrigger. This bracket should be securely mounted to the boat as shown below. The
downriggercan be mounted over the side of the boat, over the stem or off the
comer. The mounting bracket must
be
mounted on a flat surface and the rear of the
bracket must be within 114 of the edge of the gunnel so that the downrigger spool has
clearance for tilting (see diagram). Because of the heavy stresses placed on the boat
gunnel by the leverage of the long downrigger arm, we recommend that a wood or
metal backing plate always be installed on the underside of the mounting surface.
This spreads the load and avoids damage to the boat, in the event of a bottom hang up.
Position the downrigger on the tilt bracket. Insert the stainless steel mounting bolt
through the mounting bracket and downrigger base. Hand tighten.
1
114"
MAXIMUM
NOTE:
If
your boat's gunnel configuration does not allow
this standard mounting, see the optional mounts on page 11.
RIGGING
YOUR FISHING LINES
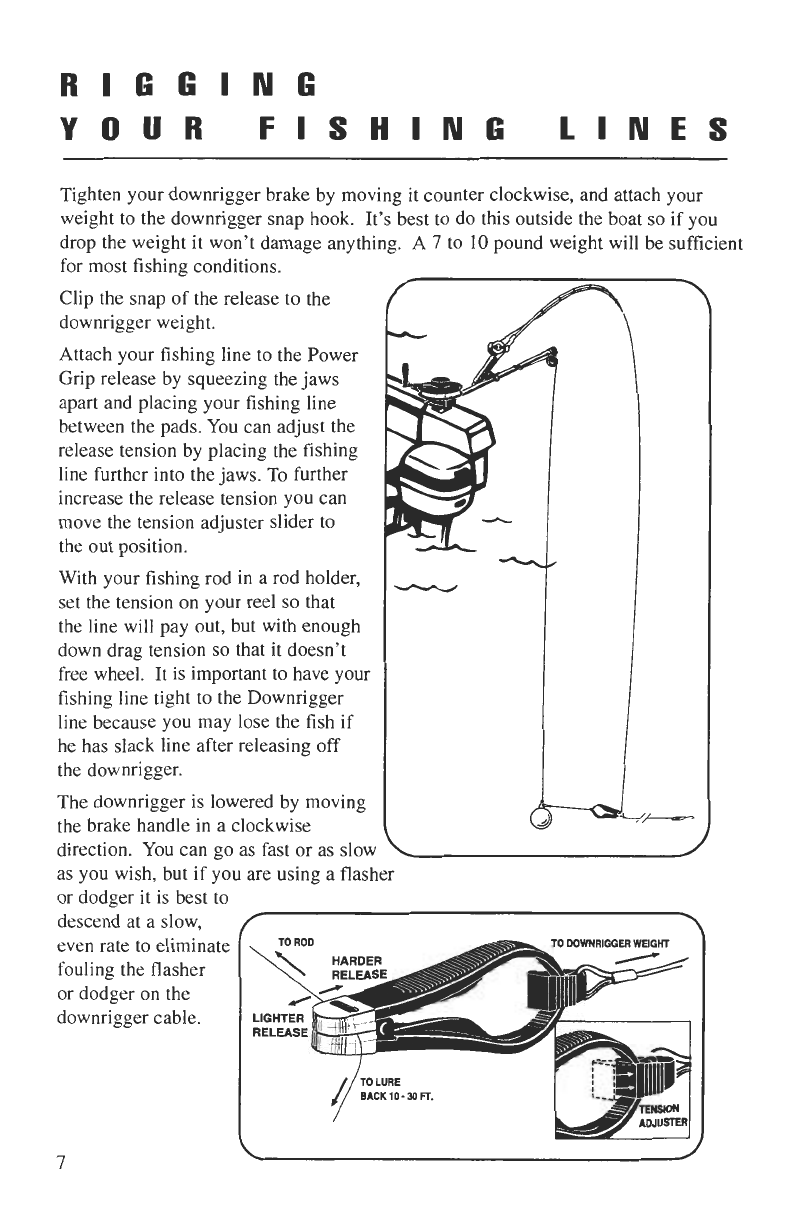
Tighten your downrigger brake by moving it counter clockwise, and attach your
weight to the downrigger snap hook. It's best to do this outside the boat so if you
drop the weight it won't damage anything. A
7
to
10
pound weight will be sufficient
for most fishing conditions.
Clip the snap of the release to the
downrigger weight.
Attach your fishing line to the Power
Grip release by squeezing the jaws
apart and placing your fishing line
between the pads. You can adjust the
release tension by placing the fishing
line furthcr into the jaws. To further
increase the release tension you can
move the tension adjuster slider to
the out ~osition.
With your fishing rod in a rod holder,
set the tension on your reel so that
the line will pay out, but with enough
down drag tension so that it doesn't
free wheel.
It
is important to have your
fishing line tight to the Downrigger
line because you may lose the fish if
he has slack line after releasing off
the downrigger.
The downrigger is lowered by moving
the brake handle in a clockwise
\
direction. You can go as fast or as slow
\-/
as you wish, but if you are using a flasher
or dodger it is best to
descend at a slow,
even rate to eliminate
fouling the flasher
or dodger on the
downrigger cable.
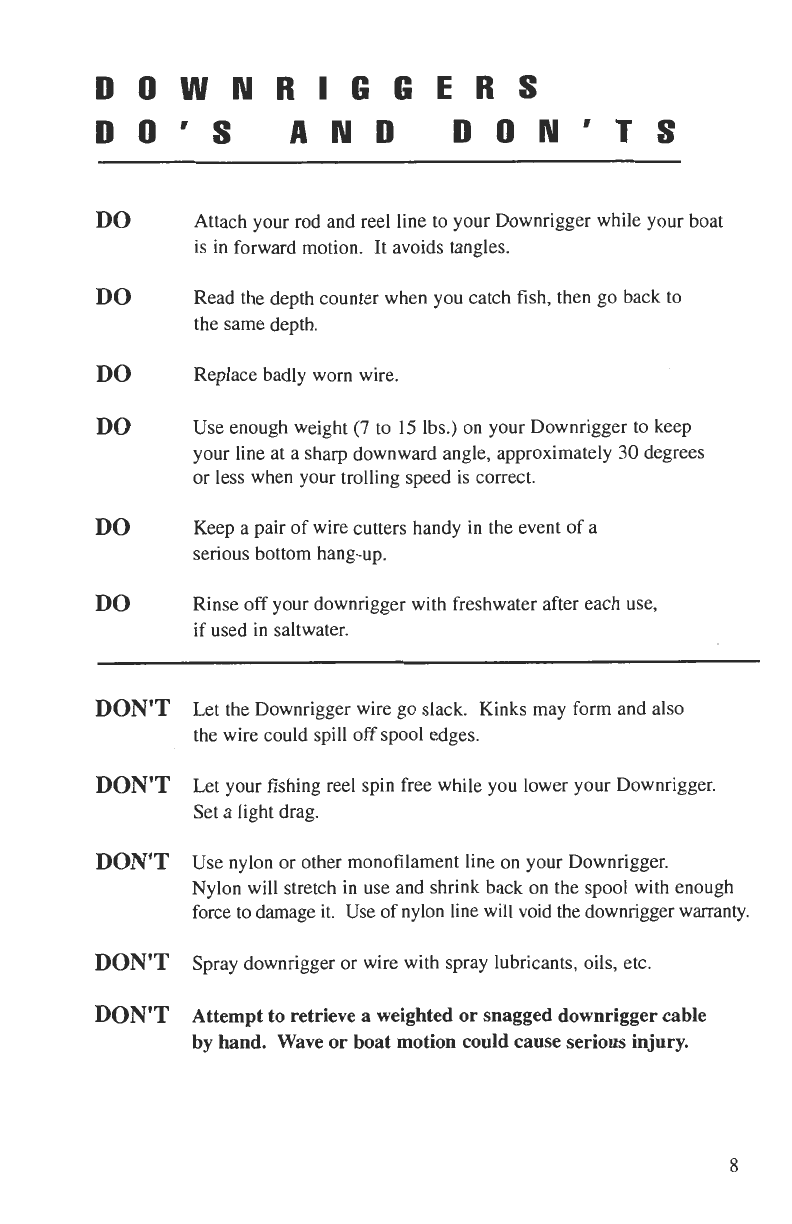
DOWNRIGGERS
DO'S AND DON'TS
DO
Attach your rod and reel line to your Downrigger while your boat
is in forward motion. It avoids tangles.
DO
Read the depth counter when you catch fish, then go back to
the same depth.
DO
Replace badly worn wire.
DO
Use enough weight
(7
to
15
Ibs.) on your Downrigger to keep
your line at a sharp downward angle, approximately
30
degrees
or less when your trolling speed is correct.
DO
Keep a pair of wire cutters handy in the event of a
serious bottom hang-up.
DO
Rinse off your downrigger with freshwater after each use,
if used
in
saltwater.
DON'T
DON'T
DON'T
DON'T
DON'T
Let the Downrigger wire go slack. Kinks may form and also
the wire could spill off spool edges.
Let your fishing reel spin free while you lower your Downrigger.
Set a light drag.
Use nylon or other monofilament line on your Downrigger.
Nylon will stretch in use and shrink back on the spool with enough
force to damage it. Use of nylon line will void the downrigger warranty.
Spray downrigger or wire with spray lubricants, oils, etc.
Attempt to retrieve a weighted or snagged downrigger cable
by hand. Wave or boat motion could cause serious injury.
CARE
AND
MAINTENANCE
Your Scotty Downrigger is constructed of corrosion resistant materials.
Very little maintenance is required. We can pass along a few tips, however that
will ensure that your Scotty downrigger will keep up to peak performance.
Routinely check the stainless steel fastenings with a screwdriver to see that they
are snug and secure.
Do not use any lubricant on your Scotty, as the material combinations are
self-lubricating,and some spray lubricants will attack the plastic components.
It
is not advisable to leave the unit in direct sunlight for long periods when not
in use. Ultraviolet light will eventually damage any plastic material.
BRAKE
ADJUSTMENT
It may be necessary to adjust the brake tension if either the weight does not
descent freely or cannot be held when the brake is in the on position.
(1)
Lift up (do not twist) to remove counter cover.
(2)
Remove the Jam Nut, which holds down the counter assembly. Lift the
counter assembly off the Downrigger. (It lifts straight up and sometimes
requires some gentle prying with two screwdrivers under the opposite edges).
(3)
Using two 9/16 inch wrenches or two small crescent wrenches, hold the
bottom nut with one wrench and loosen the top jam nut with the other wrench.
With the brake in rhe off or "6 o'clock" position, either tighten or loosen the
bottom nut as required to obtain the correct brake setting.
With a weight on, the brake should engage automatically when the handle is
released, yet slip if constant strain is applied to wire.
(4)
Tighten down the Jam Nut and re-assemble the Counter Assembly.
WIRE MAINTENANCE
We have found many things can affect the life of wire. Included
in
this are such
things as an unobserved kink, electrolysis caused by stray electrical currents
emanating from the boat, and certain types of jelly fish and minute sea creatures
which may have a corroding effect when left on the wire.
Frequent inspection and wiping or washing wire with fresh water may help
prolong wire's usefulness.
HOW TO REPLACE WIRE
All our original downrigger wire is fitted with a Scotty snap swivel and crimp-on
locator sleeves. If you have occasion to replace the wire, proceed as follows.
Mount the downrigger someplace secure (its regular boat mount is good) and
pull off the old wire. When you come to the end of the wire cut the loop off thc
downrigger spool.
Take the free end of the wire from the supply spool and thread
it
through the
pulley and any fairleads. Thread the wire through the holes from the inside
of the spool.
Tie an overhand knot
in
the wire, pulling
it
snug against the spool.
Tie a second overhand knot giving you a "square knot" and pull
it
snug.
The loose end of the wire should be pointing back towards the pulley.
Secure the loose end with tape to keep
it
from fouling the remainder of the
wire line.
Keep tension on the supply spool to wind the new wire on as tight as possible.
Avoid twisting or kinking the wire, or winding it onto the spool too loosely.
(This operation is best carried out with two people.)
Thread the end of the wire through any fairleads and the pulley, and attach a
new Scotty bumper and snap hook.
NOTE: Winding more than
300'
of
150
Ib. test wire onto the spool wil! affect
the accuracy of the depth counter, use of heavier test wire will also affect the
counter accuracy.

OPTIONAL MOUNTS
FOR MODELS No. 1050 AND 1060 ONLY
No. 1015
Right Angle Side No. 1021
GunnelFor boatsMountwith
Clamp Mount
*B
I
2)
For portable downrigger fishing from
narrow or uneven gunnels. aluminum boats
Dimensions: 5 114"
x
2 112" Dimensions: 5 518"
x
4 314"
x
3 118"
Bolting Dimensions: 4 911 6"
x
1
518" Clamp opening: 2"
lncludes S.S. bolts to fasten mounting bracket. lncludes S.S. bolts to fasten mounting bracket,
FOR ALL MODELS
For boats with narrow or uneven gunnels.
Strong and durable, with quick fastening
stainless steel bolts for easy set up and removal.
Fits No. 1026 swivel mount.
Dimensions: 6"
x
6"
x
6"
Bolting dimensions: 4"
x
2"
lncludes S.S. bolts to fasten
mounting bracket.
No. 1027
Rail Mount
\
\.
For all downriggers, fits up to
1
112"
round rail. or oval-shaped wooden rails.
Easily installed and removed for storage.
wooden board (not included) transfers-the
downward pressure to the boat gunnel.
Fits No. 1026 swivel mount.
Dimensions: 6 118"
x
7
118"
lncludes S.S. bolts to fasten mounting bracket.
Gives full 360" rotation with 16 locking
positions, with quick fastening stainless
steel bolts for easy set up and removal.
Dimensions: 5 112"
x
5
112"
x
3 518"
Bolting dimensions: 4 112"
x
3 112"
lncludes S.S. bolts to fasten
mounting bracket.
Gimbal Mount
-
9"or
12"
Fits into boat's flush mount
rod holder. Eliminates drilling
holes and permanent
mounting of downrigger
brackets on boat. Made from
welded stainless steel and modified nylon
for the ultimate in strength and durability.
Fits No.1026 swivel mount.
Dimensions:
NO. 1028
-
6 118"
x
7
118"
x
9"
x
1
112"
NO. 1029
-
6 118"
x
7
118"
x
12"
x
1
314
lncludes S.S. bolts to fasten
mounting bracket.

TO OBTAIN PARTS, INFORMATION OR TO LOCATE THE
WARRANTY SERVICE DEPOT NEAREST YOU CONTACE
SCOTTY
FISHING
AND MARINE PRODUCTS
2065 HENRY
AVE.
WEST
SIDNEY,
BC
CANADA
V8L 526
TEL:
(250) 656-8102
FAX:
(250) 656-8126
Toll
Free:
1-800-214-0141
E-mail: [email protected]

Although Scotty makes every effort to ensure the accuracy of
specifications at the time of publication, specifications for
products described in this publication are subject to change
without notice. Contact Scotty for the most current information.
1-800-214-0141
69
Recycled Paper
Printed in Canada
May
/
03

S-COUNTERBRK
COUNTER BRAKE
S-COUNTERSTAR
COUNTER STAR
S-BRKPAD.750X.80
BRAKE PAD, .7670 X .8055 X .25
S-HNDLBRKELEC
BRAKE HANDLE ELECTRIC
(see detail above)
S-SSCUT SQ4
BRAKE PLATE, STEEL, SQUARE, 4X4”
S-COUNTER
COUNTER ONLY
, BLACK, 3 DIGIT
S-CAM3RAMP
CAM PAD, 3 RAMP
DETAIL OF BRAKE HANDLE
BRAKE PAD PLACEMENT
(S-BRKPAD.750X.80)
PADS MUST BE ARRANGED
IN THIS MANNER FOR BRAKE
TO FUNCTION PROPERLY
Spool Assembly for :
1050
S-SPLPLTBOT
SPOOL PLATE BOTTOM
S-SPLPLTTOP
SPOOL PLATE TOP
S-HNDLLK PLUG
RED PILL FOR HANDLE LOCK
(1/2 SIZE)
S-HNDLARM/MASTER
HANDLE ARM HOUSING, DEPTH MASTER)
S-HNDLLK SPOL D-9
HANDLE SPOOL
S-SLEVHNDL
SLEEVE HANDLE
S-NUTJAMQLOC OC36
3/1616 Q-LOCK JAM HEX NUT
S-SUBWELDNUTMV
WELDED NUT AND FENDER
WASHER
S-NUTJAM38
3/6 - 16 JAM HEX NUT
S-COUNTERBASE
COUNTER BASE
S-SUBCOUNTERCVR
COUNTER COVER COMPLETE
S-MSRDSL1024x2
10X24X4 RD HEAD SLOT
MACHINE SCREW

S-PULLEYWHEEL
DOWNRIGGER PULLEY WHEEL
S-PULLYWHLHSG
PULLEY WHEEL HOUSING
S-OILITE38X58
3/16”IDx3/8”ODx5/8” OILITE BUS
S-MSPNPH1024X1
#10-24 X 1 PAN PHIL MACHINE SCREW
S-PULLEYSWVLINSRT
PULLEY SWIVEL HOUSING INSERT
S-MS8X58PNPHT25
#8 x 5/8 PAN PHIL TYPE 25 TC
S-PULLEYSWVLHSG
Pulley Swivel Housing
S-TUBED350BLK
Rod Holder
S-STKN516X4
Star Knob
S-BOOMRDHLDBDY
S-BOOMRDHLDNUT
S-SUBSSTUB34X23
S-HSGFAIRDSET34
S-HB38X412
S-BASE1050-1060
S-BASEWEDGE
S-PULLYSLV34
S-PULLYPLUG34
S-FAIRLEAD1114
Arm Assembly
1050, 1050MP, 1060
Other manuals for HIGH PERFORMANCE ELECTRIC DOWNRIGGER
1
This manual suits for next models
7
Table of contents
Other Scotty Fishing Equipment manuals


