Sealey ML111.V2 User manual
INSTRUCTIONS FOR:
RECHARGEABLE
FLUORESCENT
LANTERN
MODEL No. ML111.V2
Thank you for purchasing a Sealey Product. Manufactured to a high standard this product
will, if used according to these instructions and properly maintained, give you years of
trouble free performance.
IMPORTANT: PLEASE READ THESE INSTRUCTIONS CAREFULLY. NOTE
THE SAFE OPERATIONAL REQUIREMENTS, WARNINGS AND CAUTIONS.
USE THIS PRODUCT CORRECTLY AND WITH CARE FOR THE PURPOSE
FOR WHICH IT IS INTENDED. FAILURE TO DO SO MAY CAUSE
DAMAGE AND/OR PERSONAL INJURY AND WILL INVALIDATE THE
WARRANTY. PLEASE KEEP INSTRUCTIONS SAFE FOR FUTURE USE.
1. SAFETY INSTRUCTIONS
NOTE: It is our policy to continually improve products and as such we reserve
the right to alter data, specifications and component parts without prior notice.
IMPORTANT: No liability is accepted for incorrect use of this equipment.
WARRANTY: Guarantee is 12 months from purchase date, proof of which will
be required for any claim.
INFORMATION: For a copy of our latest catalogue and promotions call us on
01284 757525 and leave your full name and address, including postcode.
1.1. GENERAL SAFETY
WARNING! Ensure the lantern is correctly charged before initial use.
DO NOT allow children to use the lantern.
DO NOT use if the battery or the lantern casing is damaged.
Only use the supplied battery and charger with this lantern.
When not in use store the lantern in a safe, dry, childproof
location.
1.2. BATTERY SAFETY INSTRUCTIONS
WARNING! Powered by a sealed lead-acid battery which can be
dangerous if not handled with care.
Charge battery prior to first use. The battery will have been shipped
in a low charge state. Minimum initial charge time 16 hours.
Use only the charger provided to charge the battery.
DO NOT charge battery when room temperature is below 50°F
(10°C) or above 104°F (40°C).
DO NOT attempt to recharge the battery by means of an engine
generator or a DC power source.
DO NOT short-circuit the battery by linking both terminals with a
metal object, or your fingers etc.
DO NOT store the battery (or lantern) in locations where the
temperature may exceed 104°F (40°C) such as outside sheds,
above heaters, or metal buildings in summer.
WARNING! Dispose of spent battery correctly and in accordance
with local regulations as it contains acid.
DANGER! DO NOT attempt to dismantle the battery.
For safety and environmental reasons DO NOT discard in domestic
waste or by burning. ONLY discard or recycle according to local
waste authority regulations.
WARNING! DO NOT allow a leaking battery to come into contact
with your skin. If you come into contact with battery fluid take
immediate action:
a) Skin contact: Wash immediately with soap and water.
b) Eye contact: Flush eye immediately with cool, clean running
water for at least 15 minutes and seek immediate professional
medical attention.
1.3. ELECTRICAL MAINS POWER SAFETY
ONLY USE THE SUPPLIED CHARGER PLUG (fig 2) FOR
CONNECTING UNIT TO THE MAINS` ELECTRICAL POWER SUPPLY.
WARNING! It is the user’s responsibility to read, understand and
comply with the following electrical instructions:
You must ensure the risk of electric shock is minimised by the
installation of appropriate safety devices. An RCCB (Residual Current
Sole UK Distributor,
Sealey Group,
Bury St. Edmunds, Suffolk.
01284 757500
sales@sealey.co.uk 01284 703534
www.sealey.co.uk
Web
ENVIRONMENTAL PROTECTION.
Recycle unwanted materials instead of disposing of
them as waste. All tools, accessories and packaging
should be sorted, taken to a recycle centre and
disposed of in a manner which is compatible with the
environment.
When the product is no longer required, it must be
disposed of in an environmentally protective
way.
BATTERY DISPOSAL.
See section 4.3
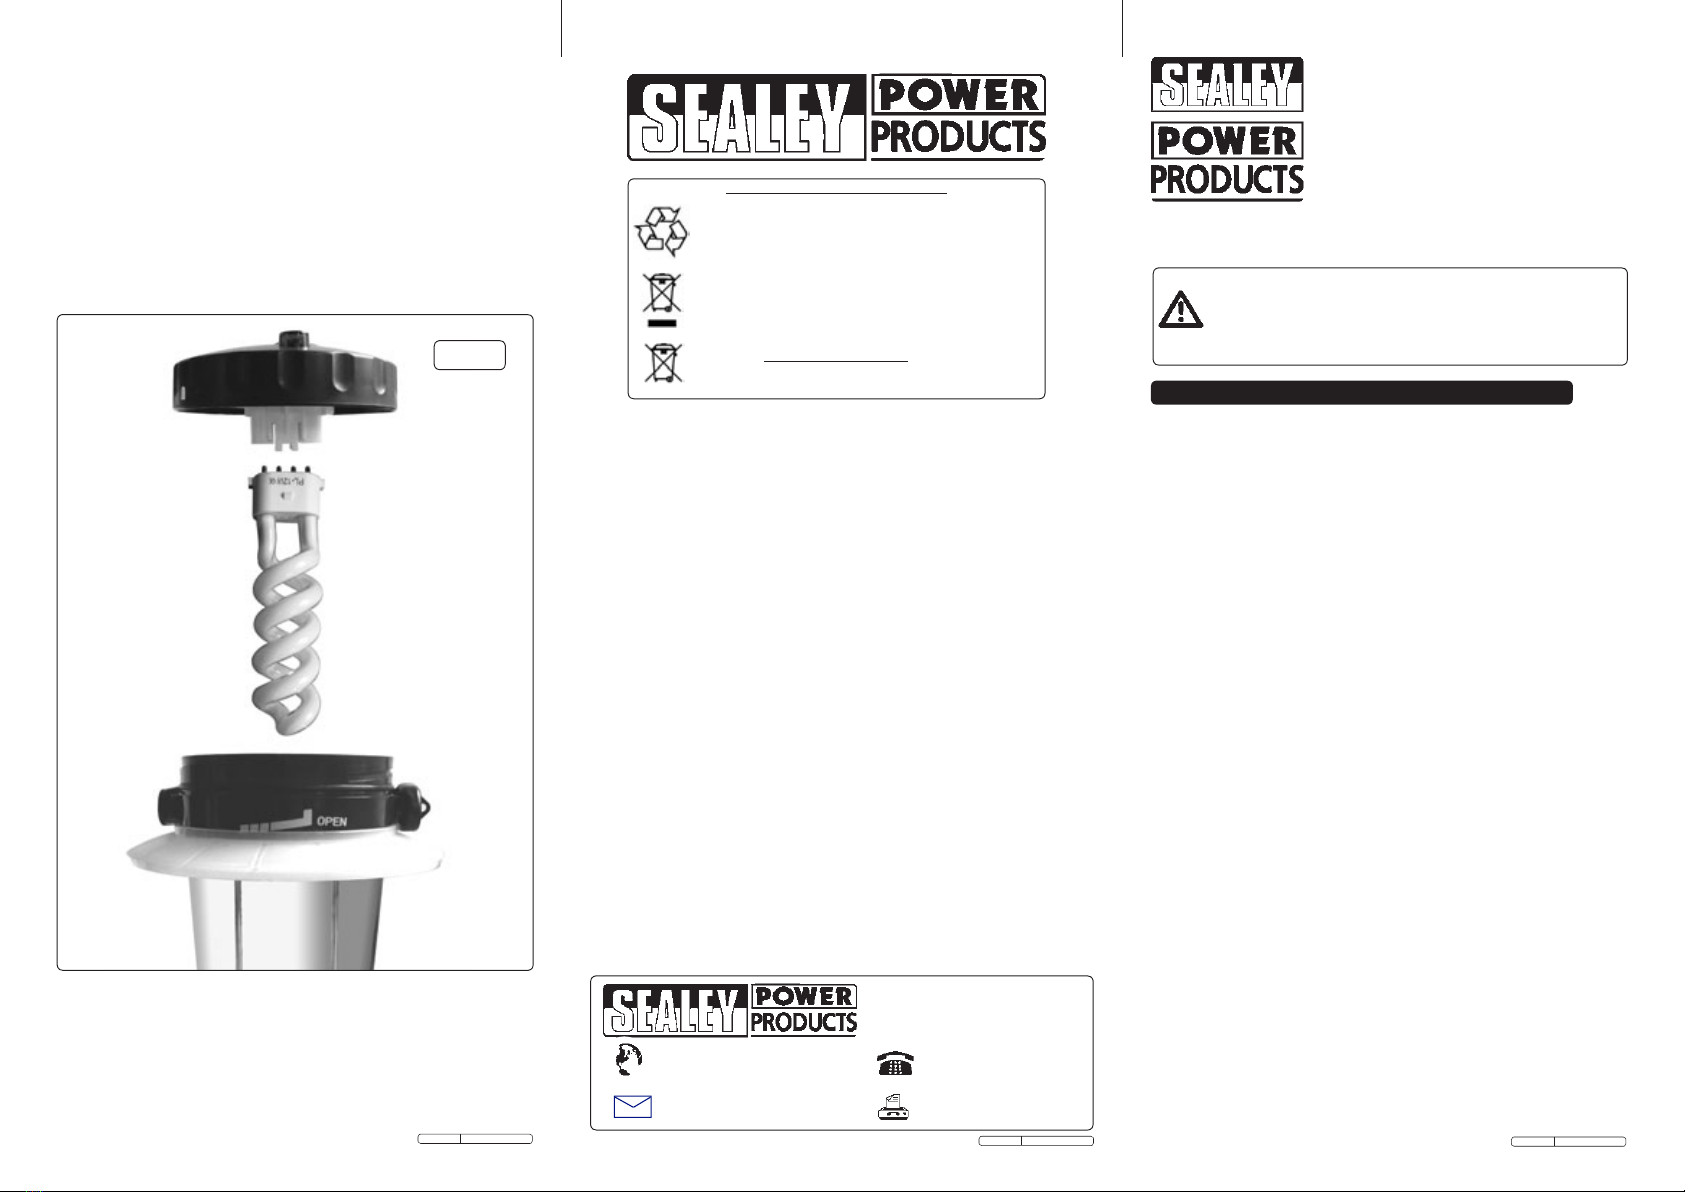
Fig.5
4.2. Replacing the fluorescent bulb. The 12W spiral fluorescent bulb
should be replaced with one of the exact type and specification as
that supplied with the lantern. Contact your Sealey Dealer for a
replacement. Part No. ML111/SB
4.2.1. To access the bulb rotate the top of the lantern anticlockwise until the
mark on the lid lines up with the 'OPEN' mark on the upper part of
the lantern just above the shroud and lift off the top with bulb
attached.
4.2.2 Ease the old bulb out of it's plastic clip on the underside of the lid
and insert a new bulb ensuring that it is fully seated under the plastic
clips.
4.2.3 Lower the bulb through the hole in the top of the lantern. Align the
mark on the lid with the 'OPEN' mark on the upper part of the lantern
and rotate the lid clockwise for about 30° until it stops.
4.3. Battery removal and disposal.
4.3.1 Invert the lantern and unscrew the base cover to reveal the battery.
Lay the lantern on its side and slide out the battery and stand it
vertically to access the terminals. Pull the connectors from the
terminals and remove the battery.
4.3.2 Dispose of the battery according to local authority regulations
specified for lead acid batteries.
email
Original Language Version ML111.V2 Issue: 2 - 02/11/09 Original Language Version ML111.V2 Issue: 2 - 02/11/09
Original Language Version ML111.V2 Issue: 2 - 02/11/09

2. INTRODUCTION & SPECIFICATION
3. CHARGING & OPERATION
3.1.2. The lantern can also be charged from a car cigarette lighter socket
using the 12V adaptor cable supplied (see fig.2B). Allow 12 hours to
fully charge.
3.2. OPERATION.
WARNING! Ensure you read, understand and apply the safety
instructions relating to the battery and charger before use.
3.2.1 Use the 3 position rotary switch on top of the lantern to turn it on
and off. The central position is OFF. To turn the lantern ON without
remote operation turn the switch anticlockwise. (See above).
3.2.2 Remote operation. Turn the switch clockwise to select ON with
remote control operation. In this position the lamp can be switched
ON and OFF with the remote control. Do not repetitively switch the
lantern ON and OFF as this will shorten the life of the bulb. It is
recommended that the light be left on for at least 20 to 30 seconds.
3.1. BATTERY CHARGING
WARNING! Ensure you read, understand and apply the safety
instructions relating to the battery and charger before use.
3.1.1. Plug the mains charger (see fig.2A) into the mains power supply.
Plug the charging connector at the other end of the charging cable
into the charging socket in the base of the lantern (see fig.1). Switch
on the mains power supply. The charging indicator situated next to
the charging socket is a dual colour LED (red & green). At the start
of charging the LED will be predominately red. When fully charged
the LED will be predominately green. Allow 16 hours to fully charge.
Circuit Breaker) should be incorporated in the main distribution
board. We also recommend that an RCD(Residual Current Device)
is used with all electrical products, particularly portable equipment
which is plugged into an electrical supply not protected by an RCCB.
You must also read and understand the following instructions
concerning electrical safety.
1.3.1. The Electricity at Work Act 1989 requires all portable electrical
appliances, if used on business premises, to be tested by a qualified
electrician, using a Portable Appliance Tester (PAT), at least once a
year.
1.3.2. The Health & Safety at Work Act 1974 makes owners of electrical
appliances responsible for the safe condition of the appliance, and
the safety of the appliance operator. If in any doubt about electrical
safety, contact a qualified electrician.
1.3.3. You must ensure that you:
Inspect the charger (fig.2) plug, cable and adaptor for wear and
damage to ensure items are safe before connecting to the mains
power supply. If worn or damaged DO NOT use.
Check cable is protected against short circuit and overload.
Important: Check that the voltage marked on the charger plug is the
same as the power supply to be used.
Uncoil the cable between charger and lantern.
DO NOT pull the charger plug from the mains socket by the lead.
DO NOT use any other type of charger with this product.
DO NOT place the power connector into any area of the product
except the correct inlet socket (fig.1).
DO NOT try to open or dis-assemble the charger plug.
DO NOT use charger plug to charge or power any other electrical
item.
DO NOT get charger wet, or use in wet, damp conditions (for indoor
use only).
WARNING! NEVER substitute a standard 13 amp 3 pin plug, or
any other type of plug, for the charger plug.
2.1. Introduction
2.1.1. Fluorescent lantern with 12W spiral tube. Rechargeable sealed lead-
acid battery gives over eight hours of light on a single charge. Rotary
switch enables selection of lighting options. Infra-red remote control
allowing illumination up to a range of 8meters. Recharge from the
mains using the 230-6Volt power adaptor or in car cigarette charger.
Also includes folding carry/hanging handle.
2.2 Specification.
Tube:.............................................................................................12W
Power Supply:........................................................................6V - 4Ah
Height:.......................................................................................315mm
Operating Time:................................................................ 8hrs approx.
Replacement Tube:..............................................................ML111/SB
Fig.1
Fig.3
Fig.2 Fig.4
4. MAINTENANCE
4.1. Remote control battery replacement. When the red LED next to
the remote button ceases to light the batteries should be replaced.
4.1.1. Slide off the battery cover on the underside of the remote control and
remove the old batteries. Replace with new AAA batteries ensuring
that the polarity is as shown in fig.4 below. Close the battery
compartment by sliding the cover back into place.
Original Language Version ML111.V2 Issue: 2 - 02/11/09
Original Language Version ML111.V2 Issue: 2 - 02/11/09
Original Language Version ML111.V2 Issue: 2 - 02/11/09
Other Sealey Lantern manuals

Sealey
Sealey LED136 User manual

Sealey
Sealey LED439 User manual

Sealey
Sealey CP1810 User manual

Sealey
Sealey LED026 User manual

Sealey
Sealey AK433.V2 User manual

Sealey
Sealey LED3606 Series User manual

Sealey
Sealey LED026EU User manual

Sealey
Sealey LED181 User manual

Sealey
Sealey ML18/36.V3 User manual

Sealey
Sealey AK435 User manual


