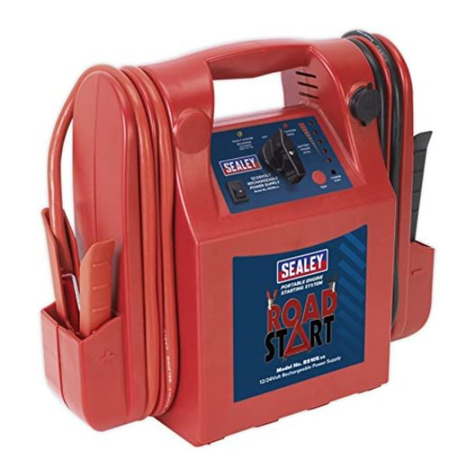
Sealey ROADSTART PBI18112S User manual

INSTRUCTIONS FOR:
ROADSTART® EMERGENCY POWER PACK
12V PEAK AMPS 1700 DEKRA APPROVED
MODEL NO: PBI1812S
© Jack Sealey Limited Original Language Version
1. SAFETY
IMPORTANT: PLEASE READ THESE INSTRUCTIONS CAREFULLY. NOTE THE SAFE OPERATIONAL REQUIREMENTS, WARNINGS & CAUTIONS. USE THE
PRODUCT CORRECTLY AND WITH CARE FOR THE PURPOSE FOR WHICH IT IS INTENDED. FAILURE TO DO SO MAY CAUSE DAMAGE AND/OR
PERSONAL INJURY AND WILL INVALIDATE THE WARRANTY. KEEP THESE INSTRUCTIONS SAFE FOR FUTURE USE.
Thank you for purchasing a Sealey product. Manufactured to a high standard, this product will, if used according to these
instructions, and properly maintained, give you years of trouble free performance.
PBI1812S Issue: 1 - 30/04/14
IMPORTANT: To reduce the risk of a battery explosion, follow these instructions and those published by the battery manufacturer and the
manufacturer of any equipment you intend to use in the vicinity of the battery. Remember to review warning marks on all products and on
engines.
1.1 PERSONAL PRECAUTIONS
Use in a well ventilated area.
Ensure there is another person within hearing range, or close enough to come to your aid should a problem arise, when working near a
lead-acid battery.
Have fresh water and soap nearby in case battery acid contacts skin, clothing or eyes.
Wear safety eye protection and protective clothing. Avoid touching eyes while working with a battery.
Wash immediately with soap and water if battery acid contacts skin or clothing. If acid enters eye, flush eye immediately with cool, clean
running water for at least 15 minutes and seek immediate medical attention.
Remove personal metallic items such as rings, bracelets, necklaces and watches. A lead-acid battery can produce a short-circuit current
high enough to weld a ring or the like to metal, which may cause severe burns.
1.2 IMPORTANT SAFETY INSTRUCTIONS
Familiarise yourself with the applications, limitations and potential hazards of the RoadStart.
Keep the unit in good working order and condition. Replace damaged parts immediately.
Use only recommended parts. To use unapproved parts may be dangerous and will invalidate your warranty.
The RoadStart must only be opened and checked by qualified service personnel. DO NOT disassemble the unit for any reason.
Keep children and unauthorised persons away from the work area.
Keep work area clean and tidy and free from unrelated materials. Ensure that there is adequate lighting.
If the RoadStart receives a sharp knock or blow, it must be checked by a qualified service agent before being used.
When not in use re-charge every 30 days.
DO NOT smoke or allow a spark, or flame in the vicinity of the battery or engine.
DO NOT drop any metal item onto the battery as it may spark or short circuit the battery, which could cause an explosion.
DO NOT use RoadStart to recharge dry cell batteries that are commonly used with home appliances. These batteries may explode and
cause personal injury and damage to property.
DO NOT charge or boost a frozen battery.
DO NOT use attachments other than those recommended. To do so may risk damage to the unit and other equipment and possible personal
injury.
DO NOT pull or carry the unit by its cables and do not pull the negative and positive clamps from the battery terminals.
DO NOT operate in vicinity of flammable liquids or gases.
DO NOT recharge the unit with plugs, cables or attachments that are damaged. Replace such items immediately.
DO NOT use this product to perform a task for which it is not designed.
DO NOT store the unit in damp or wet locations or where the temperature may exceed 50°C.
DO NOT submerge the unit in water.
DO NOT use whilst under the influence of drugs, alcohol or intoxicating medication.
DO NOT leave the unit in a totally discharged state for an extended period of time as this may result in permanent damage.
DO NOT cross-connect the power leads from the RoadStart to the battery. Ensure that positive is to positive and negative is to negative.
Ensure that the unit is fully charged before storage.
Safety Markings/Symbols
Read
Instructions
Before
Use.
Do Not
Expose To
Rain.
Risk
Of
Explosion.
Caution:
Risk of
Electric
Shock.
Use In A
Well
Ventilated
Area.
Keep
Away From
Sparks &
Flame -
Battery
Could Emit
Explosive
Gases.

© Jack Sealey Limited Original Language Version PBI1812S Issue: 1 - 30/04/14
Model: ..........................PBI1812S
Starting Current: ...................323A
Peak Amps: ........................1700A
Voltage:...................................12V
Auxiliary Output: .....................12V
Cable & Clamp Length: ......0.6mtr
Weight: ................................ 7.2kg
1.3 ELECTRICAL SAFETY (with respect to mains chargers)
WARNING! It is the user’s responsibility to check the following:
You must check the AC adaptor to ensure that it is safe before using. You must inspect the power supply lead, plugs and all electrical
connections for wear and damage.
You must ensure the risk of electric shock is minimised by the installation of appropriate safety devices. An RCCB (Residual Current
Circuit Breaker) should be incorporated in the main distribution board. We recommend that an RCD (Residual Current Device) is used
with all electrical products.
It is particularly important to use an RCD with portable products that plug into an electrical supply not protected by an RCCB. If in doubt
consult a qualified electrician. You can obtain a Residual Current Device through your Sealey dealer.
You must read and understand instructions concerning electrical safety.
1.3.1 The Electricity At Work Act 1989 requires all portable electrical appliances, if used on business premises, to be tested by a qualified
person, using a Portable Appliance Tester (PAT), at least once a year.
1.3.2 The Health & Safety at Work Act 1974 makes owners of electrical appliances responsible for the safe condition of the appliance and
the safety of the appliance operator. If in any doubt about electrical safety, contact a qualified electrician.
1.3.3 DO ensure that the insulation on all cables and the product itself is safe before connecting to the mains power supply.
1.3.4 DO ensure that cables are always protected against short circuit and overload.
1.3.5 DO regularly inspect power supply, leads, plugs for wear and damage and power connections to ensure that none is loose.
1.3.6 DO check product voltage is the same as power supply to be used and check that all fused plugs are fitted with the correct capacities.
2. INTRODUCTION
3. SPECIFICATION
22Ah Professional grade, high output AGM battery especially formulated to jump start vehicles. Fully sealed battery enables the unit to be stored
in any position. Features a lightweight, high impact casing, which is durable and corrosion proof for easy portability. Battery status LEDs indicate
to the user when the battery is at full power, 75% charge, 50% charge or less and when the unit needs to be recharged. A fusible link integrated
in the output cable gives increased protection to the unit, while making for an easier fuse charge without disassembly. On/off switch for safety
and control. Features 12V accessory outlet including overload and short circuit protection.
4. OPERATION
WARNING! RISK OF CONTACT WITH BATTERY ACID. BATTERY ACID IS A HIGHLY CORROSIVE SULPHURIC ACID.
4.1. Preparing to use the RoadStart
4.1.1. Clean the battery terminals before using the RoadStart. During cleaning, keep airborne corrosion from coming into contact with your
eyes, nose and mouth. Use baking soda and water to neutralise the battery acid and help eliminate airborne corrosion. DO NOT touch
your eyes, nose or mouth.
4.1.2. Determine the voltage of the battery by referring to the owner's manual and make sure the output voltage of the RoadStart is correct.
4.1.3. Make sure the RoadStart cable clips make tight connections.
4.2. Connecting to a battery
WARNING! A SPARK NEAR THE BATTERY MAY CAUSE AN EXPLOSION. REDUCE THE RISK OF A SPARK NEAR A BATTERY:
4.2.1. Attach the output cables to the battery and chassis as indicated below. Never allow the output clips to touch each other.
4.2.2. Position the DC cables to reduce the risk of damage to the bonnet, door and moving or hot engine parts.
Note: If it is necessary to close the bonnet during the jump starting process, ensure the bonnet does not touch the metal part of the
battery clips or cut the insulation of the cables.
4.2.3. Stay clear of fan blades, belts, pulleys and other parts which can cause injury.
4.2.4. Determine which post of the battery is grounded (connected) to the chassis. If the negative post is grounded to the chassis (as in most
vehicles), see step 4.2.5. If the positive post is grounded to the chassis, see step 4.2.6.
4.2.5. For a negative-grounded vehicle, connect the POSITIVE (RED) clip from the roadstart to the POSITIVE (POS, P, +) ungrounded post of
the battery. Connect the NEGATIVE (BLACK) clip to the vehicle chassis or engine block away from the battery. DO NOT connect the clip
to the carburetor, fuel lines or sheet-metal body parts. Connect to a heavy gauge metal part of the frame or engine block.
4.2.6. For a positive-grounded vehicle, connect the NEGATIVE (BLACK) clip from the RoadStart to the NEGATIVE (NEG, N, -) ungrounded
post of the battery. Connect the POSITIVE (RED) clip to the vehicle chassis or engine block away from the battery. DO NOT connect
the clip to the carburettor, fuel lines or sheet-metal body parts. Connect to a heavy gauge metal part of the frame or engine block.
4.2.7. When disconnecting the RoadStart, remove the clip from the vehicle chassis, then remove the clip from the battery terminal, in that
order.
4.3. Charging the internal battery of the RoadStart
IMPORTANT: CHARGE IMMEDIATELY AFTER PURCHASE, AFTER EACH USE AND EVERY 30 DAYS TO KEEP THE ROADSTART
INTERNAL BATTERY FULLY CHARGED. NEVER WAIT UNTIL THE ROADSTART IS COMPLETELY DISCHARGED BEFORE
RECHARGING.
4.3.1. IMPORTANT: The switch must be in the OFF position while checking the status and charging the unit.
1. Professional Grade, High Output AGM Battery
2. Charging Status LEDs
3. On/Off Switch
4. Internal Battery Status Switch
5. Internal Battery Status LEDs
6. 12 Volt DC Power Outlet
7. Heavy Duty, Battery Clips
8. Durable Polypropylene Case
9. Clamp Holder
4.3.2. TO CHECK THE INTERNAL BATTERY’S CHARGE STATUS, MAKE SURE THE WALL CHARGER IS NOT PLUGGED INTO THE
ROADSTART, THEN PRESS THE BATTERY STATUS BUTTON ON THE FRONT OF THE ROADSTART.
The LED lights will indicate the charge level as follows:
•AredLEDindicatesa50%orlesschargeandyoushouldimmediatelyrechargetheRoadStart.
•AyellowLEDindicatesa50to75%charge.TheRoadStartmaybeusedbutshouldberechargedassoonaspossible.
•AgreenLEDindicatestheinternalbatteryisfullycharged.
•TheCHARGING(red)LEDindicatestheRoadStartischarging(connectedtoanACpowersource.)Atfullcharge,theCHARGED
(green) LED will light.
4.3.3. IMPORTANT: Only use the charger that was included with the RoadStart to charge the internal battery of the RoadStart. Using any other
charger or using the included charger for any other purpose could result in personal injury or property damage.
4.3.4. To charge, plug the included wall charger into the charger plug on the back of the RoadStart.
4.3.5. ConrmtheACoutletvoltagematchestheinputvoltageofthewallcharger.
4.3.6. Plugthewallchargerintoanelectricalwalloutlet.Makesuretoplacethechargeronadry,nonammablesurfacelikemetalor
concrete.
© Jack Sealey Limited Original Language Version PBI1812S Issue: 1 - 30/04/14
4.3.7. While the RoadStart is charging, the CHARGING (red) LED will be lit. When the internal battery is fully charged, the CHARGED (green)
LED will light. Complete charging may take up to 30 hours. The RoadStart is then ready to use.
4.3.8. The charger will automatically go into maintain mode and maintain the battery at full charge without damaging it.
IMPORTANT: DO NOT use the RoadStart while charging the internal battery.
4.4. Operating Instructions: Jump Starting a Vehicle Engine
WARNING! A SPARK NEAR THE BATTERY MAY CAUSE A BATTERY EXPLOSION.
TO REDUCE THE RISK OF A SPARK NEAR THE BATTERY:
1. Turn the vehicle’s ignition OFF before making cable connections.
2. Connect the RoadStart to the vehicle’s battery as described in Section 4.
3. Turn the RoadStart ON/OFF switch to the ON position.
4. Crank the engine. If the engine does not start within 3-8 seconds, stop cranking and wait at least 1 minute before attempting to start
the vehicle again. (This permits the RoadStart battery to cool down.)
5. After the engine starts, turn the RoadStart ON/OFF switch to the OFF position.
6. Disconnect the RoadStart from the vehicle, as described in Sec. 4.2.
7. Return the battery clips to the clamp holders. Recharge the RoadStart as soon as possible after use.
4.4.1. When using the other features of the RoadStart, always observe the following steps:
1. Ensure the battery clips are securely clipped on the clamp holders.
2. Charge the RoadStart as soon as possible after using the feature.
4.5. Operating Instructions: Powering a DC device
The RoadStart is a power source for all 12V DC accessories that are equipped with a 12V accessory plug. Use it for power cuts and
shingorcampingtrips.
Make sure the device to be powered is OFF before inserting the 12V DC accessory plug into the 12V DC accessory outlet.

© Jack Sealey Limited Original Language Version PBI1812S Issue: 1 - 30/04/14
1. Open the protective cover of the DC power outlet on the front of the RoadStart.
2. Plug the device into the outlet, and turn the device on (if required).
3. If the device draws more than 15A or has a short circuit, the internal circuit breaker of the RoadStart will trip and disconnect the power
to the device. Disconnect the device and the breaker will automatically reset.
IMPORTANT: The DC power outlet is wired directly to the internal battery. Extended operation of a 12V device may result in excessive
battery drain. Recharge immediately after unplugging the device.
5.3. Storage
5.3.1. Unplug the charger from the RoadStart before attempting any maintenance or cleaning.
5.3.2. Use a dry cloth to wipe all battery corrosion and other dirt or oil from the battery clamps, cables and the RoadStart case. DO NOT use
cleaninguids.
5.3.3. Ensure that all of the RoadStart components are in place and in good working condition.
5.3.4. Allotherservicingshouldbeperformedbyqualiedservicepersonnel.
5. MAINTENANCE
5.1. Unplug the charger from the RoadStart before attempting any maintenance or cleaning.
5.1.1. Use a dry cloth to wipe all battery corrosion and other dirt or oil from the battery clamps, cords and the RoadStart case. DO NOT use
cleaninguids.
5.1.2. Ensure that all of the RoadStart components are in place and in good working condition.
5.1.3. Allotherservicingshouldbeperformedbyqualiedservicepersonnel.
5.2 Fuse Replacement For The RoadStart
The RoadStart is equipped with an external fuse to protect the battery from overload.
WARNING Disconnect the charger unit from mains supply.
5.2.1. To replace the fuse if it has blown, use a flat bladed screwdriver to gently push in the fuse cover release clips at each end, to release
the cover.
5.2.2. Undo the two 13mm nuts and replace the fuse.
5.2.3. Refit the cover.
6. TROUBLESHOOTING
PROBLEM POSSIBLE CAUSE SOLUTION
The RoadStart won't start my vehicle. Clips are not making a good connection to the Check for poor connection to battery
battery. and chassis. Make sure connection
points are clean. Rock clips back and
forth for a better connection.
The RoadStart is not charged. Check battery charge status by
pressing the button on the front of the
RoadStart.
The vehicle's battery is defective. Have the battery checked.
The RoadStart won't power a 12V The 12V device is not turned on. Turn on the 12V device.
device.
The RoadStart's battery is not charged. Check the battery's charge status by
pressing the button on the front of the
RoadStart. See LED indicator's section of
this manual.
The 12V device draws more than 15A Disconnect the 12V device. The internal
or has a short circuit. breaker will automatically reset after a
minute or two. Try the 12V device
again. If it happens again, replace the
12V device.
The battery in the RoadStart won't The battery is defective (will not accept a charge). Have the battery checked.
hold a charge.

PBI1812S Issue: 1 - 30/04/14
NOTE: It is our policy to continually improve products and as such we reserve the right to alter data, specifications and component parts without prior notice.
IMPORTANT: No liability is accepted for incorrect use of this product.
WARRANTY: Guarantee is 12 months from purchase date, proof of which will be required for any claim.
INFORMATION: For a copy of our latest catalogue and promotions call us on 01284 757525 and leave your full name and address, including postcode.
01284 757500
01284 703534
sales@sealey.co.uk
Sole UK Distributor, Sealey Group,
Kempson Way, Suffolk Business Park,
Bury St. Edmunds, Suffolk,
IP32 7AR
www.sealey.co.uk
Original Language Version
© Jack Sealey Limited
Environmental Protection
Recycle unwanted materials instead of disposing of them as waste. All tools, accessories and packaging should be
sorted, taken to a recycling centre and disposed of in a manner which is compatible with the environment.
When the product becomes completely unserviceable and requires disposal, drain off any fluids (if applicable)
into approved containers and dispose of the product and the fluids according to local regulations.
WEEE Regulations
Dispose of this product at the end of its working life in compliance with the EU Directive on
Waste Electrical and Electronic Equipment (WEEE). When the product is no longer required, it must be disposed
of in an environmentally protective way. Contact your local solid waste authority for recycling information.
Battery Removal
1. Place the road start unit front side down.
2. Remove all screws holding the casing together and lift off the back half off the unit.
3. Disconnect the wires from the battery terminals, taking care to avoid accidental arcing off the terminals.
4. Lift the battery out of the casing.
Under the Waste Batteries and Accumulators Regulations 2009, Jack Sealey Ltd are required to inform potential
purchasersofproductscontainingbatteries(asdenedwithintheseregulations),thattheyareregisteredwith
Valpak’s registered compliance scheme. Jack Sealey Ltd’s Batteries Producer Registration Number (BPRN) is
BPRN00705.
Parts support is available for this product. To obtain a parts listing and/or diagram,
please log on to www.sealey.co.uk, email sales@sealey.co.uk or telephone 01284 757500.
Table of contents
Other Sealey Power Pack manuals

Sealey
Sealey POWERSTART PSTART1000HD User manual

Sealey
Sealey RS131.V3 User manual

Sealey
Sealey RS1.V4 User manual

Sealey
Sealey ROADSTART RS105.V4 User manual

Sealey
Sealey RS132.V4 User manual

Sealey
Sealey PWRSTART 4400 User manual

Sealey
Sealey SL32S User manual

Sealey
Sealey RS131.V5 User manual

Sealey
Sealey RS1322HV User manual

Sealey
Sealey SPB160W User manual