manuals.online logo
Brands
  1. Home
  2. •
  3. Brands
  4. •
  5. Sealey
  6. •
  7. Water Pump
  8. •
  9. Sealey WPD235A.V2 User manual

Sealey WPD235A.V2 User manual

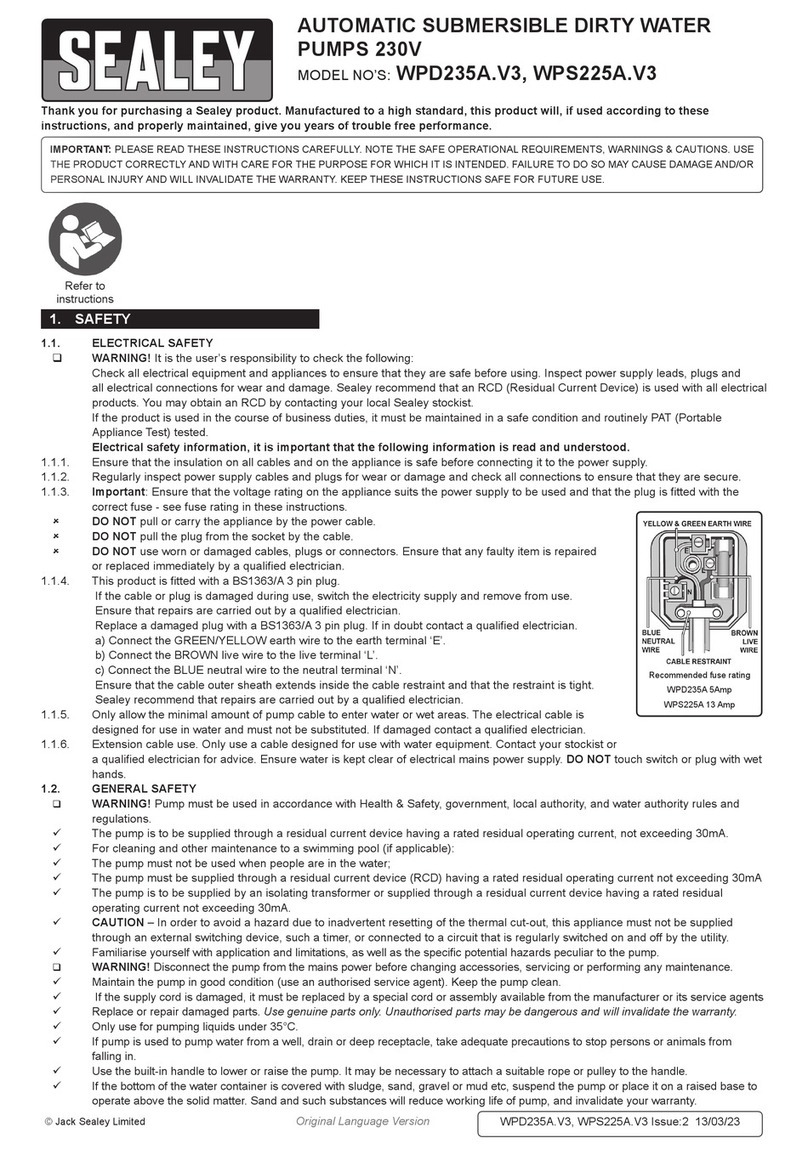
Thank you for purchasing a Sealey product. Manufactured to a high standard this product will, if used according to these instructions and
properly maintained, give you years of trouble free performance.
IMPORTANT: PLEASE READ THESE INSTRUCTIONS CAREFULLY. NOTE THE SAFE OPERATIONAL REQUIREMENTS, WARNINGS & CAUTIONS.
USE THE PRODUCT CORRECTLY AND WITH CARE FOR THE PURPOSE FOR WHICH IT IS INTENDED. FAILURE TO DO SO MAY CAUSE
DAMAGE AND/OR PERSONAL INJURY AND WILL INVALIDATE THE WARRANTY. PLEASE KEEP INSTRUCTIONS SAFE FOR FUTURE USE.
INSTRUCTIONS FOR:
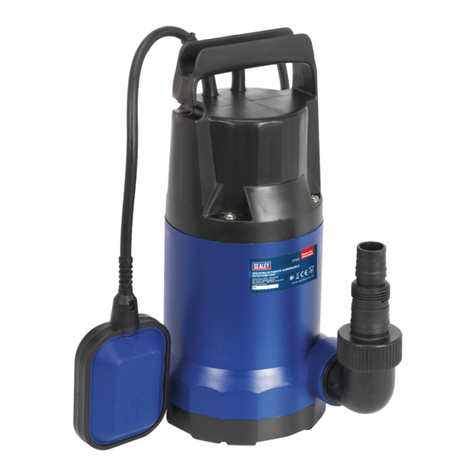
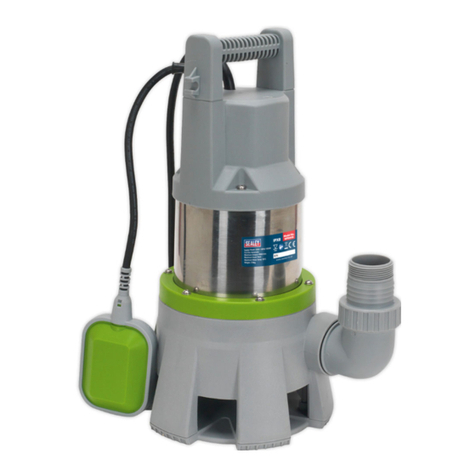
SUBMERSIBLE DIRTY WATER PUMPS -
AUTOMATIC
MODEL No's: WPD235A.V2, WPS225A.V2
1.2. GENERAL SAFETY
WARNING! Pump must be used in accordance with Health & Safety, government, local authority, and water authority rules and regulations.
Familiarise yourself with application and limitations, as well as the specific potential hazards peculiar to the pump.
WARNING! Disconnect the pump from the mains power before changing accessories, servicing or performing any maintenance.
Maintain the pump in good condition (use an authorised service agent). Keep the pump clean.
Replace or repair damaged parts. Use genuine parts only. Unauthorised parts may be dangerous and will invalidate the warranty.
Only use for pumping liquids under 35°C.
If pump is used to pump water from a well, drain or deep receptacle, take adequate precautions to stop persons or animals from falling in.
Use the built-in handle to lower or raise the pump. It may be necessary to attach a suitable rope or pulley to the handle.
If the bottom of the water container is covered with sludge, sand, gravel or mud etc, suspend the pump or place it on a raised base to
operate above the solid matter. Sand and such substances will reduce working life of pump, and invalidate your warranty.
In flood situations, user is responsible for ensuring that appropriate back-up procedures, alarms etc are correctly installed in case of pump failure.
In swimming pools, fish ponds, etc, ensure location is clear of people and animals, including removal of fish from pond.
Note: this pump is not designed for continuous use in a fish pond or similar water feature or display.
DO NOT operate the pump if any parts are damaged or missing as this may cause failure and/or possible personal injury.
DO NOT use the pump for any purpose other than for that which it is designed.
DO NOT use to pump chemicals, fuels or salt water.
DO NOT insert hands into the mouth of the pump as this could lead to injury.
DO NOT use to pump septic tanks or settling pits. DO NOT pump any liquids other than water.
DO NOT operate the pump out of water. The pump pick up area must be completely submerged during operation.
DO NOT exceed the maximum submersible depth - see specifications.
DO NOT operate the pump during freezing temperatures. DO NOT leave the pump in water that may freeze.
DO NOT use in swimming pools if people could come into contact with the water whilst pump is in use.
DO NOT use for pumping sea water or inflammable, corrosive, explosive or dangerous liquids.
DO NOT carry the pump by its electrical cable, or outlet pipe. Use the handle only.
When not in use switch off pump and remove plug from power supply. Rinse pump, drain out any water and store in a frost free, safe location.
WARNING! DO NOT allow uncontrolled discharge of contaminated water which would pollute the environment.
1.1. ELECTRICAL SAFETY
WARNING! It is the owner’s responsibility to read, understand and comply with the following:
You must check all electrical equipment and appliances to ensure they are safe before using. You must inspect power supply leads, plugs and
all electrical connections for wear and damage. You must ensure the risk of electric shock is minimised by the installation of appropriate safety
devices. An RCCB (Residual Current Circuit Breaker) should be incorporated in the main distribution board. We also recommend that an RCD
(Residual Current Device) is used with all electrical products. It is particularly important to use an RCD together with portable products that are
plugged into an electrical supply not protected by an RCCB. If in doubt consult a qualified electrician. You may obtain a Residual Current
Device by contacting your Sealey dealer. You must also read and understand the following instructions concerning electrical safety.
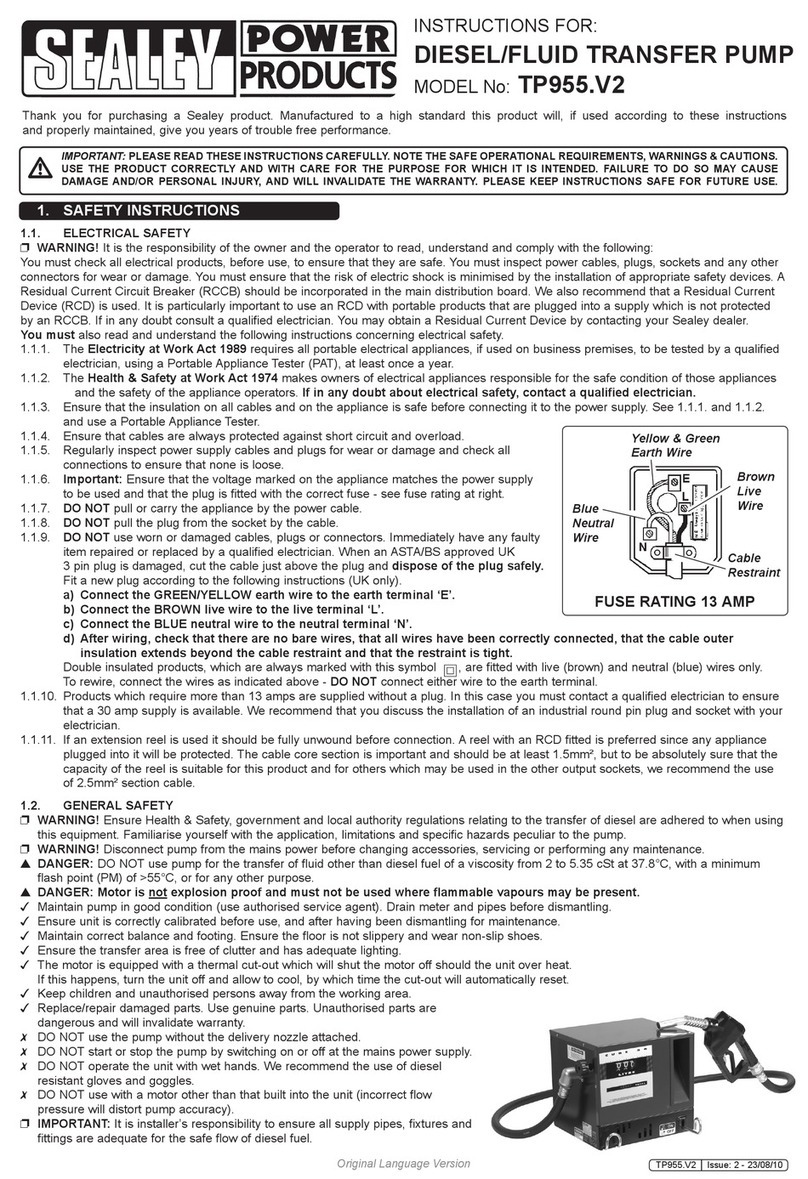
1.1.1. The Electricity At Work Act 1989 requires all portable electrical appliances, if used on business premises, to be tested by a qualified
electrician, using a Portable Appliance Tester (PAT), at least once a year.
1.1.2. The Health & Safety at Work Act 1974 makes owners of electrical appliances responsible for the safe condition of the appliance
and the safety of the appliance operator. If in any doubt about electrical safety, contact a qualified electrician.
1.1.3. Ensure the insulation on all cables and the product itself is safe before connecting to the mains power supply. The pump and cable
are designed for submerging in water and as such must not be tampered with (if in doubt, contact a qualified electrician).
1.1.4. Ensure that cables are always protected against short circuit and overload.
1.1.5. Regularly inspect power supply leads, plugs and all electrical connections for wear and damage,
especially power connections, to ensure that none is loose.
1.1.6. Important: Ensure the voltage marked on the product is the same as the electrical power supply to
be used, and check that plugs are fitted with the correct capacity fuse. A 13 amp plug may require a
fuse smaller than 13 amps for certain products, see fuse rating at right.
1.1.7. DO NOT pull or carry the appliance by its power supply lead.
1.1.8. DO NOT pull power plugs from sockets by the power cable.
1.1.9. DO NOT use worn or damaged leads, plugs or connections. Immediately replace or have repaired
by a qualified electrician. A U.K. 3 pin plug with ASTA/BS approval is fitted. In case of damage, cut
off and fit a new plug according to the following instructions (discard old plug safely).
(UK only - see diagram at right). Ensure the unit is correctly earthed via a three-pin plug.
a) Connect the GREEN/YELLOW earth wire to the earth terminal ‘E’.
b) Connect the BROWN live wire to live terminal ‘L’.
c) Connect the BLUE neutral wire to the neutral terminal ‘N’.
d) After wiring, check that there are no bare wires, that all wires have been correctly connected, that the cable outer
insulation extends beyond the cable restraint and that the restraint is tight.
1.1.10. Only allow the minimal amount of pump cable to enter water or wet areas. The electrical cable is designed for use in water and must
not be substituted. If damaged contact a qualified electrician.
1.1.11. Extension cable use. Only use a cable designed for use with water equipment. Contact your dealer or a qualified electrician
for advice. Ensure water is kept clear of electrical mains power supply. DO NOT touch switch or plug with wet hands.
1. SAFETY INSTRUCTIONS
RECOMMENDED FUSE
RATING: 13AMP
Original Language Version
WPD235A.V2, WPS225A.V2 Issue: 2(L) - 01/07/16
© Jack Sealey Limited
2. INTRODUCTION & SPECIFICATIONS
3. OPERATING INSTRUCTIONS
WARNING! Ensure you read, understand and apply safety instructions.
3.1. Fit appropriate discharge pipe to pump outlet and secure with clip. Ensure the diameter of the discharge pipe is the same as, or
greater than, the outlet diameter. A smaller pipe will adversely effect the pump flow rate.
3.2. Position pump in the water, and place the outlet pipe securely in the discharge receptacle or area. We recommend the pump is
submerged with its discharge outlet facing up to release any trapped air.
3.3. Plug the pump into the electrical mains supply and switch on.
The pump will automatically turn on as the level of water rises (fig.1.A). As water level lowers, the float will automatically switch the
pump off as it reaches the minimum height (B). Float may be adjusted by shortening or lengthening the cable. The pump will switch on
if the water level is up to or above the maximum length of the float cable. To function correctly the float must move freely. Ensure the
float can do so and that the cable is not restricted. Check that the pump and discharge are working correctly.
3.4. The water into which the pump is placed will act as the motor cooling agent. For this reason the pump must remain submerged at all
times. Should the pump have to be used in shallow water DO NOT operate for more than 10 minutes. Failure to follow this rule will
damage the unit and will invalidate your warranty.
NOTE: See fig.2 to determine minimum clearance required if using pump in a restricted area i.e. well, etc.
fig.1
WPD235A.V2 WPS225A.V2
fig.2
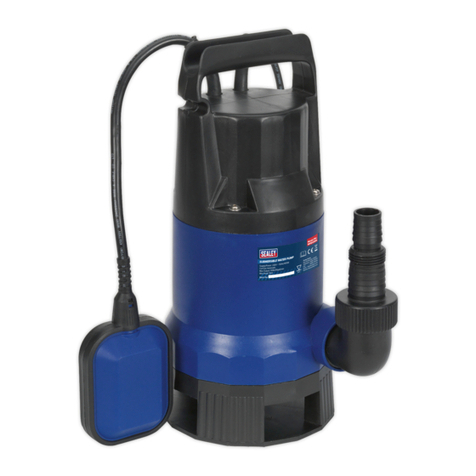
Manufactured from corrosion resistant materials with - stainless steel motor case and Noryl base cover - WPD235A.V2
- stainless steel body and motor case - WPS225A.V2
Fitted with automatic cut-out. Designed for operation in dense and dirty water. Suitable for the effective drainage of cellars, sinks, cisterns,
baths and the general transfer of water and dense liquids.
Model No. Cut-Out Outlet OD Maximum Maximum Motor Input Maximum Minimum Maximum
Output Head Particle Size Water Depth Water Depth
WPD235A.V2 Automatic 38mm 217ltr/min 8mtr 750W 230V 35mm 40mm 7mtr
WPS225A.V2 Automatic 38mm 225ltr/min 7.5mtr 750W 230V 15mm 30mm 5mtr
4. MAINTENANCE
WARNING! With the exception listed below, all pump, float and electrical cable service maintenance and repair must only be
undertaken by an authorised service agent. Failure to observe this rule may be dangerous and will invalidate your warranty.
WARNING! Ensure the pump is disconnected from the mains power supply before attempting any service or maintenance.
4.1. Keep all parts of the pump clean. Rinse, drain and allow to dry before storing pump.
4.2. Regularly check the water inlet on the base of the pump to ensure there are no blockages. To access the impeller carefully undo the
base hex headed screws and remove base. Clean impeller and replace base ensuring that the O ring is correctly located.
DO NOT dismantle any other part of the unit.
a. Motor operates but
there is no suction.
b. Reduced water
volume for level
of water
c. The pump will not
start or suddenly
stops during
operation.
1. No electrical power.
2. Float not working.
3. Impeller is jammed.
1. Check cable, plug and fuse.
2. Contact authorised service agent.
3. Clean the pump.
1. Discharge pipe bent, or pinched.
2. Discharge pipe too narrow.
3. Pump partially blocked.
1. Straighten pipe.
2. Use wider diameter pipe.
3. Clean pump.
1. Water level below min suction depth.
2. Air bubbles in pump accumulated during submersion,
or float is incorrectly positioned so pump does not stop
at minimum level and sucks in air.
3. Clogged intake filter or discharge pipe.
1. Stop the pump.
2. Release air by inclining the pump and
re-immersing it in water.
3. Remove blockage, and clean the unit.
TROUBLESHOOTING
NOTE: It is our policy to continually improve products and as such we reserve the right to alter data, specifications and component parts without prior notice.
IMPORTANT: No liability is accepted for incorrect use of this product.
WARRANTY: Guarantee is 12 months from purchase date, proof of which will be required for any claim.
01284 757500
01284 703534
sales@sealey.co.uk
Sole UK Distributor, Sealey Group,
Kempson Way, Suffolk Business Park,
Bury St. Edmunds, Suffolk,
IP32 7AR
www.sealey.co.uk
Web
NOTE: This appliance is not intended for use by persons (including children) with reduced physical, sensory or mental capabilities or lack of
experience and knowledge, unless they have been given supervision or instruction concerning the use of the appliance by a person responsible
for their safety. Children should be supervised to ensure that they do not play with the appliance.
Original Language Version
WPD235A.V2, WPS225A.V2 Issue: 2(L) - 01/07/16
© Jack Sealey Limited
This manual suits for next models

1

Other Sealey Water Pump manuals

Sealey TP96.V3 User manual

Sealey

Sealey TP96.V3 User manual

Sealey WPC100A.V2 User manual

Sealey

Sealey WPC100A.V2 User manual

Sealey TP9424.V2 User manual

Sealey

Sealey TP9424.V2 User manual

Sealey WPB50A User manual

Sealey

Sealey WPB50A User manual

Sealey TP9424.V2 User manual

Sealey

Sealey TP9424.V2 User manual

Sealey AK4560D.V2 User manual

Sealey

Sealey AK4560D.V2 User manual

Sealey WPP1750S User manual

Sealey

Sealey WPP1750S User manual

Sealey TP17 User manual

Sealey

Sealey TP17 User manual

Sealey WPC100 User manual

Sealey

Sealey WPC100 User manual

Sealey TP6818 User manual

Sealey

Sealey TP6818 User manual

Sealey AK450DX User manual

Sealey

Sealey AK450DX User manual

Sealey TP80 User manual

Sealey

Sealey TP80 User manual

Sealey WPC100A.V3 User manual

Sealey

Sealey WPC100A.V3 User manual

Sealey TP955.V2 User manual

Sealey

Sealey TP955.V2 User manual

Sealey PW12CC User manual

Sealey

Sealey PW12CC User manual

Sealey WPB050 User manual

Sealey

Sealey WPB050 User manual

Sealey TP6801 User manual

Sealey

Sealey TP6801 User manual

Sealey WPD415 User manual

Sealey

Sealey WPD415 User manual

Sealey wpd133a User manual

Sealey

Sealey wpd133a User manual

Sealey AK450DP User manual

Sealey

Sealey AK450DP User manual

Sealey WPC100.V2 User manual

Sealey

Sealey WPC100.V2 User manual

Sealey WPW9355 User manual

Sealey

Sealey WPW9355 User manual

Sealey WPB062S.V2 User manual

Sealey

Sealey WPB062S.V2 User manual

Sealey RE83/840.V2 User manual

Sealey

Sealey RE83/840.V2 User manual

Popular Water Pump manuals by other brands

Ulvac DAT-50DA instruction manual

Ulvac

Ulvac DAT-50DA instruction manual

Becker SVw 190 operating instructions

Becker

Becker SVw 190 operating instructions

Piusi VISCOMAT 90 T user guide

Piusi

Piusi VISCOMAT 90 T user guide

Permagard PermaSEAL Installation and Operation Guidelines

Permagard

Permagard PermaSEAL Installation and Operation Guidelines

Grundfos Liftaway B Installation and operating instructions

Grundfos

Grundfos Liftaway B Installation and operating instructions

Viessmann Solar-Divicon DN20B Installation, Start-Up and Service Instructions

Viessmann

Viessmann Solar-Divicon DN20B Installation, Start-Up and Service Instructions

Grundfos CRE Installation and operating instructions

Grundfos

Grundfos CRE Installation and operating instructions

Rothenberger ROJET 30/130 Instructions for use

Rothenberger

Rothenberger ROJET 30/130 Instructions for use

BUSCH Mink MB 0018 A instruction manual

BUSCH

BUSCH Mink MB 0018 A instruction manual

GORMAN-RUPP PUMPS 10 Series Installation, operation and maintenance manual

GORMAN-RUPP PUMPS

GORMAN-RUPP PUMPS 10 Series Installation, operation and maintenance manual

Idex Corken Coro-Vac CPS1X Important instructions

Idex

Idex Corken Coro-Vac CPS1X Important instructions

Kärcher SP 7 Dirt manual

Kärcher

Kärcher SP 7 Dirt manual

Pulsafeeder PULSAlarm Pulsa Installation, operation & maintenance instructions

Pulsafeeder

Pulsafeeder PULSAlarm Pulsa Installation, operation & maintenance instructions

Hamworthy Trigon ST1 Installation, Commissioning, Operation & Service Instructions

Hamworthy

Hamworthy Trigon ST1 Installation, Commissioning, Operation & Service Instructions

Sulzer VMS Installation, Operating and Maintenance Instructions for the Installer and the User

Sulzer

Sulzer VMS Installation, Operating and Maintenance Instructions for the Installer and the User

Grundfos CRE Series Installation and operating instructions

Grundfos

Grundfos CRE Series Installation and operating instructions

Waterous CS Series Operation and maintenance

Waterous

Waterous CS Series Operation and maintenance

Grundfos TPE 2 Series instructions

Grundfos

Grundfos TPE 2 Series instructions

manuals.online logo
manuals.online logoBrands
  • About & Mission
  • Contact us
  • Privacy Policy
  • Terms and Conditions

Copyright 2025 Manuals.Online. All Rights Reserved.