manuals.online logo
Brands
  1. Home
  2. •
  3. Brands
  4. •
  5. Sealey
  6. •
  7. Water Pump
  8. •
  9. Sealey AK450DP User manual

Sealey AK450DP User manual

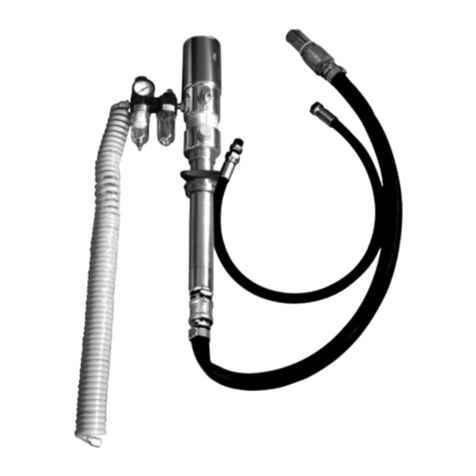
AIR POWERED PUMP AWAY STATION
MODEL NO: AK450DP
Thank you for purchasing a Sealey product. Manufactured to a high standard, this product will, if used according to these instructions,
and properly maintained, give you years of trouble free performance.
IMPORTANT: PLEASE READ THESE INSTRUCTIONS CAREFULLY. NOTE THE SAFE OPERATIONAL REQUIREMENTS, WARNINGS & CAUTIONS. USE
THE PRODUCT CORRECTLY AND WITH CARE FOR THE PURPOSE FOR WHICH IT IS INTENDED. FAILURE TO DO SO MAY CAUSE DAMAGE AND/OR
PERSONAL INJURY AND WILL INVALIDATE THE WARRANTY. KEEP THESE INSTRUCTIONS SAFE FOR FUTURE USE.
1. SAFETY
WARNING! Ensure Health & Safety, local authority, and general workshop practice regulations are adhered to when using this
equipment.
WARNING! DO NOT pollute the environment by allowing uncontrolled discharge of waste oil. Dispose of waste oil in accordance with
local authority regulations.
WARNING! Turn off air supply and de-pressurise the output line before removing the pump unit from any installation or mobile system.
Failure to comply with this instruction may damage the unit and will invalidate the warranty.
WARNING! Disconnect the pump from the air supply before changing accessories, servicing or performing any maintenance.
WARNING! Ensure correct air pressure is maintained and not exceeded.
9Familiarise yourself with the application and limitations of the product as well as the potential hazards.
9Install the pump in an appropriate working area. Keep area clean and tidy, free from unrelated materials and ensure there is adequate
lighting.
9Maintain the pump in good condition (use an authorised service agent).
9Replace or repair damaged parts. Use genuine parts only. Unauthorised parts may be dangerous and will invalidate the warranty.
9When not in use ensure the air supply is turned off.
9Keep the pump clean for best and safest performance.
9Maintain correct balance and footing. Ensure the floor is not slippery and wear non-slip shoes.
9Keep children and unauthorised persons away from the working area.
9Keep air hose away from heat, oil and sharp edges.
9Check air hose for wear before each use, and ensure that all connections are secure.
8DO NOT allow unauthorised persons to operate the pump.
8DO NOT operate the drainer if any parts are damaged or missing as this may cause failure and/or personal injury.
8DO NOT point airline at yourself, other persons or animals.
WARNING! DO NOT tamper with, or open, the pump unit. To do so will invalidate the warranty.
8DO NOT use the pump to draw off any other liquids other than oils.
8DO NOT force the pump to schieve a task it was not designed to perform.
8DO NOT allow untrained persons to operate the pump
8DO NOT operate the pump when you are tired or under the influence of alcohol, drugs or intoxicating medication.
8DO NOT leave the pump operating unattended.
2. INTRODUCTION
Air operated 1:1 oil pump, suitable for use with Model No’s AK450DX and AK468DX oil drain units. Supplied with a wall mounting bracket, 2m
flexible hose with dry-fit male and female quick couplings to attach it to the drain unit. 2m flexible air supply hose with filter, lubricator and regulator
assembly is also included. The pump can be plumbed into a run of pipework to a waste oil storage point sited out of the workshop.
3. SPECIFICATION
Model no....................................................................AK450DP
Air consumption..............................................................8.8cfm
Min/max air pressure................................................. 30/120psi
Oil delivery @90psi ......................................................60L/min
4. CONTENTS
1. Pump
2. Filter-regulator
3. Lubricator
4. Pressure gauge
5. Mounting bracket, filter-regulator
6. Air inlet hose and fitting
7. Suction hose and fittings
8. Wall bracket, pump
9. Hex plug, regulator
Refer to
instruction
manual
Wear eye
protection
Wear
protective
clothing
Wear
protective
gloves
AK450DP Issue:3 (H,F) 11/6/21
Original Language Version
© Jack Sealey Limited
10. Fitting, air system - 2 off
fig.1
5. ASSEMBLY
5.1. The air control unit items (fig.1. 2 & 3) have polycarbonate bowls and must not be installed where the bowls may be exposed to
materials incompatible with polycarbonate such as certain solvents and chemicals, or where fumes can weaken the bowls. If this is
unavoidable, an extension air line hose may be placed between the pump unit and the air control unit, but should not exceed 2 metres
(6½ft) in length. Note that a mounting bracket (fig.1.5) is supplied to provide support for remote positioned air control unit.
WARNING! Clean new air lines ensuring all metal shavings have been removed before connecting the pump and control unit. Any dirt in
the inlet lines could damage the unit and may invalidate the warranty.
5.2. Connect filter-regulator to lubricator using one of the fittings (10). Note the air flow direction arrows on each unit and that lubricator must
be between pump and filter-regulator. Using the second fitting (10) connect the lubricator outlet to the pump air inlet.
5.3. Screw gauge (4) into filter-regulator port, choosing the port which will provide easiest gauge visibility in final installed position. Plug the
remaining gauge port with plug (9).
5.4. Screw air hose (6) into filter-regulator inlet port. Secure all connections (but do not over tighten).
6. INSTALLATION
8DO NOT install the unit where it may be damaged by moving apparatus, or may endanger personal safety.
6.1. Secure wall mounting bracket (fig.1.8) to wall, as shown in fig.3, ensuring wall and attaching screws are adequate to take the weight of
the pump and the pull of the suction and output hoses.
6.2. Remove the knurled mounting ring from the pump body and pass the pump unit through the mounting bracket and secure with the
knurled ring, (fig.3).
6.3. Attach suction hose (fig.2.7) to inlet at base of pump unit. Attach output line (¾” bore - not supplied, (see fig.2) to the pump output port.
6.4. The bowl of the filter-regulator (fig.2.2) is fitted with an automatic drain valve the outlet of which may be piped away using suitably sized
flexible tube.
6.5. Remove lubricator (fig.2.3) oil filler plug and fill with good quality air tool oil (Sealey ATO/500 500ml size or ATO/1000 1L size) checking
the maximum level marked on the side of the unit.
Note: The installation of a wall bracket next to the pump, to support the suction hose when not in use, is recommended.
Use PTFE tape or similar on all connections to ensure leak-free joints.
7. OPERATION
7.1. The regulator should be set at 6 bar/90psi. It is important to maintain the correct operating pressure to ensure that the control valves
and connectors are not damaged and to prevent leakage in the delivery lines.
7.2. Connect the suction hose (fig.2.7) to the oil drain unit and ensure the outlet hose will dispose of the waste in accordance with local
authority regulations. DO NOT pollute the environment by the uncontrolled discharge of waste products.
WARNING! DO NOT operate pump dry - suction line must be connected to drainer before turning on.
7.3. Before turning on air supply for the first time ensure that pressure regulator knob (fig.4.A) is unwound (anticlockwise) so that there is no
load on the regulator spring. Turn on air supply. Regulator output gauge (fig.2.4) should show zero. Turn regulator knob clockwise, slowly,
until gauge shows 6 bar (90psi) - pump will start at approx. 2 bar. Lock knob with locking ring (fig.4.B) to prevent accidental movement.
Note: When resetting the regulated pressure always start from below the new required pressure and adjust up.
7.4. Check that there are no leaks from any of the hoses or fittings.
7.5. When pumping is complete turn the air line off. Disconnect suction hose from drain unit and store. Wipe up any spillage.
Note: Waste oil will not pump if its viscosity is too high.
8. MAINTENANCE
WARNING! Ensure that the pump is disconnected from the air line and that there is no pressure in the output line before attempting
any service or maintenance.
 Note:Itisessentialthatdirtandmoisturearekeptoutoftheairsupplytothepump.Drainairsupplysystemandcleanltersregularly.
8.1. AIR LINE LUBRICATOR AND WATER TRAP (FIG.2.3)
8.1.1. This unit is designed to automatically lubricate the pump via the air supply. The unit must be kept topped up with good quality air tool
oil (Sealey reference: ATO/500 - 500ml size or ATO/1000 - 1L size). To adjust the oil flow turn the oil regulator on the top of the unit.
Turn screw anticlockwise to increase the flow and clockwise to decrease flow - set to minimum flow for this application.
fig.2
fig.3
Original Language Version
© Jack Sealey Limited
fig.4
AK450DP Issue:3 (H,F) 11/6/21
Sealey Group, Kempson Way, Suffolk Business Park, Bury St Edmunds, Suffolk. IP32 7AR
01284 757500 01284 703534 sales@sealey.co.uk www.sealey.co.uk
ENVIRONMENT PROTECTION
Recycle unwanted materials instead of disposing of them as waste. All tools, accessories and packaging should be sorted, taken to
a recycling centre and disposed of in a manner which is compatible with the environment. When the product becomes completely
unserviceable and requires disposal, drain any fluids (if applicable) into approved containers and dispose of the product and fluids
according to local regulations.
Note: It is our policy to continually improve products and as such we reserve the right to alter data, specifications and component parts without prior
notice.
Important: No Liability is accepted for incorrect use of this product.
Warranty: Guarantee is 12 months from purchase date, proof of which is required for any claim.
WEEE REGULATIONS
Dispose of this product at the end of its working life in compliance with the EU Directive on Waste Electrical and Electronic Equipment
(WEEE). When the product is no longer required, it must be disposed of in an environmentally protective way. Contact your local solid
waste authority for recycling information.
At regular intervals check that water is draining from filter-regulator, since it is essential that water does not enter the pump.
8.2. CLEANING
8.2.1. Clean pump and air units with clean damp cloth. Mild detergents may be used to remove oil.
8DO NOT use solvents or abrasives and do not get the pump or air units wet.
9. TROUBLESHOOTING
.
Original Language Version
© Jack Sealey Limited
Problem Cause Solution
Air motor does not operate Air pressure is too low
Mu󰀪erisblocked
Internal defect
Adjust air pressure to above 2 bar/30psi
Contact service agent
Poor performance Mu󰀪erisblocked
Wasteuidtobepumpedisbelow15°C
Viscosity is too high for the pump
Contact service agent
Increase oil temperature by moving drain unit to a warmer area
Check viscosity of waste oil
AK450DP Issue:3 (H,F) 11/6/21

Other Sealey Water Pump manuals

Sealey WPS060 User manual

Sealey

Sealey WPS060 User manual

Sealey TP96 User manual

Sealey

Sealey TP96 User manual

Sealey AK450DX User manual

Sealey

Sealey AK450DX User manual

Sealey EWP050 User manual

Sealey

Sealey EWP050 User manual

Sealey SWP30 User manual

Sealey

Sealey SWP30 User manual

Sealey TP17 User manual

Sealey

Sealey TP17 User manual

Sealey TP6801 User manual

Sealey

Sealey TP6801 User manual

Sealey TP6818.V2 User manual

Sealey

Sealey TP6818.V2 User manual

Sealey BC110.V2 User manual

Sealey

Sealey BC110.V2 User manual

Sealey TP80 User manual

Sealey

Sealey TP80 User manual

Sealey WPP3000S User manual

Sealey

Sealey WPP3000S User manual

Sealey WPL117A User manual

Sealey

Sealey WPL117A User manual

Sealey wps250a User manual

Sealey

Sealey wps250a User manual

Sealey TP94 User manual

Sealey

Sealey TP94 User manual

Sealey EWP40 User manual

Sealey

Sealey EWP40 User manual

Sealey TP80 User manual

Sealey

Sealey TP80 User manual

Sealey TP9424.V2 User manual

Sealey

Sealey TP9424.V2 User manual

Sealey TP50.V3 User manual

Sealey

Sealey TP50.V3 User manual

Sealey WPB50A.V2 User manual

Sealey

Sealey WPB50A.V2 User manual

Sealey TP98 User manual

Sealey

Sealey TP98 User manual

Sealey TP9312 User manual

Sealey

Sealey TP9312 User manual

Sealey WPD235A.V2 User manual

Sealey

Sealey WPD235A.V2 User manual

Sealey WPB062S.V2 User manual

Sealey

Sealey WPB062S.V2 User manual

Sealey WPS92A User manual

Sealey

Sealey WPS92A User manual

Popular Water Pump manuals by other brands

Carrier WeatherMaker 38YDB Wiring diagram

Carrier

Carrier WeatherMaker 38YDB Wiring diagram

Gast DOA Shown Operation & maintenance manual

Gast

Gast DOA Shown Operation & maintenance manual

Pentair Jung Pumpen U3K /2 instruction manual

Pentair Jung Pumpen

Pentair Jung Pumpen U3K /2 instruction manual

Samoa 537630 manual

Samoa

Samoa 537630 manual

Zoeller I7011 owner's manual

Zoeller

Zoeller I7011 owner's manual

Xylem LOWARA e-LNE Series Installation, operation and maintenance manual

Xylem

Xylem LOWARA e-LNE Series Installation, operation and maintenance manual

Becker SV 130 operating instructions

Becker

Becker SV 130 operating instructions

Gardena 21000 inox operating instructions

Gardena

Gardena 21000 inox operating instructions

Agilent Technologies 9130037 instruction manual

Agilent Technologies

Agilent Technologies 9130037 instruction manual

Intex SF80220-2 owner's manual

Intex

Intex SF80220-2 owner's manual

Vortec Dual-Force Vac 2109 Operation and safety instructions

Vortec

Vortec Dual-Force Vac 2109 Operation and safety instructions

Ashland Pump UT57 Operation, Performance, and Specifications

Ashland Pump

Ashland Pump UT57 Operation, Performance, and Specifications

KSB Ama-Drainer-Box Mini Supplementary Operating Manual

KSB

KSB Ama-Drainer-Box Mini Supplementary Operating Manual

Goulds Pumps JC Installation, operation and maintenance instructions

Goulds Pumps

Goulds Pumps JC Installation, operation and maintenance instructions

Makita EW2050H instruction manual

Makita

Makita EW2050H instruction manual

Wayne VIP50 Operating instructions and parts manual

Wayne

Wayne VIP50 Operating instructions and parts manual

Heidolph ROTAVAC valve control instruction manual

Heidolph

Heidolph ROTAVAC valve control instruction manual

KNF FK 1100 installation instructions

KNF

KNF FK 1100 installation instructions

manuals.online logo
manuals.online logoBrands
  • About & Mission
  • Contact us
  • Privacy Policy
  • Terms and Conditions

Copyright 2025 Manuals.Online. All Rights Reserved.