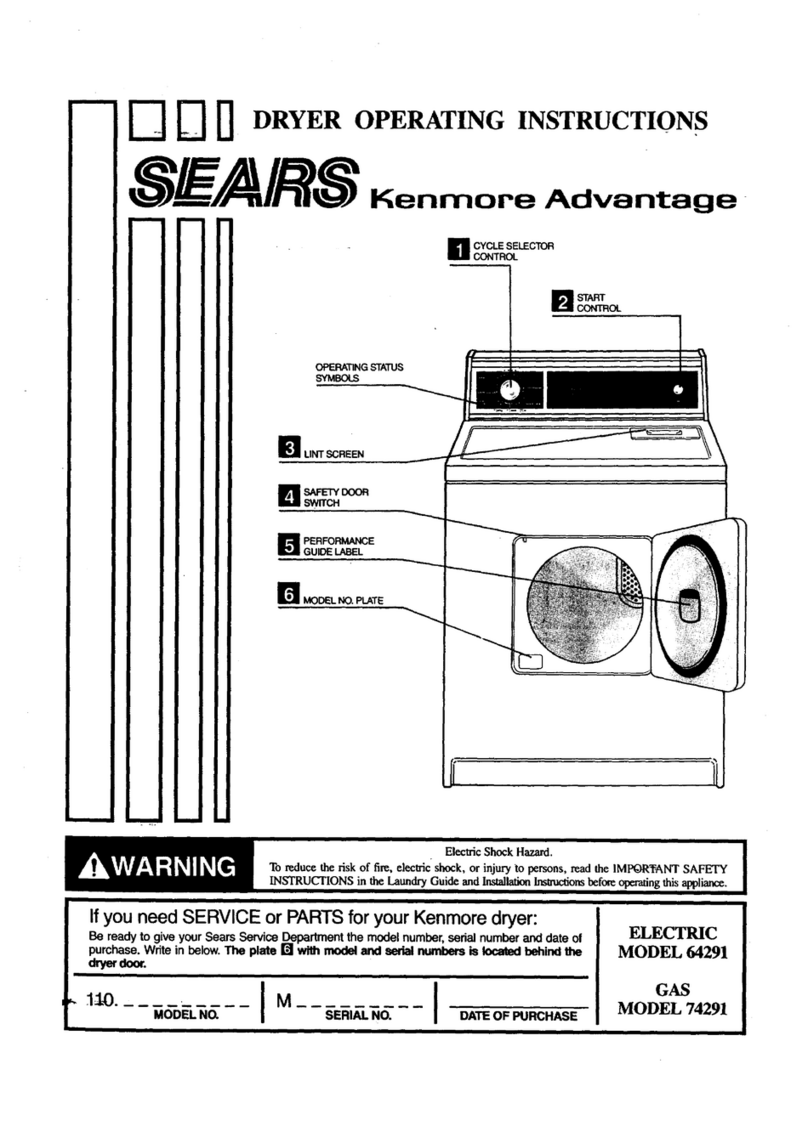
Sears Kenmore 417 Series User manual

®
%_}];ii
Read all instructions before using this
appliance. This book contains valuable
information about the operation, care and
service of your dryer. Keep it in a safe place
Sears, Roebuck and Co., Hoffman Estates, IL 60179 U.S.A.
wvv_A/.sears.com P/N 134464000A (0412)

Table of Contents Product Record
Product Record 2
Dryer Warranty 2
Sears Maintenance Agreement 2
IMPORTANT SAFETY INSTRUCTfONS 3-4
Drying Procedures and Features 5-6
Common Drying Problems 6
Care and Cleaning 7
Avoid Service Checklist 8
Espaflo[ .............................. 9
Service Back Cover
In the space below, record the date of purchase, model and
serial number of your product You will find the model and
serial number printed on an identification plate located on
the left side of the door opening
Model No 417.
Serial No,
Date of Purchase
Save these instructions and your sales receipt for future
reference
Warranty Restriction
If this Dryer is used for any purpose other than Private Family Use, all warranty coverage is effective for only 90 days.
Warranty Service
Warranty service is available by contacting your nearest Sears Service Center in the United States.
This warranty applies only while this Dryer is in use in the United States.
This warranty gives you specific legal rights, and you may also have other rights which vary from state to state.
Sears, Roebuck and Co., Dept. 817WA, Hoffman Estates, IL 60179
Master Protection Agreement theU.S.A
Congratulations on making a smart purchase Your new Kenmore® appliance is designed and manufactured for years of
dependable operation. But like all products, it may require preventive maintenance or repair from time to time That's when
having a Master Protection Agreement can save you money and aggravation.
Purchase aMaster Protection Agreement now and protect yourself from unexpected hassle and expense.
The Master Protection Agreement also helps extend the life of your new appliance Here's what's included in the Agreement:
Expert service by our 12,000 professional repair specialists
Unlimited service and no charge for parts and labor on all covered repairs
"No-lemon" guarantee - replacement of your covered product if more than three aroduct failures occur within 12 months
_' Product replacement if your covered product can't be fixed
Annual Preventive Maintenance Check at your request - no extra charge
Fast help by phone - non4echnica[ and instructional assistance on products repaired in your home, plus convenient
repair scheduling
Power surge protection against electrical damage due to power fluctuations
Rental reimbursement if repair of your covered product takes longer than promised
Once you purchase the Agreement, a simple phone call is all that it takes for you to schedule service, You can call anytime day
or night, or schedule a service appointment online_
Sears has over 12,000 professional repair specialists, who have access to over 45 million quality parts and accessories_ That's
the kind of professionalism you can count on to help prolong the life of your new purchase for years to come, Purchase your
Master Protection Agreement today!
Some limitations and exclusions apply.
For prices and additional information,
call 1-800-827-6655.
Sears Installation Service
For Sears guaranteed professional installation of home
appliances and items like garage door openers and
water heaters, in the U.S.A. call 1-800-4-MY-HOME@

Foryoursafety,theinformationinthismanualmustbefollowedtominimizetheriskoffireor
explosionorto preventpropertydamage,personalinjuryorlossoflife.
Donotstoreorusegasolineorotherflammablevaporsandliquidsinthevicinityofthisoranyotherappliance.
WHAT TO DO IF YOU SMELL GAS:
Do not try to light any appliance.
Do not touch any electri(al switch; do not use any phone in your building.
Clear the room, building or area of all occupants.
Immediately call your gas supplier from a neighbor's phone. Follow the gas supplier's instructions.
If you cannot reach your gas supplier, call the fire department.
Installation and service must be performed by a qualified installer, service agency or the gas supplier.
Your safety and the safety of
others is very important.
We have provided many important
safety messages in the Use and
Care Guide, Operating Instructions,
Installation Instructions and on your
appliance. Always read and obey all
safety messages.
This is tile safety alert symbol.
This symbol alerts you to hazards
that can kill or hurt you or others. All
safety messages will be preceded by
the safety alert symbol and the word
"DANGER" or "WARNING ". These
words mean:
You will be killed or
seriously injured if you don't follow
instructions.
You (:an be killed or
seriously injured if you don't follow
instructions.
All safety messages will identify
the hazard, tellyou how to reduce
the chance of injury, and tell you
what can happen if the
instructions are not followed.
Important Safety Instructions
Read all instructions before using this dryer.
To reduce the risk of fire, electrical shock, or injury to persons
when using this dryer, comply with the basic warnings listed below.
Failure to comply with these warnings could result in serious personal
injuries.
Prevent Fire
Do not dry items that have been previously cleaned in soaked
in, or spotted with gasoline, cleaning solvents, kerosene, waxes, etc. Do not
store these items on or near tile dryer. These substances give off vapors that
could ignite or explode.
Do not place items exposed to cooking oils in your dryer. Items
contaminated with cooking oils may contribute to a chemical reaction that could
cause a load to catch fire.
To prevent fire, do not use heat to dry items containing plastic,
foam rubber or similarly textured rubberqike materials, or items containing
feathers or down. Use Air Fluff (No Heat) only.
Clean the lint screen before or after each load. The interior of
the dryer, lint screen housing and exhaust duct should be cleaned
approximately every 18 months by qualified service personnel. An excessive
amount of lint build-up in these areas could result in inefficient drying and
possible fire. See Care and Cleaning, page 7.
Do not operate the dryer if the lint screen is blocked, damaged
or missing. Fire hazard, overheating and damage to fabrics can occur. If your
dryer has a drying rack, always replace the lint screen when finished using the
drying rack.
Pedestal
A pedestalaccessory,ModelNo. 46262,
specifically designed for this dryer may
be used to elevate the dryer for easeof
use. Failureto useaccessoriescertified
by the manufacturer could result in
personal injury, property damage or
damage to tile dryer.
Keep area around the exhaust opening and surrounding areas
free from the accumulation of lint, dust and dirt.
Do not obstruct the flow of ventilating air. Do not stack or place
laundry or throw rugs against the front or back of the dryer.
Do not spray any type of aerosol into, on or near dryer at any
time.
Do not use fabric softeners or products to eliminate static
unless recommended by the manufacturer of tile fabric softener or product.
Failureto comply with these warnings could result in fire, explosion, serious
bodily injury and/or damage to the rubber or plastic parts of the dryer.
3Printed in US.A

ThisUseandCareGuideprovides
generaloperatinginstructionsforyour
dryer.Italsocontainsinformation
aboutfeaturesforseveralother
models.Yourdryermaynothave
everyfeatureincluded.
Usethedryeronlyasinstructedin
thisUse&CareGuideandthe
Operating instructions included with
your dryer.
Avoid fire hazard or
electrical shock. Do not use an
adaptor plug or extension cord or
remove grounding prong from
electrical power cord. Failure to
follow this warning can cause
serious injury, fire or death.
ELECTR/C DRYERS:
14-30R
DRYER
FUSED 30 AMP
120/240 V OR
120/208 V
WALL DRYER
RECEPTACLE S E R V C E
CORD
CORRECT
Use this way ONLY
GAS DRYERS:
Grounding type
wall receptacle
not under
any circumstances 1
cut, remove,
or bypass 1
the grounding prong I
,,from this plug. .J
Power supply
cord with 3-prong
grounding plug
CORRECT
Use this way ONLY
Protect Children
Do not allow children to play on or in the dryer. Close
supervision of children is necessary when the dryer is used near children. As
children grow, teach them the proper, safe use of all appliances.
Destroy the carton, plastic bag and other packing materials after
the dryer is unpacked. Children might use them for play. Cartons covered with
rugs, bedspreads or plastic sheets can become airtight chambers.
Keep laundry products out of children's reach. To prevent
personal injury, observe all warnings on product labels.
Before the dryer is removed from service or discarded, remove
the dryer door to prevent accidental entrapment.
Failure to comply with these warnings could result in serious personal
injuries.
Prevent Injury
To prevent shock hazard and assure stability during operation,
the dryer must be installed and electrically grounded by a qualified service
person in accordance with local codes. Installation instructions are packed in
the dryer for the installer's reference. Refer to INSTALLATION INSTRUCTIONS
for detailed grounding procedures. If the dryer is moved to a new location, have
it checked and reinstalled by a qualified service person.
To prevent personal injury or damage to the dryer, the electrical
power cord of a gas dryer must be plugged into a properly grounded and
polarized 3-pron g outlet. The third grounding prong must never be
removed. Never ground the dryer to a gas pipe. Do not use an extension
cord or an adaptor plug.
ALWAYS disconnect the dryer from the electrical supply before
attempting any service or cleaning. Failure to do so can result in electrical
shock or injury.
Do not use any type spray cleanser when cleaning dryer interior.
Hazardous fumes or electrical shock could occur.
To prevent injury, do not reach into the dryer if the drum is
moving. Wait until the dryer has stopped completely before reaching into the
drum.
To prevent injury and damage to the dryer:
All repairs and servicing must be performed by an authorized servicer
unless specifically recommended in this Owner's Guide. Use only
authorized factory parts.
Do not tamper with controls.
Do not install or store the dryer where it will be exposed to the weather.
Note: Tile instructions appearing in
this Use and Care Guide are not
meant to cover every possible
condition and situation that may
occur. Common sense and caution
must be practiced when installing,
operating and maintaining any
appliance.
A thermal limiter switch automatically turns off the motor in the unlikely
event of an overheated situation (electric dryers only). A service technician
must replace the thermal limiter switch after correcting the fault.
Failure to comply with these warnings could result in serious personal
injuries.
SAVE THESE INSTRUCTIONS
4

Drying Procedures • Readthe Operating Instructions for operating your specific model.
•Always read and follow fabric care labels and laundry product labels.
Follow fabric care label instructions.
To reduce the risk of fire, electrical shock, or injury to persons,
read Important Safety Instructions, pages 3-4, before operating this dryer.
.Prepare items for drying.
• Dry items of similar fabric, weight and construction in the same load.
• Separate dark items from light-colored items. Separate items that shed
lint from those that attract lint. If an item sheds lint, turn it inside out.
• Be sure buckles, buttons and trim are heatproof and won't damage the
drum finish. Close zippers, fasten hooks and Velcro@-Iike fasteners.
Tie strings and sashesto prevent snagging and tangling.
• If possible, turn pockets inside out for even drying.
• Check for stains which may not have been removed in washing. Dryer
heat may permanently set some stains. Repeat stain removal process
before drying.
• Place small items in a mesh bag to prevent tangling and for easy
removal.
2. Check that lint screen is clean and in place.
J3. Load the dryer.
: i.i_' • The average load will fill the drum 1/3 to 1/2 full. Items need room to
:, tumble freely for even drying and lesswrinkling. Do not oveHoad
,J__
When drying large items, dry only 2 or 3 at a time. Fillout tile load with
._:,,_:u,',.,;,_,_,.:_+_"_.........._/small and medium sized items.
,:_,,,_:_s,u:_v,,,.:,._,_...... • For delicate or very small loads, add 2 lint-free towels for better drying,
lesswrinkling, and to prevent grease stains caused by fabric softener
• Do not overdry items. Overdrying can cause wrinkling, shrinkage,
Placesmall items in a mesh bag. harshness, and a build-up of static electricity, which can produce more
lint.
• If desired, add a dryer fabric softener sheet.
Fill dryer drum 1/3 to 1/2 fulk
.
5.
Close the dryer door and select the cycle, temperature, dryness level
options and features desired.
SeeOperating Instructions for your specific model infornqation.
Press START to begin the cycle.
• To add or remove items when the dryer isrunning open the door. The
dryer will stop when the door isopened. Allow the drum to come to a
complete stop before reaching inside.
• Close the door and press STARTto resume tile cycle.
6. When the cycle ends, remove items immediately and hang or fold.

Fe_ _ufe$ Cyde 5ignai
A signal will sound at the end of tile cycle and )eriodically during Wrinkle-Rid.
Drum Light
A drum light will come on whenever the door _sopened to illuminate the dryer
drum during loading and unloading. Closing the door turns off the light.
Reversible Dryer Door
Your dryer is equipped with a reversible door. The door carl be hinged on the
right or left side. Refer to the INSTALLATION INSTRUCTIONSfor directions
on changing the door.
Place the front bar under
the lip of the lint screen opening
Drying Rack
Use the drying rack to dry items which should not be tumble dried.
I. Open the dryer door and remove the lint screen.
2. Insert drying rack into tile dryer drum. Placethe front bar under the lip of
tile lint screen opening.
3. Place items to be dried on top of the rack. Weight should not exceed 10
Ibs. Leave space between items, but do not let items hang over tile sides
or through the grids. Do not tumble other items when using the drying
rack.
4. Select Time Dry. Use only tile No Heat option for items containing plastic,
foam rubber, rubberqike materials, feathers or down.
5. When items are dry, remove the rack and replace the lint screen. If lint
screen is not in place, tumbling items could enter the exhaust system and
cause damage to the dryer.
Common Drying Probiems
Many drying problems involve poor cleaning results, poor soil and stain removal, residues of lint and scum, and fabric
damage. For satisfactory drying results, follow these suggestions provided by The Soap and Detergent Association.
PROBLEM
Greasy, oily
stains
Lint
Pilling
(Fibers break
off, ball up and
cling to fabric)
Shrinking
Wrinkling
POSSIBLE CAUSES SOLUTIONS PREVENTIVE MEASURES
Fabric softener sheet,
Overloadin%
Overdrying causes static
electricity_
Lint screen not clean
when cycle began
Lint is attached to "pills"
Rub fabric softener stains with bar
soap, Rinse and rewash
Reduce load size and rewash using
liquid fabric softener in the final rinse
Or, add a fabric softenersheet and
tumble without heat
Uselint brushor roller to remove lint,
Add a few bath towels to small loads for
proper tumbling
Some "silk4ike" fabrics should be air
dried
Use proper drying temperature
Place fabric softener sheet on top of load
before starting the dryer_
Do not overload dryer.
Use fabric softener in washer or dryer to
reduce static electricity.
Remove items when they are slightly
damp to avoid overdrying
Check that lint screen is clean and in
place
Pilling is normal with
synthetic and permanent
press fabrics_ This is due
to abrasion from normal
wear_
Use a lint brush or shaver to remove
pills, Use fabric softener to lubricate fibers_
When ironing, use spray starch or fabric
finish on collars and cuffs_
Turn items inside out to reduce abrasion
Overdrying
Overloadin%
Leaving items in dryer
after cycle ends,
Irreversible condition,
Reduce load size and tumble at
medium or low heat for 5-10 minutes_
Remove items immediately Hang or
fold, 6
Follow fabric care label directions
If shrinking is a concern, check load often.
Remove items while slightly damp and
hang or lay flat to complete drying_
Block knits into shape_
Do not overload dryer_
Remove items as soon as cycle ends

Care and Cleaning To reduce risk of fire or serious injury to persons or property,
comply with the basic warnings listed in Important Safety lnstrucdons, pages
3-4, and those listed below.
Clean lint screen after every load
Before cleaning the dryer interior, unplug the electricatpower cord to
avoid electrical shock hazards.
Do not use any type spray cleanser when cleaning dryer interior.
Hazardous fumes or electrical shock could occur.
Inside
• Clean the lint screen after every load. Lint build-up in the screen restricts
air flow, which causes longer drying times. The screen is located at the
bottom of the door opening. Remove by pulling straight up. Remove the lint
and replace the screen.
Occasionally a waxy build-up may form on the lint screen from using dryer-
added fabric softener sheets. To remove this build-up, wash the lint screen
in warm, soapy water. Dry thoroughly and replace. Do not operate tile dryer
without the lint screen in place.
Do not store or place laundry products
on top of dryer at any time They can
damage the finish or controls
If the dryer drum becomes stained from noncolorfast fabrics, clean the
drum with a damp cloth and a mild liquid household cleanser. Remove
cleanser residue before drying the next load.
Every 18 months an authorized servicer should clean the dryer cabinet
interior and exhaust duct. These areas can collect lint and dust over time.
An excessiveamount of lint build-up could result in inefficient drying and
possible fire hazard.
Outside
•Clean tile cabinet with mild soap and water. Never use harsh, gritty or
abrasive cleansers.
If the cabinet becomes stained, clean with diluted chlorine bleach [I/2 cup
(120 ml) in 1 quart (.95 liter) water]. Rinse several times with clear water.
Remove glue residue from tape or labels with a mixture of warm water and
mild detergent. Or, touch residue with the sticky side of the tape or label.
Before moving the dryer, place a strip of cardboard or thin fiberboard
under the front leveling legs to prevent damage to floor.

Avoid Service
Checklist Before catling forservice, reviewthis list. It may save both time and expense. The list includes
common occurrences that are not the result of defective workmanship or materials in this dwer.
OCCURRENCE POSSIBLE CAUSE SOLUTION
Dryer does not start. Electrical power cord is not securely, Make sure the plug fits tightly in wall outlet
plugged in or plug may be loose
House fuse blown or circuit breaker Reset circuit breaker or replace fuse_
tripped, Make sure electrical line is not overloaded and the
dryer is on a separate circuit
Thermal limiter tripped, Call authorized service person for replacement,
Dryerrunsbutwon'theat. There are 2 house fuses in the dryer Replace fuse.
circuit If 1 of the 2 fuses is blown, the
drum may turn but the heater will not
operate
Gas supply valve is not open (gas Check to make sure supply valve is open_ See
models) INSTALLATION INSTRUCTIONS for procedure_
Dryer does not have anough air supply See INSTALLATION INSTRUCTIONS
to support the burner flame (gas models)_
LP gas supply tank is empty or there has Refill or replace tank.
been a utility interruption of natural gas
(gas models) Dryer should heat when utility service is restored
Drying cycle takes too long, Lint screen is clogged with lint Make sure all lint has been removed from the dryer lint
outsideofthedryerfeelstoo screen before starting each cycle_
hot or smells hot. Exhaust duct requirements have not
been met, Exhaust duct must be at least 4 inches in diameter and
made of rigid or flexible metal,
When in place, the duct must have no more than two
90° bends and must not exceed length listed in
INSTALLATION INSTRUCTIONS
Electric dryer is connected to a 208 volt Drying time will be 20% longer than drying on a 240
circuit_ volt circuit
Drying procedures have not been See Drying Procedures, page 5,
followed
Outside exhaust hood or exhaust duct Clean out any obstruction,
may be clogged or restricted
High humidity Use a dehumidifier near the dryer
Excessive wrinkling. Dryer is overloaded. Do not overload. See Drying Procedures, page 5,
Items left in dryer too long, Remove items as soon as cycle ends.
Insufficient sorting of items. See Drying Procedures, page 5.
Drying temperature too high Follow fabric care label instructions_
Scratching or chipping of the
drum finish, Foreign objects such as coins, pins, clips
or buttons are inside the dryer_
Permanently attached items such as belt
buckles, zippers and fasteners may, be
hitting the inside of the drum,
Always remove foreign objects from pockets before
laundering_ Remove objects from drum and restart
dryer
It may be necessary to baste a scrap of material
securely around ornaments before drying to prevent
scratching and damage to the dryer
Drum damage caused by foreign objects or
permanently attached items is not covered by the
warranty,

r
tnd ce
English 2_8
Registro de producto 9
Garantfa para la secadora 9
Contrato de mantenimiento Sears ................ 9
INSTRUCCIONES fMPORTANTES
PARA LA SEGURfDAD ...................... 10ol 1
Procedimientos para el secado 12
Caracter[sticas 13
Problemas comunes del secado 13
Cuidadoylimpieza 14
Evitar JJamadas de servicio 15
Servicio ...................................................... Cubierta
Registro de producto
Registre en la parte reservada a continuacion la fecha de
compra, el n0mero de modeJo y el nQmero de serie de su
eJectrodom6stico_ El n0mero de modelo y el n0mero de serie
est_in inscribidos sobre una placa de identificaci6n ubicada
en la parte izquierda de la abertura de la puerta,
N0mero de modelo: 417.
Fecha de compra:
No de serie:
Guarde estas instrucciones y su boleta de compra para
futuras referencias.
Garantia para ia secadora
Garanda completa de un aho para las piezas mec2nicas y el6ctricas
Por un afio desde la fecha de compra original, siesta secadora se instala y opera de acuerdo con las Instrucciones del
Manual de Uso y Mantenimiento, las Instrucciones para la Operation y las Instrucciones para la Instalacion, Sears
reparara o reemplazara cualesquiera de sus piezas mec_nicas o electricas en caso de que elias est&n defectuosas debido
a material o a mano de obra.
Restricci6n de la garanda
Siseoperaestasecadora para un usodistintoal usodomesticodeunasolafamilia, toda la cobertura delagarantiaes
efectiva para solamento 90 dias.
Servido bajo la garanda
Para obtener servicio bajo la garantia pongase en contacte con el mas cercano Centro de Servicio Sears en los Estados
Unidos.
Esta garantia se aplica 0nicamente mientras esta secadora est6 siendo usado en los Estados Unidos.
Esta garantia le otorga derechos legales especificos, y usted tambien puede tenet otros derechos que varian de un
estado a otro.
Sears, Roebuck and Co. Dept. 817WA, Hoffman Estates, IL 60179
CONTRATOS DE PROTECCtON PRtNCtPALES
Lo felicitamos por su sabia decisi6n de compra. Su nuevo electrodomestico Kenmore ha sido disenado y fabricado para ofrecerle muchos anos de
rendimiento seguro Pero, al igual que todos los productos, de vez en cuando puede necesitar rnantenimiento preventivo o reparacion. En tal momento
es cuando un Contrato de Protection le puede ahorrar preocupaciones y gastos.
Adquiera un ¢ontrato de Protecd6n Princfpal ahora y prot?_jase contra /ncertldumbres y gastos mesperados.
El Contrato de Protecci6n Principal adem_s le ayuda a prolongar la vida Otil de su nuevo electrodomestico. El Contrato incluye Io siguiente:
Servicio posventa por nuestros 12000 profesionales especializados en reparaciones
Servicio posventa ilimitado y gratis de piezas y mano de obra para todas las reparaciones cubiertas por el contrato
Garantia de rendimiento - reemplazo del producto bajo contrato si ocurren rn_s de tres fallas del producto dentro de doce
meses.
Reemplazo de su producto si el producto bajo contrato rio puede ser reparado.
Revisi6n Anual de Mantenimiento Preventivo cuando Io solicite - sin costo adicional
Ayuda r@ida por teldono - ayuda e informacion no t_cnica para los productos reparados en su hogar, adem_s de fijaci6n de
fechas convenientes para las reparaciones
Proteccion contra arremetidas electricas debido a fluctuaciones de la corriente el6ctrica
Reembolso de costos de arriendo si las reparaciones de su producto bajo contrato demoran rnas tiempo que Io prometido
Una vez que usted ha comprado el Contrato, solamente necesita una Ilamada por teldono para fijar la fecha del servicio Puede Ilamar a cualquier hora,
durante el dia o en la noche o puede fijar la fecha para el servicio a travd_sde la computadora.
Existen ciertas limitaciones y exdusiones,
Para precios y mayor informaci6n,
Ilame al 1_800-827-6655
Sears tiene mas de 12.000 profesionales especializados en reparaciones, que tienen acceso a m_s de 4,5 millones de piezas y accesorios de calidad,
Este es el tipo de profesionalismo al que usted puede recurrir para prolongar la visa util de su nuevo electrodornestico durante muchos anos. iCompre
hoy mismo su Contrato de Protecci6n Principal! Servicio de Instalaci6n Sears
Para instalaci6n profesional garantizada de electrodomesticos
Sears y articuJos tales como sistema de apertura de puertas de
cocheras y calefactores de agua, en los EEUU JJame al 1-800-
4_My_HOME@

Para su seguridad, siga la information contenida en este manual para minimizar el riesgo de
incendio o explosi6n o para evitar dafios materiales, lesiones personales o la muerte.
No guarde ni utilice gasolina ni otros vapores y liquidos inflamables en las cercanias de este o cualquier otro
electrodom6stico.
QUE HACER SI NOTA UN OLOFt A GAS:
5u seguridad y la seguridad de
terceros son muy importantes.
No trate de encender ningOn electrodomestico.
No toque ningOn interruptor electrico; no use ningOn telefono de su edificio.
Haga que todo el mundo salga del cuarto, edificio o area.
Llame inmediatamente al proveedor del gas desde el tel6fono de un vecino. Siga las instrucciones del
proveedor del gas.
Si no puede ponerse en contacto con el proveedor del gas, Ilame a los bomberos.
Lainstalaci6nyelserviciodebenserhechospor un instaladorcapacitado,unaagenciadeservicioso elproveedordelgas.
Instrucciones importantes para la seguridad
Lea todas las instrucciones antes de udfizar esta secadora.
Hemos proporcionado muchos
mensajes importantes para la
seguridad en las hstrucciones de
Operaci6n del Manual de Uso y
Mantenimiento, las hstrucciones de
InstaJaci6n yen el mismo aparato_
Siempre lea y obedezca todos los
mensajes para seguridad
_Este s[mbolo significa aJerta Este
sfmbolo Io alerta acerca de peligros
que pueden matar o Jesionar, tanto a
usted como a otras personas Todos los
mensajes de seguridad ser_in
precedidos por el sfmboJo de alerta
para su seguridad y Ja paJabra
"DANGER" o "WARNfNG" (PELIGRO 0
ADVERTENCIA) Estas palabras
significan:
DANGER (PEMGRO)
Usted morir_5 o resultar_i seriamente
lesionado si no sigue Jas instrucciones
siguientes
WARNING
(ADVERTENCIA) Usted puede rnorir o
resultar seriamente lesionado si no
sigue las instrucciones siguientes
Todos los mensajes de seguridad
identificaran el peligro, le diran a
usted c6mo reducir la posibilidad de
lesi6n y tambien que puede suceder
si no se siguen las instrucciones.
Pedestal
Unaccesoriodel pedestal disefi6,Numero
de Modelo 46262, especificamente para
esta secadora puede set utilizado al elevar
la secadora para la facilidad de empleo.
La falta de utilizar los accesorios
certificados pot el favrcante podia dar
lugar a dafios corporales, a da_ios
materiales, o a dafio a la secadora.
Impreso en los EE,UU
Para reducir el riesgo de incendio, descargas el6ctricas o
Jesiones a Jas personas durante el uso de esta secadora, cumpla con las advertencias
b_isicas que se enumeran a continuaciOn
P_EI incumplimiento de estas advertencias puede causar lesiones personales graves_
Evite elincendio
No seque ninguna prenda que haya sido limpiada, remojada o
manchada previamente con gasolina, soJventes de Jimpieza, keroseno, , ceras, etc_ No
guarde estos productos sobre ni cerca de Ja secadora Estas substancias emiten vapores
que pueden encenderse o explotar,
No coloque en su secadora ninguna prenda que haya sido expuesta
a los aceites de cocina. Elaceite de cocina contenido en estas prendas puede crear una reaction
qu[mica que puede causar alas prendas de encenderse.
Para prevenir el incendio, no use calor para secar prendas que
contengan pJ_Sstico, goma espuma o materiales tipo caucho, ni prendas que
contengan plumas o plum6n. Use la graduaci6n de "Air Fluff" (sin calor) solamente.
Limpie Ja rejilJa para pelusas antes o despu_s de cada carga de
ropa EJinteriordeJasecadora, eJrecipientequeaJbergaJarejiJla parapelusasyel
conducto de salida deben set Jimpiados aproximadamente cada 18 meses pot un
t_cnico de servicio capacitado_ Una cantidad excesiva de peJusas en estas _ireas
puede causar un secado deficiente y un posibJe incendio, Vea Cuidado y fimpieza en
la p_igina 14,
No ponga la secadora en funcionamiento si la rejilla para
pelusas est.5 bloqueada, daFiada o si no est.1 coJocada_ Puede ocurrir un riesgo de
incendio, un sobrecaJentamiento o daBos a Jas prendas_ Si su secadora tiene un
estante para secado, vuelva siempre a colocar la rejiJla para pelusas cuando termine
de usar el estante para secado
Mantenga el a'rea alrededor de Jaabertura de saJida y Jas_ireas
adyacentes libres de acumulaci6n de pelusas, polvo y suciedad_
Noobstruyaelpasodelairedeventilaci6n Noapilenicoloque
ropa o alfombras contra la parte delantera o trasera de Ja secadora_
No rode ningOn tipo de aerosol dentro, sobre o cerca de Ja
secadora en ningOn momento.
No use suavizantes ni productos para eJiminar Jaelectricidad
est_Sticaa menos que Io recomiende el fabricante deJsuavizante o del producto
_EI incumplimiento de estas advertencias puede traer como consecuencia un incendio,
una explosi6n, lesiones corporales graves y/o daBos a las piezas de caucho o de pJ_istico de
Jasecadora_
10

Este Manual de Uso y Mantenimiento le
ofrece instrucciones generales para la
utilizaci6n de su secadora_ Tambi6n
contiene informaciOn sobre las
caracter[sticas de otros modelos. Puede
ser que su secadora no tenga todas las
caracter[sticas que se induyen aqu[.
Use la secadora solamente como se
indica en el Manual de Uso y
Mantenimiento y la tarjeta de
lnstrucdones para el Fundonamiento
que se incluye con la secadora
_-'_ Evite los riesgos
de incendio o las descargas el_ctricas
No use un adaptador o un cable de
extensi6n ni saque la davija de toma
de tierra del cable el6ctrico El no
seguir esta advertencia puede causar
lesiones graves, incendio o la muerte_
5ECADORAS ELECTR/C.4S:
14-30R
REC EPT,_C ULO
MURAL CON
FUSIBLES DE
30 AMP CORDON
120/240 VOLTIOS EL_CTRfCO
O 120/208 VOLTIOS DE LA
SECADORA
MANERA CORRECTA
Usese asi SOLAMENTE
SECADORAS ,4 GAS:
No torte, saq ue ni
cortodrcuite bajo nin-
guna circunstanda la
davija de toma de
tierra de este enchufe,
Cable de alimentadqn
el_ctrica con encbufe de tema
de derra con 3 davijas
MANERA CORRECTA
Usese asi SOLAMENTE
Nora: Las instrucdones que aparecen
en este Manual de Uso y Mantenimiento
no pretenden cubrir todas las
condiciones y situaciones posibles que
puedenocurrir Debetenersesentido
com0n y cuidado al instalar, operar y
mantener cualquier electrodom_stico.
Proteja a los nihos
No permita que los niFios jueguen encima de o dentro de la
secadora Debe vigiJar de cerca a los ninos cuando Jasecadora est@ siendo usada en
presenciadeniBos Cuandoestoscrezcan, ens_Beleselusocorrectoysegurodetodos
los eJectrodom6sticos.
Deseche la caja de cart6n, la bolsa de pl_istico y los dem_is
materiales de env[o una vez que haya desembalado la secadora_ Los ninos podr[an
usarlosparajugar Lascajasdecart6ntapadasconalfombras, colchasu hojasde
pl_istico pueden convertirse en c_imaras herm6ticas,
Mantenga todos los productos de lavado fuera del alcance de los
niBos_ Para evitar las lesiones personales, siga todas Jasadvertencias de Jasetiquetas
de los productos
Antes de retirar la secadora de servicio o desecharla, saque la
puerta de la secadora para evitar que alguien quede atrapado.
[J_l_ El incumplimiento de estas advertencias puede causar lesiones personales graves.
Evite lesiones
Para evitar el riesgo de descargas el_ctricas y garantizar la
estabilidad durante el funcionamiento, la secadora debe ser instalada y conectada a
una toma de tierra por un tecnico de servicio capacitado de conformidad con los c6digos
el6ctricos locales. Se incluyen instrucciones para la instalaci6n con la secadora para
referencia delinstalador Vea lasINSTRUCCIONES PARA LAINSTALACION para los
iSECADORA procedimientosdetalladossobrelaconexiOnalatomadetierra Sisemuevela
secadora a otra ubicaci6n, haga que un t_cnico de servicio capacitado examine y
vuelva a instalar la secadora,
Para evitar lesiones personales o daFios a la secadora, el cable
electrico de la secadora a gas debe estar enchufado en un tomacorrientes de 3 clavijas,
poJarizado y con toma de tierra adecuada_ No debe sacarse nunca la clavija de tierra.
No conecte nunca la toma de tierra a una tuberia de gas, No use un cable de
extensi6n ni un adaptador.
Desconecte SfEMPRE la secadora del tornacorrientes antes de
tratardehacercualquiermantenimientoolimpieza Sinolohace, puedenocurrir
descargas el_ctricas o lesiones
No use ning0n limpiador en vaporizador cuando limpie el interior
delasecadora Pueden desprendersevaporespeligrososo producirsedescargas
el6ctricas.
Para evitar lesiones, no meta la mano en la secadora mientras el
tamborest6en movimiento Dejequeeltamborsedetengacompletamenteantesde
meter la mano
Para evitar lesiones personales graves y daFlos a la secadora:
Todas las reparadones y el servicio deben set Ilevados a cabo pot un tecnico
autorizado a menos que se recorniende Io contrario en este Manual del Usuario
Use solamente piezas de repuesto autorizadas por la flibrica
No modifique los controles
No instale ni guarde Jasecadora en un lugar a la intemperie
_!_ Un disyuntor de seguridad apaga el motor automna'ticamente en el caso poco
probable de que ocurra un sobrecalentamiento (secadoras eJectricas solamente). Un
t@cnico de servicio deber_i cambiar el disyuntor de seguridad despues de haber
corregido la falla.
_1_ El incumplimiento de estas advertencias puede causar Jesiones personales graves,
GUARDE ESTAS INSTRUCCIONES
11

Procedimientos para el
Siga las instrucciones de la
etiqueta de la prenda_
Coloque las prendas pequerhas
en un saco de rnalla
J
J
J
J
J
f
tlene el tarnbor de la secadora
de un tercio a la mitad_
el secado
• Lea la tarjeta de Instrucdones para e/ Fundonamiento para utilizar su rnodelo
especifico
•Lea y siga siempre las etiquetas para el cuidado y secado de sus prendas,
Para reducir el riesgo de incendio, descargas el6ctricas o
lesiones personales, lea Jas lnstrucciones lmportantes para la Seguridad en las
p_iginas 10 y 11 antes de poner la secadora en marcha,
1. Prepare la ropa para et secado.
• Seque las prendas de tejidos, pesos y confecciones sirnilares en la rnisrna
carga
• Separe Jas prendas oscuras de las prendas tiaras, Separe las prendas que
sueltan pelusa de Jas que atraen pelusa, Si una prenda sueJta peJusa,
col6quela al reves
• Aseg0rese de que las hebiJJas, los botones y los adornos sean resistentes
aJ caJor y no danen el acabado del tarnbor Cierre Jas crernaJleras, los
ganchos y los cierres de tipo VeJcro *_, Anude los lazos y Jas cintas para
evitar que se enganchen y se enreden,
• Si es posibJe, saque los boJsillos para que se sequen tarnbi@n
• Examine las prendas para ver si hay rnanchas que no fueron elirninadas
con el lavado El calor de Ja secadora puede asentar perrnanenternente
aJgunas rnanchas Repita el proceso de eJirninaci6n de rnanchas antes del
secado,
• CoJoque las prendas pequeBas en un saco de rnaJJa para evitar que se
enreden y para sacarJas con rn_is faciJidad,
2. Compruebe que la rejilla para pelusas este #mpiay
colocada en su lugar.
3. Llene la secadora.
• La carga prornedio Ilenar_i el tarnbor a un tercio o la rnitad, Las prendas
necesitan espacio para rnoverse librernente para obtener un secado
uniforme y rnenos arrugas_ No sobrecargue la secadora.
• Cuando seque prendas grandes, seque s6lo 26 3 a la vez, Complete la
carga con prendas pequenas y rnedianas,
• Para cargas delicadas o rnuy pequer_as, anada 2 toallas sin pelusas para
obtener un rnejor secado, rnenos arrugas y para evitar las rnanchas de
grasa causadas pot las hojas de suavizante,
• No sequela ropa excesivarnente, El secado excesivo puede causar
arrugas, encogirniento, aspereza y una acurnulaci6n de electricidad
est_itica que puede producir rn_is pelusas,
• Si Io desea, armada una hoja de suavizante,
4. Cierre la puerta de la secadora y selecdone el ddo, la
termeratura, el nivel de la sequedad y las opciones,
deseadas.
Vea la tarjeta de Instrucdones para el funcionamiento para los controles
especificos de su rnodelo
5. Presione IMPREStON para comenzar et cido:
• Agregar o quitar articulos cuando el secador esta' fundonando abre la puerta
El secador parar_i cuando se abre la puerta Perrnita que el tarnbor venga a una
parada cornpleta antes de alcanzar el interior;
• Cierre la puerta y presione IMPRESION para reasurnir el ddo,
6. Cuando se termine el ddo, saque las prendas inmediata-
mente y cuelguelas od6blelas.
12

Caracterisdcas
Ubique la barra del frente debajo
del labio de apertura del filtro de pelusa_
Control de ta Serial de Cido (algunos modelos)
Una serial sonara en el extemo del ciclo y durante la arruga librada en el nivel
del volumen seleccionado.
Luz del Tambor (atgunos modetos)
Una luz se prender_ cada vez que la tapa de la secadora sea abierta, para
iluminar el tambor durante las operaciones de carga y descarga. Cerrando la
puerta se apagara la luz.
Puerta Reversible
Su secadora est_ equipada con una puerta reversible. Lasbisagras pueden
colocarse a la derecha o a la izquierda. Vea las INSTRUCCIONESPARA LA
INSTALAC!ON para saber c6mo cambiar la puerta.
Parritta de 5ecado {Mgunos modeJos)
Use la parrilla de secado para prendas que no deban ser volteadas.
I. Abra la tapa de la secadora y remueva el filtro de pelusa.
2. Inserte la parrilla de secado en el tambor de secado. Ubique la barra del frente
debajo del labio de apertura del filtro de pelusa.
3. Coloque las prendas que van a ser secadas sobre la parrilla. El peso no debe
exceder las 101bs. Deje espacio entre las prendas, pero no deje las prendas
colgar a los costados de la parrilla o entre los agujeros de la malla. No voltee
otras prendas cuando este siendo usada la parrilla de se(ado.
4. Seleccione un ciclo de secado regulado que mejor se adapte alas prendas
por secar. Seleccione solamente temperatura aire sin calor para articulos que
contengan plastic:o, espuma de goma, materiales parecidos a la goma,
plumas o plumon.
5. Cuando los articulos est6n secos, remueva la parrilla de secado y vuelva a
colocar el filtro atrapa pelusa. Si el filtro atrapa pelusa no est_ en su lugar, los
articulos que est6n siendo volteados pueden entrar en el sistema de escape
de aire y daflar la secadora.
ProMemas comunes del secado
Muchos de los prob[emas del secado involucran resultados pobres de [avado, manchas y suciedad ma[ quitada, residuos de
peJuda y escoria y articuJos darhados Para resultados de secado satisfactorios, observe estas sugestiones proporcionadas por Ja
Asociaci6n de Jab6n y Detergente.
PROBLEMA CAUSA5 POSIBLE5 50LUCIONE5 MEDIDA5 PREVENTIVA5
Manchas _Papel suavizante de telas • Frote las mar/chas de suavizante con _Agregue alguna toalla de bano para cargas
aceitosas o una barra de jab6n Enjuague y vuelva pequenas, para producir un volteo apropiado
gra_ienta_ a lavar _Algunas prendas "imitaci6n seda" deben ser secadas
al aire
.Use la temperatura de secado apropiada
.Coloque la hoja de papel suavizante sobre la carga
antes de comenzar el secado.
PeJusa
Apilamiento
(rotura de fibras,
formaci6n de
adherencias a la
tela)
Encogido
• Demasiada carga ,Reduzca la carga y vuelva a lavar
• Secar m_s de Io necesario usando suavizante liquido en el ultimo
produce ca/ga electrost_itica enjuague
• EIfiltro at/apa pelusa rio est_ _0 agregue una hoja de papel
limpio al iniciar el ciclo suavizante y voltee sin usar calor
_La pelusa esta unida a "motas". _Use un cepillo o /odillo removedor de
pelusa papa remover la misma.
• EI apilamiento es normal en
telas con contenido de fibras
sinteticas y planchado
pelotas pequenas y pe/manente Esto es producido
por la abrasion debido al uso
normal de la prenda.
• Demasiado secado
Arrugas
• Use un cepillo o a[eitadora para pelusa
para remover esta formation
• Esta condition es irreversible
• Cargas muy grandes
• Dejar las prendas en la
secadora luego de haber
terminado en cido
• Reduzca el tamano de la carga y voltee a
temperatura media por 5 a 10 minutos.
• Remueva las prendas inmediatamente y
cuelgue o doble 13
• No sobrecargue la secadora
• Use suavizante en el lavado o en el secado para
reducir la carga electrosd_tica
• Rernueva las prendas de la secadora cuando todavia
est_in ligeramente humedas, para evitar el sobre
secado
,Controle que el filtro atrapa pelusa este lirnpio yen su
lugar.
Use suavizante para lubricar las fibras,
• Durante el planchado rode almidon o acondicionador
de telas, en cuellos y punos
_De vuelta las prendas para reducir la abrasion,
• Observe las indicaciones para el cuidado en las
etiquetas de cada prenda.
• Si el encogido es una preocupaciOn, cont/ole el
secado a rqenudo
_Remueva las prendas estando ligeramente bumedas
_Extienda las prendas tdidas a la forma original
• ColOquelas acostadas pa/a cornpleta/ el secado
• No sobreca/gue la secadora.
• Remueva las prendas tan pronto como el ciclo
termine

Cuidado yiimpieza
Limpie la rejilla para pelusas
despues de cada carga
BLANQUEADOR
DETERGENTE
No guarde ni coloque los productos de
lavado encima de la secadora en ning0n
momento Pueden danar el acabado o
los controles_
.'T=_,A'Ja_Ja_L_r_! Para reducir el riesgo de incendio o lesiones graves a
personas o materiales, cumpla con las advertencias bAsicas enumeradas en las
Instrucciones importantes para la seguridad en las paginas 10 y 11, ylas que se
enumeran a continuaci6n
Antes de limpiar el interior de la secadora, desconecte el cable electrico para
evitar riesgos de descargas el6ctricas
No use ning0n limpiador en vaporizador cuando limpie el interior de Ja
secadora_ Pueden desprenderse vapores peligrosos o producirse descargas
eJ6ctricas
Interior
• Limpie la rejilla para pelusas despu6s de cada carga. La acumulaci6n de
peJusas en la rejilla limita el paso de aire, Io que hate que los tiernpos de
secado sean mAs largos. La rejilla se encuentra en Ja parte inferior de la
abertura de Ja puerta_ %quela jaJando hacia arriba Saque las pelusas y vuelva
a colocar la rejilla
De vez en cuando puede formarse una acumulaci6n de cera sobre la rejilla
causada por el uso de hojas de suavizante en la secadora_ Para eliminar esta
acumulaci6n, lave la rejilJa para peJusas en agua jabonosa y caliente_ S6queJa
bien y vueJva a coJocarla en su lugar No ponga Ja secadora en marcha sin la
rejiJJa para pelusas en su Jugar.
• Si el tambor de la secadora tiene manchas de ropa de colores, Ifmpielo con un
paBo h0medo y un limpiahogar Ifquido suave Limpie el residuo de Jimpiador
antes de secar la siguiente carga
Cada 18 meses un t6cnico de servicio autorizado debe limpiar el interior de la
envoltura de la secadora yel conducto de salida Estas a'reas pueden acumular
pelusas y poJvo con el tiempo_ Una cantidad excesiva de pelusas puede causar
un secado deficiente y un posible riesgo de incendio
Exterior
• Limpie [a envoltura con un jab6n suave y agua No use nunca limpiadores
asperos, granulados oabrasivos,
• Si la envoltura se mancha, limpie con lejia diluida [1/2taza (120 mL) en 1 cuarto
de gal6n (0,95 L) de agu4 Enjuague varias veces con agua limpia_
• Elimine el residuo de pegamento de la cinta o las etiquetas con una mezda de
agua caJiente y detergente suave. O bien, toque el residuo con el Jado pegajoso
de Ja cinta o etiqueta
•Antes de mover la secadora, coJoque una tira de cart6n o lamina deJgada de
fibra debajo de Jas patas deJanteras niveJadoras para evitar darhar el piso
14

Evitar Ilamadas de servido
Antes dellamar paraobtenerservicio, examineestalista_ Puedeahorrarletiempoydinero Estalistaincluyelosproblemascomunes
que no son el resultado de una fabrication o materiales defectuosos de esta secadora
PROBLEMA CAUSA POSIBLE SOLUCION
La secadora no se porte El cable _q(_ctricono est_ bien enchufado o el Aseg_rese de que el enchufe est6 bion encajado en _,1
en marcha enchufe puede estar flojo, tomacorrientes de la pared,
El fusible de la casa se ha fundido o el disyuntor Prenda el disyuntor o cambie el fusible.
se ha disparado. AsegOrese de que la Iinea ek:,ctdca no este sobrecargada y de
que la secadora este en un circuito separado.
El disyuntor de seguridad para la temperatura Llame al t_cnico autorizado de servicio para que Io cambie.
se ha disparado,
La secadera se pone en Flay 2 fusibles dom_sticos en el circuito de la Cambie el fusible.
marcha pero no cafienta, secadora. Si I de los 2 fusibles se ha fundido, el
tambor puede girar pero el calentador no
funciona.
La v_lvula de entrada de gas no est_ abierta Compruebe que la valvula de entrada est_ abierta. Vea las
(modelos de gas). INSTRUCCIONES PARA LA INSTALACION para saber como
hacerlo.
La secadora no tiene una cantidad suficiente Vea las INSTRUCCIONES PARA LA INSTALACION.
de aire de entrada para el quemador de la llama
(modelos de gas).
La bombona de gas est_ vada o ha habido un Llene o cambie la bombona.
torte en el uministro de gas natural (modelos
de gas), La secadora debera secar cuando regrese el suministro de gas
El tide de secado es La rejilla para pelusas esta obstruida con Asegurese de haber quitado las pelusas de la rejilla para pelusas
demasiade lento, et exterior pelusas de la secadora antes de comenzar cada ciclo,
de la secadora est_
demasiado caliente o huele No se han cumplido los requisitos para el El conducto de salida debe tenor como minimo 10 cm (4
cafiente, conducto de salida, pulgadas) de diametro y debe estar hecho de metal rigido o
flexible
Una vez colocado, el conducto de salida no debe tenor m_isde
dos dobleces de 90° y no debe sobrepasar la Iongitud indicada en
las INSTRUCCIONES PARA LA INSTALACION.
La secadora electrica esta conectada a un El tiempo de secado sera un 20% mas largo que el secado hecho
circuito de 208 voltios, con un circuito de 240 voltios.
No se hart seguido las procedimientos de Vea los Procedimientos para el secado en la p_gina 12.
secado.
La campana de salida exterior o el conducto de Limpie la obstrucci6n.
salida pueden estar taponados o semi
obstruidos.
Mucha humedad, Use un deshumidificador cerca de la secadora.
Arrugas excesivas, La secadora esta sobrecalentada. No la sobrecargue. Vea los Procedimientos para el secado en
la pagina I2.
Las prendas se ban dejado demasiado tiempo Saque las prendas tan pronto como termine el cido.
en la secadora.
Distribuci6n insuficiente de las prendas. Vea los Procedimientos para ef secado en la pagina 12.
Temperatura de secado demasiado alta, Siga las instrucciones de la etiqueta de la prenda.
Arahazos o descascariflado
del acabado del tambor. Objetos extranos como monedas, alfileres,
pinzas o botones dentro de la secadora.
Accesorios permanentes como hebillas de
dnturones, cremalleras y cierres pueden estar
golpeando el interior del tambor,
Saque siempre los objetos extranos de los bolsillos antes de lavar
la prenda, Saque los objetos del tambor y ponga la secadora en
marcha de nuevo,
Puede set necesario envolver bien un pedazo sobrante de tela
alrededor de los adornos antes del secado para evitar los
aranazos y danos a la secadora,
Los dahos a/ tambor causados per objetos extrahos o
accesorios permanentes no est&n cubiertos per la garanda.
15

Other manuals for Kenmore 417 Series
1
Table of contents
Languages:
Other Sears Dryer manuals