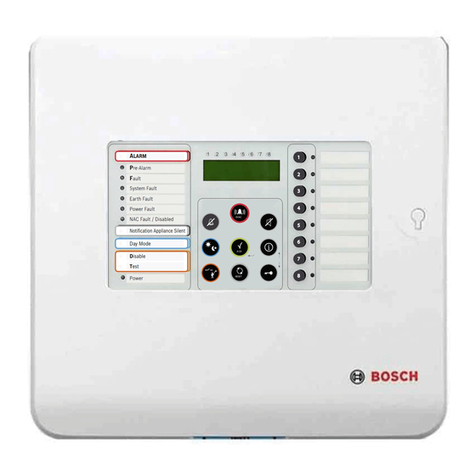
SECOLink P16 User manual

Wiring manual
Intruder alarm system SAFETY WARNINGS
The device must be installed in a place with limited access.
Pleaseactaccordingtoyourlocalrulesanddonotdisposeofyourunusablealarmsystemoritscomponents withotherhousehold
waste.Thisproduct utilizationinEUiscoveredbyEuropeanDirective 2002/96/EC.
ThedevicemustbeconnectedtoanACpowersupplywithProtectiveEarthing.Cablecoloursmean:PhaseorLiveline(L)- black
or brown cable, Neutral line (N) - blue cable, Protective Earth line (PE) - green cable with a vertical yellow dash. Double isolated
2
cableswithminimumcross-sectionalareaof 0,75mm for230Vpowersupplymustbeused.
Thedeviceusestwopowersupplies:mainandback-up.
2V,7Ah/20HRcapacity,rechargeablehermeticallysealedLead-Acidbattery.
Mainpowersupply:a power transformer with:
-primarywinding:~230V,50Hz;
-secondarywinding:~20V,1.5A,50Hz.
Back-uppowersupply:1
SECOLINKintruderalarmsystem iscompliantwith EN60950-1safetyrequirements.
PowersuppliesdescribedabovemustcomplywiththeEN60950-1safetyrequirements.
All devices being connected with the alarm system (sirens, detectors, computer for programming and etc.) must comply with
EN60950-1safetyrequirements.
Additional automatic Two-Pole Circuit Breaker should be installed in an AC electric power circuit in order to protect against
over-current,shortcircuitsandearthingfaults.
Thecircuitbreakercontactgapshouldbenolessthan3mm,protectivecircuitbreaker currentmustbe in 0,5A-2A range .
Thecircuitbreakershouldbeplacedclosetothesystem'shousingandshouldbeeasilyaccessed.
Beforeperforminganyworkofinstallationorservice always disconnect thedevice frompowersuppliesinsequenceasdescribed
below:
- cut off 230VACpowerlinewiththeautomaticTwo-poleCircuitBreaker;
- disconnect12Vback-upbatterybyremovingbatteryfemaleplugfromControlPanelmalesocketBAT.
Two-poleCircuit-Beakerinstallationonflexiblecablesisforbidden.
Generalsafetyrequirements:
-donottouchanypartofthemainpowersupplyundervoltage:transformer,afuseblock,connectionwires;
-itisforbiddentoperformanydeviceinstallationorserviceworkduringlightning;
-usebatteriesaccordingtomanufacturerrecommendations.Theuseofimproperbatterytypemaycauseanexplosion;
- besurebatteryterminalsareisolated,batteryterminalsshort-wiring maycauseanexplosion.batteryreplacement:
Itisnotrecommendedtoconnectthedevicetoafullydischargedbattery.
Inoperativeorexpiredbatteriesshouldberecycledaccordingtothelocalrulesor EUdirectives 2006/66/EC and 93/86/EEC.
Collectionandseparateutilizationofwastebatteryismandatory!
Toavoidsystemmalfunctionuseanadequatechargerto
chargeanewordischargedbatterybeforeconnectingbatterytothe device.
Theconnectiontothemainssupplymustbemadeasperthelocalauthoritiesrulesandregulations.
The end of a stranded conductor shall not be consolidated by soft-soldering, insulated pins shall be used. Insulated pins shall be
connectedinamannerthattheyareandwithremainmechanicallyefficient.
Power supply distribution board
Automatic two-pole
circuit breaker
L N
NL
Cable from power
distribution board
Power cable to the
alarm system
The PSTN communicator PSTP terminals TIP, RING, T-1, R-1 should be connected to analog PSTN line. Connection to digital
ISDN line may cause device damage.
The device installation and service should be performed by trained personnel with sufficient knowledge about the device and
general safety requirements for work with low voltage (up to 1000V) AC power lines. In the case of a device malfunction repair
works can be performed by qualified personnel only. If the system is malfunctioning, the end user should inform the qualified
personnelassoonaspossible.Userdoesn'thaverighttorepairthesystem.
Page 1
Control Panels P16, P32, P64
Cabinet of the alarm system (device)
Picture 1. Automatic two-pole circuit breaker and power cable wiring diagram
Alarmsystemmodulescomeswithin-built LEDindicator.LEDblinkswhenmoduleispoweredup.Anoptiontocheckisthesystem
ispoweredupornotcanbeapressofanykeyonkeypad.Ifsystemwaspoweredupthekeypadbacklightwilllastfor30seconds.
LAN800and VIDNETare designedtobe usedincouple witharouter whichisplaced inthesame room orpremises.It’sprohibited
toconnectLAN800orVIDNETdirectlyto WideAreaNetwork(MAN,WAN)orbuildingITinfrastructurecables.

DAT
COM
+12V
CLK
3.15A
P16
P32
P64
COM
+BELL
DAT
+AUX
CLK
COM
-PGM
+PGM
COM
Z2
Z6 +AUX Z7 COM Z8
Z1
ANT
R-1
T-1
RING
TIP
PSTP
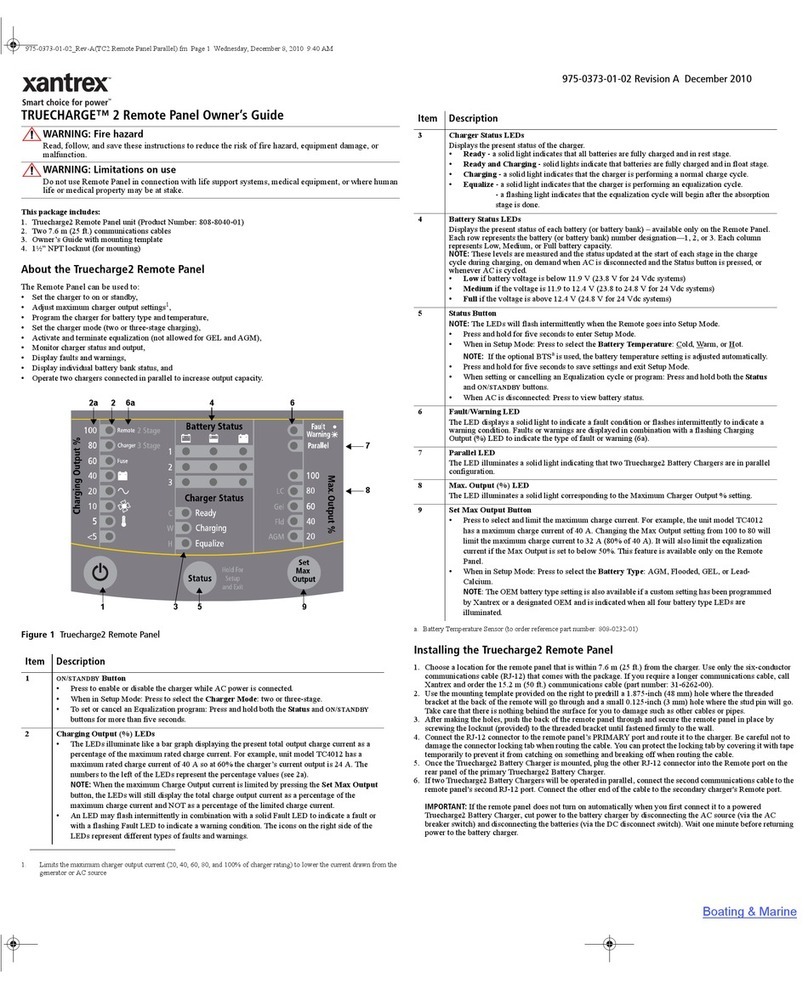
For correct operation P series control panels
P16, P32, P64 (abbreviation: Pxx) needs one
12V 7Ah rechargeable battery. The battery is
used as a back-up power supply in case of
temporal ACloss.Thisbatteryis also usedwhen
alarmsystemconsumesmorepowerthancontrol
panel can supply. Excessive consumption may
happen when system activates siren or radio
transmitter. Usually activation last only few
minutes,soitdoesnot dischargethebattery.
Power supply
distribution board
AC power transformer:
Primary winding: 230V AC 50Hz
Secondary winding: 20V AC 50Hz
~~
12V battery
7Ah/20HR Black
Red
Installation of control panel
Live
wire
L
Neutral
wire
N
Protective
Earth wire
PE Fuse
250mA
+BELL
COM
Intruder alarm system
Page 2
Picture 2. Wiring of power supply, PSTN line and siren without battery
Picture 4. Installation of 2 wire type siren. Siren uses back-up battery
Note: in case installation uses 2 wire siren with back-up
battery (picture 4) installer needs to make changes as
showedontheright.Thistypesirensusesback-upbattery
to sound alarm and makes alarm when power supply line
(+BELL) do not provide power from control panel. Use
Inversion of Status PGM attribute to program system for
thisoperation.Programming sequence on the right.
System Setup:
PGM Outputs
Service Mode:
System Setup
Definition
Fire/BurgAlarm
O01
Attributes
+InversionOfS
O01
S
power supply
positive control / power supply
Note: check siren wiring manual from manufacturer.
Switchesorjumperscanbeused tosetupthistypesiren.
Note: in most templates +BELL is set for sirens with no
battery (picture 2). To use the siren with back-up battery
(picture 3) you need to change +BELL(O01) definition to
Power supply. Definition changing sequence is showed
ontheright (exampleforKM20Bxkeypad).
System Setup:
PGM Outputs
Service Mode:
System Setup
Definition
Power Supply
O01
If adirect connection of the control panel PGM output -PGM to siren
triggering input S does not ensure astable siren activation, please
connect the pull up resistor (3 - 15 kOhm) between the +BELLand -
PGMasshowninthepicture.
+BELL
COM
-PGM
10kΩ
S
power supply
negative control
power supply
Picture 3. Installation of 3 wire type siren. Siren uses back-up battery
Wiring manual
SECOLINK security systems are supplied to customers with a pre-installed
template in the keypad memory. The template is a set of most frequently used
system settings. During First start procedure keypad sends these settings to
other modules. When First start is completed the system will be set to
1partitionand 8 zones:
Z1ispresettobeusedwithaentrydoormagneticcontact;
Z2- with PIRmotiondetectorinentry/exit path;
Z3,Z4- forPIRdetectorswiring;
Z5- withsmokedetector;
Z6-forcabinettamperswitchwiring;
PGMoutputs:
+BELL(O01)ispresetinthetemplatetocontrolasirenwithnobattery;
-PGM (O02) is preset to make activation (makes “minus”) of siren with back-
upbattery;
+PGM(O03) is preset tomake+12V power supply forsmokedetectors.
Template. Siren output programming
SECOLINK security systems may have different templates for different
countries. Check keypad sticker for a country prefix or pre-installed template
code. Example: KM20B_MY
Main Protective
Earthing terminal
Attention!
Do not cover ventilation
holes of cabinet!
Mounting modules in
cabinet
Service Mode:
System setup
System setup:
Modules:
Use Tamper
Settings
No
M00
Modules
Use a tamper switch to protect control panel
Securing power cable
to cabinet
Zones (see "Zone wiring")
+PGM
COM
+12V CLKDAT COM
CLK
DAT
+AUX
Module
-PGM
Main Protective
Earthing terminal
Protective Earth
wire PE
Analog PSTN
line
Control Panels P16, P32, P64
TIP RING T-1 R-1
Serial port SERIAL (see "Wiring of system modules”)
+AUX Z3 COM Z4 -Z5F +Z5F
COM
+BELL
-PGM
Z3
Z4
-Z5F
+Z5F
Z6
+AUX
Z7
COM
Z8
COM
+AUX
20VAC COM -PGM +PGM COM CLK DAT +AUX Z1 COM Z2+BELL
20 VAC
20 VAC
20VAC COM -PGM+BELL
+BELL
COM
COM
+BELL
-PGM
20VAC COM -PGM+BELL
20 VAC
Leave minimum 10 cm of free
space between the ventilation hole
and any other surface. Heating of
controlpanelcanreducemaximum
currenton+AUXandPGMoutputs:
+BELL,+PGM.
By default control panel zone Z6 is set for detection of alarm system
cabinet opening. Opening the cabinet when system is disarmed will
makeatroubleevent or willtriggeranalarm if system is armed. When
cabinet’stamperis unused, input Z6canbeset asnormalzone.
How to set by using
keypad KM20Bx:
Plastic box
Board
Pxx
Screw
Z6
AUX
Z7
COM
Z8
+Z5F
+Z5F Z6 +AUX Z7 COM Z8
SERIAL port
+13,8 V
COM
RX-DAT
TX-CLK
Use plastic component to
fastenpowercabletocabinet.
Boards of control panels and
modules have to be fastened in
plastic cabinet by using screws.
Module's mounting holes should
correspond to cabinet's rear wall
holes.
Attention!Consumed by radio
transmitter short time current
should not exceed 3A. Control
panel supply current to this
connector with not full electronic
short-circuit protection. In case
of long term high current PCB
damageispossible.

Maximum battery charging current: 0,35A
Module disconnect battery when it’s
voltage less than: 9,5V
Black
Red
12V battery
7Ah/20HR
3.15A
COM
+BELL
20VAC COM -PGM+BELL
System start-up with no 230V AC power
Connect 12V battery with P
seriescontrol panel by using
a BAT connector. Use the
jumper to close the shown
pins for 1 second.The
system will start operating;
howeverAC loss trouble will
beindicated.
Jumper
Keypad mounting
Keypad
Use only self-tapping screws with flat
(countersunk) head (3x30 PH) to mount keypad’s
plasticonthewall.Makesurethescrewisscrewed
completely and screw head hides in the plastic.
Other shape screws or not completely screwed
screws may touch keypad electronics and cause
damageof keypad.
Wiring manual
Intruder alarm system
Maximum current out of +AUX:
Maximum battery charging current:
1,5 A
2A
+1 A
+0,35 A
Maximum load ratings and electrical characteristics
of P series control panels
Maximum current out of +BELL:
Maximum current out of +PGM for P16:
Maximum current out of +PGM for P32, P64:
+2,0 A
+0,5 A
+0,9 A
Control panel disconnect battery when it’s voltage less than: 9,5 V
Minimum AC voltage on 20 VAC:
Note: with ~16 V on 20 VAC max DC current generated by
control panel power supply is 0,7A.
Maximum current of fast blowing fuse used in battery circuit:
~16 V
3,15 A
Maximum AC voltage on :
Note: higher than V voltage can damage control panel
20 VAC
~22 .
Maximum voltage on +AUX, +BELL, +PGM outputs:
Minimum voltage on +AUX, +BELL, +PGM outputs:
~22 V
+13,9 V
+12,0 V
Maximum current of slow blowing fuse used in primaryAC:
Maximum AC power consumption:250 mA
150 mA
Maximum long term output current of P16 control panel:
(I + I + I + I 1,5 A )
+AUX +BELL +PGM BAT. CHARGE
Maximum long term output current of P32, P64 control panel:
(I + I + I + I 2 A )
+AUX +BELL +PGM BAT. CHARGE NowservicePINisrestoredto0000valueandsystemwithenabledservice
mode.ToresetuserPINfollowthesteps:
donotblockservice bypressingENT;
pressarrowkeytonavigateinmenu;
go to: Main Menu/Settings/Users/Edit Users/ enter 0000 /Reset PIN to
default/YES
Restoring service PIN to default value
Electrical characteristics and additional information
Live
wire
L
Neutral
wire
N
Protective
Earth wire
PE Wire
Main Protective
Earthing terminal
COM
+BELL
DAT
+AUX
Z1
COM
Z2
CLK
COM
-PGM
+PGM
Maximum current into -PGM: -0,3A
Torestoredefaultvalue(0000)forservicePIN,followthesteps:
disconnectcontrolpanelfrom20VACpowersupply;
disconnectcontrolpanelfromback-upbattery;
makeshortcircuitof -PGM and zone Z1;
connectcontrolpanelto20VACpowersupply.
Calculated life expectancy for P series control panels at 40
ambient temperature: °C
-20°C to +55°COperating temperature range: 12 years
Note: ambient temperature over 40 may reduce life expectancy.°C
Note: poor ventilation of cabinet increase ambient temperature.
Page 3
Control Panels P16, P32, P64
20 VAC
20VAC COM -PGM +PGM COM CLK DAT +AUX Z1 COM Z2+BELL
Fuse
250mA
20 VAC
Maximum long term current out of PWR20:
Maximum current out of +AUX:
2,0A
+1A
Maximum load ratings and electrical
characteristics of PWR20
Maximum current out of +BELL:
Maximum current into -PGM1:+2A
-0,05A
Wiring of modules in large or high security level system
12V battery
7Ah/20HR
Black
Red
Safe wiring of outdoor siren
Use other (than control panel) transformer and
rechargeable 12V 7Ah battery to power up
PWR20.Incase alarmsystem includes PWR20 it
is recommended to wire an outdoor siren to the
PWR20terminals+BELL,-PGM1, (-PGM2), COM
same as shown on page 2. Failure of siren’s
internal battery or the siren itself will not affect
PWR20 – power supply module with bus
repeater
Repetition of system bus is a perfect solution
when some system modules (PROX8, EXTx16)
are placed outside premises or in area not
protected by detectors. It is recommended to wire
to repeated (by PWR20) bus all outside proximity
readers or keypads located near to entry door.
Attempt to make a short circuit on outside module
will make no affect to system performance as
PWR20will detect theshortcircuitonrepeatedbus
and will disconnect repeated bus from main bus.
Terminals CLK-I, DAT-I are inputs for main bus,
terminals CLK-O and DAT-O are outputs of
repeatedbus. For powersupply modules mustuse
PWR20output +AUX.
Live
wire
L
Neutral
wire
N
Protective
Earth wire
PE
Power supply
distribution board
Main Protective
Earthing terminal
Module address LED
Low battery indicator
Battery charging on
Overload of +BELL or + AUX.
X1
BAT
OVL
CHG
LOW
MOD
PWR20
3.15A
Fuse
250mA
AC power transformer:
Primary winding: 230V AC 50Hz
Secondary winding: 20V AC 50Hz
~~DAT-O
CLK-O
COM
+12V
+12VCLK COMDAT
COM
DAT
+12V
CLK
DAT from Pxx
CLK from Pxx
COM from Pxx
+BELL
COM
-PGM1
TMP
COM
+AUX
CLK-I
CLK-O
DAT-I
DAT-O
20 VAC
DAT-O
CLK-O
COM
+12V
+12VCLK COMDAT
COM
DAT
+12V
CLK
+BELL
~20VAC COM-PGM1TMP COM +AUXCLK-ICLK-O
DAT-IDAT-O
Module
(I + I + I 2 A )
+AUX +BELL BAT. CHARGE

3.15A
P16
P32
P64
COM
+BELL
DAT
CLK
COM
-PGM
+PGM
Wiring of system modules Wiring manual
Wiring of system modulesWiring of system modules
Page 4
KM24, KM24A, KM24G
KM20B, KM20BT
COM
+12V
+12V
COM
CLK
DAT
Z2
Z1
DAT
CLK
COM
+AUX
CLKDAT
+12VCOM
+12V Z1
Z2 COM
Z2/PGM
Z1
+12V
COM
CLK
DAT
COM
CLK
DAT
+12V
Z1
PGM
Z2
+AUX
COM
CLK
DAT
KRbus
EXM800
Z1 COM Z2K7 Z3K6 Z4K5 Z5K4
COM
Z1
COM
Z2/K7
Z3/K6
COM
Z4/K5
Z5/K4
DAT
COM
CLK
+12V
Z6K3 Z7K2 Z8K1
COM COM +AUX
COM
Z6/K3
Z7/K2
COM
Z8/K1
+AUX
Ethernet cable
COM CLK DAT+12V
LAN800
+12V
COM
CLK
DAT
+12VCOM CLK DAT
Intruder alarm system
Control Panels P16, P32, P64
20VAC COM -PGM +PGM COM CLK DAT +AUX Z1 COM Z2 +AUX Z3 COM Z4 -Z5F +Z5F Z6 +AUX Z7 COM Z8+BELL
ANT
OPENOPEN
LOCKLOCK
GSVU
+AUX
+AUX
Z4
-Z5F
+Z5F
Z6
+AUX
Z7
COM
Z8
COM
Z3
COM
Z2
Z1
20 VAC
RING TIP
Not used
PROX8
+12V
COM
CLK
DAT
Modules compatibility with control panels Pxx
KM20B, KM20BT
Module Compatible (firmw.: v.5.030 and +) Not compatible
KM24, KM24A Compatible (firmw.: v.2.051 and +) Not compatible
KM24G Compatible (firmw.: v.3.009 and +)
PROX8 Limited compatibility (firmw.: v.0.10)
Only first 31 users will be able to control the system. Only first
32 zones will be monitored by PROX8 LEDs.
EXM800 Compatible (firmw.: all versions)
Compatible (firmw.: all versions)
Compatible (firmw.: all versions)
Compatible (firmw.: all versions)
Compatible (firmw.: all versions)
Compatible (firmw.: all versions)
Compatible (firmw.: all versions)
EXM3F
RCM800WL
EXT016, EXT216
EXT116S
PWR20
GSVU
GSV6, GSV6T,
GSV6U Compatible (firmw.: from v.1.025)
It is recommended to use GSVUmodule with P series control
panels. GSV6x module is only useful
LAN800
VIDNET Compatible (firmw.: from v.1.42)
Compatible (firmw.: all versions)
P16 P32 P64
BAT
CLK DAT +AUX Z1 COM Z2 +AUX Z3 COM Z4 -Z5F +Z5F Z6 +AUX Z7 COM Z820VAC COM -PGM +PGM+BELL COM
OPENOPEN
LOCKLOCK
CAM2 CAM3CAM4 COM COM COMCAM1 COM
CAM1 CAM2 CAM3 CAM4
P16
P32
P64
VIDNET
Control panels Pxx are designed in the way, that all commonly used modules can be directly plugged-on on the panel board (GSM
moduleGSVU,videomoduleVIDNET).Allothermodules,thatdoesn'thavethedirectinterfacewithapanelmustbeconnectedtodatabus-
KRbus.

Wiring of zones
Normally closed
contact
(NC)
Normally closed
contact with one
resistor
(NC/EOL)
Normally closed
contact with two
resistors
(NC/DEOL)
Normally open contact
(NO)Normally open contact
with one resistor
(NO/EOL)
Normally open contact
with two resistors
(NO/DEOL)
Wiring of single zones
Wiring of double zones
Detector
Control panel or
module Control panel or
module Control panel or
module Control panel or
module Control panel or
module Control panel or
module
+AUX
COM
Z1
COM
Tamper
Z2
Control
panel
+AUX
COM Z2
Detector
Detector
Z1
Cable
Cable
+AUX
COM
Detector
+AUX
COM
Z1
Cable
EXM800
+AUX
COM
Z1
Z2
+AUX
COM Z2
Detector
Detector
Z1
Cable
Cable
+AUX
COM
Detector
EXM800
ATTENTION! Avoid power supply loops
1kΩ620Ω
Control panel
+AUX
COM
Z1
COM
Detector A
T1
T2
NC*
C
Tamper Detector B
T1
T2
NC*
C
Tamper
300Ω
Detector A
Detector B
* - Detector contact must be NC or NO.
Control panel
Correct wiring
Wrong wiring
1kΩ
+AUX
COM
Z1
COM
Tamper
Detector
1kΩ
+AUX
COM
Z1
COM
Tamper
Detector
+AUX
COM
Z1
COM
Tamper
Detector
+AUX
COM
Z1
COM
Tamper
Detector
+AUX
COM
Z1
COM
Tamper
Detector
Wiring samples
Wiring of 2-wire smoke detector
Detector
Control
panel
-Z5F
+Z5F
NO Note: smoke detectors, produced
by different manufacturers, may
have a different terminals layout.
For more information check
detector wiring manual from
manufacturer.
Terminals of smoke detector
To -Z5F
To +Z5F
It is recommended to use diode to
supressvoltage surgesonrelay.
Wiring of relays
Smoke detectors can be triggered by dust. Therefore, to prevent
false alarms, it is recommended to verify the fire alarm. For
verification,theusermustactivatesystemsettingslistedbellow.
Zonesettings:
Zoneaddress:00_5(controlpanelzoneterminals-Z5F,+Z5F);
Zonelooptype:NO/EOL;
Zonedefinition:24hsmoke;
Attributeassignedtoazone:Fireverification;
Resettimemustbeset;
Systemtimessettings:
Detectorsettlingtimemustbeset;
Fireverificationtimemustbeset;
Operation: In order to check the triggered fire detector, the
power supply of the detector has to be turned off and turned on
again. The system turns the -Z5F off for a Reset time. When the
resettimeexpires,thesystemturnsthe-Z5Fonagainandwaitsfor
the detector to settle down (Detector settling time). After that, the
system checks the detector again for a time period set in the menu
under the Fire verification time setting. If the fire detector is
triggeredagain,itmeansthealarmwasreal.
Wiring manual
Intruder alarm system
Control panel or
module
+AUX
-PGM
Control panel or
module
+PGM
COM
T1
T2
NC
C
NO
NO
NO
Control Panels P16, P32, P64
Control
panel
2,2kΩ
Page 5
T1
T2
NC
C
T1
T2
NC
C
T1
T2
C
T1
T2
C
T1
T2
C
+AUX COM Z1 COM+AUX COM Z1 COM
12V CT2 NCT1 12V CT2 NCT1
1kΩ1kΩ1kΩ1kΩ
12V CNCT2T1 12V CT2 NOT1 12V CNOT2T1 12V CNOT2T1
+AUX COM Z1 COM +AUX COM Z1 COM +AUX COM Z1 COM+AUX COM Z1 COM
+AUX COM Z1 COM
CNC*12V T2T1 CNC*T2T112V
D1
NCNC NONO
Relay
D1
NCNC NONO
Relay
+AUX -PGM+PGM COM
2,2kΩ2,2kΩ
-Z5F +Z5F

Wiring manual
Intruder alarm system
Control Panels P16, P32, P64
Page 6
Typical system installation example - SECOLINK P16, P32
Installation of GSVU module and PSTP
communicator
P16, P32, P64
GSVU
PSTP
3.15A
P16, P32, P64
20VAC COM -PGM +PGM COM CLK DAT +AUX Z1 COM Z2 +AUX Z3 COM Z4 -Z5F +Z5F Z6 +AUX Z7 COM Z8+BELL
ANT
3.15A
+AUX
COM
Z2
Z6 +AUX Z7 COM Z8
ANT PSTP
TIP RING T-1 R-1
20VAC COM -PGM +PGM COM CLK DAT +AUX Z1 COM Z2 +AUX Z3 COM Z4 -Z5F +Z5F+BELL
OPENOPEN
LOCKLOCK
GSVU
P16, P32, P64
If the system must be expanded with other modules, that doesn't have
direct connection with control panel (for example LAN800), it could be
installed next to the panel board. Crosses and dashed line present
commonly used locations of modules. Module's mounting holes should
correspondtocabinet'srearwallholes.
Installation of control panel and GSM/GPRS or LAN module
Installation of modules in CAS6 plactic cabinet
+12VCOM CLK DAT
RING TIP
BAT
CLK DAT +AUX Z1 COM Z2 +AUX Z3 COM Z4 -Z5F +Z5F Z6 +AUX Z7 COM Z820VAC COM -PGM +PGM+BELL COM
KM20B
LAN800
P16
KM24
PROX8 PROX8
BK1, BK3, BK4,
BV3, BT1 LT5
BP1
12V battery
7Ah/20HR
OPENOPEN
LOCKLOCK
GSVU
P16, P32, P64
LAN800

Wiring manual
Intruder alarm system
Control Panels P16, P32, P64
Typical system installation example - SECOLINK P64
Plastic cabinet CAS6 has few plastic components for power cable
fastening,videocablelockingandbottomcoversifvideomodule VIDNETis
notused.Locateplasticcomponentsin the bottom of plasticcabinet andcut
themwithacutter.
SafetywarningincasealarmsystemusesLAN800orVIDNETmodules!
LAN800 and VIDNET are designed to be used in couple with a router which is placed in the same room or premises.
It’s prohibited to connect LAN800 directly to Wide Area Network (MAN, WAN) or building IT infrastructure cables.
RouterRouter
Plastic components Assigning a remote control unit to the user
OPENOPEN
LOCKLOCK
CAM2 CAM3CAM4 COM COM COMCAM1 COM
CAM1 CAM2 CAM3 CAM4
+12V
COM
CLK
DAT
+12VCOM CLK DAT
RING TIP
LAN800
VIDNET
Receiver
Cover
Video cable
locking
component
Covers
CAM2 CAM3 CAM4
Wiring manual
Intruder alarm system
Control Panels P16, P32, P64
Typical system installation example - SECOLINK P64
Plastic cabinet CAS6 has few plastic components for power cable
fastening,videocablelockingandbottomcoversifvideomoduleVIDNETis
notused.Locateplasticcomponentsin the bottom of plastic cabinetand cut
themwithacutter.
SafetywarningincasealarmsystemusesLAN800orVIDNETmodules!
LAN800 and VIDNET are designed to be used in couple with a router which is placed in the same room or premises.
It’s prohibited to connect LAN800 directly to Wide Area Network (MAN, WAN) or building IT infrastructure cables.
RouterRouter
Plastic components Assigning a remote control unit to the user
OPENOPEN
LOCKLOCK
CAM2 CAM3CAM4 COM COM COMCAM1 COM
CAM1 CAM2 CAM3 CAM4
+12V
COM
CLK
DAT
+12VCOM CLK DAT
RING TIP
LAN800
VIDNET
Receiver
Cover
Video cable
locking
component
Covers
CAM2 CAM3 CAM4
COM
Locking
component
Page 7
BAT
CLK DAT +AUX Z1 COM Z2 +AUX Z3 COM Z4 -Z5F +Z5F Z6 +AUX Z7 COM Z820VAC COM -PGM +PGM+BELL COM
OPENOPEN
LOCKLOCK
CAM1 CAM2 CAM3 CAM4
P64
VIDNET
PROX8 PROX8
BK1, BK3, BK4,
BV3, BT1 LT5
BP1
KM24GKM24G
+12V
COM
CLK
DAT
+12V COM CLK DAT
Module LED
EXM800
CAM1CAM2 CAM3CAM4 COM COM COMCOM
Wiring manual
Intruder alarm system
Control Panels P16, P32, P64
Typical system installation example - SECOLINK P64
Plastic cabinet CAS6 has few plastic components for power cable
fastening,videocablelockingandbottomcoversifvideomodule VIDNETis
notused.Locateplasticcomponentsin the bottom of plasticcabinet andcut
themwithacutter.
SafetywarningincasealarmsystemusesLAN800orVIDNETmodules!
LAN800 and VIDNET are designed to be used in couple with a router which is placed in the same room or premises.
It’s prohibited to connect LAN800 directly to Wide Area Network (MAN, WAN) or building IT infrastructure cables.
RouterRouter
Plastic components Assigning a remote control unit to the user
OPENOPEN
LOCKLOCK
CAM2 CAM3CAM4 COM COM COMCAM1 COM
CAM1 CAM2 CAM3 CAM4
+12V
COM
CLK
DAT
+12VCOM CLK DAT
RING TIP
LAN800
VIDNET
Receiver
Cover
Video cable
locking
component
Covers
CAM2 CAM3 CAM4
COM
Locking
component
Page 7
BAT
CLK DAT +AUX Z1 COM Z2 +AUX Z3 COM Z4 -Z5F +Z5F Z6 +AUX Z7 COM Z820VAC COM -PGM +PGM+BELL COM
OPENOPEN
LOCKLOCK
CAM1 CAM2 CAM3 CAM4
P64
VIDNET
PROX8 PROX8
BK1, BK3, BK4,
BV3, BT1 LT5
BP1
KM24GKM24G
+12V
COM
CLK
DAT
+12V COM CLK DAT
Module LED
EXM800
CAM1CAM2 CAM3CAM4 COM COM COMCOM
Video jungties
fiksatoriai
12V battery
7Ah/20HR
Analog camera (resolution D1)
Power cable
fastening
component
Simultaneosly hold down the buttons and
.
Message Done should appear on keypad
LCD when remote control unit is enrolled
succesfully.Releasebuttons and .
Advance to the next user with a keypad keys
or .
7
PQRS
7
PQRS
7
PQRS
7
PQRS
7
PQRS
7
PQRS
7
PQRS
7
PQRS
7
PQRS
7
PQRS
7
PQRS
ChooseNewRCUandpress button.
ENTENTENTENTENTENTENTENTENTENTENT
11
MainMenu
Settings
22
22
Settings
Users
Users
Edit users
U01 User 01
Controls NewRCU
66
Waiting...
Done
U01 User 01
Name User 01
11

Wiring manual
Control Panels P16, P32, P64
Intruder alarm system
Page 8
SECOLINK wireless detectors
11
Service mode
System setup
Enable wireless zone by changing Not used loop
type to any other loop type. If system uses keypad
produced before 2014 installer obliged to change
thelooptypetotheNO/DEOLorVibration.
Advance to the next unlearned zone with a keypad
keys or .
7
PQRS
7
PQRS
7
PQRS
7
PQRS
7
PQRS
7
PQRS
7
PQRS
7
PQRS
7
PQRS
7
PQRS
7
PQRS
11
Z01 Door
Name Door
33
System setup
Zones
Z01 Door
Looptype NO/DEOL
33
Z01 DoorZ01 Door
WLdet.loop(zone)IDWLdet.loop(zone)ID 201
44
Z01 Door
Address 06_1
33
Enter zone address MA_Z, where MA is module
addressinsystemandZiszonenumberinmodule.
Note: for wireless zones MA_1 – MA_8 system
automatically will assign NO/DEOL loop type and
for wireless zones MA_9 – MA_16 the Vibration
looptype.Don'tchangethelooptypeofzone!
Moduleaddress:
EXT116S - address 06 (default) or given during
registrationprocedure;
Virtual module EXT116S address depends on
controlpaneltype:
P16-address12;
P32-address12and13;
P64-address12,13,14and15.
Enter wireless detector loop (zone) ID number and
press key to start enrolling.Use also this field for
deletingthesensorfromthemodule.
ENTENTENTENTENTENTENTENTENTENTENT
Whenenrollment is started, immediately,for a short
timepresstamperswitch:
BKx, BT1, BV3: press the detector battery as
showninpicturethanyouwillfeelaclick.Thisaction
activates the tamper switch on back side of the
detector.
BP1: press the tamper switch as shown in picture
thanyouwillfeelaclick.
Waitingfor
WLdetector
Done If the wireless detector is successfully enrolled, the
messageDonewill appearonscreen. No additional
transmissionsareneededforconfirmation.
BK1
BK4
Supports Wireless detector loop (zone) ID number
Built-in reed switch
(used in conjuction
with a magnet)
200
255
Normally closed
circuit contact loop
wired to ...
Roller detector
loop wired to ...
Vibration detector
loop wired to ...
BK3
BK4
210
211
111
Input 1
Input 1
220
221
121
Input 2
Input 2
230
231
131
Input 3
Input 3
212 222 232
213 223 233
215 225 235
217 227 237
219
...
119
229
...
129
239
...
139
Zone response (speed) time of 0,4 sec.
211-lastdigitdefinesthenumberofRollerpulses.
111-lastdigitx10definesthezoneresponse(speed)
time(example:1x10=10msec).
Built-in
temperature
sensor BT1
BK3
BV3
BK4
Input 1 Input 2 Input 3
BV3
Delete detector
in particular zone
Delete all
detectors
in particular
wireless module
All
All
201
254
BP1
Passive infrared
sensor
(PIR sensor)
180
Built-in
temperature
sensor
181
BP1
Enrolling the wireless detector to the system zone
Use
Wireless detector loop (zone) enrolling ID numbers
Rev.19/01/16
This manual suits for next models
2
Table of contents
Other SECOLink Control Panel manuals
