Seeley MaglQtouch Installation instructions

INSTALLATION AND OWNER MANUAL
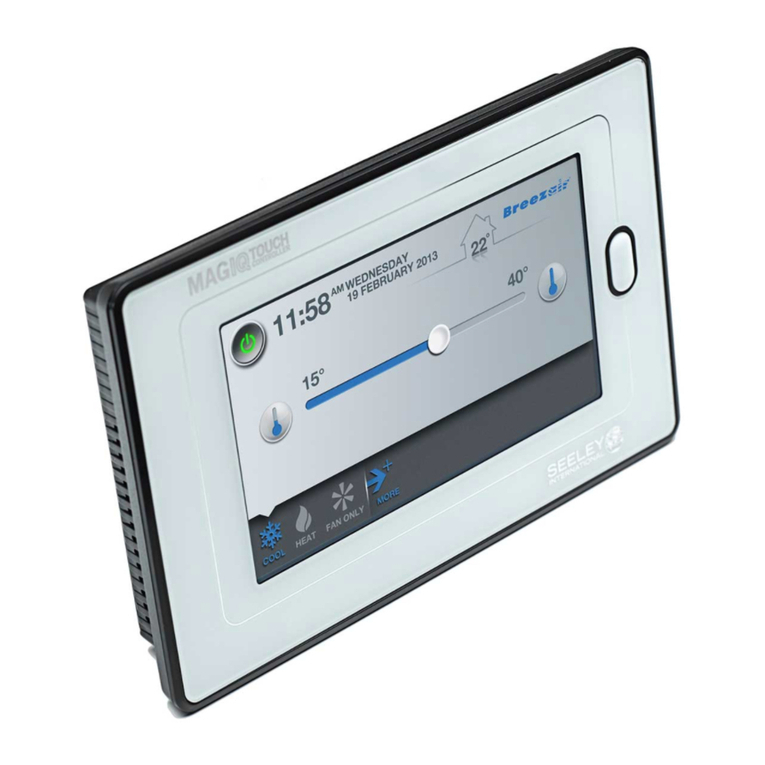
MaglQtouch WIRELESS Smart Controller
Original English Instructions


MagIQtouch Controller INSTALLATION MANUAL | i
TABLE OF CONTENTS
MagIQtouch Wireless Smart Controller
KIT CONTENTS
Item Qty Description
A 1 MaglQtouch Wireless Smart Controller
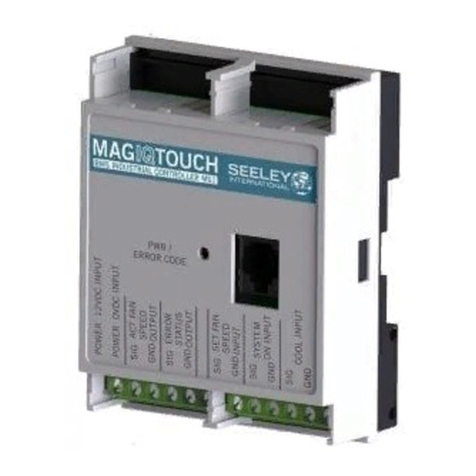
B 1 MagIQtouch Wireless Receiver
C 4 AA Batteries
D 1 Install & Operation Manual
E 2 Screw PAN PHIL 6AB*1” ZP
F 2 Wall Plug Yellow 5mm
Item A
ItemB
Item C Item D
SAFETY
Responsibilities 1
Risk Assessment 1
Warnings 1
FCC Compliance 2
MOUNTING THE MAGIQTOUCH
WIRELESS CONTROLLER
Location 3
Mounting the Controller 4
MOUNTING THE
MAGIQTOUCH WIRELESS
RECEIVER 7
Heater Installation 7
Heater With Zones 8
Cooler Installation 9
Mounting the Receiver 9
COMMISSIONING
Connecting the Receiver 11
Pairing 11
Pairing Additional Controller 13
WIRELESS CONNECTION
MAINTENANCE 15
Wireless RF Signal Range 18
CONTROLLER OR SYSTEM
RESET 19
2X Controllers Connected 20
SUPPORT 23
USER GUIDE 25
GENERAL TIPS 27
REPLACING THE BATTERIES 27
QUICK START 28
SLEEP MODE 29
WIRELESS RANGE 30
ADDITIONAL CONTROLLER 33
TROUBLE SHOOTING 35

SAFETY
This document provides technical
guidance on the installation and
operation of the MagIQtouch WI-FI
smart app.
EMPLOYER AND EMPLOYEE
RESPONSIBILITIES
Please read this manual carefully.
Your failure to do so could result in
injury to you or damage to the cooler
and property.
The installation and maintenance
of evaporative coolers at height has
the potential to create Occupational
Health and Safety issues for those
involved. Installers are advised to
ensure they are familiar with Local
Acts, Regulations and Standards,
which may oer practical guidance
on health and safety issues.
Compliance with these regulations will
require appropriate work practices,
equipment, training and qualications
of workers.
INSTALLER AND MAINTENANCE
CONTRACTORS– RISK
ASSESSMENT
Seeley International provides the
following information as a guide to
contractors and employees to assist
in minimising risk whilst working at
height.
A risk assessment of all hazardous
tasks is required under legislation.
A risk assessment is an essential
element that should be conducted
before the commencement of work,
to identify and eliminate the risk of
falls or to minimise these risks by
implementing control measures. There
is no need for this to be a complicated
process, it just is a matter of looking
at the job to be done and considering
what action(s) are necessary so the
person doing the job does not injure
themselves.
This should be considered in terms of:
• What are the chances of an
incident happening?
• What could the possible
consequence be?
• What can you do to reduce, or
better still, completely get rid of
the risk?
WARNINGS!
The MagIQtouch Wireless Smart
Controller and Receiver are to be
installed indoors only, installation
shall only be performed by suitably
trained and qualied personnel, in
accordance with local and national
wiring rules.
This appliance is not intended for use
by persons (including children) with
reduced physical, sensory or mental
capabilities, or lack of experience
and knowledge, unless they have
been given supervision or instruction
concerning use of the appliance by
a person responsible for their safety.
Children should be supervised to
ensure that they do not play with
the appliance. If any cables are
damaged, they shall be replaced by
the manufacturer or its service agent
or similarly qualied person in order to
avoid a hazard.
Stranded conductors shall not be
consolidated by lead-tin soldering
where they are subject to contact
pressure, i.e. on terminal block.
1 |

MagIQtouch Controller INSTALLATION MANUAL | 2
SAFETY
NOTE: This equipment has been
tested and found to comply with the
limits for a Class B digital device,
pursuant to part 15 of the FCC
Rules. These limits are designed
to provide reasonable protection
against harmful interference in
a residential installation. This
equipment generates, uses and
can radiate radio frequency energy
and, if not installed and used in
accordance with the instructions,
may cause harmful interference to
radio communications. However,
there is no guarantee that
interference will not occur in a
particular installation.
If this equipment does cause
harmful interference to radio or
television reception, which can
be determined by turning the
equipment o and on, the user is
encouraged to try to correct the
interference by one or more of the
following measures:
• Reorient or relocate the
receiving antenna.
• Increase the separation between
the equipment and receiver.
• Connect the equipment into an
outlet on a circuit dierent from
that to which the receiver is
connected.
• Consult the dealer or an
experienced radio/TV technician
for help.
FCC COMPLIANCE STATEMENT
This device complies with Part 15 of the FCC Rules. Operation is subject
to the following two conditions: (1) This device may not cause harmful
interference, and (2) this device must accept any interference received,
including interference that may cause undesired operation.

3 |
LOCATION
MOUNTING THE MAGIQTOUCH WIRELESS
SMART CONTROLLER
The MagIQtouch Wireless Smart Controller should be placed approximately
1.5 metres/5’ above the oor, in the most used room of the home.
Placement is critical for correct functioning of the temperature sensing
thermostat inside the Controller.
The following must be taken into consideration:
• Avoid direct sunlight exposure.
• Avoid mounting on external walls.
• Avoid mounting the wall control near heat sources such as stoves and
televisions.
• Do not locate in the direct airow of the duct outlets.
• Do not locate in strong drafts or in dead spots such as cupboards/
drawers.
CAUTION!
Always make sure there are no electrical cables, gas or water pipes, or the
like, behind where you intend to drill.

MagIQtouch Controller INSTALLATION MANUAL | 4
ILL1585-A
ILL1586-B
Step 1
Step 2
Step 3
ILL1584-A
MOUNTING THE CONTROLLER
Remove the mounting bracket from the rear of the MagIQtouch Controller.
MOUNTING THE MAGIQTOUCH WIRELESS
SMART CONTROLLER

5 |
Using the bracket as a template, mark the centre points for the screw and
cable access holes.
Step 4
MOUNTING THE MAGIQTOUCH WIRELESS
SMART CONTROLLER
ILL1587-A

MagIQtouch Controller INSTALLATION MANUAL | 6
ILL2937-A
Insert wall plugs into holes. Align and screw the bracket into position using
the supplied screws.
Step 5
ILL2938-A
Alternatively, a standard stud mounting bracket (used for wall plates) can be
used with plasterboard walls.
MOUNTING THE MAGIQTOUCH WIRELESS
SMART CONTROLLER

7 |
ILL2853-A
HEATER INSTALLATION
We recommend installation of the wireless receiver (Antenna) inside the
ceiling space, as far away from heating/cooling appliances and ductwork as
possible and also as close as practical to the area of the building the remote
controller will be used the most. Therefore, we request that the antenna is
always straightened and pointing towards the remote.
IMPORTANT!
The wireless receiver is not designed to be installed outdoors!
Do not wrap any excess wireless receiver cable around the receiver. Do not
extend the receiver cable.
MOUNTING THE MAGIQTOUCH WIRELESS RECEIVER

MagIQtouch Controller INSTALLATION MANUAL | 8
HEATER WITH ZONES - INSTALLATION
ILL2854-A
MOUNTING THE MAGIQTOUCH WIRELESS RECEIVER

9 |
ILL665-D
ILL670-E
MOUNTING THE WIRELESS RECEIVER
For most installations, mounting the receiver as shown (Fig 1) will provide
satisfactory performance.
A. Metal Roong
B. Wood or Metal Beam
C. Receiver (mount as close as possible to a
metal roof)
Using the communication cable
supplied, connect it to the RJ
socket as shown
12
COOLER INSTALLATION
ILL2855-A
MOUNTING THE MAGIQTOUCH WIRELESS RECEIVER

MagIQtouch Controller INSTALLATION MANUAL | 10
For installations where the roof is framed with steel, resting the wireless
receiver between joists and keeping the antenna as far away as possible
and perpendicular (at right angles) to joists will give the best results. (Fig. 3)
ILL666-E
MOUNTING THE MAGIQTOUCH WIRELESS RECEIVER
3
1 = Hold the receiver at onto the ceiling beam
2 = Fix the screw through the tab
3 = Antenna must be extended horizontally
ILL2940-A
ILL2940-A

11 |
• Factors that may inuence performance are:
• Shielding from metal in the attic laying between the wireless receiver and
the wireless smart controller.
• Reections from metal around the wireless receiver.
• Interference from nearby transmitters (e.g. mobile phone, AM radio,
Television, RF security systems)
Please refer to the installation manual of the heating or cooling appliances
for connecting the 6 pin communication plug from the wireless receiver.
Some manuals may refer to a ‘wired’ wall control conguration. However, the
wireless receiver can be connected in place of the wall control connection
shown in the schematic diagrams.
Fit the 4x AA batteries supplied with the Wireless Smart controller.
ILL2856-A
CONNECTING THE WIRELESS RECEIVER
COMMISSIONING
Step 1
PAIRING
Step 2
Cycle the power to the installation.
NOTE:
Rechargeable
batteries should not
be used.
Only good quality
Alkaline or Lithium
AA batteries to be
used.

MagIQtouch Controller INSTALLATION MANUAL | 12
ILL2858-A
ILL2857-B
COMMISSIONING
Step 4
Follow the on screen instructions to pair the wall control.
ILL1521-C
Step 3
Within 8 minutes of cycling the power, press the home button on the
Wireless Smart Controller to activate it.

13 |
To complete the commissioning please refer to the ‘MagIQtouch Controller -
Installation manual supplied with this kit.
Step 5
When the Wireless wall controller is paired the installation wizard will appear.
The Installation wizard will step you through the complete process.
ILL1610-B
PAIRING ADDITIONAL WIRELESS CONTROLLER
The wireless receiver can communicate with 2x Wireless Smart Controllers
within the system. During normal operation whichever wall controller is used
last will take control of the system.
To pair an additional Wireless Smart Controller commence with the following
steps.
COMMISSIONING
Fit the 4x AA batteries supplied with the Wireless Smart controller.
ILL2856-A
Step 1
NOTE:
Rechargeable
batteries should not
be used.
Only good quality
Alkaline or Lithium
AA batteries to be
used.

MagIQtouch Controller INSTALLATION MANUAL | 14
The additional wireless smart controller is now ready to use.
COMMISSIONING
ILL2861-A
Step 2
Cycle the power to the installation. This will make the Wireless receiver
discoverable for a maxmium of 8 minutes to the Wireless smart controller.
Step 3
Select ‘Additional Controller’ to pair the second Wireless controller.
ILL2859-B
ILL2860-A

15 |
WIRELESS CONNECTION MAINTENANCE
Should the wireless communications require updates or modications in
the system, these can be accessed in the SERVICE section of the Wireless
Smart controllers as follows;
Step 1
Step 2
ILL1623-D
ILL1613-D

MagIQtouch Controller INSTALLATION MANUAL | 16
Step 3
Step 4 Refer to MagIQtouch Wall control install
manual for code.
ILL1625-A
ILL2862-A
WIRELESS CONNECTION MAINTENANCE

17 |
ILL2863-A
ABOUT WIRELESS RECEIVER
Detailed RF signal strength (RSSI) and battery voltage (mV) information is
displayed here.
CHECK/MODIFY WIRELESS CONFIGURATION
All known Wireless smart devices connected to the system will be shown. If
devices are missing the wireless receiver can re-scan for wireless devices
from this conguration screen to maintain the system.
RESET/REMOVE THIS CONTROLLER FROM THE SYSTEM
This option will safely remove a Wireless Smart controller from the system.
WIRELESS RECEIVER REPLACED
In the unlikely event the wireless receiver has to be replaced in the system,
this option will load system conguration stored in the wireless smart
controller to the new wireless receiver.
WIRELESS CONNECTION MAINTENANCE
Table of contents
Other Seeley Controllers manuals
Popular Controllers manuals by other brands

WindowMaster
WindowMaster MotorController WCC 310 Installation instructions manual

Krom Schroder
Krom Schroder GIK Series technical information

Ink Bird
Ink Bird C929-A manual

System air
System air SAVE VTC 500 user manual

Krom Schroder
Krom Schroder IC 50 operating instructions

Emerson
Emerson FloBoss S600+ instruction manual