Seiko Epson TM-L60II User manual
Return to main menu
TM-L60II/L60IIP
Operator’s Manual
Using this online operator’s guide
The words on the left side of this screen are bookmarks for all the
topics in this guide.
Use the scroll bar next to the bookmarks to find any topic you
want. Click a bookmark to instantly jump to its topic. (If you wish,
you can increase the size of the bookmark area by dragging the
dividing bar to the right.)
Use the scroll bar on the right side of this screen to move through
the text.
Use the zoom tools to magnify or reduce the page display.
Click the Find button if you want to search for a particular term.
(However, using the bookmarks is usually quicker.)
Complete online documentation for Acrobat Reader is located in the Help directory for Acrobat Reader.

thermal line printer
TM-L60II/L60IIP
Operator’s Manual
400507202

All rights reserved. No part of this publication may be reproduced, stored in a
retrieval system, or transmitted in any form or by any means, mechanical,
photocopying, recording, or otherwise, without the prior written permission of Seiko
Epson Corporation. No patent liability is assumed with respect to the use of the
information contained herein. While every precaution has been taken in the
preparation of this book, Seiko Epson Corporation assumes no responsibility for
errors or omissions. Neither is any liability assumed for damages resulting from the
use of the information contained herein.
Neither Seiko Epson Corporation nor its affiliates shall be liable to the purchaser of
this product or third parties for damages, losses, costs, or expenses incurred by
purchaser or third parties as a result of: accident, misuse, or abuse of this product or
unauthorized modifications, repairs, or alterations to this product, or (excluding the
U.S.) failure to strictly comply with Seiko Epson Corporation’s operating and
maintenance instructions.
Seiko Epson Corporation shall not be liable against any damages or problems arising
from the use of any options or any consumable products other than those designated
as Original Epson Products or Epson Approved Products by Seiko Epson
Corporation.
EPSON and ESC/POS are registered trademarks of Seiko Epson Corporation.
NOTICE:
The contents of this manual are subject to change without notice.
Copyright © 1995 by Seiko Epson Corporation, Nagano, Japan.

FCC CLASS A
FCC Compliance Statement
For American Users
This equipment has been tested and found to comply with the limits for a Class A
digital device, pursuant to Part 15 of the FCC Rules. These limits are designed to
provide reasonable protection against harmful interference when the equipment is
operated in a commercial environment.
This equipment generates, uses, and can radiate radio frequency energy and, if not
installed and used in accordance with the instruction manual, may cause harmful
interference to radio communications. Operation of this equipment in a residential
area is likely to cause harmful interference, in which case the user will be required to
correct the interference at his own expense.
WARNING
The connection of a non-shielded printer interface cable to this printer will invalidate
the FCC Verification of this device and may cause interference levels which exceed
the limits established by the FCC for this equipment.
You are cautioned that changes or modifications not expressly approved by the
party responsible for compliance could void your authority to operate the
equipment.
FOR CANADIAN USERS
This Class A digital apparatus meets all requirements of the Canadian Interference-
Causing Equipment Regulations.
Cet appareil numérique de la classe A respecte toutes les exigenves du Règlement
sur le matériel brouileur du Canada.
GEREÄUSCHPEGEL
Gemäß der Dritten Verordrung zum Gerätesicherheitsgecsetz
(Maschinenlärminformations- Verordnung-3. GSGV) ist der arbeitsplatzbezogene
Geräusch-Emissionswert kleiner als 70 dB(A) (basierend auf ISO 7779).

DECLARATION of CONFORMITY for CE MARKING
Product Name: Printer
Type Name: M67LA
The printer conforms to the following Directives and Norms
Directive 89/336/EEC
EN 55022 (1986 and 1994) class B
EN 50082-1 (1992)
IEC 801-2 (1991)
IEC 801-3 (1984)
IEC 801-4 (1991)
Directive 90/384/EEC
EN45501: (1992)

DECLARATION of CONFORMITY for CE MARKING
Product Name: Printer
Type Name: M121A
The printer conforms to the following Directives and Norms
Directive 89/336/EEC
EN 55022 (1986 and 1994) class B
EN 50082-1 (1992)
IEC 801-2 (1991)
IEC 801-3 (1984)
IEC 801-4 (1991)
Directive 90/384/EEC
EN45501: (1992)

Introduction
The TM-L60II and TM-L60IIP are compact, easy-to-use printers that can be
employed in the following applications.
❏As a one-station printer with an ECR or POS system
❏Output device for scaling or measuring
❏As a ticket issuing device
The TM-L60II and TM-L60IIP have the following features:
❏Compact, lightweight configuration
❏High-speed printing of 12 lines/second
❏Low-noise thermal printing
❏Durable design for high reliability
❏Easy maintenance and head cleaning
❏ESC/POS®standard command protocol
❏Routing of interface cable, drawer control cable, and power cable in any
direction: sides, underneath, back
❏Repeated operation and copy printing are possible by using macro definitions
❏Built-in interface for 2-drawer control
❏Print and eject label command reduces paper waste
❏Characters can be scaled up to 64 times as large as the standard size. Smoothing
is also possible
❏Bar code printing is possible by using a bar code command. Bar codes can be
printed both in the vertical direction (fence bar code) and in the horizontal
direction (ladder bar code) (effective in page mode)
❏Various layouts are possible by using page mode
❏Serial number printing on label paper
❏Water-resistant control panel
❏Command selection of font sizes (12 x 24, 9 x 24)
❏Four different print densities can be selected by DIP switches
❏Bidirectional parallel interface in accordance with the IEEE 1284 Nibble/Byte
Modes (TM-60IIP)
Please be sure to read the instructions in this manual carefully before using your new
EPSON printer.

About This Manual
I. Setting Up
❏Chapter 1 contains information on unpacking the printer, choosing the place for
the printer, and names and functions of parts.
❏Chapter 2 and Chapter 3 contain information on connecting and setting up the
printer.
❏Chapter 4 contains information on testing the printer.
II. Reference
❏Chapter 5 contains information on using the printer.
❏Chapter 6 contains information on software control including printer command
descriptions.
APPENDIX
Appendixes contain information on general specifications, character code tables
and a list of commands.
CONTENTS
I. Setting Up
Chapter 1 Unpacking the Printer . . . . . . . . . . . . . . . . . . . . . . . . . . . . . . . . . . . 2
1-1 Checking the Contents of the Box . . . . . . . . . . . . . . . . . . . . . . . . . . . 2
1-2 Choosing a Place for the Printer . . . . . . . . . . . . . . . . . . . . . . . . . . . . 3
1-3 Removing the Protective Material . . . . . . . . . . . . . . . . . . . . . . . . . . . 3
1-4 General Guide . . . . . . . . . . . . . . . . . . . . . . . . . . . . . . . . . . . . . . . . . . . 4
Chapter 2 Before Setting Up . . . . . . . . . . . . . . . . . . . . . . . . . . . . . . . . . . . . . . 6
2-1 Connecting the Printer to the Computer . . . . . . . . . . . . . . . . . . . . . . 6
2-2 Connecting the Printer to the Drawer . . . . . . . . . . . . . . . . . . . . . . . . 7
2-3 Grounding the Printer . . . . . . . . . . . . . . . . . . . . . . . . . . . . . . . . . . . . . . 8
2-4 Connecting the Power Supply . . . . . . . . . . . . . . . . . . . . . . . . . . . . . . 9
Chapter 3 Installing the Parts . . . . . . . . . . . . . . . . . . . . . . . . . . . . . . . . . . . . . . 10
3-1 Installing the Roll Paper . . . . . . . . . . . . . . . . . . . . . . . . . . . . . . . . . . . . 10
3-2 Adjusting the Paper-end Detector . . . . . . . . . . . . . . . . . . . . . . . . . . 12
3-3 Setting the DIP Switches . . . . . . . . . . . . . . . . . . . . . . . . . . . . . . . . . . . . 14

Chapter 4 TheSelf Test . . . . . . . . . . . . . . . . . . . . . . . . . . .. . . . . . . . . . . . . . . .17
4-1 Checking Operation with theSelf Test . . . . . . . . . . . . . . . .. .. .. .. .17
II. REFERENCE
Chapter 5 Cautions while Using the Printer . . . . . . . . . .. . . . . . . . . . . . . . . .19
5-1 Panel Buttons and Commands . . . . . . . . . . . . . . . . . . . . . .. .. .. .. .19
5-2 Printable Area and Label Paper Conditions . . . . . . . . . . .. .. .. .. .20
5-3 Miscellaneous Notes . . . . . . . . . . . . . . . . . . . . . . . . . . . . . . .. .. .. .. .22
5-4 Error Correction . . . . . . . . . . . . . . . . . . . . . . . . . . . . . . . . . . .. .. .. .. .24
5-5 Cleaning the Head . . . . . . . . . . . . . . . . . . . . . . . . . . . . . . . .. .. .. .. .26
5-6 TheCover-open Detector . . . . . . . . . . . . . . . . . . . . . . . . . .. .. .. .. .27
5-7 Removing Jammed Paper . . . . . . . . . . . . . . . . . . . . . . . . . .. .. .. .. .27
Chapter 6 Software Control . . . . . . . . . . . . . . . . . . . . . . .. . . . . . . . . . . . . . . .28
6-1 PrinterControl . . . . . . . . . . . . . . . . . . . . . . . . . . . . . . . . . . . .. .. .. .. .28
6-2 CommandDescriptions . . . . . . . . . . . . . . . . . . . . . . . . . . . .. .. .. .. .29
6-3 Commands.. . . . . . . . . . . . . . . . . . . . . . . . . . . . . . . . . . . . . .. .. .. .. .30
APPENDIX . . .. . . . . . . . . . . . . . . . . . . . . . . . . . . . . . . . . . .. . . . . . . . . . . . . . . .92
APPENDIX A General Specifications . . . . . . . . . . . . . . . . . . . . .. .. .. .. .92
APPENDIX B Character Code Tables. . . . . . . . . . . . . . . . . . . .. .. .. .. .97
APPENDIX C Command Summary . . . . . . . . . . . . . . . . . . . . . .. .. .. .. .106
Affixing the FasteningTape(Optional) . . . . . . . . . . . . . . . . . . .. .. .. .. .109

I.
SETTING UP
Chapter 1 Unpacking the Printer
1-1 Checking the Contents of the Box
9
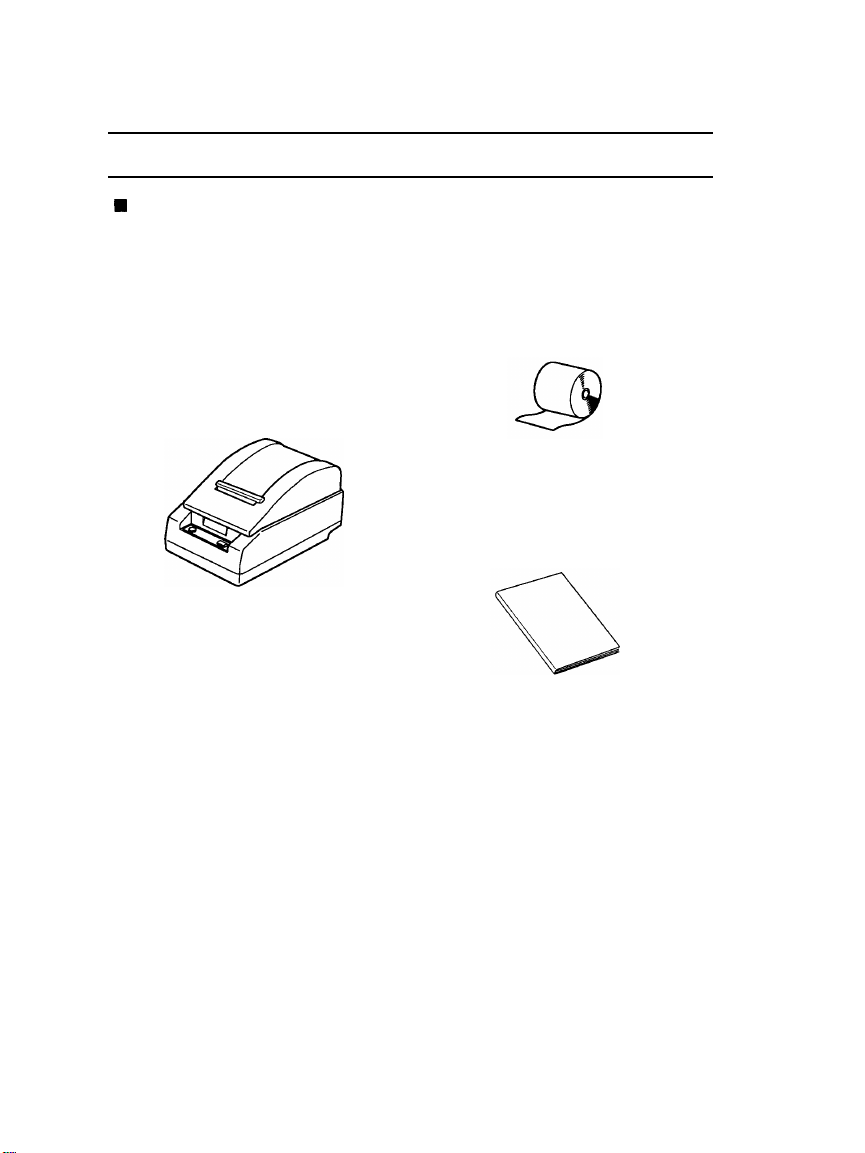
Checking the parts
Remove the printer and other parts from the box.
Printer
Operator’s Manual
Roll paper
Make sure no parts are missing or damaged.
If you find any damaged or missing parts, please contact your dealer for assis-
tance.
■
Maintenance
Keep the packing case and packing materials in case you ever need to transport
or store your printer.
■
Optional parts
Power supply (PS-150)
2
i
r
‘
1

1-2 Choosing a Place for the Printer
Avoid locations that are subject to direct sunlight or excessive heat (near
heaters).
Avoid using or storing the printer in places subject to excessive temperatures
or moisture.
Avoid using or storing the printer in locations subject to dust or dirt.
Locate the printer on a flat, stable surface. Strong vibration or impact can
damage the printer.
Make sure there is enough space around the printer to allow normal operation.
1-3 Removing the Protective Material
An orange plastic spacer is put into the printing mechanism section to protect the
printer from damage during transportation. Before you turn on the printer, be sure
to
1.
2.
3.
4.
remove the spacer according to the following steps.
Open the printer cover.
Raise the head-open lever to remove the spacer.
Place the spacer in the storage space provided on the printer (see the
illustration below). Remember to reinstall the spacer whenever transporting the
printer.
Lower the head-open lever.
3

.
,,.
,
.
1-4 General Guide
■
Part names
@
Printer cover
@
Operation panel
@
Power connector
@
Interface connector
@
Drawer kick-out connector
@
DIP switches
(*
1)
Ii!N
(3
Y
-
EEEIRREJE3E
1,
$,,,
*
1: The DIP switches are located behind the small cover on the bottom of the
printer.
4

■
Operation panel
O
POWER
O
ERROR
PAPER FEED
o
0
PAPER
n
Panel buttons
@
POWER
Press the POWER button to turn the printer ON and OFF. When the button is
pushed down, power is on. When pressed again, the button returns to its origi-
nal position, turning power off.
●
Do not turn power off during printing.
@
PAPER FEED
Press the PAPER FEED button to feed roll paper.
“Pressing PAPER FEED while the printer is in standby (caused by
GS FF
and
GS^)
exits the standby state.
●
Pressing PAPER FEED while a self-test print operation is being performed
interrupts the operation. Press PAPER FEED again to resume the self-test
print.
●
You also use this button to execute a macro.
Panel Lights (LED)
@
POWER (green)
The POWER light is on when power is turned on.
@
ERROR (red)
The ERROR light is on when the printer cover is not closed completely. The
light blinks during an error condition.
@
PAPER (red)
The PAPER light is on when roll paper is not loaded or when the paper roll is
near the end.
The light blinks when the printer is in the self-test standby mode, in the
GS FF
standby state, or in the macro ready mode.
5

Chapter 2 Before Setting Up
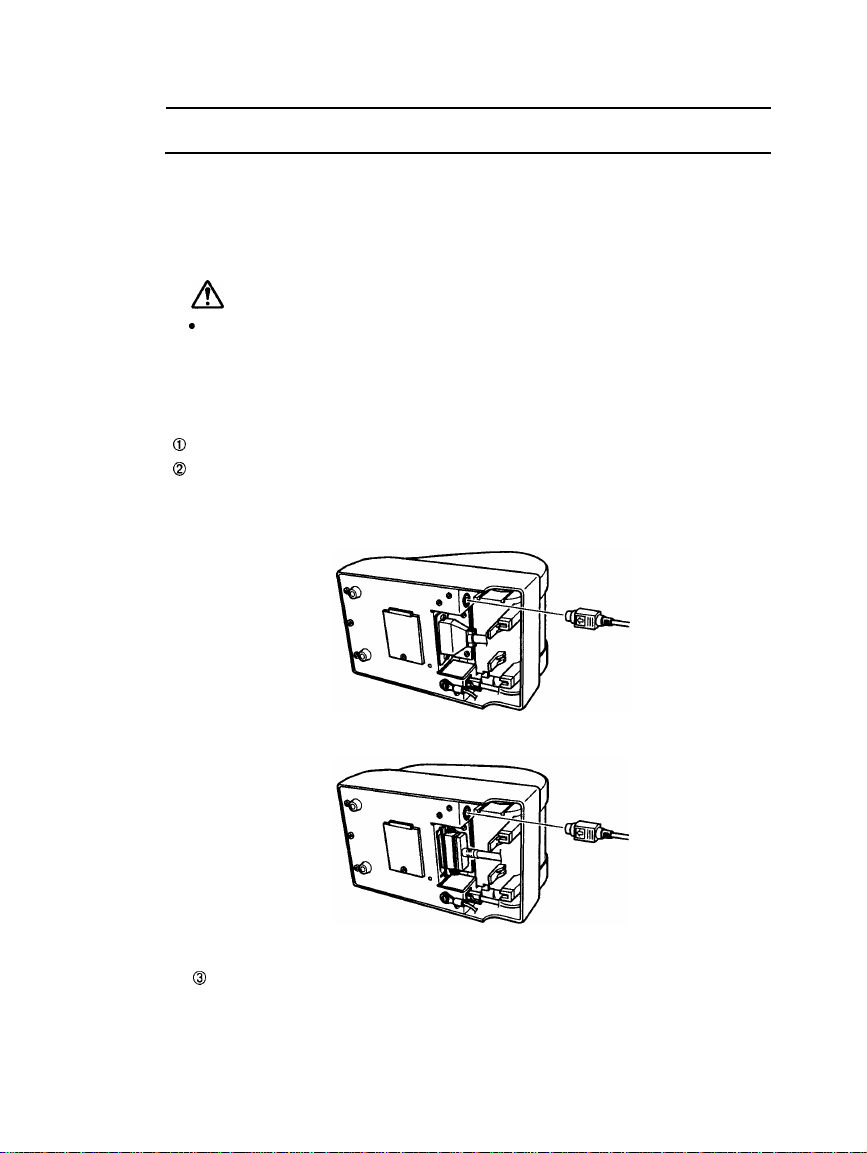
2-1 Connecting the Printer to the Computer
■
Connecting the Printer to a Host Machine
Use an interface cable that matches the specifications of both the printer and host
machine (ECR or computer). Use the following procedure to connect the printer to
a host machine.
TM-L60II
O
Make sure that the printer and the computer are turned off.
@
Plug the interface cable into the printer’s interface port, and use a screwdriver
to secure the cable in place with its screws, as shown.
@
Connect the other end of the cable to the connector on your computer.
TM-L60IIP
Make sure that the printer and the computer are turned off.
Plug the interface cable into the printer’s interface port, as shown.
b
NOTE:
●
Squeeze the wire clips on the printer together until they lock in place on both
sides of the connector.
@
Connect the other end of the cable to the connector on your computer.
6
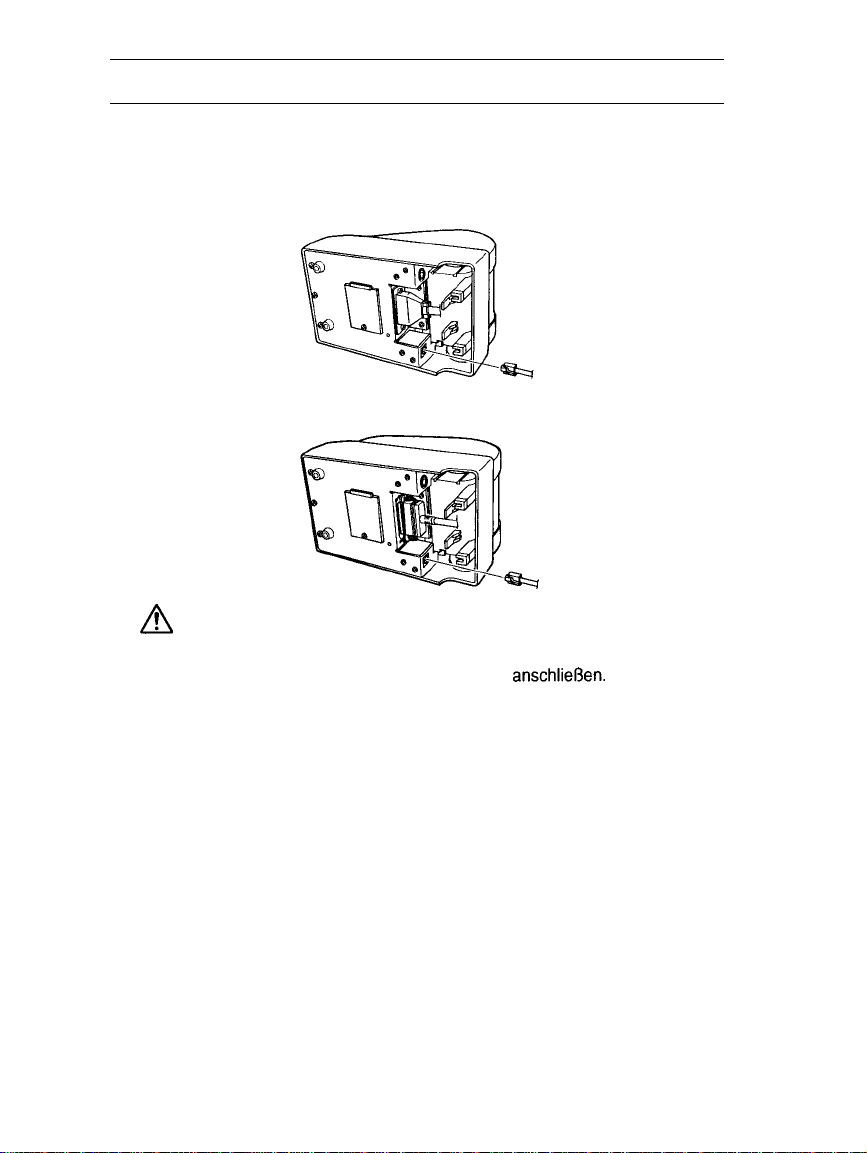
2-2
Connecting the Printer to the Drawer
n
Connecting the Printer to the Drawer
Plug the drawer cable into the drawer kick-out connector on the bottom of the
printer next to the computer interface connector.
TM-L60II
TM-L60IIP
A
CAUTION:
Do not connect a telephone line to the Drawer kick-out connector.
Kein Telefonkabel an die Schnappsteckerbuchse
anschlieBen.
l
To unplug the drawer kick-out cable, press down on the connector’s clip and
pull.
7

2-3 Grounding the Printer
You need a ground wire to ground your printer. Make sure that the wire meets the
specification below.
Thickness of wire: AWG 18 or equivalent
Diameter of terminal to be attached:
3.2
0
Make sure that the printer is turned off.
0
Connect the ground wire to the printer using the FG screw on the bottom of the
printer, as shown.
TM-L60II
TM-L60IIP
8
2-4 Connecting the Power Supply
■
Plugging in AC adapter
The printer must be connected to an external power supply using an AC adapter.
Check to make sure that the power supply you are plugging into has the same
voltage rating as that marked on your AC adapter.
A
! CAUTIONS:
c
Before connecting the power supply, make sure that the voltage (24V DC)
and other electrical specifications match the printer's requirements.
●
Using an incorrect power supply can seriously damage your printer.
Use the following procedure to connect the power supply.
O
Make sure that the power supply is turned off.
@
Plug the power cable connector into the printer’s power connector. Make sure
that the arrow mark of the connector is facing towards the bottom of the printer.
TM-L60II
TM-L60IIP
@
Plug the power supply’s cord into an outlet.
●
When unplugging the power cable from the printer, make sure you grasp the
connector and pull it straight out.
9

Chapter 3 Installing the Parts
3-1 Installing the Roll Paper
■
Installing the roll paper
Be sure to use roll paper that matches the printer's specifications.
O
Using scissors, cut the leading edge of the roll paper perpendicular to the paper
feed direction.
@
Open the printer cover and raise the release lever toward you.
Make sure to pull the release lever out until the paper slot of the printer mecha-
nism is facing up.
@
Load the roll paper while lightly pressing the right roll paper holder outward.
Release the holder after fitting the paper core onto the holder. Make sure the
roll paper turns freely.
●
When loading roll paper, make sure to insert so that it feeds from the bottom.
10
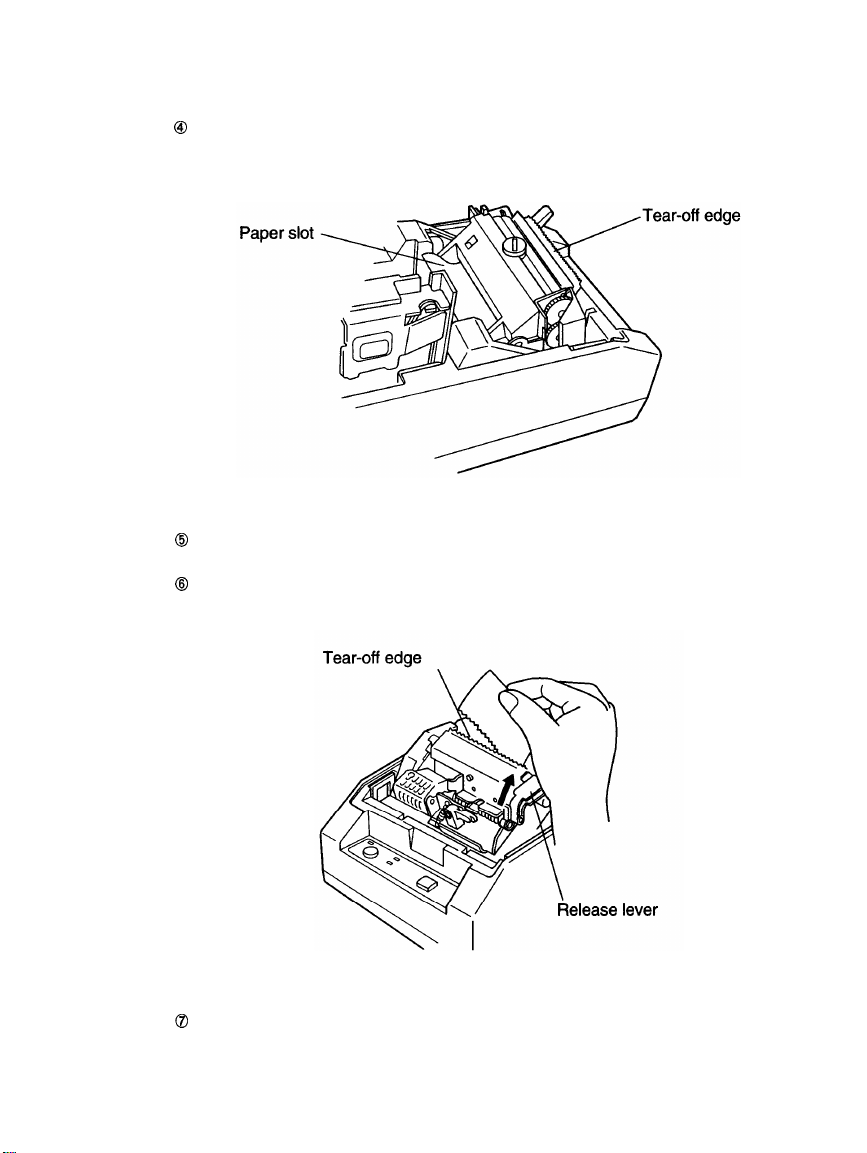
@
Insert the edge of the roll paper into the paper slot and feed the paper 5 cm
beyond the tear-off edge.
@
Align the paper coming out of the paper exit with the paper on the paper roll,
and pull the paper towards the roll to take up any slack.
@
Push down the release lever. Tear off any extra paper at the tear-off edge by
pulling the paper toward you.
@
Close the printer cover.
11
This manual suits for next models
1
Table of contents
Other Seiko Epson Printer manuals


