Seima TONDO INSET User manual
bath-select-tondo-in | v 2.0 | page 1 of 2
Important — read this first!
1 Inspect the bath before installation, to ensure there are no visible defects. If a defect is found, do not install the bath and
contact the supplier immediately. Claims for defects will not be accepted after the product has been installed.
2 The bath must be installed by a licensed tradesperson. Failure to do so may void the warranty.
3 Compliance with AS.3740 Waterproofing of Wet Areas within Residential Buildings applies when installing baths.
4 Local authorities may have specific installation requirements and this should be checked before installation.
5 Grade the bath sub-floor in accordance with requirements of local authorities. Grade sub-floor 1:60 minimum.
6 The protective film on the bath should be left intact during installation and should remain on the bath until first use.
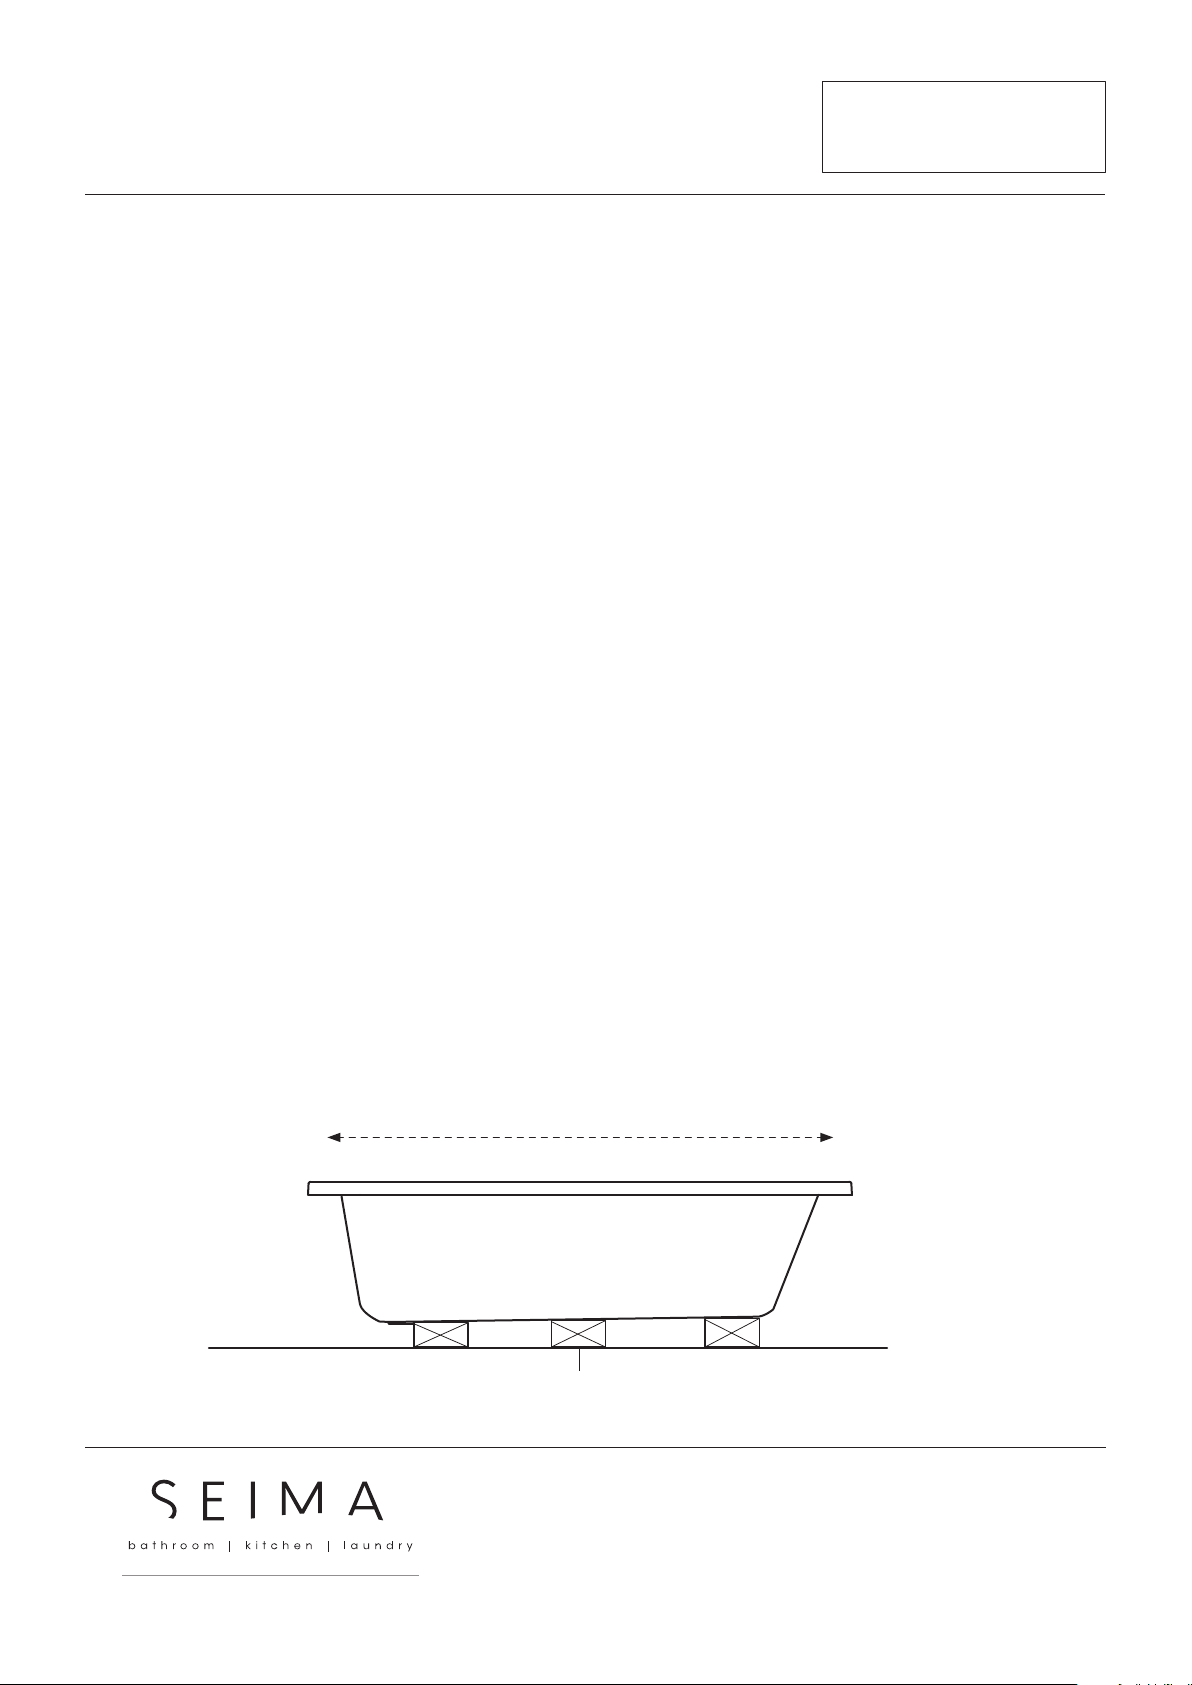
Base support for the bath
1 The design of acrylic baths allows the base of the bath to be supported by three timber support battens.
2 Position and fix timber support battens to the base of the bath and the floor, using a suitable floor and wall panelling
adhesive. Ensure that the bath is neatly fitted and properly supported.
3 During installation, use a spirit level to check that the bath rim is level.
timber support battens
Ensure that the rim of the bath is level, using a spirit level.
INSTALLATION GUIDE
SELECT + TONDO INSET BATHS
SUITABLE FOR BUILT-IN AND ISLAND INSTALLATION
Protective film | Care and maintenance of the bath surface
1 There is a protective film on the acrylic surface of the bath at the time of purchase. This should remain intact until the bath
is ready to use to protect the bath during installation.
2 To preserve its polished finish, this bath should be cleaned with a soft cloth using warm, soapy water or household
detergent. Do not use abrasive cleaning products.
3 If accidental scratches, abrasions or burns occur, the surface finish can be restored by gentle polishing with Brasso.
4 For full warranty terms and conditions, please visit seima.com.au
Please leave this guide
with the end user.
seima.com.au
Please note
− All measurements are in millimetres.
− Dimensions are nominal and subject to normal ceramic manufacturing variations of ±5mm.
− Fixing: Use acetic cured silicone sealant. Do not use epoxy type adhesives.
− Specifications may vary without notice as part of our continuous improvement practices.
− Clean with a damp cloth. Do not use abrasive cleaners, liquids or pastes.

The Select and Tondo bath models suit both built-in and island installation.
1 Built-in installation— see diagram below — the side of the bath is built into the wall.
The 50x25mm support battens run the full length of the bath in the wall.
2 Island installation — see diagram below — there is a ledge between the wall and the side of the bath.
The minimum setout from the wall is 75mm. Refer to the local authority for local setout requirements.
3 Ensure that the area under the bath is ventilated in accordance with local requirements.
Island installation
19
45 10
compressed cement
fibre sheet backing
tiling
fill
50x25 batten
sealant
stud wall
suitable moisture barrier
run-off tube
tiles
bricks
(shape to fit
alongside bath)
standard 40mm
waste outlet
sealant
unfinished
floor
grade sub-floor
1:60 minimum (or
local requirement)
wall
page 2 of 2
compressed cement
fibre sheet backing
tiling
sealant
fill
water stop
suitable moisture barrier
standard 40mm
waste outlet
unfinished
floor
run-off tube
tiles
sealant
grade sub-floor
1:60 minimum (or
local requirement)
wall
Built-in installation
seima.com.au
Please note
− All measurements are in millimetres.
− Dimensions are nominal and subject to normal ceramic manufacturing variations of ±5mm.
− Fixing: Use acetic cured silicone sealant. Do not use epoxy type adhesives.
− Specifications may vary without notice as part of our continuous improvement practices.
− Clean with a damp cloth. Do not use abrasive cleaners, liquids or pastes.
This manual suits for next models
1
Other Seima Bathtub manuals


Popular Bathtub manuals by other brands


BETTE
BETTE TWIST II installation guide

HOESCH
HOESCH ERGO+ Assembly, installation and operation instructions

SW
SW 2653 Series Installation & operating instructions

Kohler
Kohler K-1449 Roughing-In Guide

OVE
OVE PARK 1219262 installation manual

Reece
Reece Kado Lussi Freestanding Bath installation instructions

Jacuzzi
Jacuzzi AMIGA PLUS manual

Master equipment
Master equipment Superior TP382 Assembly instructions

Jacuzzi
Jacuzzi J-Sha Mi Assembly, Use and Maintenance Manual

Kohler
Kohler Mariposa K-1224-G manual

Luca Varess
Luca Varess DUO installation guide

Crosswater
Crosswater Formoso Grande US-N2ACS installation instructions