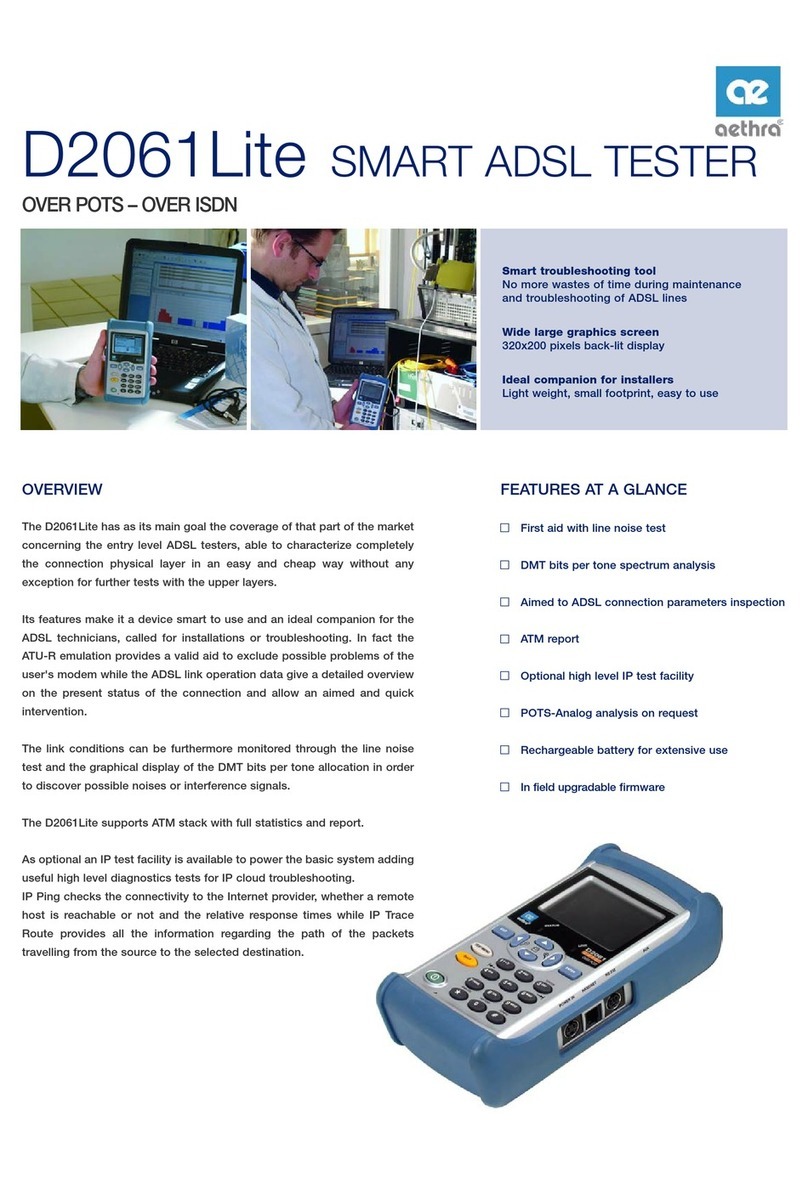
SEM The Vending Tester PRO CT3 User manual

Last revision: April 2012

2

3
Content
Introduction........................................................................................ 4
The “Cannot Test” list.........................................................................4
What the CT3 does .............................................................................5
On power up.......................................................................................5
Important Safety Instructions ............................................................ 5
Identification of the control panel the CT3 ....................................... 6
Before you start testing your equipment...........................................8
Testing a Single-Price 117V coin changer...........................................9
Testing Logic / MicroMech / Dumb Mech changers ........................11
Testing an MDB Coin changer ..........................................................14
Device Reset Button .........................................................................16
Auto-Test function............................................................................17
Printed report in Auto-Test ..............................................................19
Tuning mode and download program mode ...................................20
MDB Status.......................................................................................21
Simulator Mode, MDB Level, Scaling factor & Decimal point..........22
Testing an MDB bill validator ...........................................................24
Testing a bill validator older style (pulse).........................................26
EBVM Pin-out specification ..............................................................27
Notes ................................................................................................29
Warranty...........................................................................................30
Other fine products from S.E.M. ...................................................... 31

4
Introduction
Thank you for purchasing The Vending Tester Pro CT3. This tester will
enable you to test and repair many types of coin changers and bill ac-
ceptors, and even some cashless devices. It can test the following:
120-volt single price coin mechanism
Logic 24 & 117 VDC coin mechanism (a.k.a. Micromech or
Dumb Mech)
MDB coin mechanism having up to 7 tubes of change
MDB bill acceptors
MDB Cashless devices (may not be able to test all makes)
With the addition of the optional External Bill Validator Module
(EBVM), you can test:
24-volt pulse type bill validator
120-volt pulse type bill validator
The 2-line, 20-character LCD display will give you in depth information
on the status of the tested device plus a step-by-step procedure.
Even though The Vending Tester is protected against some short cir-
cuits, it is strongly recommended to check all devices to be tested with
an ohmmeter before plugging it to the tester so that no damages occur
to the CT3.
The Vending Tester will allow you to save a lot of money in repairs and
will pay for itself within weeks from purchasing. We are confident that
The Vending Tester CT3 will soon be one of those tools that you just
cannot live without it.
The “Cannot Test” list
The CT3 Vending Tester PRO cannot test devices using the following
protocols:
BDV
Executive
Four-price
Multi-price
Single-price 24 volts
Ten-price

5
What the CT3 does
Although there is a simulator function, The Vending Tester CT3 will not
simply act like a vending machine in normal operation; it goes much
deeper. It enables you to check all the functions of your devices. To
do so, it will not perform a simple sale. It will take all the messages
coming from the changer, bill acceptor, and cashless system and dis-
play them on the screen. It is a fantastic tool that you will enjoy for
many years to come.
On power up...
When you apply power to The Vending Tester CT3, it automatically
starts a self-test to see if all the internal functions are in good order.
As it performs this self-test, you can see the software version on the
display of your tester, followed by the current line voltage and the
mention PASSED if successful. This manual was written using firmware
version 1.5.
Then, the display will invite you to connect a device and press START to
begin. It is now safe to plug any coin mechanism or any bill validator
as no power is currently applied to any of the sockets until you press
start.
Refer to the proper section of this manual for full details on how to
test equipments. As there are still older equipments on the market
requiring a 117-volt source, be careful to apply the proper voltage to
your equipment. Failure to do so can result in serious damages to the
equipment under test.
-- IMPORTANT SAFETY INSTRUCTION --
The CT3 Vending Tester PRO was designed and built for a 120-volt 60
Hz power source (Canada, USA & México). If you live in a 220-volt 50
Hz zone, you will absolutely need a voltage converter to make the CT3
work. DO NOT MODIFY THE POWER CORD TO FIT IT IN A 220-VOLT
OUTLET. Applying 220 volts to the CT3 tester will instantly result in
serious damages to the tester as well as being a high safety hazard to
the operator. In addition, the Surge Protection function will not work
adequately as it was designed for a 60 Hz frequency.

6
Identification of the control panel on the CT3

7
Identification of the control panel on the CT3
1. Logic (MicroMech) 24 –117 volts, 12-15 pins
2. Single Price 120 volts
3. Socket 1$ pulse for single price
4. External Bill Validator Module connector
5. MDB port for coin changer, bill acceptor, and cashless
6. Power cord entrance
7. Main fuse MDL ½ amp. slow-blow
8. Main switch
9. Control panel
10. Tube low level LED
11. Volume adjustment for beeper
12. Change payout and bill validator function buttons
13. Tube high level LED
14. 2-line, 20-character LCD display
15. Single Price LEDs
16. Auto-Test button
17. Start button
18. Surge protection activated LED
19. 117 volts button & device reset
20. Accept Line and tuning mode button
21. Printer serial port (9600, N, 8, 1)
22. MDB Status button
23. MDB level button
24. Vend simulator price adjustment for each selection

8
Before you start testing your equipment…
The CT3 Vending Tester PRO is a highly sophisticated piece of equip-
ment. Before applying power to a unit for testing, check the following
point: Test with an ohmmeter for potential short circuit. Even
though the CT3 has a built-in protection, repeated hook-up of short
changers may result in damages to the CT3. Also, make sure you do
not press on the 117-volt button when you are in fact testing a 24-volt
coin changer. Pressing the 117-volt button sends that voltage to all
sockets. Firmware version 1.5 now has a protection against acciden-
tal handling on the 117-volt button. You now have to press and hold
the 117-volt button for at least two seconds before the CT3 actually
sends that voltage to the sockets.
Look for the identification label on the side of the coin changer and bill
validator for the proper voltage to apply. Some MDB coin changers
will mention 34 volts as their operating voltage. Using the 24-volt sup-
ply on the CT3 will be sufficient to power up any MDB devices ade-
quately.
You are now ready to test your equipment. In the following pages, you
will find different sections adapted for each type of equipment the CT3
can test. Read them very carefully.
Remember that the CT3 will display all messages any given unit is nor-
mally sending to the Vending Machine Controller (a.k.a. VMC). Those
messages will be numerous in an MDB device while being inexistent in
a Single Price coin changer and pulse type bill validator.

9
Press START/STOP to
test 24 volts or
Red button for 117
volts device
Auto-detecting...
Single-price 117V
Ready to test
Testing a Single Price 117-volt coin changer
Testing a 117-volt Single Price coin changer is quite simple. Connect
the changer in the proper socket, press on START followed by the 117-
Volt red button for at least 2 seconds. Many years ago, there used to
be some Single Price 24-volt changers. The CT3 cannot test those nor
can it test Four-Price changers even though the connector is identical
in shape.
The display will prompt you the following messages:
Two LEDs will light on the Single Price section of the CT3. Those two
LEDs are: L5 and L7. LED L5, meaning Line 5, is the Exact Change indi-
cator. If your changer is in a low tube level situation, this indicator
must go ON. Once about 10 coins are present in each tube, the LED
should go OFF. LED L7 is Line 7. Line 7 means the changer is giving
power to the machine to make a selection.
Set a vend price in your changer. Insert coins. Once the vend price
reached, the L7 LED will go OFF while the L3 LED will go ON briefly.
This means the coin changer has sent the credit signal. In a vending
machine, the credit relay would have been energized. A holding circuit
would keep that credit relay energized until a selection is made by the
customer. Check if the proper change was given.
Press on Accept line button to turn the acceptance OFF. Insert coins.
All coins must be rejected without exception. Change the vend price
and repeat the process. Check if the change given reflects the new
vend price. Repeat with different vend prices.
WARNING! for 117 volts
only, hold RED button

10
Once thoroughly tested, press on STOP before unplugging the coin
changer. If you are to put this changer on a shelf for future use, place
it in a plastic bag with a note that it has passed the testing adequately.
You will remember it tomorrow, but certainly not in three months
from now.
Special note for Canadian changers.
A Canadian coin changer will accept the one and two-dollar coins if the
tube’s low sensors are all covered. Otherwise, it will reject it and L5
will flash.

11
Testing Logic / MicroMech / Dumb Mech
coin changers
12 or 15 pins; 24 or 117 VDC
There are two ways to go through the testing of a Logic / MicroMech /
Dumb Mech coin changer. If you are a vending operator without deep
technical background, you may choose the AUTO-TEST function as it
will take you into a step-by-step testing procedure. For the AUTO-TEST
function proceed directly to page 17. If you are a qualified vending
machine technician, you may prefer to use the conventional method
described below.
No matter which method you choose, at the end, you will know if your
changer is working fine, needs a minor repair or must be sent to a cer-
tified service centre for a more serious problem. No matter what type
of device you are testing, you can only test ONE device at a time. Mul-
tiple-device testing works only in simulation mode. (See page 22)
Testing this type of coin changer requires you to be very careful, as
there are two types of coin changers on the market. Look at the iden-
tification label on the side of the changer to know about the proper
voltage to apply. Some changers may have lost their ID label. If it is a
15-pin plug, it means it is a 24-volt changer. If the plug is a 12-pin, it
may be either a 24 or 117-volt. Press once on START. DO NOT PRESS
on the 117 volts button yet. After a few seconds waiting, the CT3 will
conclude the changer is a 24-volt, and will then send that voltage to
the changer. If the changer really is a 24-volt, the CT3 will detect it and
enter in communication with it. If the changer is indeed a 117-volt, it
will not respond to the CT3 and thus will prompt Cannot detect –Unit
not responding on the display. Repeat the process, by applying 117
volts after pressing on START. Unit should respond to the CT3. As a
protection, we have added a safety feature that requires you to press
the 117-volt button for at least 2 seconds before the CT3 actually
sends that voltage.
Press START/STOP to
test 24 volts or
Red button for 117
volts device
Auto-detecting...
WARNING! for 117 volts
only, hold RED button

12
Logic Changer 24V
Ready to test
Logic Changer 117V
Ready to test
A 117-volt changer is now
ready for test
A 24-volt changer is now
ready for test
No matter the voltage of the coin changer, the messages sent to the
CT3 will be the same.
Messages Meaning...
Coin jam The coin path is jammed in the acceptor.
Cannot detect The vending tester cannot detect the presence
of the coin changer. Check for harness damages.
Check for unplugged harness inside coin
changer. Maybe the changer is a 117-volts and
you applied only 24.
Defective changer The tester judges that the unit can’t be tested
because of a general failure inside the coin
changer. Send this unit to a service center.
Device is short The coin changer has a short circuit in it or, you
sent 117 volts into a 24-volt changer. Most
likely, the surge protector went on.
Double arrival A second coin was inserted while the first was
still in the analysing process.
Escrow return The coin return lever was activated.
No strobe Coin was accepted, but it was not detected
when it went to the tubes or the cashbox.
Not accepted The coin is valid, but was rejected usually be-
cause of the tubes status. Canadian changers
will reject 1$ and 2$ coins if tubes are empty. It
may also be a memory problem. If the coin is
genuine, and if the tubes do have enough coins
to enable the acceptance of all coins, it may
mean the coin acceptor has totally lost its recog-
nition capability (memory erased) and must be
sent to a service center for re-programming.
Canadian $1 and $2 coins have a different metal
content since March 2012. Is your coin acceptor
capable of accepting this new coin set?

13
Logic Changer 24V
010 - > Tube $00.15
Logic Changer 24V
005 - > Tube $00.05
5¢
was
inserted
Coin
went
to...
Value of
coins
in...
10¢
was
inserted
Coin
went
to...
Value of
coins
in...
Test your coin changer with many different coins, at least to cover the
low sensors. Ideally, you should insert enough coins into the changer
to fill the tubes to the top and then see if the extra coins go to the
cashbox. (Special note for Canada: When you insert a two-dollar coin,
the display will prompt that a 1$ coin was inserted. However, note
that the amount was increased by two. This is because the 2$ signal
does not exist in a Logic changer. The 1$ signal is simply sent twice.)
One test you MUST also perform is to disable the ACCEPT LINE on the
CT3 and insert big and small coins. All coins MUST be rejected when
the Accept line is OFF. If it does not come out of the changer, it means
the return path of the changer is jammed. Test the coin return lever as
well.
Once the test is complete, it is now time to empty the tubes you just
filled. Press on the corresponding button (5¢, 10¢, 25¢) to dispense
from each tube. You can press more than one button at a time. The
changer will dispense from all tubes. When the tubes are empty,
pressing on any buttons will stop the payout.
Press STOP before unplugging the coin changer.
Once everything tested and cleaned, you can slip your coin changer in
a bag, write a short memo and put that changer on a shelf.
If some components of the coin changer are defective, such as the coin
acceptor or the tube sensors, you can swap some of the parts with an-
other defective coin changer having a different problem. This way,
instead of sending out two or three coin changers, you may send out
only one for repair.

14
Press START/STOP to
test 24 volts or
Red button for 117
volts device
MDB Changer Level 3
Ready to test
Auto-detecting...
Do not apply 117V
on an MDB device
Do not apply 117V
on an MDB device
Testing an MDB coin changer,
up to seven tubes of change.
Testing an MDB coin changer is basically the same as testing a Logic/
MicroMech coin changer, with the exception that the unit under test
can send much more information to the CT3. The MDB port is located
on the right side of the tester. It is the same port for the changer, the
bill acceptor, and even the cashless device.
Press once on START. DO NOT PRESS on the 117 volts button. Press
again on the same button to skip the delay. Communication will be
established with the device. If the unit does not answer back within 2
minutes, the display will prompt Cannot detect –Unit not responding.
This unit is dead, or not properly connected to the CT3.
As mentioned above, an MDB device sends more messages to the CT3.
They are:
Messages Meaning…
Acceptor unplugged The MDB changer cannot detect its coin
acceptor. Check if correctly plugged. Coin
acceptor may be defective.
Cannot detect The vending tester cannot detect the coin
changer. Check for harness damages.
Check for unplugged harness inside coin
changer.
Changer was reset This message is seen on power-up and
when the device is being re-initialize. Press-
ing the red button during the test will
prompt this message as well.

15
Defective
changer
The tester judges that the unit can’t be tested be-
cause of a general failure inside the coin changer.
Send the unit to a service center.
Defective sen-
sors
A high level sensor is activated while the low is not.
Either a defective top sensor or a foreign object
stuck at the top of the tube. A top sensor LED will
go on indicating which sensor.
Device short There is a short circuit in the unit you're testing.
Escrow return The coin return lever was activated.
No credit Coin accepted and directed to the tube or the
cashbox. However, that coin was not detected in
either place. Check for jammed path. Also check for
coin sensors in acceptor.
No tube pay-
out
No coin value linked to this push button. Even if the
tube is present, it may have an identical value as
another. In MDB mode, two 25¢ tubes will be seen
as one tube. As an example, a coin changer having 1
x 5¢, 2 x 25¢, and 2 x 1$ tubes will be seen as a
three-tube changer (5¢, 25¢, & 1$).
Pay out busy Changer is telling the VMC it is currently dispensing.
Please wait The tester is getting ready to do something.
ROM Check-
sum
The checksum of the changer does not match with
its internal memory because of corrupted data. Unit
must be sent to a service centre.
Routing error A validated coin did not follow the intended route.
It went to the cashbox but was meant to go the
tubes or vice-versa. Check the gate in the acceptor.
Tube jam The coin changer has detected a coin jam into the
payout mechanism of one of its tubes.
Slug Unknown coin inserted. If the coin is genuine, it
means the coin acceptor has totally lost its recogni-
tion capability (memory erased) and must be sent to
a service center for re-programming. Canadian $1
and $2 coins have a different metal content since
March 2012. Is your coin acceptor capable of ac-
cepting this new coin set?

16
Test your changer with many different coins at least to cover the low
sensors. Ideally, you should insert enough coins into the changer to fill
the tubes to the top and then see if extra coins go to the cashbox.
One test you MUST also perform is to disable the ACCEPT LINE on the
CT3 and insert big and small coins. All coins MUST be rejected when
the accept line if OFF. If it does not come out of the changer, it means
the return path of the changer is jammed. Test the coin return lever as
well.
Once the test complete, it is now time to empty the tubes you just
filled. Press on the corresponding button (5¢, 10¢, 25¢, 100¢, 200¢) to
dispense from each tube. You can press more than one button at a
time. The changer will dispense from all tubes. Press on any of the
buttons to stop the process when the tubes are empty.
Press STOP before unplugging the coin changer.
Once everything tested and cleaned, you can slip your coin changer
into a bag, write a short memo and put that changer on a shelf.
If some components of the coin changer are defective, such as the coin
acceptor or the tube sensors, you can swap some of the parts with an-
other defective coin changer with a different problem. This way, in-
stead of sending out two or three coin changer, you may send out only
one for repair.
Device Reset Button
The device reset button only works when testing (not Auto-testing) an
MDB coin changer or a Logic / MicroMech / Dumb coin changer. The
Device Reset button is the red 117-volt button. When testing one of
the above mentioned coin changers, the red button will send a reset
signal to the coin changer. Needless to mention that you do not press
on that button before the display tells you the type of changer you are
currently testing. Otherwise, you will send 117 volts to the changer.

17
Do not apply 117V
on an MDB device
Do not apply 117V
on an MDB device
AUTO-TEST started.
Red button for 117
volts device
Press AUTO-TEST to
test 24 volts or
Auto-detecting...
Auto-Test Function
The CT3 Vending Tester PRO is equipped with the Auto-Test function.
Small vending operators who do not have a strong technical back-
ground usually use this function. This function will take you into a step
-by-step sequence enabling you to test all the basic features of the
coin changer.
The auto-test function will works only with Logic/MicroMech and MDB
coin changer only. It will not work with bill acceptors, Single Price coin
changers, or cashless devices.
Once the coin changer plugged into the proper socket (Logic or MDB),
press the blue AUTO-TEST button and follow the instructions.
First, the CT3 will prompt you to apply the proper voltage. ONLY apply
117-volt if your coin changer is a logic/MicroMech 117-volt changer.
As a protection, we have added a safety feature that requires you to
press the 117-volt button for at least 2 seconds before the CT3 actually
sends that voltage.
The first test the CT3 will ask you to do is pressing on the coin return
lever. The coin return lever is an important part of your coin changer.
It must work properly.
Then, the CT3 will prompt you to insert 12 nickels. Twelve nickels is
sufficient to cover the low sensor. After that, insert 12 dimes. Repeat
with 12 quarters.
Drop 12 0005 ¢ coin

18
Drop 12 0200 ¢ coin
If other coins are accepted,
please drop them
If your coin changer is an MDB, it tells the CT3, upon power-up, the
coins it can accept. Therefore, the CT3 knows about it and can then
prompt you to insert twelve of those coins. (in USA 1$; in Canada 1$
and 2$; in México 10N$ and 20N$).
If your changer is Logic or MicroMech, it will not prompt you to insert
those coins. The message will be:
Upon insertion of the first of this type of coins, the CT3 will prompt
you to insert the remaining coins of the same type. Once those coins
dropped, again the CT3 will ask you the same question. If there are no
other coins in your country’s coin set, skip this message by pressing on
the blue AUTO-TEST button.
(Special note for Canada. When you insert a two-dollar coin into a
Logic changer, the display will prompt that a 1$ coin was inserted.
However, note that the amount was increased by two. This is due to
the fact that the 2$ signal does not exist in Logic changer. The 1$ sig-
nal is simply sent twice.)
Press on AUTO-TEST again to tell the coin changer to pay out all the
coins that went to the tubes. Once the payout is complete, the CT3
will inform you of the acceptance rate over the rejection rate in per-
centage. When you connect a serial printer to the output port of the
CT3, a printed report will come out. Take this report, attach it to the
changer and put it in a plastic bag.

19
Printed report in AUTO-TEST
If you have connected a small serial printer (9600, N, 8, 1) to the out-
put port, a report will come out automatically. Below is an example of
report coming from a Coinco Quantum 700 Series* .
CT3 Tester PRO v1,5 Test report
Device tested: MDB Changer Level 3
Information sent by the changer:
Country currency code: 0001
Coin scaling factor: 005
Decimal place: 2
Coin type credit and routing:
Coin type 00 value 0005¢ to cash box
Coin type 01 value 0005¢ to tube
Coin type 02 value 0005¢ to cash box
Coin type 03 value 0010¢ to cash box
Coin type 04 value 0010¢ to tube
Coin type 05 value 0025¢ to cash box
Coin type 06 value 0025¢ to tube
Coin type 07 value 0025¢ to cash box
Coin type 08 value 0100¢ to cash box
Coin type 09 value 0100¢ to tube
Coin type 10 value 0200¢ to cash box
Manufacturer code - CAI
Serial number: 00 36001206
Model #/tuning revision: CAQ701R01AE1
Software version: 0,08
Optional features supported:
-Alternative payout method
-Extended diagnostic command
Optional features not supported:
-Controlled manual fill/payout commands
-File transport layer (FTL)
Coins accepted: 100% Coins rejected 000%
-Escrow lever was activated
-No error message reported by the device
End of test report
* Redactor’s note: SEM does
not endorse, nor support any
specific brand of coin
changer, bill acceptor, or card
reader. We took this coin
changer as an example sim-
ply because it was the closest
available the day we wrote
this manual.

20
Press START/STOP to
test 24 volts or
Red button for 117
volts device
Tuning mode active
Press STOP to finish
Tuning mode, press
START/STOP to begin
Tuning mode and program download function.
Tuning mode
Some older changers offer you the possibility to tune them in order to
improve their acceptance rate. The CT3 Vending Tester PRO offers
you the possibility to do that. To activate the tuning mode, press on
TUNING MODE black button BEFORE pressing on start. The display will
prompt you: Tuning mode, press START/STOP to begin. Press on
START. Apply 117 volts if the changer is a 117-volt.
Tune your coin changer using manufacturer’s instructions. Please note
that not all makes of coin changers allow you to make the tuning. To
exit, press STOP.
Program download function
In tuning mode, there is no communication between the CT3 and the
unit. The CT3 only applies the proper power to the unit. This is neces-
sary when you wish to download some data to the coin changer/bill
acceptor through the MDB port.
Some devices are capable of receiving a new program through the
MDB port. Connect the download module into the MDB port of the
CT3, connect your device in the download port, press on TUNING
MODE button and then on START/STOP. Wait two seconds and press
again on START/STOP. Do not apply 117 volts to an MDB device. Fol-
low the instructions on the download module to transfer the new firm-
ware into the MDB device. Other modules may connect to a port on
the device rather than the MDB port. Process is still the same. Once
completed, press on STOP to get out of this mode.
Table of contents
