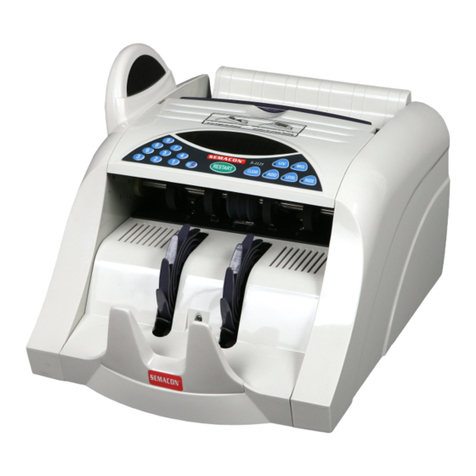
Semacon S-1200 Series User manual

S-1200 Series Currency Counter
Operating Manual
Models S-1200, S-1215 and S-1225

i
CONTENTS
Copyright © 2011-2015 Semacon Business Machines, Inc. All Rights Reserved.
No part of this document may be copied or reproduced by any individual or entity for any reason without prior written permission
from Semacon.
(Revision O03)
Introduction 1
Front View Machine Diagram 2
Rear View Machine Diagram 3
Control Panel Overview 4
Control Panel Functions 5
Operating Instructions Overview
-Startup
-Basic Counting Process
-Error Codes During the Counting Process
6
Modes and Functions
-Add Mode
-Manual Mode
-Batching
7
Counterfeit Detection 8
Maintenance
-Clearing a Jam
-Cleaning
-Feed Tension Adjustment
9
Malfunction Code List 11
Error Code List 12
Technical Specifications 13

1
SEMACON S-1200 SERIES CURRENCY COUNTERS
This instruction manual serves as a general guide for operating your Semacon S-1200 Series
Currency Counter. This machine is a heavy duty bank grade currency counter designed to save
time and labor while counting banknotes in bulk. Before starting, please read the manual
thoroughly to become familiar with the operation and functions of the machine. Please follow the
operating instructions step by step and skip the functions that are not applicable to the model you
purchased. If you have any questions or suggestions, please contact your authorized distributor or
Semacon.
WA R N I N G S :
The machine should only be connected to a main AC socket with proper grounding and correct voltage.
Please turn off the power switch and unplug the power cable before you open the back cover or when the
machine will not be in use for an extended period of time.
Model Counting
Mode
Adding
Mode
Counting Speed
(Notes/Min)
UV Counterfeit
Detection
MG Counterfeit
Detection
S-1200 √√800/1200/1600 - -
S-1215 √√800/1200/1600 √-
S-1225 √√800/1200/1600 √ √

2
S-1200 SERIES CURRENCY COUNTER
FRONT VIEW
1) Carrying Handle
2) Sliding Hopper Guides
3) Separation Mechanism
4) Display
5) Left Side Cover
6) Stacker Rack
7) Feed Deck
8) Control Panel
9) Stacker Roller
10) Right Side Cover
11) Feed Tension Adjustment Knob
Figure 1
1
2
5
4
3
7
6
8
9
10
11

3
S-1200 SERIES CURRENCY COUNTER
REAR VIEW
12) Upper Cover
13) Power Switch
14) Power Socket
15) Serial Number Label
16) Upper Rear Cover
Figure 2
12
15
13
14
16

4
CONTROL PANEL OVERVIEW
KEY FUNCTION
START Starts the counting process
CLR Clears the counting number display
ADD Selects add mode or normal counting mode
SPD Changes the counting speed
MNL Selects auto or manual feed mode
0/C - 9 Number buttons for selecting the batch stop setting
0/C Clears the batch stop setting or functions as 0 when setting batch limit
UV Turns on/off UV counterfeit detection (models S-1215 and S-1225)
MG Turns on/off MG counterfeit detection (model S-1225 only)
Model S-1200
Model S-1215 with Ultraviolet Counterfeit Detection
Model S-1225 with Ultraviolet and Magnetic Counterfeit Detection

5
CONTROL PANEL FUNCTIONS
The START button is used to restart the counting process after the machine stops
during batch counting or after an error, and for manual feed mode.
THRU
The number buttons are used for selecting the batch stop setting. In this mode, the
counter will stop each time the batch stop setting is reached and the operator then
removes the batch from the stacker. Batch stop settings between 1 and 999 bills
can be entered. The batch stop setting will appear on the upper display. The
selected batch number can be cleared by pressing the 0/C button; this will remove
the batch setting and deactivate the batch stop mode.
The quantity of banknotes counted, which appears on the lower display, will be
reset to zero when the CLR button is pressed.
The ADD button switches between ADD mode and normal mode. When the
machine is in ADD mode, the machine will add the count for each stack of bills to
the previous total. In normal mode, the total is cleared each time a stack of bills
is removed from the stacker.
The UV button turns on/off Ultraviolet Counterfeit Detection. When Ultraviolet
Counterfeit Detection is activated, a green light will appear next to UV on the
control panel and the counter will scrutinize the paper of each banknote during the
counting process to determine if there are any suspect counterfeit notes. If a
suspect counterfeit banknote is detected, the counter will stop and alert the
operator. If you are experiencing too many false UV suspects, the UV detection
feature should be adjusted or deactivated.
(This feature applies to models S-1215 and S-1225 only)
The MG button turns on/off Magnetic Counterfeit Detection. When Magnetic
Counterfeit Detection is activated, a green light will appear next to MG on the
control panel and the counter will scrutinize the ink of each banknote during the
counting process to determine if there are any suspect counterfeit notes. If a
suspect counterfeit banknote is detected, the counter will stop and alert the
operator. If you are experiencing too many false MG suspects, the MG detection
feature should be adjusted or deactivated.
(This feature applies to model S-1225 only)
The SPD button adjusts the counting speed of the machine. When this button is
pressed, the green lights above the count display will switch between H(1600),
M(1200), and L(800), with 800 being the slowest counting speed and 1600 being
the fastest. The recommended setting is M(1200).
The MNL button switches between auto and manual feed mode. When the green
light is off the machine will start counting the bills as soon as they are placed in
the hopper. When the green light is on, the machine will not start counting until
the START button is pressed.

6
OPERATING INSTRUCTIONS OVERVIEW
Startup
1) Turn on the power switch located on the back of the counter near the power socket. The display
will read all 8’s, indicating that the unit is completing a self-check process and checking each
sensor.
2) 0will appear to indicate that the counter has successfully completed its self-diagnostic process
and is now in standby mode and ready to be used.
3) If the machine encounters a problem during the self-check startup process, an error message
will appear on the display. For example: E1
E6
Please refer to the Startup Malfunction Codes to determine what the error code represents.
Basic Counting Process
1) Place the banknotes in the hopper and the counter will auto-start the counting process. It will
count all the banknotes in the hopper and show the total count on the display.
2) To continue counting, remove all of the counted banknotes from the stacker and place the next
stack of banknotes in the hopper. The counter will begin counting from "0" again.
3) If the banknotes in the stacker are not removed before placing additional banknotes into the
hopper, the counter will restart automatically but will add the additional banknotes to the previous
total.
Error Codes During The Counting Process
During the counting process, if a suspect counterfeit banknote is detected or a feeding error occurs
(such as double note, chain note or half note), the counter will stop counting and the appropriate
error code will be displayed. Please see the Counting Error Code List to interpret the meaning
of any error codes.
NOTE: Avoid placing damp or wet banknotes into the machine. Always be sure to remove
any paper clips, rubber bands, staples or other items attached to the banknotes before counting.
If the banknotes are curled, folded or bent, flatten them before running them through the
machine.

7
MODES AND FUNCTIONS
Add Mode
Adding during count mode is performed by pressing the ADD button (green LED will light next
to the button when activated). With this mode turned on, the machine will add the count for each
stack of bills to the previous total.
Manual Start Mode
If you do not want the machine to start counting automatically when banknotes are placed in the
hopper, you can press the MNL button (green LED will light next to the button when activated).
This turns on the Manual Start Mode. In this mode, the machine will not start counting until the
START button is pressed.
Batching
1) To set a batch stop setting, enter any number from 1-999 using the numeric buttons and the
setting will appear in the upper display on the control panel. For example, to set the batch limit to
“50”, press the 5key and then press the 0/C key.
2) Place banknotes in the hopper. The machine will start counting and will stop once the counted
number reaches the preset batch number.
3) To repeat the batch counting, simply remove the banknotes from the stacker and the machine
will count the next batch.
4) To clear the batch stop setting, press the 0/C button until nothing appears above the count on
the display.
NOTE: Add mode can also be used when batching if the operator selects a batch stop setting
while Add mode is activated.

8
COUNTERFEIT DETECTION
Certain counter models contain a sophisticated counterfeit detection system (models S-1215 and
S-1225). While the counterfeit detection features are designed to be as accurate as possible, they
are specifically designed to pinpoint suspect banknotes that are believed to have a high probability
of being counterfeit. An alert to a suspect counterfeit banknote does not assure or guarantee that
the banknote is counterfeit. Additionally, while the counter is designed to detect potential
counterfeit banknotes, there is always the possibility that an actual counterfeit banknote may pass
through the screening process undetected.
The UV detection found in models S-1215 and S-1225 is designed to inspect and scrutinize the
banknote paper for potential counterfeit properties while the MG detection found in model S-1225
is designed to inspect and scrutinize the banknote ink for potential counterfeit properties. The
combination of UV and MG detection capabilities found in model S-1225 offers the greatest
protection and has the highest probability of catching a suspect counterfeit banknote.

9
MAINTENANCE
Clearing A Jam
With the machine off and the power cord unplugged, reach in and remove any jammed banknotes
if they are visible from either the top area of the machine near the feed rollers or the bottom area
of the machine near the stacker. If the obstruction is not visible, the operator can cut a bill-sized
piece from a file folder and use the feed wheels to manually roll it through the machine (with the
power off) in order to push the obstruction to a point where it is visible and within reach. If this
does not work, please contact your authorized Semacon service provider.
Cleaning
In order to properly maintain your counter, it should be cleaned on a regular basis. We suggest
regularly blowing any dust out of the counter with a can of compressed air which can be purchased
at most office supply stores. We also recommend placing a dust cover over the machine when it
is not in use and the power is off.
Depending on your usage level, your counter should be professionally cleaned and serviced on a
regular basis by your authorized Semacon distributor or it can be sent to the Semacon Service
Center for a general preventative cleaning & maintenance service. Contact your distributor to
determine the proper location for service.
WARNING: Never place your fingers inside the machine during operation.
WARNING: Always switch off the power and unplug the power cord when cleaning
the machine or before reaching into the counter to clear a jam.
WARNING: Do not use any wet cleaning cards in the machine.

10
Feed Tension Adjustment
You may need to occasionally adjust the feed tension to compensate for the normal wear that the
rubber feed wheels experience over time. The feed tension can be adjusted by turning the Feed
Tension Adjustment Knob on the top of the machine. The initial factory setting is with the dot at
the 0 position (in the center toward the back of the machine). Turning the knob clockwise (so the
dot on the knob is at +1 or +2) will loosen the feeding system, while turning the knob
counterclockwise (so the dot on the knob is at -1 or -2) will tighten the feeding system.
Most machines function best with the dot on the knob centered at 0, but if the machine is
experiencing frequent jam errors, the knob may need to be turned clockwise so that the dot is at
+1 or +2. Alternately, if the machine is experiencing frequent double note or chain note errors,
the knob should be turned counterclockwise so that the dot is at -1 or -2.
IMPORTANT! The dot on the knob should never be adjusted past +5 or -5.
Contact your authorized Semacon service provider if your machine still receives
error messages after the feed tension has been adjusted to either of these points.

11
MALFUNCTION CODE LIST
Malfunction
Code
Cause Solution
E1 The left count sensor pair is
dirty, out of alignment or needs
repair
Clean both sensors with a can of
compressed air and then use a cotton swab
dipped in alcohol or windex. If this does
not correct the problem, your counter
should be sent to an authorized Semacon
service center or Semacon for repair.
E2 The right count sensor pair is
dirty, out of alignment or needs
repair
Clean both sensors with a can of
compressed air and then use a cotton swab
dipped in alcohol or windex. If this does
not correct the problem, your counter
should be sent to an authorized Semacon
service center or Semacon for repair.
E3 The magnetic counterfeit
detection sensor needs repair
Your counter should be sent to an
authorized Semacon service center or
Semacon for repair
E4 The ultraviolet counterfeit
detection sensor needs repair
Your counter should be sent to an
authorized Semacon service center or
Semacon for repair
E5 The hopper sensor is dirty or
needs repair
Clean the sensor with a can of compressed
air and then use a cotton swab dipped in
alcohol or windex. If this does not correct
the problem, your counter should be sent
to an authorized Semacon service center
or Semacon for repair.
E6 The stacker sensor pair is dirty,
out of alignment or needs repair
Clean both sensors with a can of
compressed air and then use a cotton swab
dipped in alcohol or windex. If this does
not correct the problem, your counter
should be sent to an authorized Semacon
service center or Semacon for repair.

12
ERROR CODE LIST
Error Code Cause Solution
ECH Chain Note Detection Alert
Adjust Feed Tension Adjustment Knob
counterclockwise by one level (e.g.
from 0 to -1). Run a stack of bills
through the counter. If the machine still
receives error messages, repeat this step
until you reach -5.
If you reach -5 and the machine is still
receiving error messages, reverse the
process and run a stack of bills through
the machine after turning the Feed
Tension Adjustment Knob clockwise by
one level (e.g. from -4 to -3). This step
can be repeated until you reach +5.
If you reach +5 and your machine is still
receiving errors, please contact your
authorized Semacon service facility for
further assistance.
ECL Chain Note Detection Alert
(on the first bill in the stack)
dbH Double Note Detection Alert
dbL Double Note Detection Alert
(on the first bill in the stack)
EH Half Note Detection Alert
EJ Jam Detection Alert
Ob Skew Note Detection Alert
CF1
(models S-1215 and S-1225)
Suspect Counterfeit Note -
Ultraviolet Detection Alert
Inspect top banknote in stacker for
counterfeit qualities.
CF2
(model S-1225 only)
Suspect Counterfeit Note - Magnetic
Detection Alert

13
TECHNICAL SPECIFICATIONS
1) Ambient Temperature
32 - 104ºF
0 - 40ºC
2) Ambient Humidity
30 – 90%
3) Banknote Feeding System
SmartFeed™Friction Roller System
4) Counting Speed
800/1200/1600 Notes Per Minute
5) Note Size
115 x 50 mm to 175 x 85 mm
6) Hopper Capacity
200 – 300 Notes
7) Stacker Capacity
200 Notes
8) Display
4 Digit (LED)
9) Power Source
110 – 120VAC / 60Hz or 220 – 240VAC / 50Hz
10) Power Consumption
<50W
11) Stand-by Consumption
<20W
12) Unit Size
10.5”(W) x 9.75”(D) x 9.5”(H)
270mm(W) x 250mm(D) x 240mm(H)
13) Weight
15 lbs (6.8 kg)
Specifications are subject to change without notice.

7430 Trade Street
San Diego, CA 92121 USA
Tel: 858-638-0100
Fax: 858-638-0110
www.semacon.com
This manual suits for next models
3
Table of contents
Other Semacon Cash Counter manuals
