manuals.online logo
Brands
  1. Home
  2. •
  3. Brands
  4. •
  5. semble
  6. •
  7. Indoor Furnishing
  8. •
  9. semble SP2D User manual

semble SP2D User manual

1
Place on end: Insert dowels
into the top & boom … and
insert these into the gable.
The top & boom of your car-
cass are dowelled into the
back & the gable so ensure
these are correctly located.
Orient the Gables: look for the 4 gables with the holes
on the inside face —nd the four pairs of holes for the
hinge plate screws (see circles below) ...
Place the gables face down and open
your hardware pack . Find the four
hinge plates for each side.
The hinge plates are designed for DIY
assembly and can simply be “pushed in”
and nished o by screwing in ght…
Idenfy the arrow on each plate and
ensure these face the front edge.
2
Split construcon: due to its size and weight, this cabi-
net is constructed in two parts. Assemble both and simply
screw the two cabinets together to create a single unit.
You will note the doors are hinged
with four hinges across the two car-
casses which will ensure a strong
and sag-free door…
Idenfy Box 1 and assemble this
carcass (you can leave out the ad-
justable shelf for now).
Idenfy Box 2 and assemble this
carcass. Again, leave the adjustable
shelves to one side.
Please take care with the plasc
feet when handling this unit. While
they are designed to withstand the
weight of the unit, they do not take
kindly to bending as you rotate or
move the cabinet.
BOX 1
BOX 2
Almost there: place the last gable on to the carcass
ensuring the dowels are aligned.
Secure with screws in the remaining
holes.
4
Assemble Box 1: insert dowels into the back and join
with a gable - secure with screws in the outside holes.
3
Place to the side: check you don’t
have any holes leover except the
adjustable shelf holes (sets of three).
Now place this cabinet to one side
and connue with Box 2.
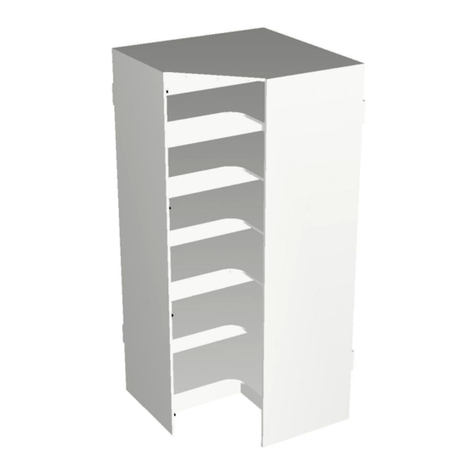
SP2D:
Tall Pantry Cabinet—2 Door (900mm)
5
Final Assembly: Once you are happy with the nal locaon
of your lower unit, you should level and set your height at
147mm o the oor for your kick plate.
This will be possible later but
will be more dicult due to
the combined weight.
Place the upper unit on top
and ensure the fronts of
both carcasses are ush.
Simply screw through
the lower unit into the
upper unit using a
30mm screw so you do
not pierce the top unit.
Place in your adjustable shelf's.
Hang and adjust your doors
ensuring each door is clipped
securely with four hinges...
8
Orient the Gables: nd the tall gables and ensure you
have the three hinge plates correctly mounted in each
(remember they have an arrow to face the front).
Idenfy the back: insert dowels into the holes—then join this back
with one of the gables… Be sure to secure this join by inserng screws
in the small holes from the outside.
It is a good idea to lie the gable on the oor and slot the back in ensur-
ing the dowels are correctly seated into the gable.
Then carefully stand this up and secure with screws using the
through holes provided in the gable.
Insert the panels: insert dowels into the top and
boom and locate into the Gable and back - secure with
screws in the outside holes.
Almost there: place the last gable on to the carcass ensuring the
dowels are aligned. Then secure with screws in the remaining holes.
6
Stand your unit up: Do a nal check again that all pan-
els are correctly located and secured with screws.
The only holes you will have remaining will the adjustable shelf holes -
sets of three in both gables
and the back—enough for
three shelves.
If you have screwed and dow-
elled your cabinet well, you
will nd you have a square and
solid feeling unit.
We are ready to assembly both
units together now. This cabi-
net has a signicant weight
when fully assembled and can
be dicult to move without
damaging the legs.
Leave your adjustable shelves and doors to one side and place this
lower carcass into its correct locaon for installaon. This will save
double handling later...
7
SP2D:
Tall Pantry Cabinet—2 Door (900mm)
Other semble Indoor Furnishing manuals

semble Aventos HK-XS Lift-up TIPON COMPACT User manual

semble

semble Aventos HK-XS Lift-up TIPON COMPACT User manual

semble SCPA1D User manual

semble

semble SCPA1D User manual

semble Aventos HK User manual

semble

semble Aventos HK User manual

Popular Indoor Furnishing manuals by other brands

Wholesale Beds CHARLES Assembly instructions

Wholesale Beds

Wholesale Beds CHARLES Assembly instructions

Wilhelm Schildmeyer 627150 Assembly instructions

Wilhelm Schildmeyer

Wilhelm Schildmeyer 627150 Assembly instructions

DURAVIT White Tulip WT 7051 Mounting instructions

DURAVIT

DURAVIT White Tulip WT 7051 Mounting instructions

BUT LIT BANQUETTE 820132 manual

BUT

BUT LIT BANQUETTE 820132 manual

Genie CM7989HB-FQ-A4 Assembly instructions

Genie

Genie CM7989HB-FQ-A4 Assembly instructions

Teknion hiSpace operation instruction

Teknion

Teknion hiSpace operation instruction

IKEA KULLEN 703.557.33 manual

IKEA

IKEA KULLEN 703.557.33 manual

Homelegance 1525-1 Assembly instruction

Homelegance

Homelegance 1525-1 Assembly instruction

NOA & NANI Järstorp Assembly instructions

NOA & NANI

NOA & NANI Järstorp Assembly instructions

BDI MÜV 1252 quick start guide

BDI

BDI MÜV 1252 quick start guide

Eurotech LAU1 Assembly instructions

Eurotech

Eurotech LAU1 Assembly instructions

VITO 1433 Assembling instructions

VITO

VITO 1433 Assembling instructions

Original Steifensand Seno owner's manual

Original Steifensand

Original Steifensand Seno owner's manual

Sealey AP22513BB.V3 quick start guide

Sealey

Sealey AP22513BB.V3 quick start guide

Coaster 300525F Assembly instructions

Coaster

Coaster 300525F Assembly instructions

SEI Modesto CK642300TX Assembly instruction

SEI

SEI Modesto CK642300TX Assembly instruction

Allen + Roth FTS61374C Quick reference guide

Allen + Roth

Allen + Roth FTS61374C Quick reference guide

Germania 1690 Assembly instruction

Germania

Germania 1690 Assembly instruction

manuals.online logo
manuals.online logoBrands
  • About & Mission
  • Contact us
  • Privacy Policy
  • Terms and Conditions

Copyright 2025 Manuals.Online. All Rights Reserved.