manuals.online logo
Brands
  1. Home
  2. •
  3. Brands
  4. •
  5. semble
  6. •
  7. Indoor Furnishing
  8. •
  9. semble SCPA1D User manual

semble SCPA1D User manual

1
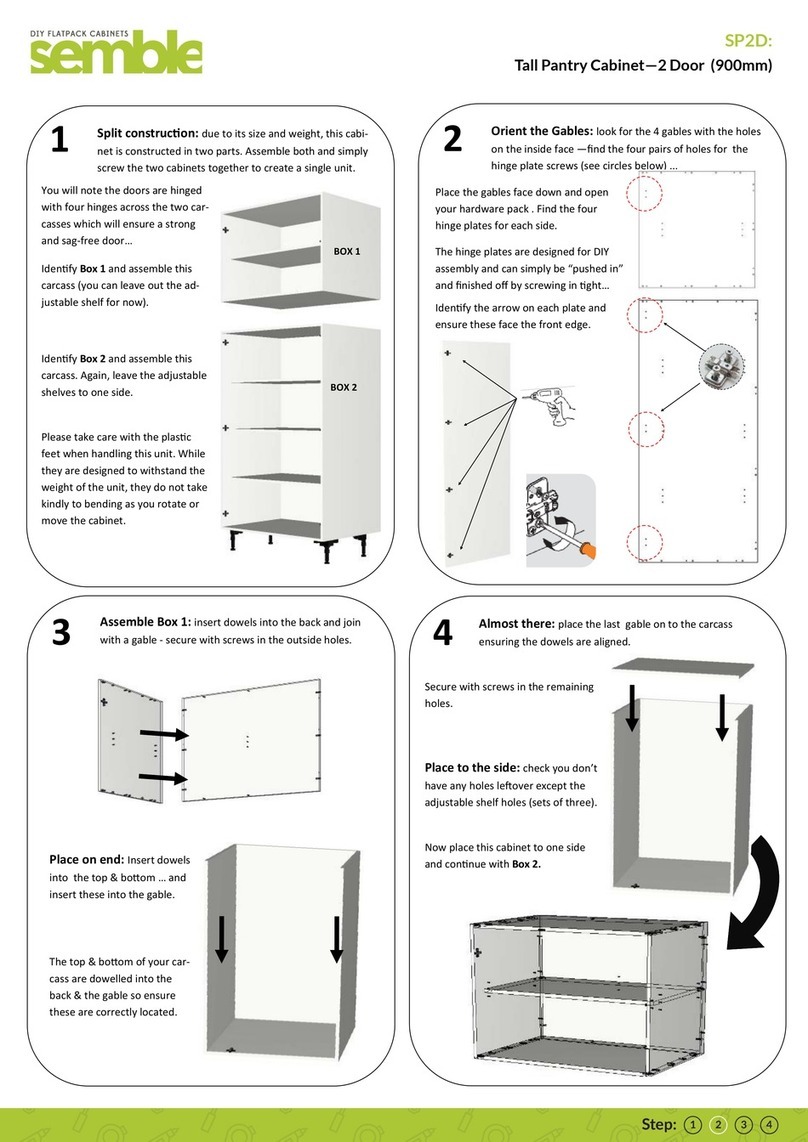
Orient the Gable: look for the gables with the holes on
the inside face —nd the four pairs of holes for the hinge
plate screws (see circles below) ...
Place the gables face down and open
your hardware pack . Find the four
hinge plates for this gable.
The hinge plates are designed for DIY
assembly and can simply be “pushed in”
and nished o by screwing in ght…
Idenfy the arrow on each plate and
ensure these face the front edge.
2
Large construcon: due to its size and weight, this cabi-
net is best assembled with two people. Please take care in
rotang, liing or shiing this carcass.
This cabinet is constructed with several key dierences:
(1) rstly, the cabinet has no
plasc feet but sits on its ga-
bles and a dowelled in kick.
(2) secondly, the cabinet is
designed to have a 16mm
void on both backs to allow
for some tolerance when in-
stalling against walls that
may not be perfectly square.
(3) nally, the carcass is held
together with the top,
boom and a xed shelf so
please ensure these are cor-
rectly seated and screwed
together ghtly using the
supplied 45mm screws.
Fix the Door Gable: Now take the Gable with the in-
serted hinge plates and ensure locate and seat correctly
on the dowels in the top, boom and shelf from Step 3.
Ensure these components are correctly seated and then screws to-
gether ghtly using the 45mm assembly screws provided. Ensure
that any visible hole has a screw when you are nished.
4
Find the short back: idenfy the two backs for this cab-
inet—they are the largest pieces you have. Once of them is
slightly narrower then the other—you can also check the
dimensions on the label. It is the short one you want rst.
Now, nd the (1) boom, (2) xed shelf, and (3) angled top . You can
check your labels to ensure you have the right components. Insert
dowels and insert them into the short back.
Hint: the boom sits 147mm inset on the back so look for the
correct ends and insert to same orientaon as shown here.
3
SCPA1D:
Corner Pantry Cabinet—1 Door
SP2D: Pantry Cabinet—2Door [900]
Kitchen Brands Pty Ltd (2012) trading as Semble Step 1Step 2Step 3Step 4
5
Final Assembly: Now you're nished your assembly! You
can choose to install the two 16mm void plates on the rear of
each back—these will help you install the cabinet into your
corner.
You can leave your adjust-
able shelves and door to
one side now unl aer
you have moved this car-
cass into its nal locaon.
Remember, this unit is
large and heavy, please
take care with moving.
8
Insert Second Back: rotate the carcass so that you are
sing on at on the rst back.
Insert dowels into the Back , top and shelf and the rst back and now
t the second back ensuring it is correctly aligned and all dowels are
seated. Now screw o ghtly
Fix you nal gable: insert dowels into the top and
boom, and shelf and get your nal gable ready for xing
to the carcass.
Once you have this Gable inserted, you will not be able to insert
the adjustable shelf that sits in the boom secon of the pan-
try… This must be inserted now (see icon 1 below)
Now Locate the gable correctly onto carcass and secure ghtly
with screws…..
6
Insert the Kick: Locate the two short kick plates and
idenfy their matching dowel holes in the boom shelf.
Insert dowels and t, nishing with screws from above the shelf
7

This manual suits for next models

1

Other semble Indoor Furnishing manuals

semble SP2D User manual

semble

semble SP2D User manual

semble Aventos HK-XS Lift-up TIPON COMPACT User manual

semble

semble Aventos HK-XS Lift-up TIPON COMPACT User manual

semble Aventos HK User manual

semble

semble Aventos HK User manual

Popular Indoor Furnishing manuals by other brands

LittleHugs OLIVIA Assembly instructions

LittleHugs

LittleHugs OLIVIA Assembly instructions

West Elm Metalwork Assembly instructions

West Elm

West Elm Metalwork Assembly instructions

HAMPTON BAY ARIA FCS80234TPK Use and care guide

HAMPTON BAY

HAMPTON BAY ARIA FCS80234TPK Use and care guide

Twin Star Home TC68-6994 Assembly instructions

Twin Star Home

Twin Star Home TC68-6994 Assembly instructions

Polywood RRT236 Assembly instructions

Polywood

Polywood RRT236 Assembly instructions

Simpli Home brooklyn+max WyndenHall AXCLRY52LG-OAK manual

Simpli Home

Simpli Home brooklyn+max WyndenHall AXCLRY52LG-OAK manual

Next CAMILLE 295259 Assembly instructions

Next

Next CAMILLE 295259 Assembly instructions

Kristall-Form Sound-Box 2 instruction manual

Kristall-Form

Kristall-Form Sound-Box 2 instruction manual

HAMPTON BAY VESTRI FSS60523-ST Use and care guide

HAMPTON BAY

HAMPTON BAY VESTRI FSS60523-ST Use and care guide

Herman Miller RATIO installation guide

Herman Miller

Herman Miller RATIO installation guide

Home Styles 200 -10-FB02 1 quick start guide

Home Styles

Home Styles 200 -10-FB02 1 quick start guide

Jason.L Whistler 2.0 Assembly instructions

Jason.L

Jason.L Whistler 2.0 Assembly instructions

agatameble CHRBS821 Assembling Instruction

agatameble

agatameble CHRBS821 Assembling Instruction

Closet Maid 2844 installation guide

Closet Maid

Closet Maid 2844 installation guide

Home Styles 20 05525 0080 Assembly instructions

Home Styles

Home Styles 20 05525 0080 Assembly instructions

Disc-O-Bed L Assembly instructions

Disc-O-Bed

Disc-O-Bed L Assembly instructions

QU-AX 76 16 TF 0x manual

QU-AX

QU-AX 76 16 TF 0x manual

TREX TXC23 Assembly instructions

TREX

TREX TXC23 Assembly instructions

manuals.online logo
manuals.online logoBrands
  • About & Mission
  • Contact us
  • Privacy Policy
  • Terms and Conditions

Copyright 2025 Manuals.Online. All Rights Reserved.