SMH10R
13.1 Start and End Two-way Intercom
13.2 Voice Activated Intercom (VOX Intercom)
13.3 Intercom and Mobile Phone Call
13.4 Intercom and GPS
13.5 Intercom and Two-way Radio
14. THREE-WAY CONFERENCE INTERCOM
14.1 Start Three-way Intercom
14.2 End Three-way Intercom
15. FOUR-WAY CONFERENCE INTERCOM
15.1 Start Four-way Intercom
15.2 End Four-way Intercom
16. THREE-WAY CONFERENCE PHONE CALL WITH INTERCOM
PARTICIPANT
17. INTERCOM FAILURE
18. INTERCOM RECONNECTION
19. FAULT RESET
20. FIRMWARE UPGRADE
21. CASE STUDY
Case 1
Case 2
Case 3
Case 4
Case 5
Case 6
BATTERY INFORMATION
MAINTENANCE AND CARE
DISPOSAL
CERTIFICATION AND SAFETY APPROVALS
• FCC Compliance Statement
• FCC RF Exposure Statement
• FCC Caution
• CE Declaration of Conformity
• Industry Canada Statement
• Bluetooth License
WAIVER AND GENERAL RELEASE
• Two-Year Limited Warranty
• Limitation of Liability
• Return for Full Refund
WARNING
1. INTRODUCTION
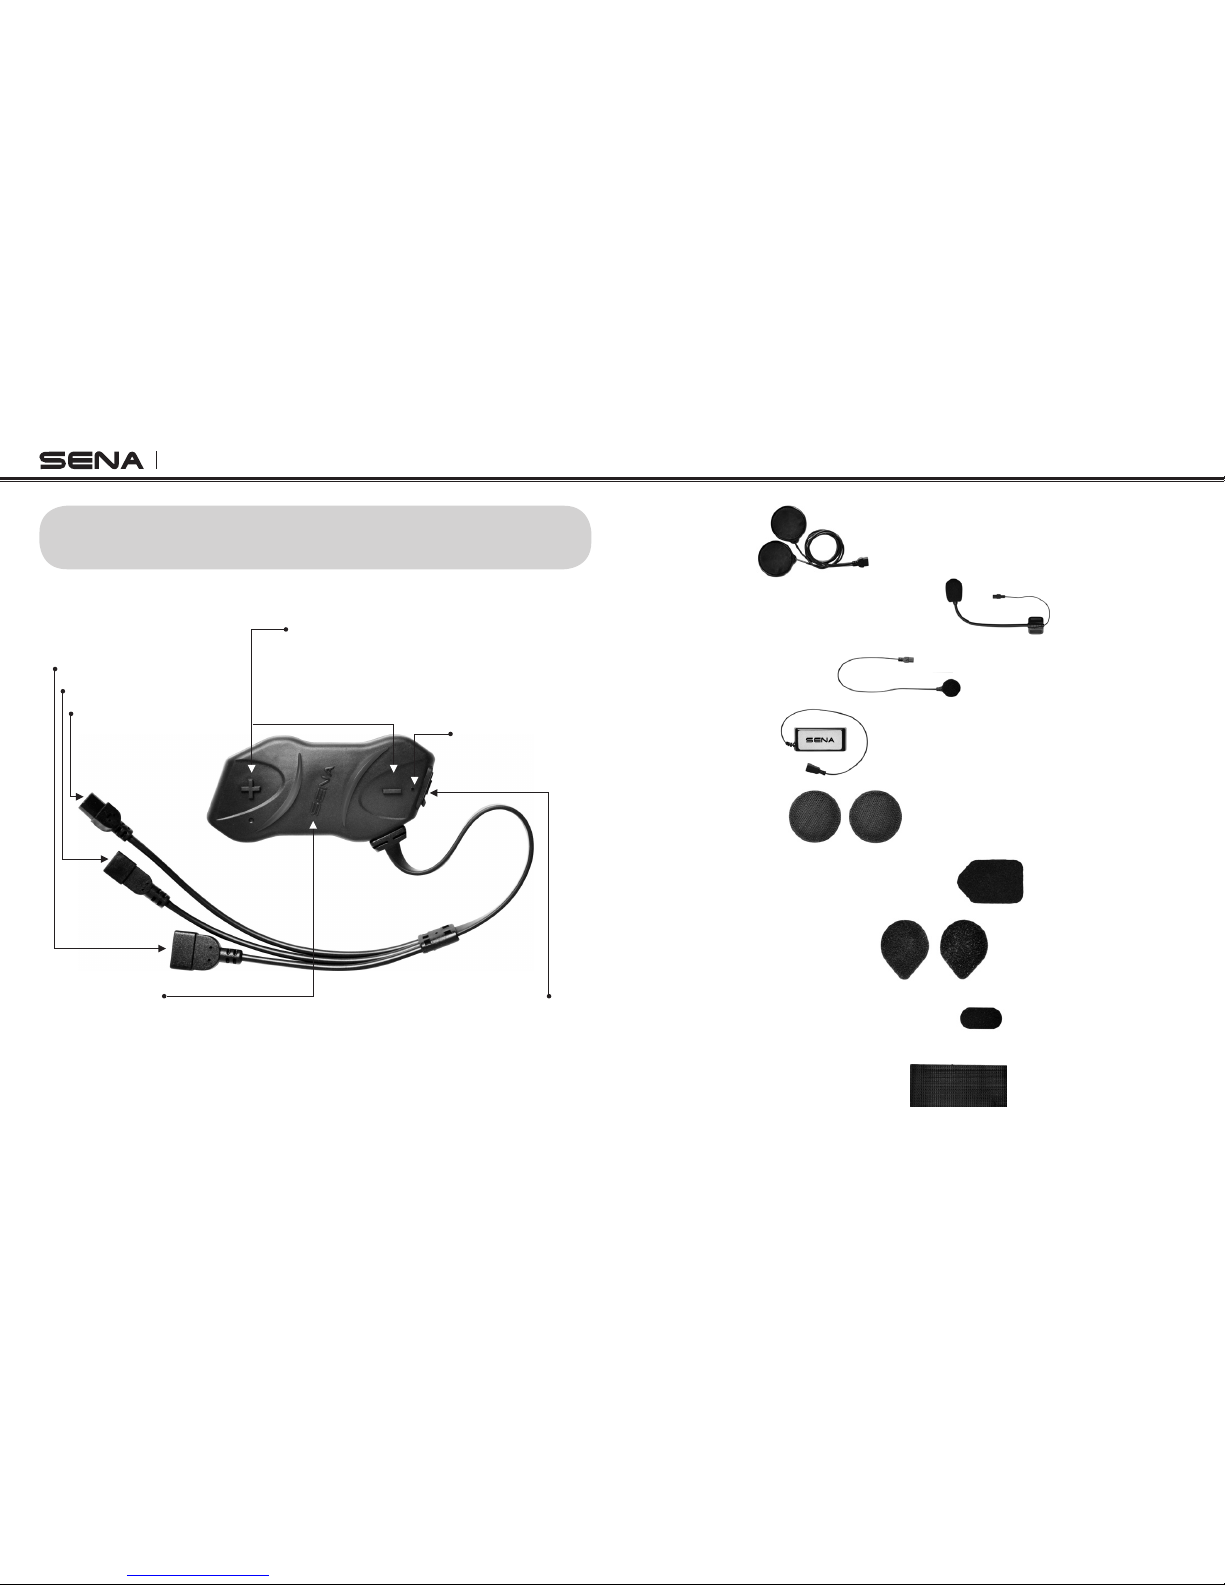
2. PACKAGE CONTENTS
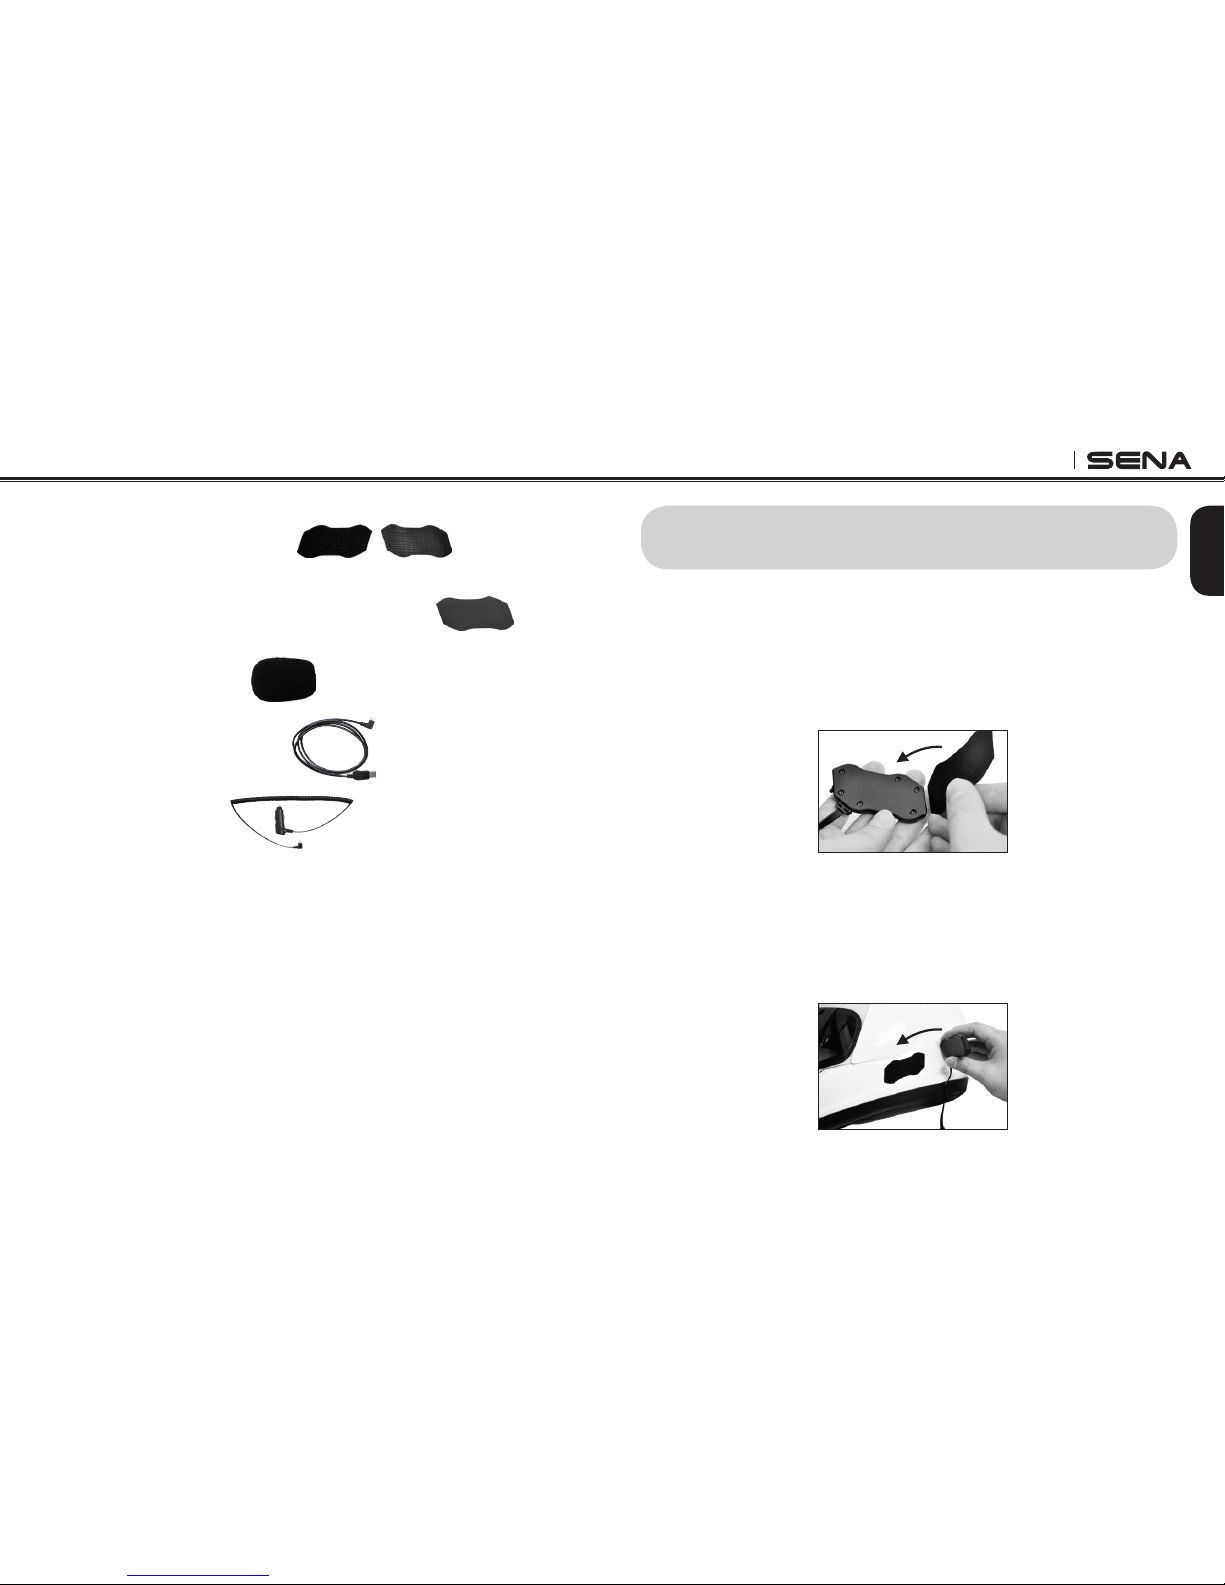
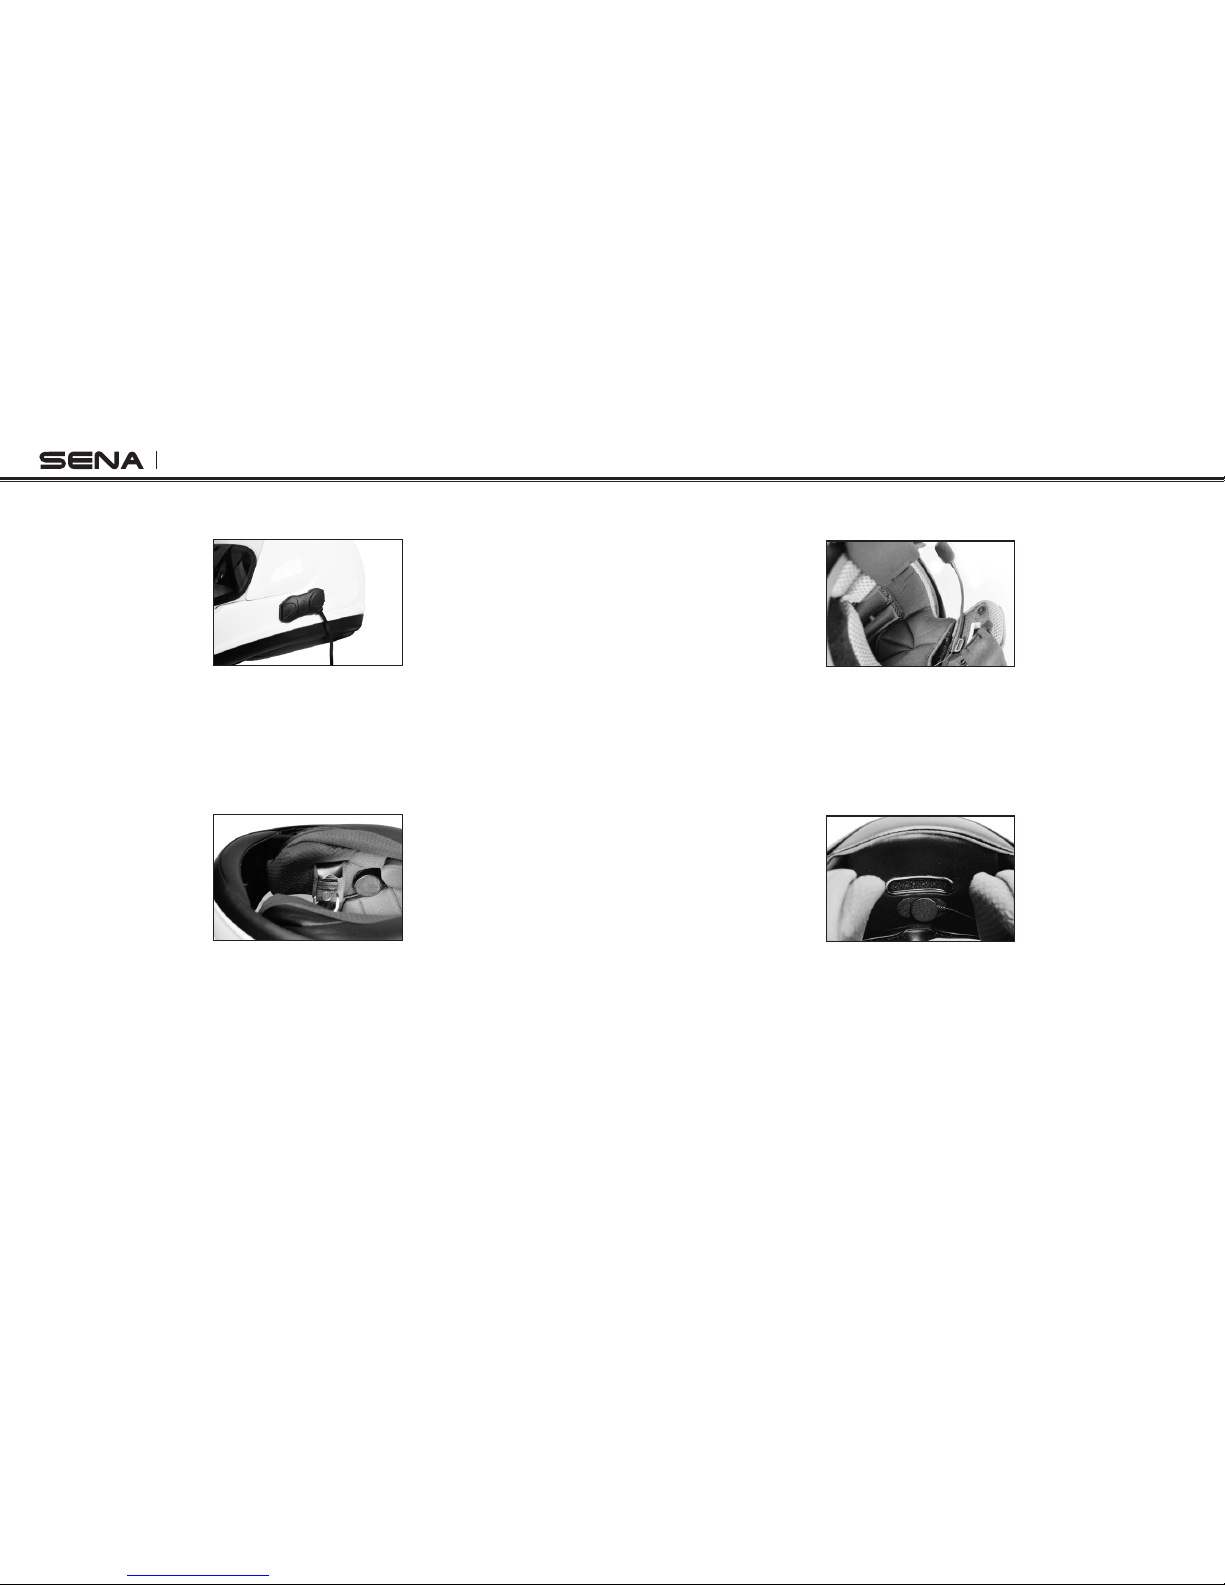
3. INSTALLING THE SMH10R ON YOUR HELMET
4. POWERING ON/OFF AND CHARGING
4.1 Powering On
4.2 Powering Off
4.3 Charging
4.4 Low Battery Warning
4.5 Checking the Battery Level
5. VOLUME ADJUSTMENT
6. SMH10R CONFIGURATION SETTING
6.1 Mobile Phone Pairing
6.2 Multipoint Pairing
6.3 Phone Selective Pairing
6.4 Media Selective Pairing
6.5 Enabling/Disabling Voice Activated Phone Answering
6.6 Enabling/Disabling Voice Activated Intercom
6.7 Setting Intercom VOX Sensitivity
6.8 Enabling/Disabling Voice Prompts
6.9 Delete All Bluetooth Pairing Information
6.10 Reset to Factory Default Setting
6.11 Exit Voice Configuration Menu
7. PAIRING THE SMH10R WITH BLUETOOTH DEVICES
7.1 Mobile Phone Pairing
7.2 Multipoiint Pairing
7.3 Bluetooth Stereo Device Pairing
7.4 Bluetooth GPS Navigation Pairing
7.5 Pairing with the Sena SR10, Bluetooth Two-way Radio Adapter
8. PAIRING WITH SELECTIVE PROFILE: HFP OR A2DP STEREO
8.1 Phone Selective Pairing: HFP for Phone Call Only
8.2 Media Selective Pairing: A2DP Stereo Music Only
9. INTERCOM PAIRING
9.1 Pairing with Other SMH10R Headsets for Intercom Conversation
9.2 Pairing with Other Sena Headset Models for Intercom Conversation
10. FUNCTION PRIORITY
11. STEREO MUSIC
12. MOBILE PHONE CALL MAKING AND ANSWERING
13. TWO-WAY INTERCOM
3
4
5
7
7
7
7
7
8
8
9
10
10
10
10
10
11
11
11
12
12
12
13
13
14
14
15
17
18
18
18
19
19
20
20
21
22
23
23
23
24
24
25
26
26
27
28
28
28
29
29
29
30
30
30
30
31
31
32
32
33
33
34
34
35
35
35
35
35
36
36
36
38
38
39
39
CONTENTS