Senna LightStation User manual

LightStation
by SENNA
User Manual

1. Introduction
LightStation is a system of LED panels and the wireless control plate which enables you to set and store
different light presets and scenes which can be recalled at any point. The settings include dimmer and
temperature regulation.
LightStation is a modular system, meaning that one channel can control 1 LED panel or endless number of
panels depending on your needs. There master settings for storing six different light scenes, meaning that you can
set and store six different combinations of light presets of LED panels. Fade speed control between light scenes
is adjustable. Strobe and running lights, with adjustable speed, are available, too.
1.1 Features:
Wireless light control
6 bank/24 channel system (4 channel per bank)
Remote dimmer and temperature regulation
6 light scene storages
Auto memory recall and cycle option
Fade speed
Strobe and running lights–adjustable speed
Special effect presets–fire, candle lights, thunder lights, TV, police lights…
1.2 Specifications:
CONTROL PLATE
Parameter
Description
Control plate dimensions
28x5,5x20cm
Control plate weight
0,6 kg
Operating voltage
7,4 v
Operating temperature
0 ÷ 45 °C (or more if connected to power adapters)
Battery
Rechargeable Lithium Battery Pack (7.4v, 2400mAh)
Wireless frequency
431 ÷ 478 MHz, frequency is preset on 444 MHz and
cannot be changed on device, only in factory when
ordering, in steps of 200 KHz (235 channels)
Wireless output power
20 mW
Wireless range
up to 300 m line of sight
LED PANELS
Parameter
Description
Dimensions
238X190X32mm
Weight
540g
Bulbs
528 psc
Operating voltage
7,4 v
Operating temperature
0 ÷ 45 °C (or more if connected to power adapters)
Battery
Rechargeable Lithium Battery Pack (7.4v, 6400mAh)
Wireless frequency
431 ÷ 478 MHz, frequency is preset on 444 MHz and
cannot be changed on device, only in factory when
ordering, in steps of 200 KHz (235 channels)
Wireless output power
20 mW
Wireless range
up to 300 m line of sight
Luminous intensity
2000 lux
Color temperature
3200K-5600K
Beam Angle
75°
Flicker
Flicker-free

1.3 Components:
Control plate
4 LED Panels with diffusors
8 batteries
1 x stand 0,5m-2,1m
2 x stand 1m-2,6m
1 x boom stand
1 x four-stand bag
4 x honeycomb grids (7°, 15°, 20°,
45°)
6 x color filters
2 x filter/grid rails
4 x joint adapter
1x Holder with ball heads (if ordered)
5 x Power adapter
Flight Case (panels and control plate)

2. Part diagram
2.1 Control plate diagram
2.2 Led panel diagram

3. Mounting the system
3.1. Mounting the panels
Before you switch the system on, you need to
mount the panels on the stands. Systems includes 4
light stands:
One small stands (0,5m-2,1m)
Two standard stands (1m-2,6m)
One boom stand (1m-6m)
Using the joint adapter you can adjust the angel of
panel:
3.2 Mounting the grids
LightStation systems includes 4 different
honeycomb grids (7°, 15°, 20°, 45°)
To mount the grids on the panels, simply
insert the grids into the slot on the panels as
shown in the picture. You can mount color
filter on panels the same way.

3.2.1. Mounting honeycomb grids and colour filters
If you have a need to use honeycomb grids and color filters at the same time, please follow the steps:
1. Mount the filter/grid rails on the
panel. Using the screws on the rails
attach the rails on both sides of the
panel.
2. Insert the grids into the slot on the
panel.
3. Insert the color filter into the slot
on the rails.
4. Getting started
Now that you have mounted the panels on light stands you can turn the system on by following the steps:
1. Insert the battery into battery adapter on the control plate. Press the battery bumper, insert the battery safety
into battery adapter and release the battery safety bumper.
2. Insert two batteries into battery adapters on the back of each panel
3. Turn the power switch button on LED panels on.
4. Turn the power switch of the control plate on.
5. The control plate will start establishing wireless connection with panels and the lights will flash on all buttons.
6. When the lights on buttons turn off, wireless connection is established and your LightStation system is ready for
use.
4.1. Setting the panel address
In order to be able to control the panel with the light control plate, you need to set the address of each panel.
The address of the panel shows which channel controls it. To set the address of the panel please press the
Address button on the back of the panel as many times as needed to set the channel number as shown in the
pictures below:

Channel 1
Channel 2
Channel 3
Channel 4
4.2. Using more than one panel per channel
Basic LightStation set includes 4 LED panel. However, LightStation is a modular system, meaning that it can
control as many panels as you like, and if you need more light, you can extend your configuration with more
panels whenever you like. Pay attention! The system can control only Senna LED panels. Other LED panels are
not compatible with the system and cannot be controlled with Senna Light controller.
When you use more than four panels in LightStation
system, you can mount up to 4 LED panels on one
single stand. (see the picture)
To mount more panels on a stand please follow the
steps:
1. Attach the holder with ball heads to the stand
2. Attach the LED panels to the ball heads
Holder with ball heads
Pay attention! When you use more than one panel per channel the important thing you need to do is to set
the same address on all the panels you want to control with one channel.

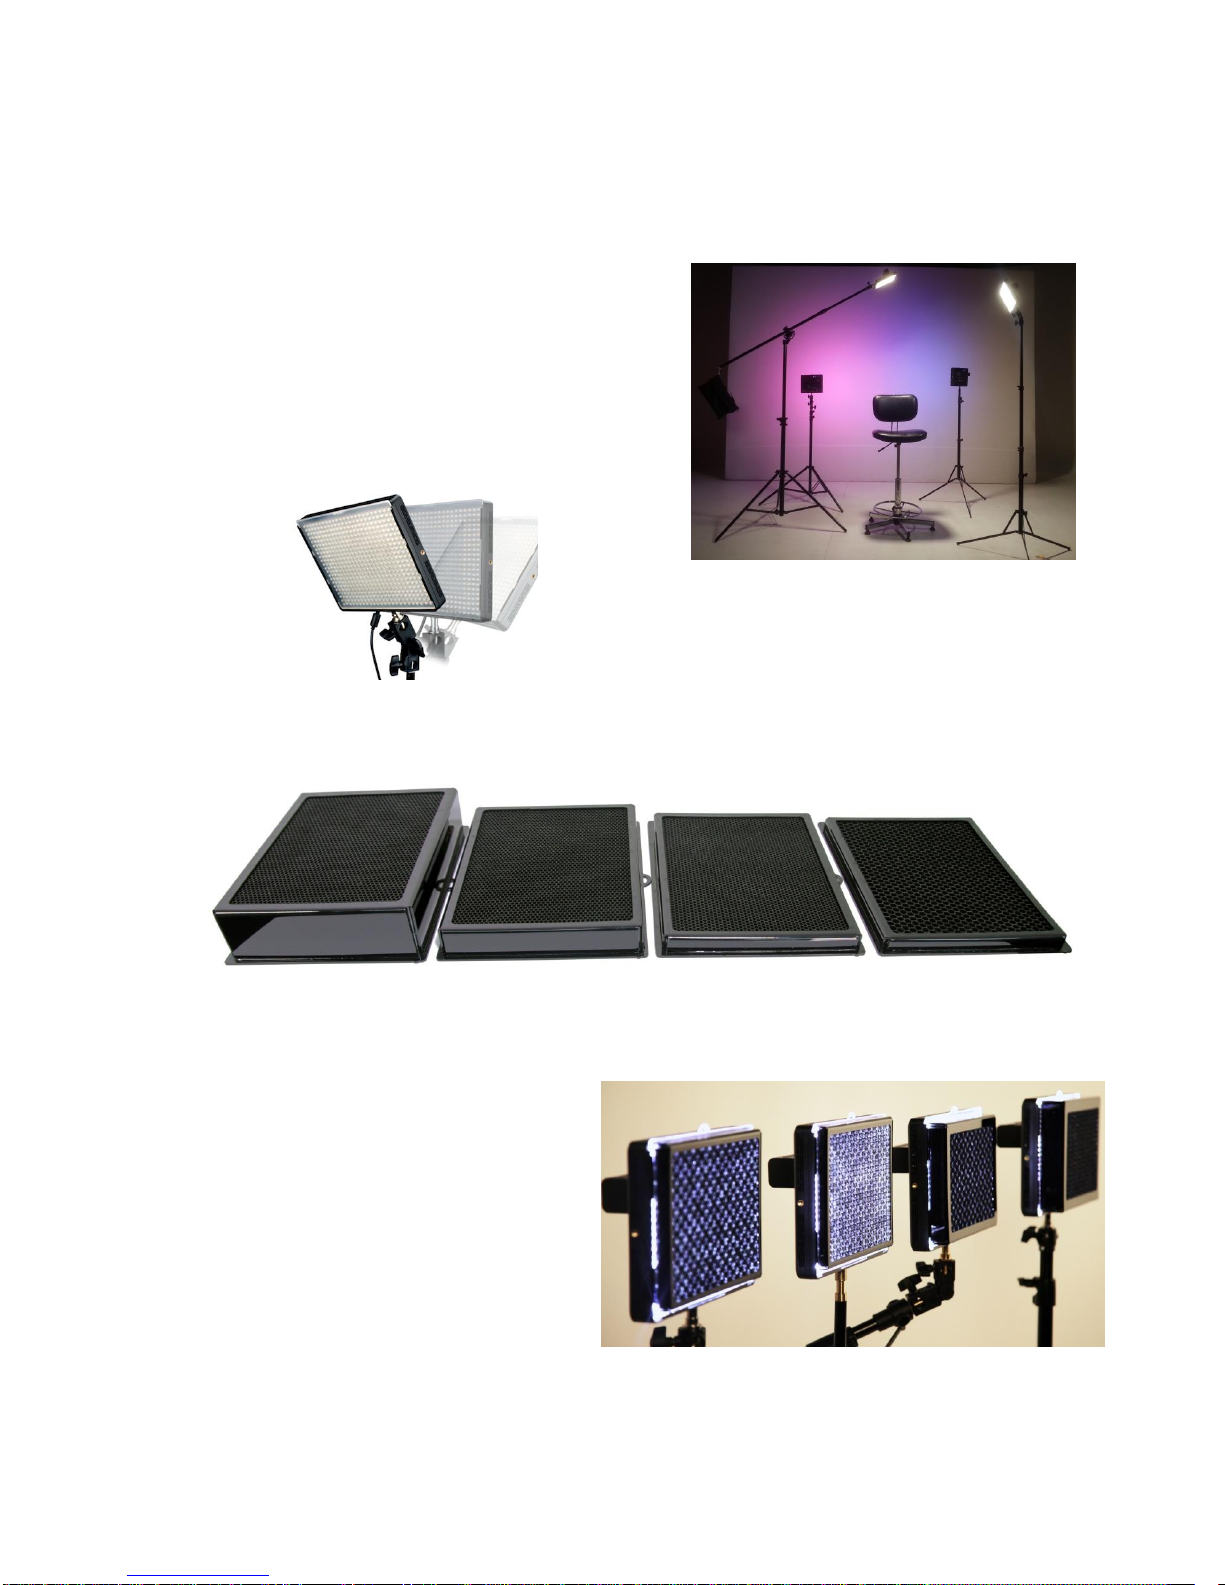
4.3. Dimmer and temperature regulation
Now that the address of the panels are set, you can
easily regulate dimmer and color temperature of each
panel remotely using dimmer regulation knobs on the
control plate. Any change you make with be shown on
display –in percentage and Kelvins.
5. Advanced settings
5.1. Scene settings
Scene settings allow you to set and store six different light scenes - combinations of light presets of LED panels.
To set and store light scenes, please follow the steps:
1. Adjust dimmer and colour temperature of 4 channels
using dimmer/temperature knobs on the control plate.
2. Press and hold scene button 1
3. All scene buttons will flash red.
4. The desirable light scene is now stored.
5. Repeat the steps 1-3 until you have stored all six
light scenes.
To recall the scene:
Stored scenes now can be recalled at any time by
short press to the memory button.
When recalled, memory button will turn green.
The display with show dimmer and temperature
settings of each channel of the stored scene.
5.1.1. Scene Fade speed
Fade speed between recalled light scenes can be easily adjusted using the Fade speed knob.
5.1.2. Auto Scene recall
After you have stored the desired light scenes, you can set the automatic scene recall.
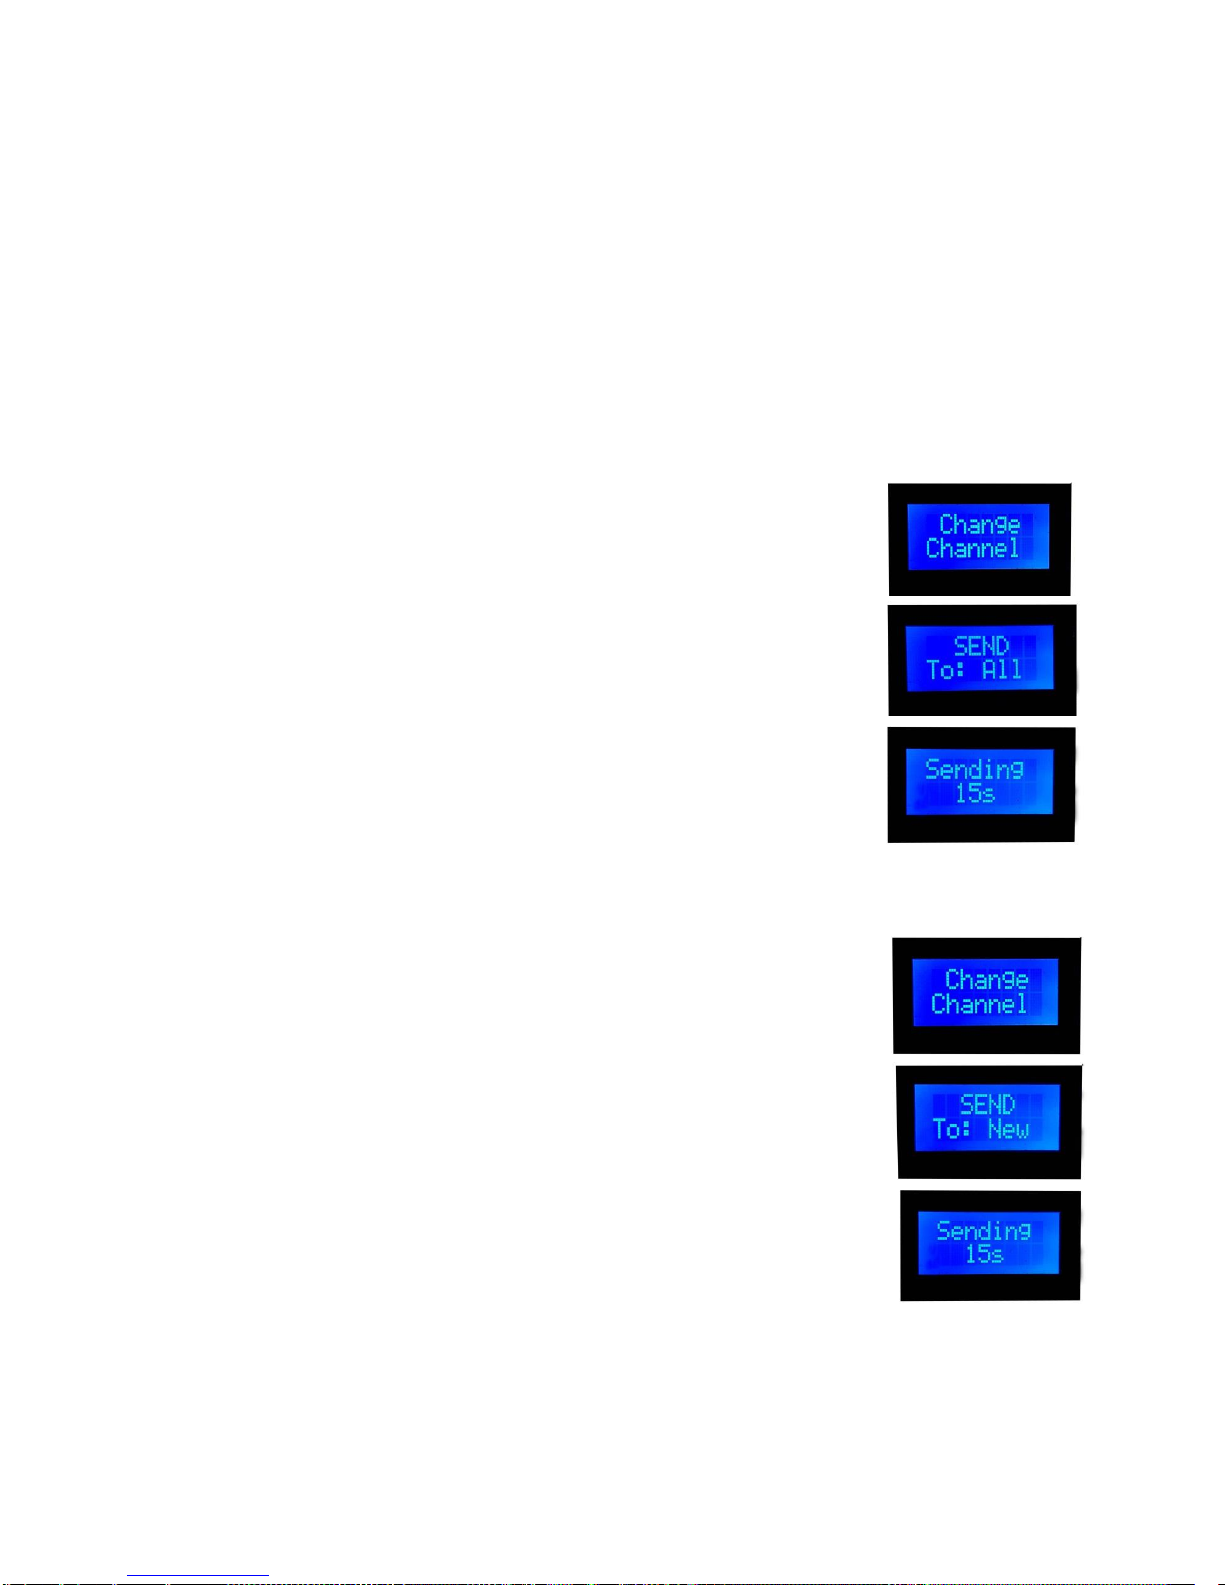
To set auto scene recall, please follow the steps:
1. Press and hold Menu button and while holding it press scene button with which you would like to
start the recall session. Green light on the memory button will turn on.
2. Now press scene button where the second wanted scene is stored. Green light on the first scene
button will turn on, and then on the second scene button (the lights will constantly loop showing the
order of scene recall session)
3. Repeat the step 2 until you have set all wanted scenes in desired recall session. (You can set the same
light scene in session more than once)
4. Now you can release the Menu button.
5. Auto scene recall session is now stored.

IMPORTANT: Start pressing the memory buttons right after you have
pressed Menu, otherwise you will enter the Menu.
To activate Auto scene recall press the Menu button shortly.
The panels will turn to the first stored light scene, and then to each
next added scene and they will stop at the last scene stored in session.
Display with indicate that scene recall is active and the length of the
session recalled.
Fade speed between recalled light scenes can be adjusted with the Fade speed knob.
5.1.3. Scene Loop cycle
This option allows the system to constantly loop over the stored light scenes in the order you have set.
To set scene loop cycle option, you should follow the steps 1-5 in the charter Auto Scene Recall, but pay
attention to set the same light scene as the first and the last in the scene recall session!
Set as described, the light will keep looping as long as you do not press the Menu button shortly once again.
5.2. Running lights
The option of running lights can be activated by
pressing the Running button
The green light indicator will turn on and the
lights will shift one by one.
The speed of running lights can be adjusted using
Strobe/Running Speed knob.
To deactivate running lights option just press
Running button once again.
The green light indicator will turn off and the
lights will stop running.
5.3. Strobe
The Strobe option can be activated by pressing the Strobe button
The green light indicator will turn on and the lights will start flashing.
The strobe speed can be adjusted using Strobe/Running Speed knob.
To deactivate strobe option just press Strobe button once again.
The green light indicator will turn off and the lights will stop flashing.
Note! Strobe and Running lights option cannot be activated at the same time.
6. Menu options
To enter the Menu, please press and hold the Menu button for a few
seconds.
To navigate through the Manu, use Strobe (for previous) and
Running lights (for next) buttons.

The options of the menu are:
1. Change channel
2. Change bank
3. Change settings (available for customised orders)
4. Console settings
5. Change DMX (available for customised orders)
6. Exit menu
7. Choose effects
6.1. Change channel:
In order to be able to change the channel of the panel/s, control plate and the panel/s must be set on
the same bank.
To change the channel of the LED panel/s, please follow the steps:
1. Press the hold Menu button for a few seconds to enter the Menu.
2. Use Stobe/Running buttons to find the option “Change channel”
3. Press the Menu button to confirm the request
4. Use Stobe/Running buttons to choose the channel (1-4)
5. Press the Menu button to confirm the request
6. The display with show “Send to ALL” meaning that the channel of
all panels that are turned on at that moment will be changed.
7. To confirm the request press and hold Menu button until the
display shows counting down (from 30s to 0)
8. The panel/s will start blinking
9. Press Menu button once again to confirm.
10. Display with show “Channel changed”
If you don’t want to change the channel of all panels, please follow this
procedure:
1. Keep the panel/s you want to change the channel to turned OFF.
2. Follow the steps 1-6 from the instructions above.
3. Use Stobe/Running buttons to change the option to “Send to New”
4. Press and hold the Menu button to confirm the request
5. The display will show counting down (from 30s to 0)
6. Now turn the panel ON (within this 30 seconds)
7. The panel will start blinking
8. Press Menu button once again to confirm.
9. Display with show “Channel changed”

6.2. Change bank
This option refers to the bank of the panel/s. You can use control plate to easily change the bank of the
panels. This is the procedure:
1. The control plate must be set on the same bank as the panel/s
you want to effect on.
2. Press the hold Menu button for a few seconds to enter the
Menu.
3. Use Stobe/Running buttons to find the option “Change bank”
4. Press the Menu button to confirm the request
5. Use Stobe/Running buttons to set the desirable bank number
(1-6)
6. Press the Menu button shortly to confirm the request
7. The display with show “Send to ALL” meaning that the bank
of all LED panels that are turned on at that moment will be
changed.
8. To confirm the request press and hold Menu button until the
display shows counting down (from 30s to 0)
9. The panel/s will start blinking
10. Press Menu button once again to confirm.
11. Display with show “Finished, exiting”
12. Bank is changed
If you don’t want to change the bank of all panels, please follow this procedure:
1. The control plate must be set on the same bank as the panel/s you want
to effect on.
2. Keep the panel/s you want to change the channel to turned OFF.
3. Follow the steps 1-7 from the instructions above.
4. Use Stobe/Running buttons to change the option to “Send to New”
5. To confirm the request press and hold Menu button until the display
shows counting down (from 30s to 0)
6. Now turn the LED panel/s ON (within 30 sec)
7. Panel/s will start blinking.
8. Press Menu button once again to confirm.
9. Display with show “Finished, exiting”
10. Bank is now changed
IMPORTANT: To be able to control the panel/s, the bank of the control plate and the panel/s must be
the same!

6.3. Console settings
With console settings you can change display backlight intensity or the color of control plate light:
1. RGB LED color:
13. Press the hold Menu button for a few seconds to enter
the Menu.
14. Use Stobe/Running buttons to find the option “Console
settings”
15. Press the Menu button to confirm the request
16. Use Stobe/Running buttons to find the option “RGB
LED color”
17. Press the Menu button to confirm the request
18. One Dimmer knobs (Daylight) of the Channel 1, 2 and 3 to mix the colors.
19. When you have reached desirable intensity, press Menu button shortly to confirm the request.
2. Display backlight:
1. Press the hold Menu button for a few seconds to enter
the Menu.
2. Use Stobe/Running buttons to find the option “Console
settings”
3. Press the Menu button to confirm the request
4. Use Stobe/Running buttons to find the option “Display
backlight”
5. Press the Menu button to confirm the request
6. The display will show “ Move WhitePOT”
7. Use the Dimmer knob (Daylight) of the Channel 1 to change the intensity of display backlight.
8. When you have reached desirable intensity, press Menu button shortly to confirm the request.
6.4. Choose effect
There are 10 special effect presets available:
1. Warning light
2. Police effect (Red color filter should be added on one panel and the blue one on the other)
3. Security escort (Red color filter should be added on one panel and the blue one on the other)
4. Fire effect (It is recommended to add orange color filter on the panel)
5. Candle light (It is recommended to add orange color filter on the panel)
6. Sunrise
7. Sunset
8. Watching TV
9. Thunder Type I
10. Thunder Type II
To activate desirable effect:
1. Press the hold Menu button for a few seconds to enter the Menu.

2. Use Stobe/Running buttons to find the option “Choose effect”
3. Press the Menu button to confirm the request
4. Use Stobe/Running buttons to find choose desirable effect
5. Press Menu button shortly
6. The effect with start playing, and the display will show “Playing effect”
7. To change the intensity of the effect, use the Dimmer knob (Daylight) of the Channel 1.
8. To stop the effect, press Menu button shortly.
9. To exit the option, choose “Exit menu” and press the Menu button once again to confirm.
7. Using GafferStation console
GafferStation is simplified model of
LightStation control plate.
Dimmer/Temperature regulation for 4
channels is available the same way as no
LightStation control plate.
There are 2 light Scenes available (the
procedure of storing light scenes is the
same as on LightStation control plate)
There are no Strobe/running options
8. Using LightStation LED panels separately from the system
LightStation LED panels can also be used separately from the set, meaning that you can control them manually.
To unlink the panel from the system, please follow the steps:
1. Turn the panel off.
2. Press and hold Address button on the back of the panel.
3. While you are holding the Address button, turn the panel on. The Address button will start flashing.
4. Release the address button.
5. The LEDs will turn on.
6. The panel is now unlinked from the system and it can be controlled manually.
If you want to return the Panel to remote control, just turn it off and on again, and it will be a part of LightStation
system again.
8.1. Manual control
To adjust the dimmer and colour temperature
manually, use dimmer and temperature knobs on the
back of the panels.
The value will be shown on the display.

9. Batteries
LightStation system (control plate and panels)
run on 7.4v rechargeable batteries.
The batteries capacity of the system is 2 working hour.
9.1. Checking the state of batteries:
To check the state of the control plate battery please
check the voltage indicator display.
If the voltage is under 6,5 battery needs to be charged.
Please attach the power adapter.
If the voltage is 7,4 battery is fully charged.
To check the state of the panels batteries, please read
the voltage indicator on back of the panel.
If the indicator shows 1 green square, the batteries need
to be charged. Please attach the power adapter.
If the indicator shows 4 green squares, the batteries are
fully charged.
9.2. Charging the batteries
When the batteries get empty, you should attach the power adapter on the control plate/LED panels. With the
power adapter attached, the system can work on mains power and charge the batteries at the same time.

Power adapter inputs
Table of contents
Other Senna Lighting Equipment manuals