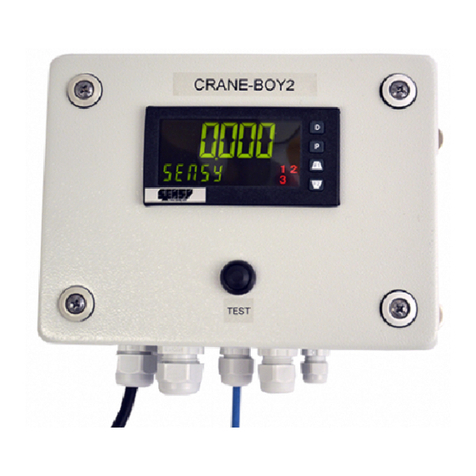
SENSY INDI-PAXS2 User manual

QUICK START INDI-PAXS2®
For more information, see the manual which can be found on www.sensy.com/support
Pour plus d’informations, voir le manuel qui peut être trouvé sur www.sensy.com/support
SENSORS AND SYNERGY S.A. –SENSY S.A. / Z.I Jumet - Allée Centrale - 6040 Jumet, Belgique Belgium / Tel. +32 71 25 82 00 - Fax +32 71 25 82 05 / Email : info@sensy.com
09/01/2020
This page provides information on key parameters that must be
adjusted during the commissioning of an INDI-PAXS2. The values
set for these parameters depend on the application (see the Data
Sheet). By default, the indicator displays the current and
calibrated value. To enter the configuration menu, perform the
operations described in this document.
Cette page vous informe sur les principaux paramètres qu’il faut
adapter lors de la mise en service d’un appareil de mesure des
INDI-PAXS2. Les valeurs à introduire pour ces différents
paramètres dépendent de l’application (voir fiche d’étalonnage).
Par défaut, l’indicateur affiche la valeur courante et étalonnée.
Pour entrer dans le menu de configuration, il faut effectuer les
opérations décrites dans ce document.
The basic functions for navigating through the menus of the
display are :
Les fonctions de base pour naviguer à travers les menus de
l’afficheur sont :
To validate and to go to the next parameter
Valider et passer au menu ou paramètre suivant
To increment the displayed value
Incrémenter la valeur affichée
To decrement the displayed value
Décrémenter la valeur affichée
To leave the menu
Sortir du menu
As Sensy’s sensors are linear, calibration can be done with only
2 points. Moreover, it also allows calibrating the display with a
different load of the bridge’s capacity (at least 75% of its capacity).
The display will then extrapolate between zero (no load) and the
load used during the calibration to calculate the sensitivity of the
sensor.
Etant donné que les capteurs Sensy sont linéaires, l’étalonnage
peut se faire en 2 points seulement. De plus, cela permet aussi
d’étalonner un afficheur avec une charge différente de la capacité
du pont (au minimum 75% de la capacité). L’afficheur va alors
extrapoler entre le zéro (capteur à vide) et la charge pesée lors
de l’étalonnage pour calculer la sensibilité du capteur.
We give the example of a 12t bridge, calibrated with a load of 9.5t
with an INDI-PAXS2.
Nous donnons l’exemple d’un pont de 12t, étalonné avec une
charge de 9,5t sur un INDI-PAXS2.
1
CONFIGURATION
PARAMETRAGE
Press P to display
COdE 0
Appuyer sur P pour
afficher COdE 0
Press F1 to enter
COdE 7
Appuyer sur F1
pour entrer COdE 7
Enter with P
Valider avec P
2
CALIBRATION
ETALONNAGE
Press F1 to display
INPUt
Appuyer sur F1
pour afficher INPUt
Press P to enter
the menu INPUt
Appuyer sur P pour
entrer dans le
menu INPUt
Press P to enter
the menu ANALOG
Appuyer sur P pour
entrer dans le
menu ANALOG

QUICK START INDI-PAXS2®
For more information, see the manual which can be found on www.sensy.com/support
Pour plus d’informations, voir le manuel qui peut être trouvé sur www.sensy.com/support
SENSORS AND SYNERGY S.A. –SENSY S.A. / Z.I Jumet - Allée Centrale - 6040 Jumet, Belgique Belgium / Tel. +32 71 25 82 00 - Fax +32 71 25 82 05 / Email : info@sensy.com
09/01/2020
Factory setting
D’usine
To go to the next line of the menu, press to validate
Pour aller à la ligne suivante du menu, appuyer sur pour
valider.
Example
Exemple
Your case
Votre cas
Input type and scale
As Sensy’s load cells have a sensitivity
less than 2mV/V, the signal should not be
above 24mV for an INDI-PAXS2.
Type et échelle d’entrée
Pour les capteurs Sensy ayant une
sensibilité inférieure à 2mV/V, le signal ne
devrait pas dépasser 24mV pour un INDI-
PAXS2.
0.024u→±24mV
0.24u→±240mV…
Input update rate
Taux de rafraichissement de l’entrée
Display resolution
Résolution de l’affichage
Display rounding increment
Arrondi de l’affichage
Display tare value
Valeur de tare de l’affichage
Filter setting
Réglage du filtre
Filter band
Generally, 5% of the nominal load of the bridge (i.e. :12t * 5% =
0.6)
Bande d’action du filtre
En général, 5% de la capacité nominale du pont (ex. : 12t * 5% =
0.6)
Linearization - number of scaling points
Linéarisation –nombre de points de mise à l‘échelle
APPLY : Calibration with reference loads
KEY : Calibration programmed through keyboard
APPLY : Etalonnage avec des masses étalons
KEY : Etalonnage en entrant les valeurs manuellement

QUICK START INDI-PAXS2®
For more information, see the manual which can be found on www.sensy.com/support
Pour plus d’informations, voir le manuel qui peut être trouvé sur www.sensy.com/support
SENSORS AND SYNERGY S.A. –SENSY S.A. / Z.I Jumet - Allée Centrale - 6040 Jumet, Belgique Belgium / Tel. +32 71 25 82 00 - Fax +32 71 25 82 05 / Email : info@sensy.com
09/01/2020
APPLY
Example
Exemple
Your case
Votre cas
KEY
Reading of the zero:
The existing programmed value will appear.
To update this value, unload the cell, press
and confirm by pressing .
Lecture du signal à vide :
La valeur programmée s’affiche. Pour mettre
à jour cette valeur, mettre le capteur à vide,
appuyer sur et valider avec
Configuration of the no load value:
Enter the value of the no load signal and
confirm by pressing
Enregistrement de la valeur à vide :
Entrer la valeur du signal à vide et valider
avec
Enter the value to display for no load
(normally 0) and confirm by pressing
Entrer la valeur à afficher pour le capteur à
vide (en principe 0) et valider avec
Enter the value to display for no load
(normally 0) and confirm by pressing
Entrer la valeur à afficher pour le capteur à
vide (en principe 0) et valider avec
Reading of the loaded signal:
The existing programmed value will appear.
To update this value, load the cell, press
and confirm by pressing .
Lecture du signal en charge :
La valeur programmée s’affiche. Pour mettre
à jour cette valeur, mettre le capteur en
charge, appuyer sur et valider avec
Configuration of the loaded signal:
Enter the signal for a known load and confirm
by pressing
Enregistrement de la valeur en charge :
Entrer la valeur du signal pour une charge
connue et valider avec
Enter the value of the load and confirm by
pressing
Entrer la valeur de la masse étalon et valider
avec
Enter the value of the load and confirm by
pressing
Entrer la valeur à afficher pour la charge et
valider avec
Press P then D (several times) to see End to go out of the
menu and back to the general display with saving of the
configuration.
Appuyer sur P puis sur D (plusieurs fois) jusqu’à l’apparition de
End pour sortir du menu et revenir à l’affichage général avec
mémorisation.
3
ABOUT THE SUMMATION
A PROPOS DE LA SOMMATION
Two analog output cards (CARD-CDL10) are needed for the
summation or the module 8-out is not enabled.
Deux cartes de sortie analogique (CARD-CDL10) sont
nécessaires pour la sommation ou le module 8-out n'est pas
accessible.
Analog output parameters
Paramètres de la sortie analogique
Selection of the analog type
tYPE AnL
Sélection du type de la sortie analogique
Assignment of the source for the analog output
ASSIGN AnL
Affectation de la source à la sortie analogique
Low scale dsiplay value
ANALOG LO
Valeur basse de l’échelle d’affichage
High scale display value
ANALOG HI
Valeur haute de l’échelle d’affichage
Update time
UPdAtE AnL
Période de rafraîchissement
Do step 1 then
Suivre l’étape 1 pui
Press F1 to display
OUtPUt
Appuyer sur F1
pour afficher OUtPUt
Press P to enter
the menu
Appuyer sur P pour
entrer dans le
menu
Press F1 then P to
enter the menu
ANALOG
Appuyer F1 puis
sur P pour entrer
dans le menu
ANALOG

QUICK START INDI-PAXS2®
For more information, see the manual which can be found on www.sensy.com/support
Pour plus d’informations, voir le manuel qui peut être trouvé sur www.sensy.com/support
SENSORS AND SYNERGY S.A. –SENSY S.A. / Z.I Jumet - Allée Centrale - 6040 Jumet, Belgique Belgium / Tel. +32 71 25 82 00 - Fax +32 71 25 82 05 / Email : info@sensy.com
09/01/2020
Example 1
Exemple 1
Example 2
Exemple 2
Example 3
Exemple 3
Example 1
Exemple 1
Example 2
Exemple 2
Example 3
Exemple 3
tYPE
4-20
4-20
0-20
tYPE
4-20
4-20
0-20
ASSIGN
INP
INP
INP
ASSIGN
INP
INP
INP
LO
0
0
-3.5
LO
0
0
-3.5
HI
12.0
14.0
14.0
HI
12.0
14.0
14.0
UPdAtE
0.0
0.0
0.0
UPdAtE
0.0
0.0
0.0
1-lnP
Example 1
Exemple 1
Example 2
Exemple 2
Example 3
Exemple 3
INP1
8.00
8.00
0.00
mA
dSP1
0
0
-7.0
INP2
40.00
40.00
40.00
mA
dSP2
24.0
28.0
28.0
The configuration of this menu must be the same on both INDI-
PAXS2.
La configuration de ce menu doit être identique sur les deux
INDI-PAXS2.
ANALOG-LO1= ANALOG-LO2
ANALOG-HI1= ANALOG-HI2
The display values (dSPx) of the DISP-PAXD2 should equal the
summation of the analog outputs values (ANALOG-xx) of the
INDI-PAXS2.
Les valeurs d'affichage (dSPx) du DISP-PAXD2 doivent être
égales à la somme des valeurs des sorties analogiques
(ANALOG xx-) de l’INDI-PAXS2.
dSP1 = ANALOG-LO1+ ANALOG-LO2= 2 * AN-LO
dSP2 = ANALOG-HI1+ ANALOG-HI2= 2 * AN-HI
Other SENSY Measuring Instrument manuals
