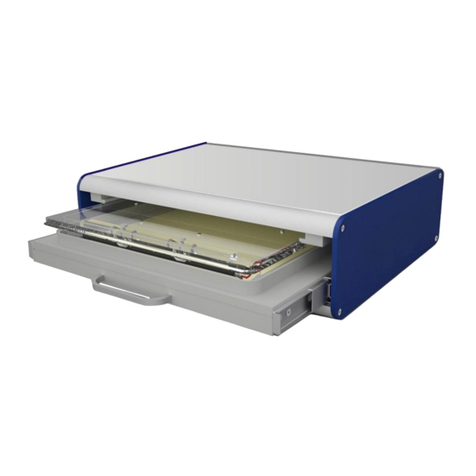
serva BlueStain User manual

SERVA BlueLine
Instruments for Electrophoresis
SERVA BlueStain
Automatic Gel Stainer
Instruction manual
Cat. No. BST-01


550138 BlueStainE Ver 0323
General information
Keep the instruction manual close at hand nearby your device. We structured this document in a way
that you can refer to the desired information via the index. We recommend reading all the chapters to
obtain detailed explanations and operations notes. Aim of this instruction manual is to make the
operation accessible to you with a language easy to understand. Get in touch with our technical
service should any questions arise or explanations being unclear (contact details, see rear page).
By using the packing list, please check after unpacking, if all parts of the device are complete and the
device is undamaged. If this is the case, please inform SERVA Electrophoresis GmbH at once.
The warranty period is 12 months and starts at delivery. We ask for setting the packing material
aside until warranty period is expired.
Transport and important data
There are no specific requirements during transport
Note catalog and serial number here in advance:
Catalog number:
Serial number:
Our target group
The SERVA BlueLine devices are intended for laboratory use. English is considered as the global
language of science. The target group of this instruction manual is skilled laboratory staff. Among them
count workers-in-training (e.g. trainee, apprentice, diplomate and postgraduate) after briefing as well.
Local safety regulations (e.g. biological, chemical, radioactive and medical risk- und security level)
cannot be considered in this manual. The liability in these issues lies with the user.
Security definitions
ATTENTION
Light to heavy injuries are possible.
CAUTION
Light to heavy injuries are certain.
WARNING
Irreversible to fatal injuries are possible.
DANGER
Irreversible to fatal injuries are certain.

550138 BlueStainE Ver 0323
Security symbols
Attention, Danger! The symbol is a sign of a common injury risk for human. It
refers to both transport, operation and maintenance of the device. The security
definitions above bespeak the degree of the endangerment. The accompanying
text explains and indicates to possible preventions.
Attention, Electric Shock! The symbol is a sign of an injury risk for human
caused by electrical shock. It refers to both transport, operation and maintenance
of the device. The security definitions above bespeak the degree of the
endangerment. The accompanying text explains and indicates to possible
preventions.
SERVA assistance
Assistance Contact
Sales Team (Germany) Contact your local sales representative to receive product information, to
arrange demonstrations or to inquire quotations and product samples.
Distributor (International)
Outside Germany, please contact your local distributor for product
information, pricing and inquiries. The contact details of our worldwide
distributors are listed on our website.
Customer Care Our sales department is informing you about prices, inquiries and shipment.
The contact details are listed on the rear page of the manual.
Technical Service Our Technical Service is your contact point for technical and scientific
questions about our products.
Product Specialist Our Product Specialists for individual applications are glad to assist you with
improving your method and solve problems. Ask our Technical Service for
the contact.
Download Center In our Download Center you find all Manuals, ApplicationNotes and
TechNotes regarding our products. Downloadable are brochures, the online
catalog and various certificates as well. Additionally, on the single product
pages in the online shop, MSDS and the specifications are deposited.
Webinar Archives Inform yourself about our future webinar dates under Events on our website.
Recorded videos of previous webinars can be downloaded from our Webinar
Archives.
General lab safety information
In the lab, wear gloves, lab coat and safety goggles. Do not wear jewelry or watches.
Avoid contact with mouth, nose and eyes by hand before having your hands washed. Treat
and dress small wounds sufficiently.
Before leaving the lab, take your safety equipment off and wash your hands thoroughly with
soap.
Change the gloves frequently and remove them before using a telephone, a light switch or a
writing utensil.
Clean your equipment, lab bench and devices frequently and directly after contamination with
a mild soap and disinfectant.

550138 BlueStainE Ver 0323
Hazards
If the user follows the safety regulations as described below, the SERVA BlueLine devices are
designed in a way that safe working is ensured. Any warranty claim will be voided if the device or its
spares are changed and modified by an unauthorized person. Working contrary to regulations will void
warranty claim additionally.
Cleaning and disinfection
Clean the SERVA BlueLine devices before first start-up and then frequently with a mild detergent
(0.1% SDS solution) followed by distilled water as follows:
First, disconnect the device from the grid before start cleaning. Use lintless cloth soaked in water only.
To remove tenacious dirt, lintless cloth soaked in 0.1% SDS solution can be used before. Never use
aggressive cleaner or solvents. Let everything dry before reconnecting and start working. Parts of the
device that were in contact with other liquids than water must be cleaned after each usage to avoid
salting-out and encrusting. Perform program no5 (Cleaning Program) after each staining job to remove
chemicals from all hoses.
If contaminated, choose the disinfection method fitting your local regulations and guidelines. First,
disconnect the device from the grid and let the device cool down before start disinfecting. After
disinfection clean as described before.
If the device needs to be shipped back to SERVA, perform cleaning and disinfect if necessary.
Document this on the Decontamination Certificate (Download Center on www.serva.de) and enclose it
in the shipping box.
CE Certification
Important: This SERVA product is designed and certified to comply the safety guideline IEC 61010-1
+ Corr.
CE certified products are safe in use if utilized as described in the manual. The device has not to be
modified. After any modification, warranty and CE certification becomes null and void. Additionally,
these modifications may represent a potential source of danger.
SERVA is not responsible for any harm or injury that was caused by device modification, improper use
or unspecified applications.
Imprint
Parts of this manual neither may be changed nor used in any other form without permission in written
form on the part of SERVA Electrophoresis GmbH. We reserve the right to modify our products and
documents anytime. We assume no responsibility for errors, damage and injuries caused by
unspecified applications or noncompliance with the advised safety regulations.

550138 BlueStainE Ver 0323

550138 BlueStainE Ver 0323
Table of Contents
1 Introduction 1
2 Installation 2
2.1 Packing list 2
2.2 Operation conditions 2
2.3 Specifications 2
2.4 Set up / hose renewal 2
2.4.1 Pump setup 2
2.4.2 Tray setup 4
2.4.3 Valve setup 4
3 Operation 5
3.1 User Interface 5
3.2 Modi of the Main Menu 6
3.2.1 Run Selected job 6
3.2.2 Load / Edit Job 7
3.2.3 Manual Operation 9
3.2.4 Level tray 10
3.2.5 Toggle Buzzer 10
3.2.6 Show logfiles 10
3.2.7 Step simulation 10
3.2.8 Switch / change user 10
3.3 Pre-Programmed Staining Jobs 12
3.3.1 Program No1 Silver Staining Kit 13
3.3.2 Program No2 CSF Silver Staining Kit 14
3.3.3 Program No3 HPE™ Silver Staining Kit 15
3.3.4 Program No4 Your Own Program 16
3.3.5 Program No5 Cleaning Program 16
4 Pharma Upgrade Kit 17
4.1 Introduction 17
4.2 Firmware Upgrades 17
4.2.1 Lock/Unlock Screen 17
4.2.2 Installing printer 18
4.2.3 Additional SUPERUSER options 19
4.2.4 Printing and USB export 20

550138 BlueStainE Ver 0323 1
1 Introduction
SERVA BlueStain is an automatic gel stainer for accurate, reproducible and user-friendly staining of
polyacrylamide and film-backed polyacrylamide gels up to a format of 30 x 25 cm.
The device is characterized by a sturdy, long lasting construction: Built on an aluminum housing,
equipped with robust, precisely running motors, sophisticated electronics and high-quality 10-valve
pump technology. If necessary, the gels can be fixed with magnets. The movement of the table can be
controlled manually in all directions at a freely adjustable speed. For a gentle staining process, the
angle of inclination of the table is 4°. The generously dimensioned touch screen is waterproof and, like
the entire device, easy to clean. The built-in mechanism is maintenance-free.
The SERVA BlueStain is suitable for the whole range of currently applied staining methods. The
simple operation, the robust mechanics and the results achieved with the device make it an
indispensable tool in your laboratory. Programs are pre-installed on delivery, e.g. different methods of
Coomassie® and silver staining.
Due to flexible programming you can create your own logs or modify existing or pre-installed programs
at any time. You can also intervene in a program that is already running, i.e. cancel a step and go to
the next step.

550138 BlueStainE Ver 0323 2
2 Installation
2.1 Packing list
Main Unit
Mains cable
Staining Tray
Hoses for Valve
Hose for Pump
Plastic Tubes
2.2 Operation conditions
Use the BlueStain only in closed laboratories; maximum relative humidity up to 80% (at a temperature
up to 31 °C), decreasing linearly to 50% relative humidity (at a temperature up to 40 °C), with a
maximum altitude of 2000 m (NN).
2.3 Specifications
Power connection 240V, max. 150W
Max gel size 300 x 250 mm
Size touch screen 5’’
Number of programs 12
Inclination of table 4°
Dimensions (W x D x H) 175 x 410 x 390 mm
Moveable parts
WARNING
The device works with a moving rocker table able to cause finger or hand injuries
Do not insert finger or hand in between the rocker table and the base during run.
2.4 Set up / hose renewal
Do not lift the device at the shaking table! Place the device on the lab bench and unpack the spares.
2.4.1 Pump setup
For easy renewal of the pump hose, the SERVA BlueStain obtains a lever to open and close the
pump.
Move the lever to the left to open the pump. Remove both reducer on each side of the pump hose.
Pull out the old pump hose and insert a new one of same length centrically. Take care that it runs
through the V-shaped sides and over the pump rolls. Mount the reducer on each side and fix them with
a zip tie. Move the lever to the right to close the pump.

550138 BlueStainE Ver 0323 3
WARNING
Other cables or hoses on the back can be pinched
Do not force closing of the pump head if the resistance is too strong. The moving rollers
can, for example, cause a pinched power cable to strip and causing an electric shock.
Use the screw to set the appropriate contact pressure for the hose. If the contact pressure is too weak
or too strong, the solution delivery will be interrupted.

550138 BlueStainE Ver 0323 4
2.4.2 Tray setup
Place the tray onto the shaking table with the
out-/inlet facing to the rear right side. Use thin
hose to connect table out-/inlet to reducer.
2.4.3 Valve setup
Fix thin hose at right reducer with a zip tie.
Connect thin hose to valve inlet port
(unnumbered position in the middle) and fix it
with a zip tie. Connect 10 thin hoses to each
numbered port. Please note: The longer the
hoses 1-10, the higher the dead volume… Keep
it short!
Insert one white tube at each end of the hoses
1-10 and number them using the numbered
clamps according to the number the hose is
installed to.

550138 BlueStainE Ver 0323 5
3 Operation
Important Information: Always wear powder free disposable gloves when handling gels and staining
solutions.
3.1 User Interface
In this section, the user interface is explained and displayed using images. In the following sections,
the operation modi are explained and referred to this section.
Main Menu
Run Selected Job
Load/Edit Jobs
Select Job
Edit Job
Copy / Delete Job
Manual Operation
Switch Valve
Fill Table
Pump fwd/rev
Switch to Shaker Mode
Move Tray to Level Pos
Move Tray to Drain Pos
Level Tray
Initialize Device
Save Table Zero PosToggle Buzzer
Show logfiles
Show log Content
Copy log to USB
Step Simulation Start / Stop
Switch / Change User
Superuser Login
Select

550138 BlueStainE Ver 0323 6
3.2 Modi of the Main Menu
After booting, main menu is displayed.
In the upper left corner, the last selected job with
information is displayed. In the lower left corner,
the current logged-in user is shown. Date and
time are in the lower right corner.
In the middle, eight icons show the possible
modi that can be activ
ated by pressing the icons
on the screen:
Modus Usage See chapter
Run selected Job Run the selected job shown in the upper left corner of
the main menu. 3.2.1
Load / edit Job Load or edit a job 3.2.2
Manual operation Use the stainer without a program 3.2.3
Level tray Level or reset the tray/table 3.2.4
Toggle buzzer (Un-)Mute Alarm 3.2.5
Show logfiles Watch, export logged data 3.2.6
Step simulation Simulate a program step 3.2.7
Switch / change user Edit / Login as (super-)user 3.2.8
3.2.1 Run Selected job
Prior to running a job, prepare your staining solutions in the right volume and allocate them in beakers
beside the stainer. Insert the numbered inlet ports in the correspondent solution and fix them using a
clamp or tape. Avoid bending of the hose. If needed, close the beaker using Parafilm™ or darken it
using alumina foil. Volume and port numbers are programmed in advance (see chapter 3.2.2). Place
the outlet ports in a waste bottle. The outlet ports are programmed in advance (see chapter 3.2.2).
After electrophoresis, place the gel inside the tray and close the lid.
By pressing the “Run selected job” button of the
main menu, the selected job is initializing (appr.
5 sec). The device pauses 30 seconds. The
screens shows the job, the job duration and the
30 second countdown. During this, is possible to
abort, continue to stop the countdown and
proceed or to select a different step than Step1:
After the countdown or by pressing continue,
the
job is directly beginning to pump the volume of
step 1 into the tray.

550138 BlueStainE Ver 0323 7
After finishing pumping, this screen is shown.
It displays (from top to bottom) the name of the
running job with information, the current step
with information, the remaining time, the current
valve inlet and outlet port, the total time and the
remaining total time.
After time is counted down, the solution is pumped out to the waste and the job is proceeding with the
next step automatically.
Four buttons are present that allows you to skip or pause the current step or abort the running job. The
button “Skip without draining” is especially designed to stop developing immediately without draining to
avoid overstaining. PLEASE NOTE: If you decide to stop manually with this option, double the
draining volume of the developer step or use a concentrated stop solution (40ml of a 5% stop
solution).
If the following step was programmed with a pause/alarm, the actual step will be finished, if buzzer is
activated an alarm will sound, and a button appears that indicates “continue” to proceed with the next
step. To activate the buzzer, press “Toggle Buzzer” in the main menu.
After finishing the job, a screen is shown,
indicating the job, the job duration and the exit
status. You can print (if printer is installed) or
copy the log to USB directly. To end the
procedure, press “Back to main menu”.
After finishing pumping, this screen is shown.
3.2.2 Load / Edit Job
The SERVA BlueStain is delivered with pre-programmed staining protocols for the most common
SERVA staining kits.
Please note: It is not possible to delete one single step. To program a new job it is always better to use
an empty job and copy it to the desired place later.

550138 BlueStainE Ver 0323 8
Select Job
To load a job, any user can enter this mode.
Select the programmed job using the up/down
arrows and press the button “Select job”. The
selected job is activated, visible in the main
menu and ready to get started by “Run selected
job” (see chapter 3.2.1).
To edit, copy or delete job number 1 to 5, the
Superuser must be logged in (see chapter
3.2.8). Job numbers 5+ can also be edited by
any user.
Edit Job
To edit a job, select a job and press “Edit Job”.
First, enter a name and description by pressing
the white field behind name or description,
respectively. Enter the desired name and
description and press the button.
When using the default tray, mark 1 Tray and L
Tray size. Save the changes. To edit the steps
of the job, press “Edit steps”.
Select the step to be edited by pressing the up
and down arrows.
Enter a description, the duration in seconds, the
amount of solution to be pumped in, the inlet
and outlet port by pressing the
white field behind
/ below the parameter.
Choose a shake pattern. You can choose between a classical rocking option (forward / backward
shaking), a sideways option (left / right rocking), a circular (rotation around center) or a 3D (forward /
backward shaking with stepwise left / right rocking) movement.
It is possible to enter a holding step. When the step is paused, it is also possible to apply an alarm.
Shaking speed and amplitude can be adjusted using the sliders with 5 positions.
Press “Save changes” to save the step. Please note: Each step must be saved separately.
To change an already present program, steps can be added or deleted by using the “Delete step” and
“Insert step” buttons.

550138 BlueStainE Ver 0323 9
Copy / Delete Job
To copy or delete a job press the button “Copy / Delete Job”. Please note that the Superuser must be
logged in to copy or delete programs 1-5.
Enter the program number to be deleted and press “Delete complete job”. After confirmation, the
program is reset, and all steps are empty.
Enter the program number to be copied and the designated program number and press “Copy
Compete Job”. After confirmation, the job is copied completely.
3.2.3 Manual Operation
By pressing the “Manual operation” button of the main menu, you can actuate the stainer without using
a program.
Enter the position number and press “Switch
valve” to move the valve to the right In-/Outlet.
Enter the volume and press “Fill table” to pump
the calibrated volume in.
Continuous pumping-in and -out can be
performed using the “Pump fwd.” and ”Pump
rev.” buttons.
The tray can be moved to the level or drain
position by pressing the buttons “Move tray to
level pos.” or ”Move tray to drain pos.”.
By pressing “Switch to Shaker mode”, the option menu for manual shaking is opened.
In Shaker mode, you can enter a timer from 1 to
300 minutes or a continuous operation using the
slider. It is possible to activate a beep alarm.
Choose a shake pattern. You can choose
between a classical rocking option (forward /
backward shaking), a sideways option (left /
right rocking), a circular (rotation around center)
or a 3D movement. Shaking speed and
amplitude can be adjusted using the sliders with
5 positions.
By pressing the “Start shaking” button to begin
shaking.

550138 BlueStainE Ver 0323 10
3.2.4 Level tray
By pressing the “Level tray” button of the main menu, you can level the tray.
First press “Initialize device” to start the
initializing procedure that is ending in the saved
zero position.
Place a water level into the mid of the tray. Tilt
the tray using the arrow buttons until the tray is
levelled. Press button “Save table zero position”
to save the current position as zero position.
If the surface is more uneven, use the device
feet additionally. They can be screwed or
unscrewed to level the device.
3.2.5 Toggle Buzzer
By pressing the “Toggle Buzzer” button of the main menu, the alarm is muted or unmuted. If it is
muted, the icon is marked by a cross-out line.
3.2.6 Show logfiles
Every program is data logged automatically. To view the logs, press the “Show logfiles” button of the
main menu.
3.2.7 Step simulation
Prior to programming it is useful to simulate the
steps. To enter this mode, press the “Step
simulation” button and program one single step
as explained in chapter 3.2.2.
3.2.8 Switch / change user
To enter this mode, press the “Switch / change
user” button. To change the name of the user,
press the name and enter a new one. By
switching the user, the name given will be
shown in the logged data. The preset user can
work with the device and change the jobs 5+.
Choose a user and press “select” to activate the
user

550138 BlueStainE Ver 0323 11
Press the “Superuser login” button to enter the superuser mode. The Superuser is password secured.
It is 12321 by default.
The Superuser can edit the jobs 1-5 and has
more possibilities to change the settings.
As logged in Superuser, the main menu
changes and reveals the icon “Settings” instead
of “Level tray”.
To enter the Superuser Setting, press the
“Settings” Butten when logged in as Superuser.
In the setting, you can change date and time or
perform a levelling as described in chapter
3.2.4.
You can enter three volumes that will be used in each job, manual operation, and step simulation.
Enter the volume of extra suction. This is the extra amount pumped out when draining the liquid. It is
needed because it takes time for the liquid to flow to the draining position. As the pump is calibrated
and pumps the same amount in than out, the extra suction is essential to remove most of the liquid.
Enter the tilt threshold. From the drain position (upper right corner), the tray is tilting to the right-side
position before beginning to shake. Depending on how big the gel is, this value needs to be adjusted.
With a big gel and a high tilt threshold, it may occur that one corner of the gel is already in contact with
the liquid and may stain earlier though.
Enter the shake threshold. This is the value at which shaking begins starting from the right-side
position. Depending on how big the gel is, this value needs to be adjusted. With a big gel and a high
shake threshold, it may occur that one side of the gel is already in contact with the liquid and may stain
earlier though.
In the Superuser settings it is also possible to calibrate the pump. Enter 500 ml as volume first. Press
the button “Calibrate pump”. Insert hose from valve port 1 into a beaker with 600 ml water and start
calibration. After pumping in 500ml, the pump stops. Measure out the true volume of water inside the
tray using a graduated flask. Enter the true value then in the settings and save.

550138 BlueStainE Ver 0323 12
3.3 Pre-Programmed Staining Jobs
PLEASE NOTE
Automated staining protocols differ from manual staining protocols described in the manuals of
staining kits. Pumping 250ml in or out will last approximately 90 seconds. When programming your
own staining protocol, pay regard on this fact and adjust the time for each step. All pre-programmed
staining jobs are optimized for 0.65mm film-backed gels, programmed with maximum shaking
speed/amplitude and using the 3D movement option. When using thinner (e.g. SERVA PRECOTES™)
or thicker (e.g. 2DGel DALT) gels, times need to be adjusted. Lower shaking speed and amplitude
when using non-film-backed gels to avoid gel fractures.
Recommendation: Use the same port for one chemical (SERVA default: Silver solution Port5 ;
Developer Port6 ; Stop solution Port7 ; water Port9 ; waste Port10) as residues in the hoses can
interfere or inhibit other solutions.
Always fix the hose at the beaker using a clamp or tape. Avoid bending. Close all beakers with
alumina foil or Parafilm™. Secure silver solution from light by wrapping it completely in alumina foil.

550138 BlueStainE Ver 0323 13
3.3.1 Program No1 Silver Staining Kit
SERVA Silver Staining Kit SDS (35076) or Native PAGE (35077) acc.Blum 0.65mm
Preparation
Step 1
For SDS gels use the Fixing Solution. For native gels use 20% Trichloroacetic
acid. Both are ready to use and 5x reusable. Fill 250ml into a beaker. Insert pipe
no1.
Beaker size 250ml.
Step
2
/3
Prepare
500ml
30% (v/v) Ethanol solution (not included). Inse
rt
pipe
no
2
.
Beaker size 500ml.
Step 4
Dissolve three 30mg aliquots
Sodium Thiosulfate
in 300ml dest. water. Insert
pipe no3.
Beaker size 500ml.
Step 5/6/8/9/1
1
Fill 1.250ml dest. water into a beaker. Insert
pipe
no
9
.
Beaker size 2.000ml.
Step 7
Prepare 300ml
1X silver solution (30ml silver solution + 270ml dest
.
water).
Insert pipe no5.
Beaker size 1.000ml. Dispose silver solution expertly!
Step
10
Prepare 300ml 1X
sodium carbonate
solutio
n
(
6
0ml
sodium carbonate
solutio
n
+ 240ml dest water). Add 150 µl Formaldehyde 37%. Insert pipe no6.
Beaker size 500ml.
Step 1
2
Prepare 300ml
stop
solution (
3
spoons
+
30
0ml dest
.
water)
.
I
nsert
pipe
no7.
Beaker size 500ml.
Step 1
3
Prepare
250ml
2% (w/v) Glycerol solution (not included). Insert
pipe
no8.
Beaker size 250ml.
Program (duration: 2h 17min)
Step
Solution
Duration (s)
Volume (ml)
Port IN
Port OUT
1
Fixing solution 1800
250
1
1
2
30% Ethanol 600
250
2
10*
3
30% Ethanol 600
250
2
10*
4
Sodium Thiosulfate 60
250
3
10*
5
Dest. water 20
250
9
10*
6
Dest. water 20
250
9
10*
7
Silver solution 1200
250
5
5
8
Dest. water 20
250
9
5
9
Dest. water 20
250
9
10*
Pause / Buzzer
10
Developer 120
250
6
10*
1
1
Dest. water 20
250
9
10*
1
2
Stop solution 300
250
7
10*
1
3
Storage solution 600
250
8
10*
*Port10 is the pipe for hazard-free waste. Discard to sink or use a >2.500 ml waste bottle
Table of contents
Other serva Medical Equipment manuals
Popular Medical Equipment manuals by other brands

Care Fusion
Care Fusion V. Mueller Take-Apart Kerrison Rongeur manual

LeMaitre
LeMaitre Omniflow II Instructions for use

Hillrom
Hillrom Basic Care P1440 Service manual

Etac
Etac Molift RgoSling user manual

Hillrom
Hillrom Extended Care Solution quick reference

ARJO HUNTLEIGH
ARJO HUNTLEIGH Lifeguard LG20 Instructions for use